Overnight Bread
Craving a delicious, crusty loaf of homemade artisan bread without all the fuss? This overnight bread recipe is perfect for you! You can easily prep the dough ahead of time and then bake it fresh the next day.
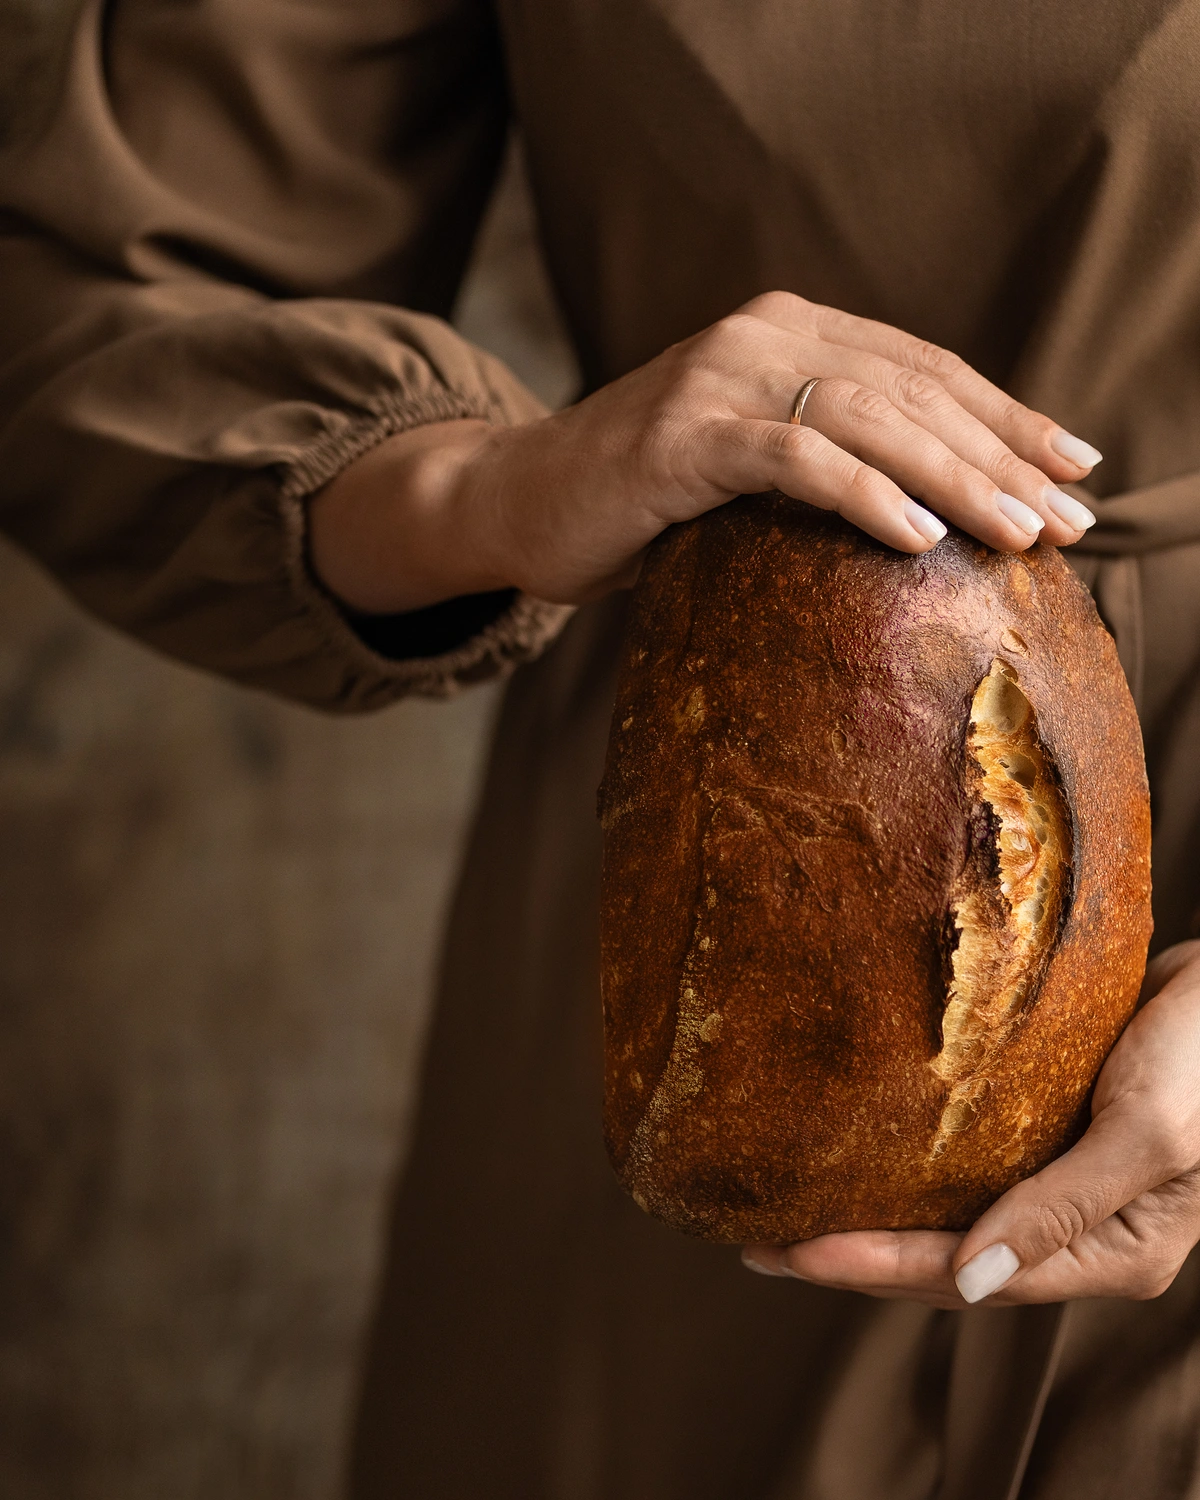
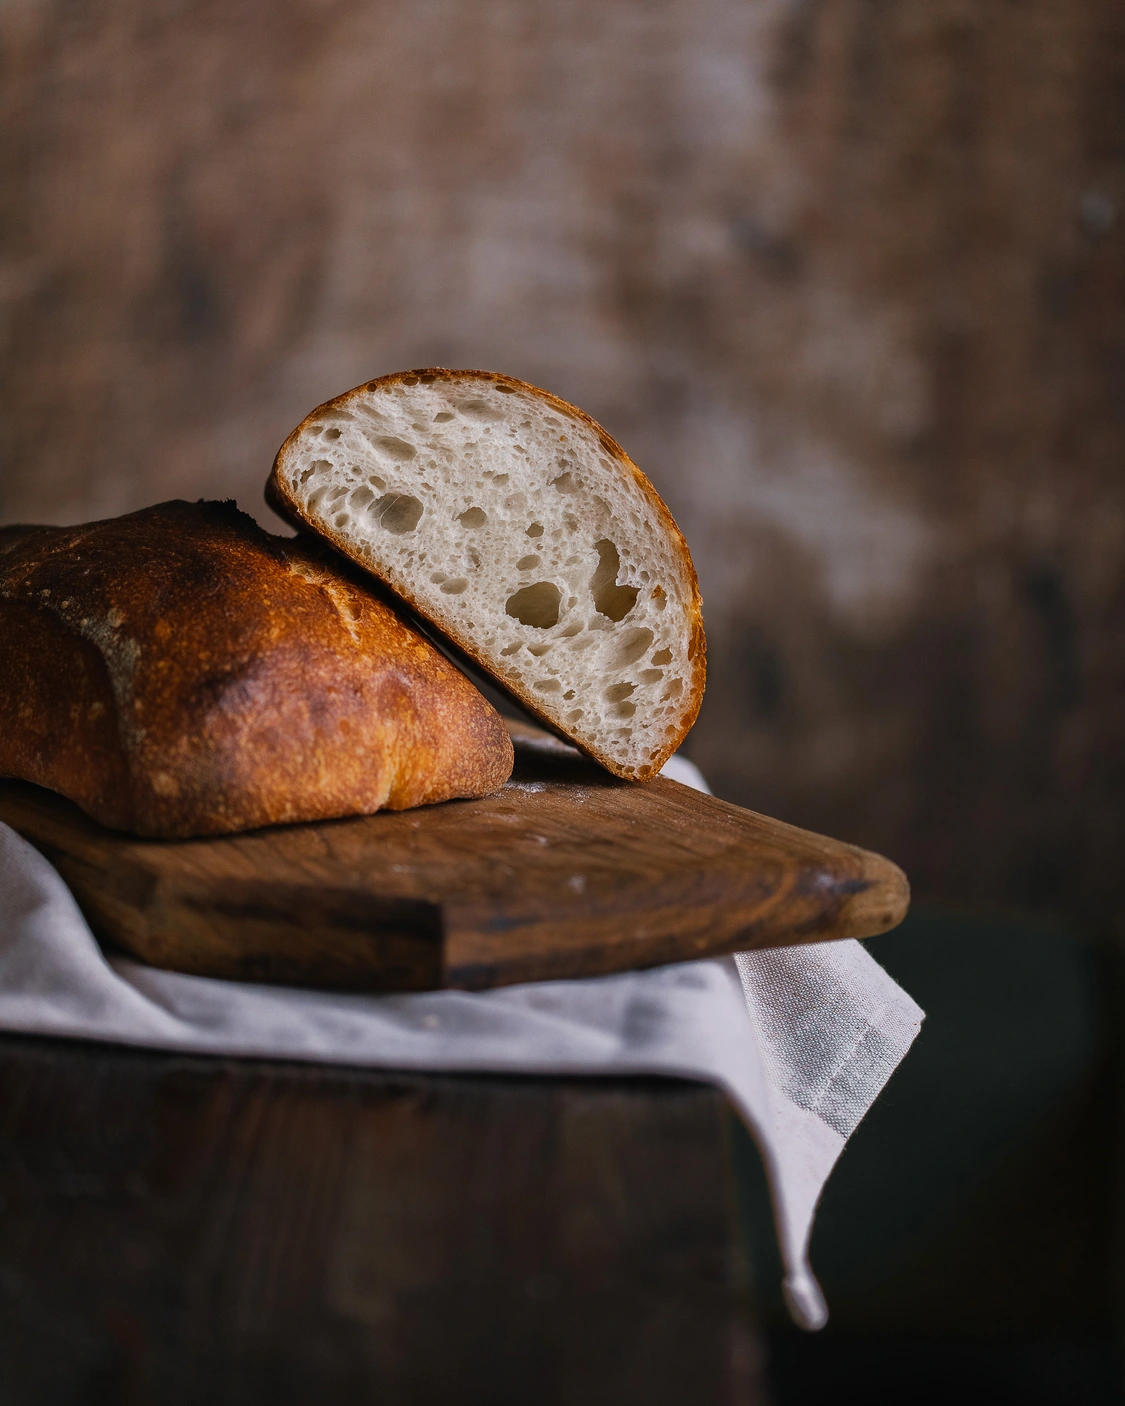
This simple no-knead bread requires just four basic ingredients: flour, water, yeast, and salt. The result is a wonderfully light and airy interior with a perfectly crusty, chewy exterior – just like those expensive loaves you find at the bakery, but so much more affordable (and delicious!) when made at home. Master this easy recipe and impress your family and friends with your baking skills!
Ingredients
BIGA (Pre-ferment for Overnight Bread)
- 175 gr. warm water (30C)
- 1/4 teaspoon dry yeast
- 225 gr flour (11.5-12% protein)
AUTOLYSIS (Initial Hydration for Artisan Dough)
- 250 gr flour (11.5-12% protein)
- 180 gr warm water (30C)
FINAL DOUGH INGREDIENTS
- 5 gr dry yeast
- 10 gr salt (no, that’s not much!)
- All Biga (from above)
- The entire mass sent for autolysis (from above)
- 40 gr warm water (30C)
Instructions for Making Your Homemade Overnight Bread
1. Preparing the Biga, Autolysis, and Final Dough
BIGA
Add the water, yeast, and flour to a tall bowl and stir until no dry lumps of flour remain. This creates your pre-ferment. Leave it to ferment at room temperature for 6-24 hours. For reference, my biga fermented for about 14 hours.
Autolysis
In the bowl of a stand mixer fitted with a dough hook, mix the water and flour on low speed until smooth. Cover with a towel and let it stand for 30 minutes. This step helps hydrate the flour for a better texture.
Final Kneading for Overnight Bread
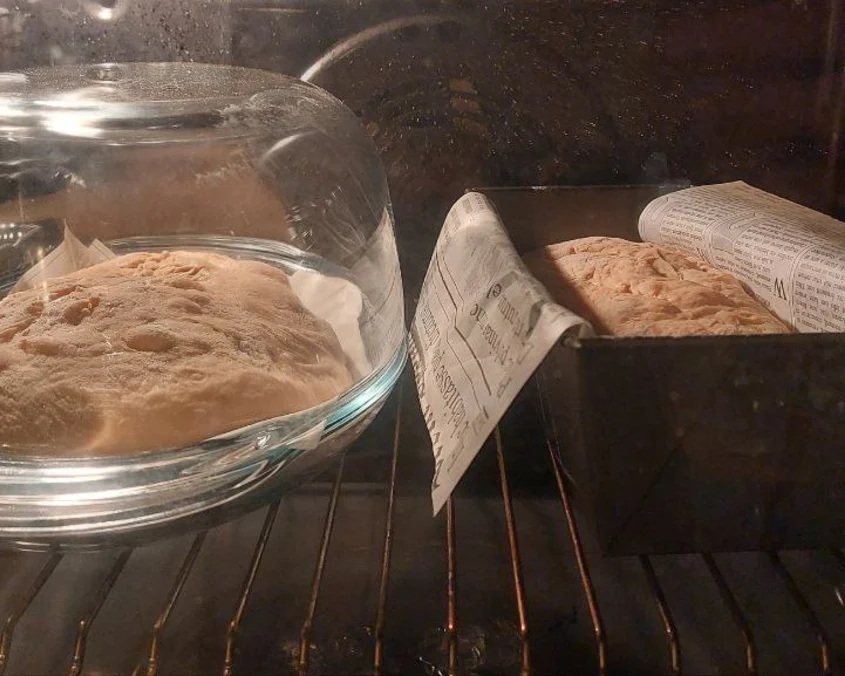
Add warm water, yeast, salt, and the prepared biga to the autolysis mixture. Mix at low speed for 3-5 minutes. Increase the speed to high and mix for another 5-8 minutes. When your dough is sufficiently mixed, it will no longer stick to the sides of the mixer bowl and will begin to shine. Transfer the dough to an oiled bowl (see photo). Cover and leave at room temperature for 30 minutes.


2. Performing Dough Bends (Stretch and Fold)
This is a bit difficult to explain in writing, but easy to do once you see it (check the video below). Visualize the dough as if it is divided into 4 triangles—don’t actually cut it! Just imagine cross-cutting the dough. Take the edge of one of the “triangles” closest to the side of the bowl, stretch it up, and fold it over to the opposite side. Rotate the bowl 90 degrees, take the next section, stretch it, and fold it over. Repeat for the remaining two sides. The process is similar to swaddling a baby. Then, carefully turn the dough upside down (seam side down) and cover it with a lid. Leave it for another 30 minutes. (If my explanation isn’t clear, you can search for “stretch and fold sourdough” online – it’s a similar technique for developing gluten.)
3. Laminating the Dough for Enhanced Structure
Sprinkle your work surface with water and wet your hands thoroughly. Stretch the piece of dough out on the table into a large rectangle (see video). Fold the right third of the dough over the center, then fold the left third over the center. Roll it up like a cylinder. Transfer it back to the bowl, seam side down, cover, and leave at room temperature for 1 hour. The dough should look aerated and active at this point.
4. Shaping and Proofing Your Artisan Overnight Loaves
Lightly flour your work surface and carefully turn the dough out onto the counter. Use a spatula to help guide it. Gently pat the dough into a square shape. Using a spatula or bench scraper, divide it into 2 equal rectangles. Prepare 2 sheets of parchment paper, each larger than your piece of dough, and flour the parchment liberally. These will help you transfer the loaves to the oven later. Carefully place each piece of dough onto the parchment paper. Cover with a towel and leave at room temperature for 30 minutes.
BAKING YOUR HOMEMADE ARTISAN OVERNIGHT BREAD
Preheat your oven to 260C. If you have a baking stone for bread, place it in the oven to heat up. Alternatively, a Dutch oven, roaster, or large heavy pot works great – preheat the stone (or pot) on the middle rack. If you don’t have those, a standard baking sheet will work for your crusty bread.
5. Achieving the Perfect Crust (with Steam)
Add boiling water to the oven
Transfer both pieces of dough onto the hot stone or into the pots along with the parchment paper. I baked one loaf in a pot and the second in a rectangular loaf pan. Pour 150 ml of boiling water into an ovenproof dish and place it on the bottom of the oven underneath the bread. This steam is key to achieving a beautiful artisan crust. If using a pot with a lid, close it. If not, you can create a “cap” with anything oven-safe, even a foil turkey roasting pan, to trap steam. Reduce the temperature to 250C and bake for 12 minutes. Remove the lid (or steam source) and continue to bake for 15 minutes until the crust is a deep golden brown.
6. Cooling Your Freshly Baked Overnight Bread
Let the bread cool completely on a wire rack. This rest period is crucial for maintaining that delicious texture!