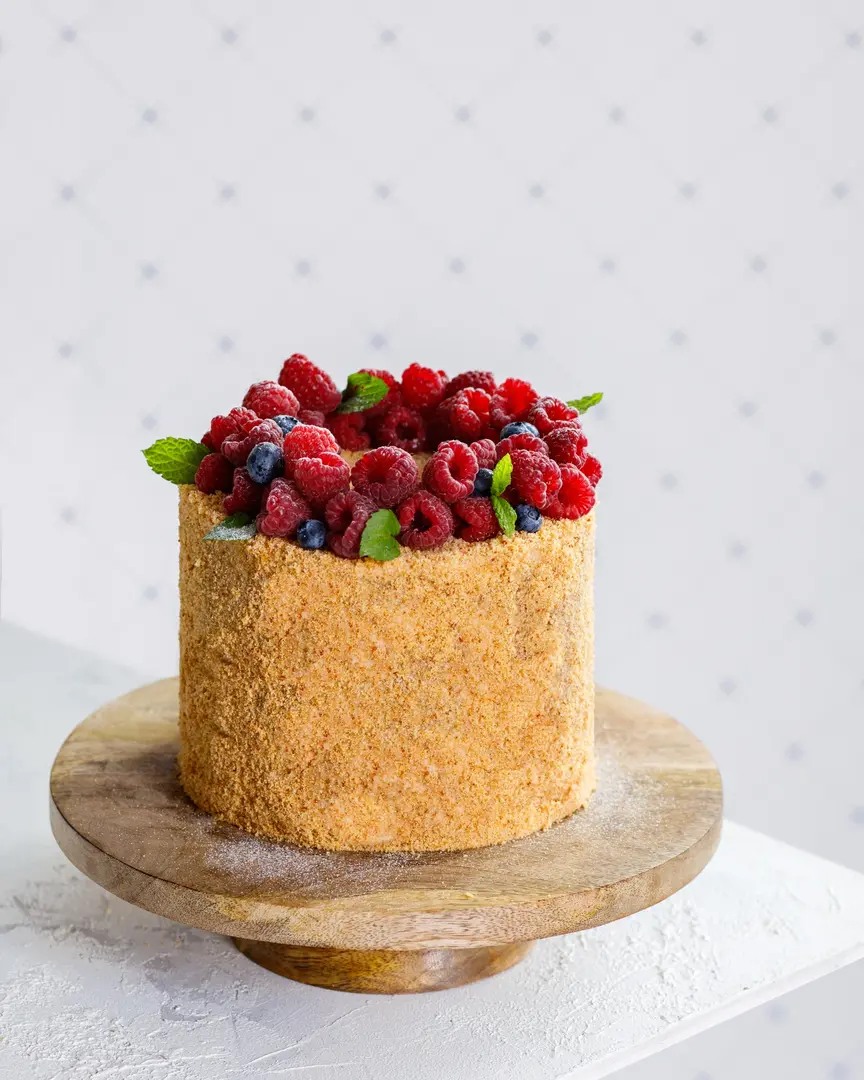
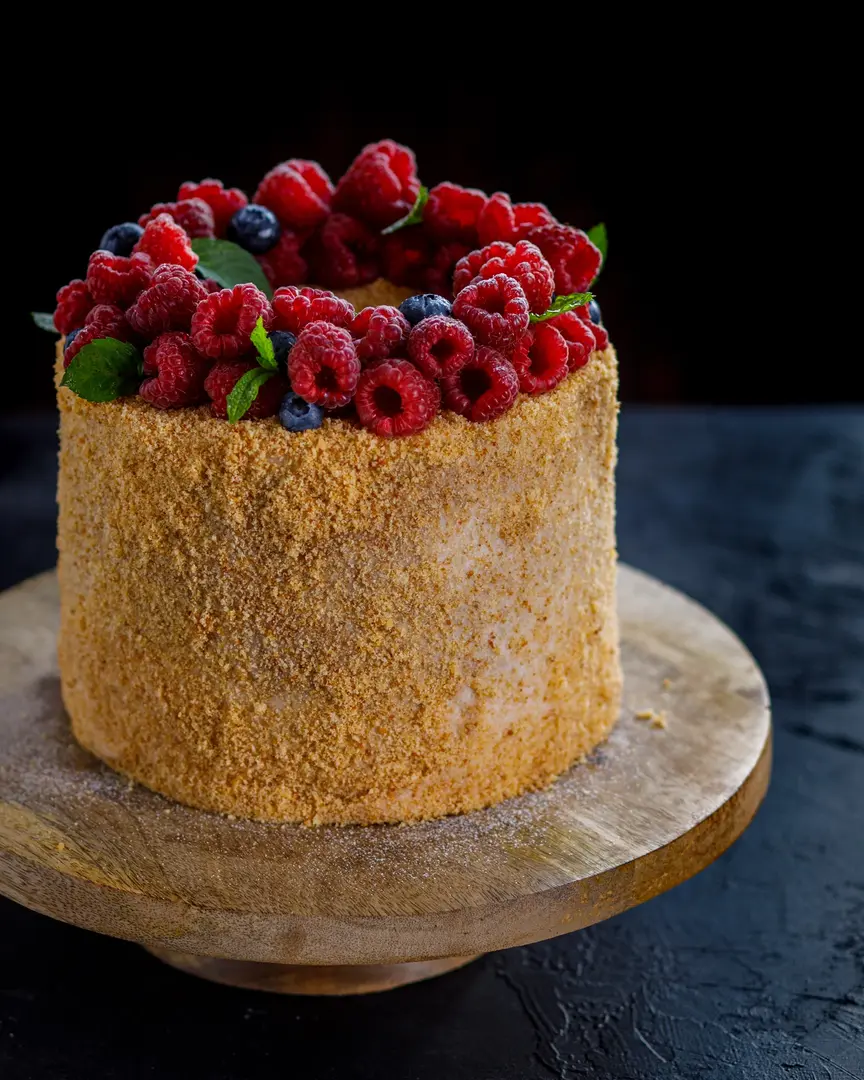
Vertical honeycake
The iconic Russian honey cake “Medovik” is a dessert everyone needs to try at least once. This classic treat features thin, delicate layers of honey dough stacked between generous coatings of creamy frosting. It creates a truly unforgettable texture and flavor profile that balances sweetness with a subtle tang.
Ingredients for Authentic Medovik Honey Cake
Honey Cake Dough
- 100 gr honey
- 90 gr sugar
- 50 gr butter 82%
- 1/2 tsp soda
- 70 gr sour cream (20% or more)
- a pinch of salt
- 1 egg
- 150 gr flour
Creamy Medovik Filling
- 300 gr mascarpone
- 300 gr cream 33%
- 200 gr sour cream (above 20%)
- Vanilla
- 90-100 gr of powdered sugar (I do not advise adding more)
Instructions for Making Medovik Honey Cake
- Preheat your oven to 170 degrees C (340°F). Meanwhile, combine the honey, sugar, and butter in a saucepan. Gently heat and brew this mixture until the first bubbles appear (approximately 2 minutes). Once you observe bubbling, swiftly add the soda. Continue to stir until the mixture foams up and turns a reddish-golden color (this typically takes 1-2 minutes). Afterward, remove the saucepan from the hot plate.

- In a separate bowl, whisk the sour cream with the egg and a pinch of salt until smooth (there’s no need to over-whisk, just ensure it’s well combined). Gradually pour the still-hot honey mixture into the sour cream and egg mixture in a thin stream, stirring intensively with a whisk to temper. Now, it’s time to add the flour to this wet mixture. Mix the dough until it’s smooth and uniform. Distribute half of this batter (approximately 250 grams) onto a baking mat, shaping it into a rectangle measuring 24 cm x 40 cm (or spread to the edges of your baking sheet). Bake in the preheated oven until it achieves a confident reddish-brown color (this usually takes 7 to 10 minutes). While the first layer is baking, prepare the second baking sheet and spread the remaining dough into an identical rectangle.
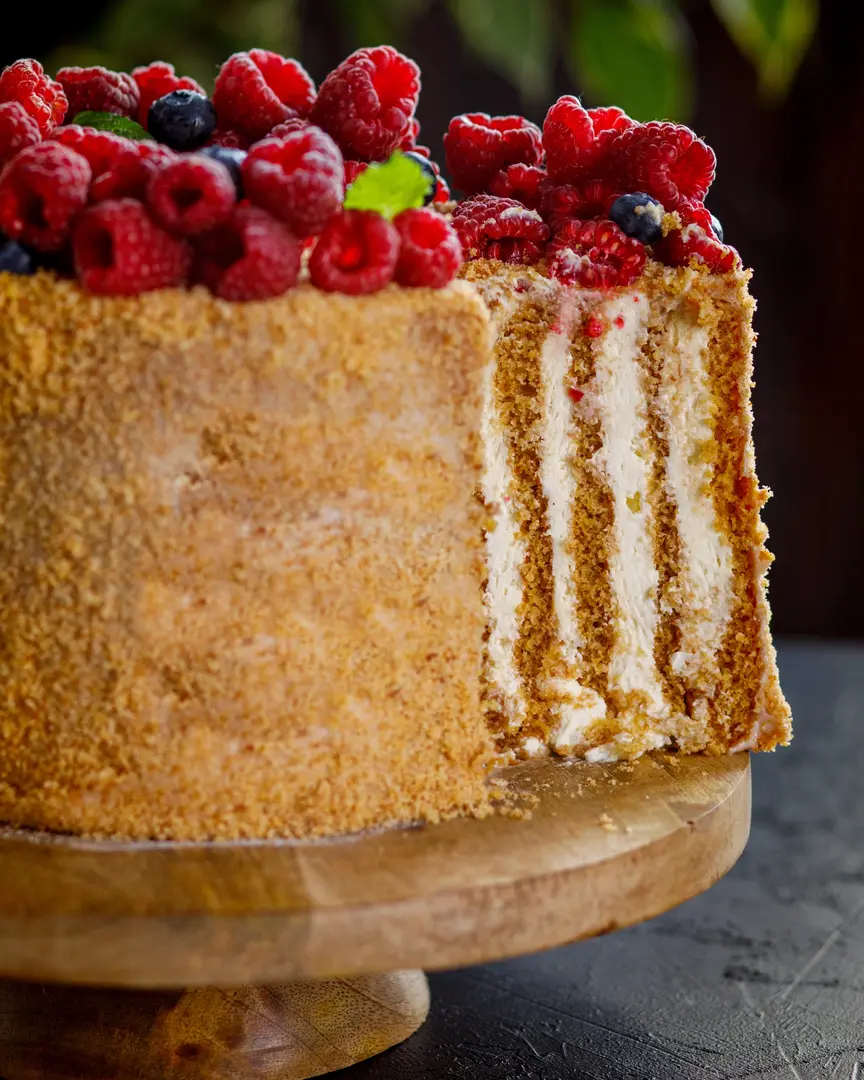
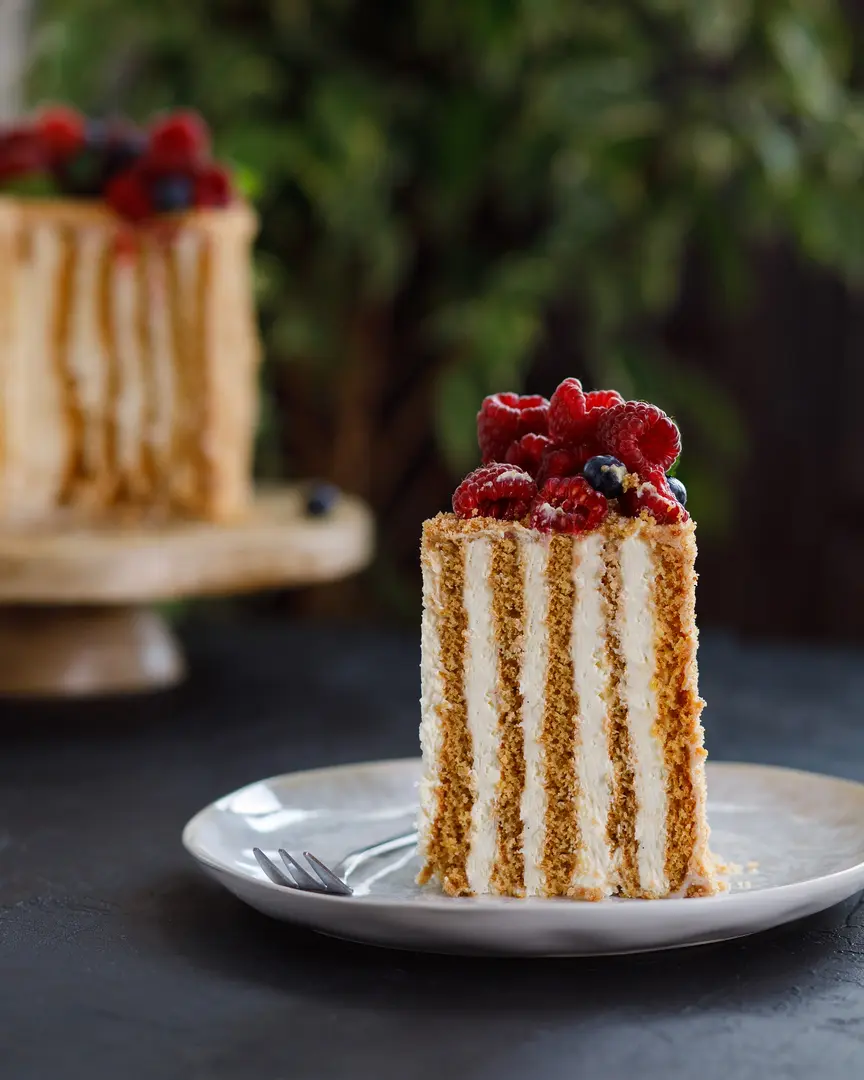
- Once baked, carefully remove the first cake layer and let it cool for 10 minutes. Then, precisely cut it into two rectangles along the long side, creating two flexible strips, each 12 cm x 40 cm. When the second layer is finished baking, allow it to cool for 10 minutes (this is a good time to whip the cream as per step 4). Cut this layer in the same manner, yielding another two strips of 12 cm x 40 cm. All four flexible strips are now ready for assembly – we will twist them into a delightful roll.
-
For the filling, gather all the cream ingredients and place them in a deep plate or mixing bowl. Beat with a mixer until soft peaks form. This cream is truly simple to prepare, typically ready in just 3-4 minutes.
-
Assembling Your Medovik Honey Cake
Your assembly begins now. Apply approximately 1/4 of the prepared filling onto one of the cake strips (remember, they are 12 cm x 40 cm). Spread the whipped cream evenly across the strip. It’s often easier to neatly cut the strips before applying cream, which is why I recommend this sequence. You don’t need to wait before rolling; the sponge is flexible. Gently roll the first cream-coated strip into a tight spiral. Connect the end of this first rolled strip with the next cream-coated strip, continuing to roll and wrap to extend the spiral. Repeat this process for all four strips, creating a single large spiral. Once assembled, carefully wrap your thick roll in cling film. If you have a sliding form or ring mold, use it to fix and shape the cake; otherwise, use the cling film to clasp the cake tightly and maintain its form. You now have one large, beautiful spiral. Turn it upright so one of the flat spiral ends is exposed at the top. Chill the shaped vertical cake for at least 45 minutes to allow the layers to meld and the cream to set before decorating.
Optional tip for alternative sizing: If you don’t have a form, consider making a shorter roll, for example, 8 cm high. To achieve this, cut each baked layer into three strips (3 strips * 8 cm height = 24 cm total width). It sounds intricate, but this assembly is quick once you get going! It took longer to write than to do!