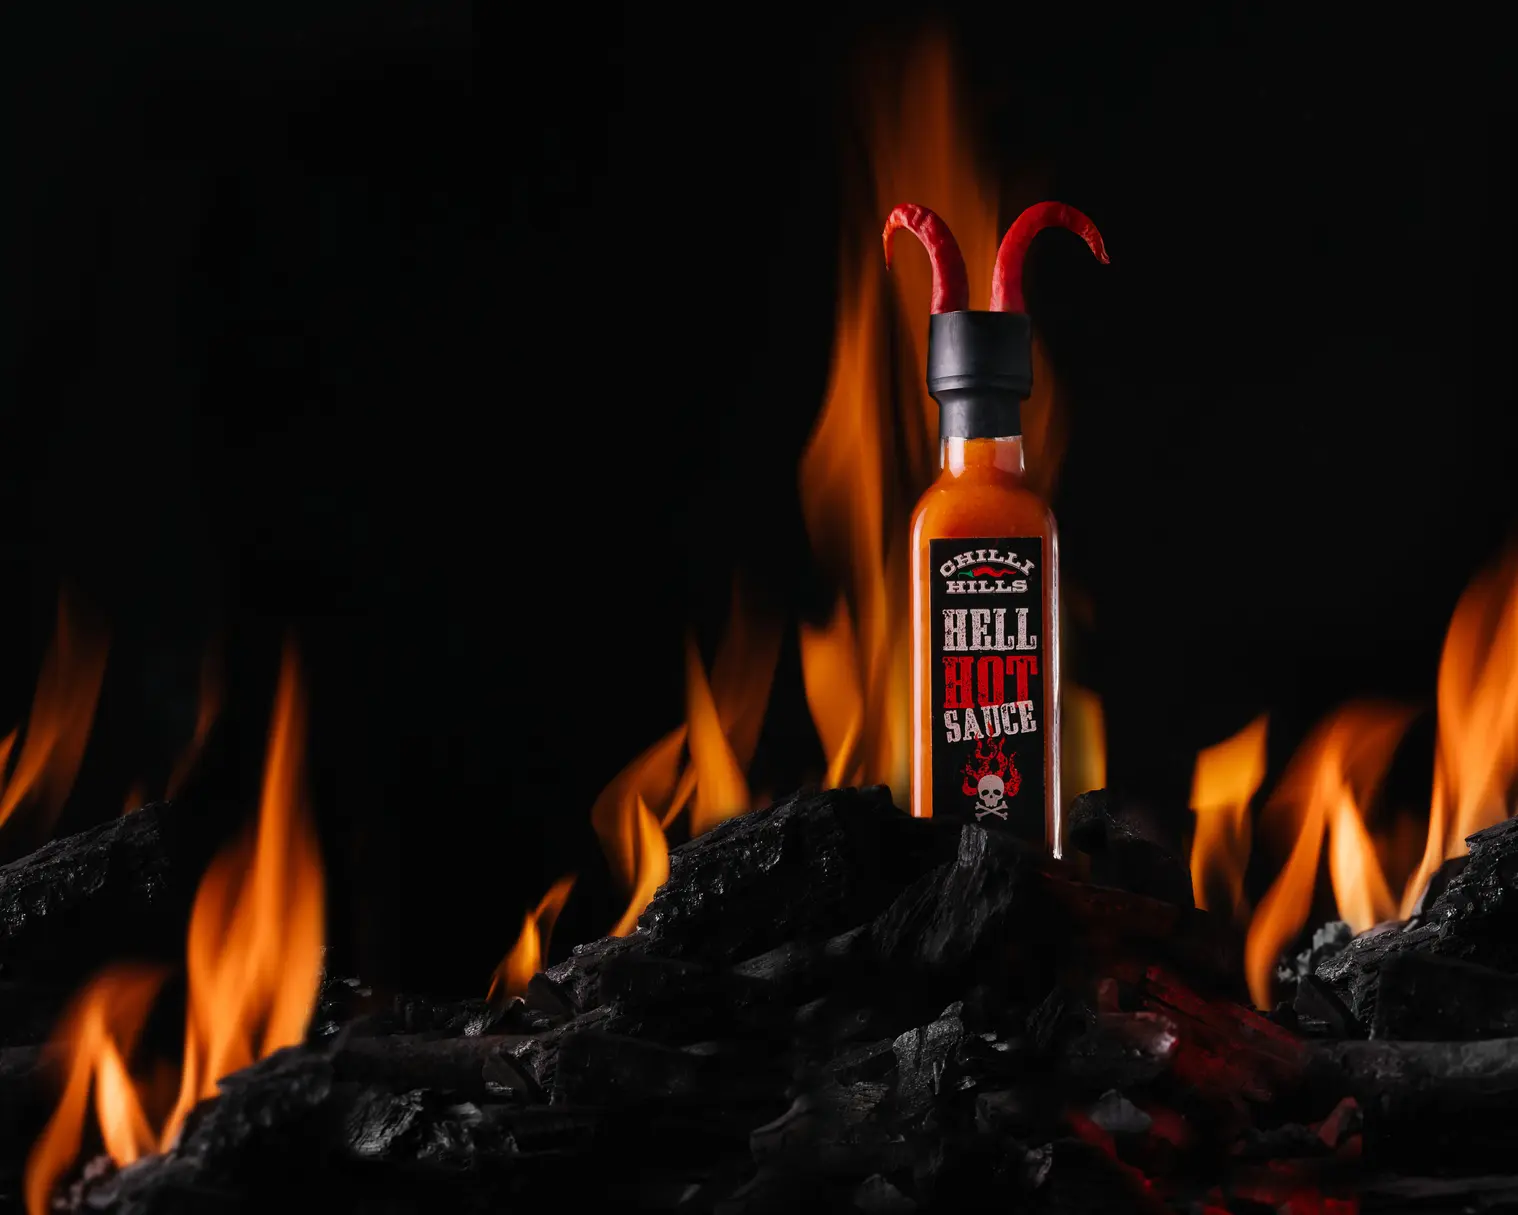
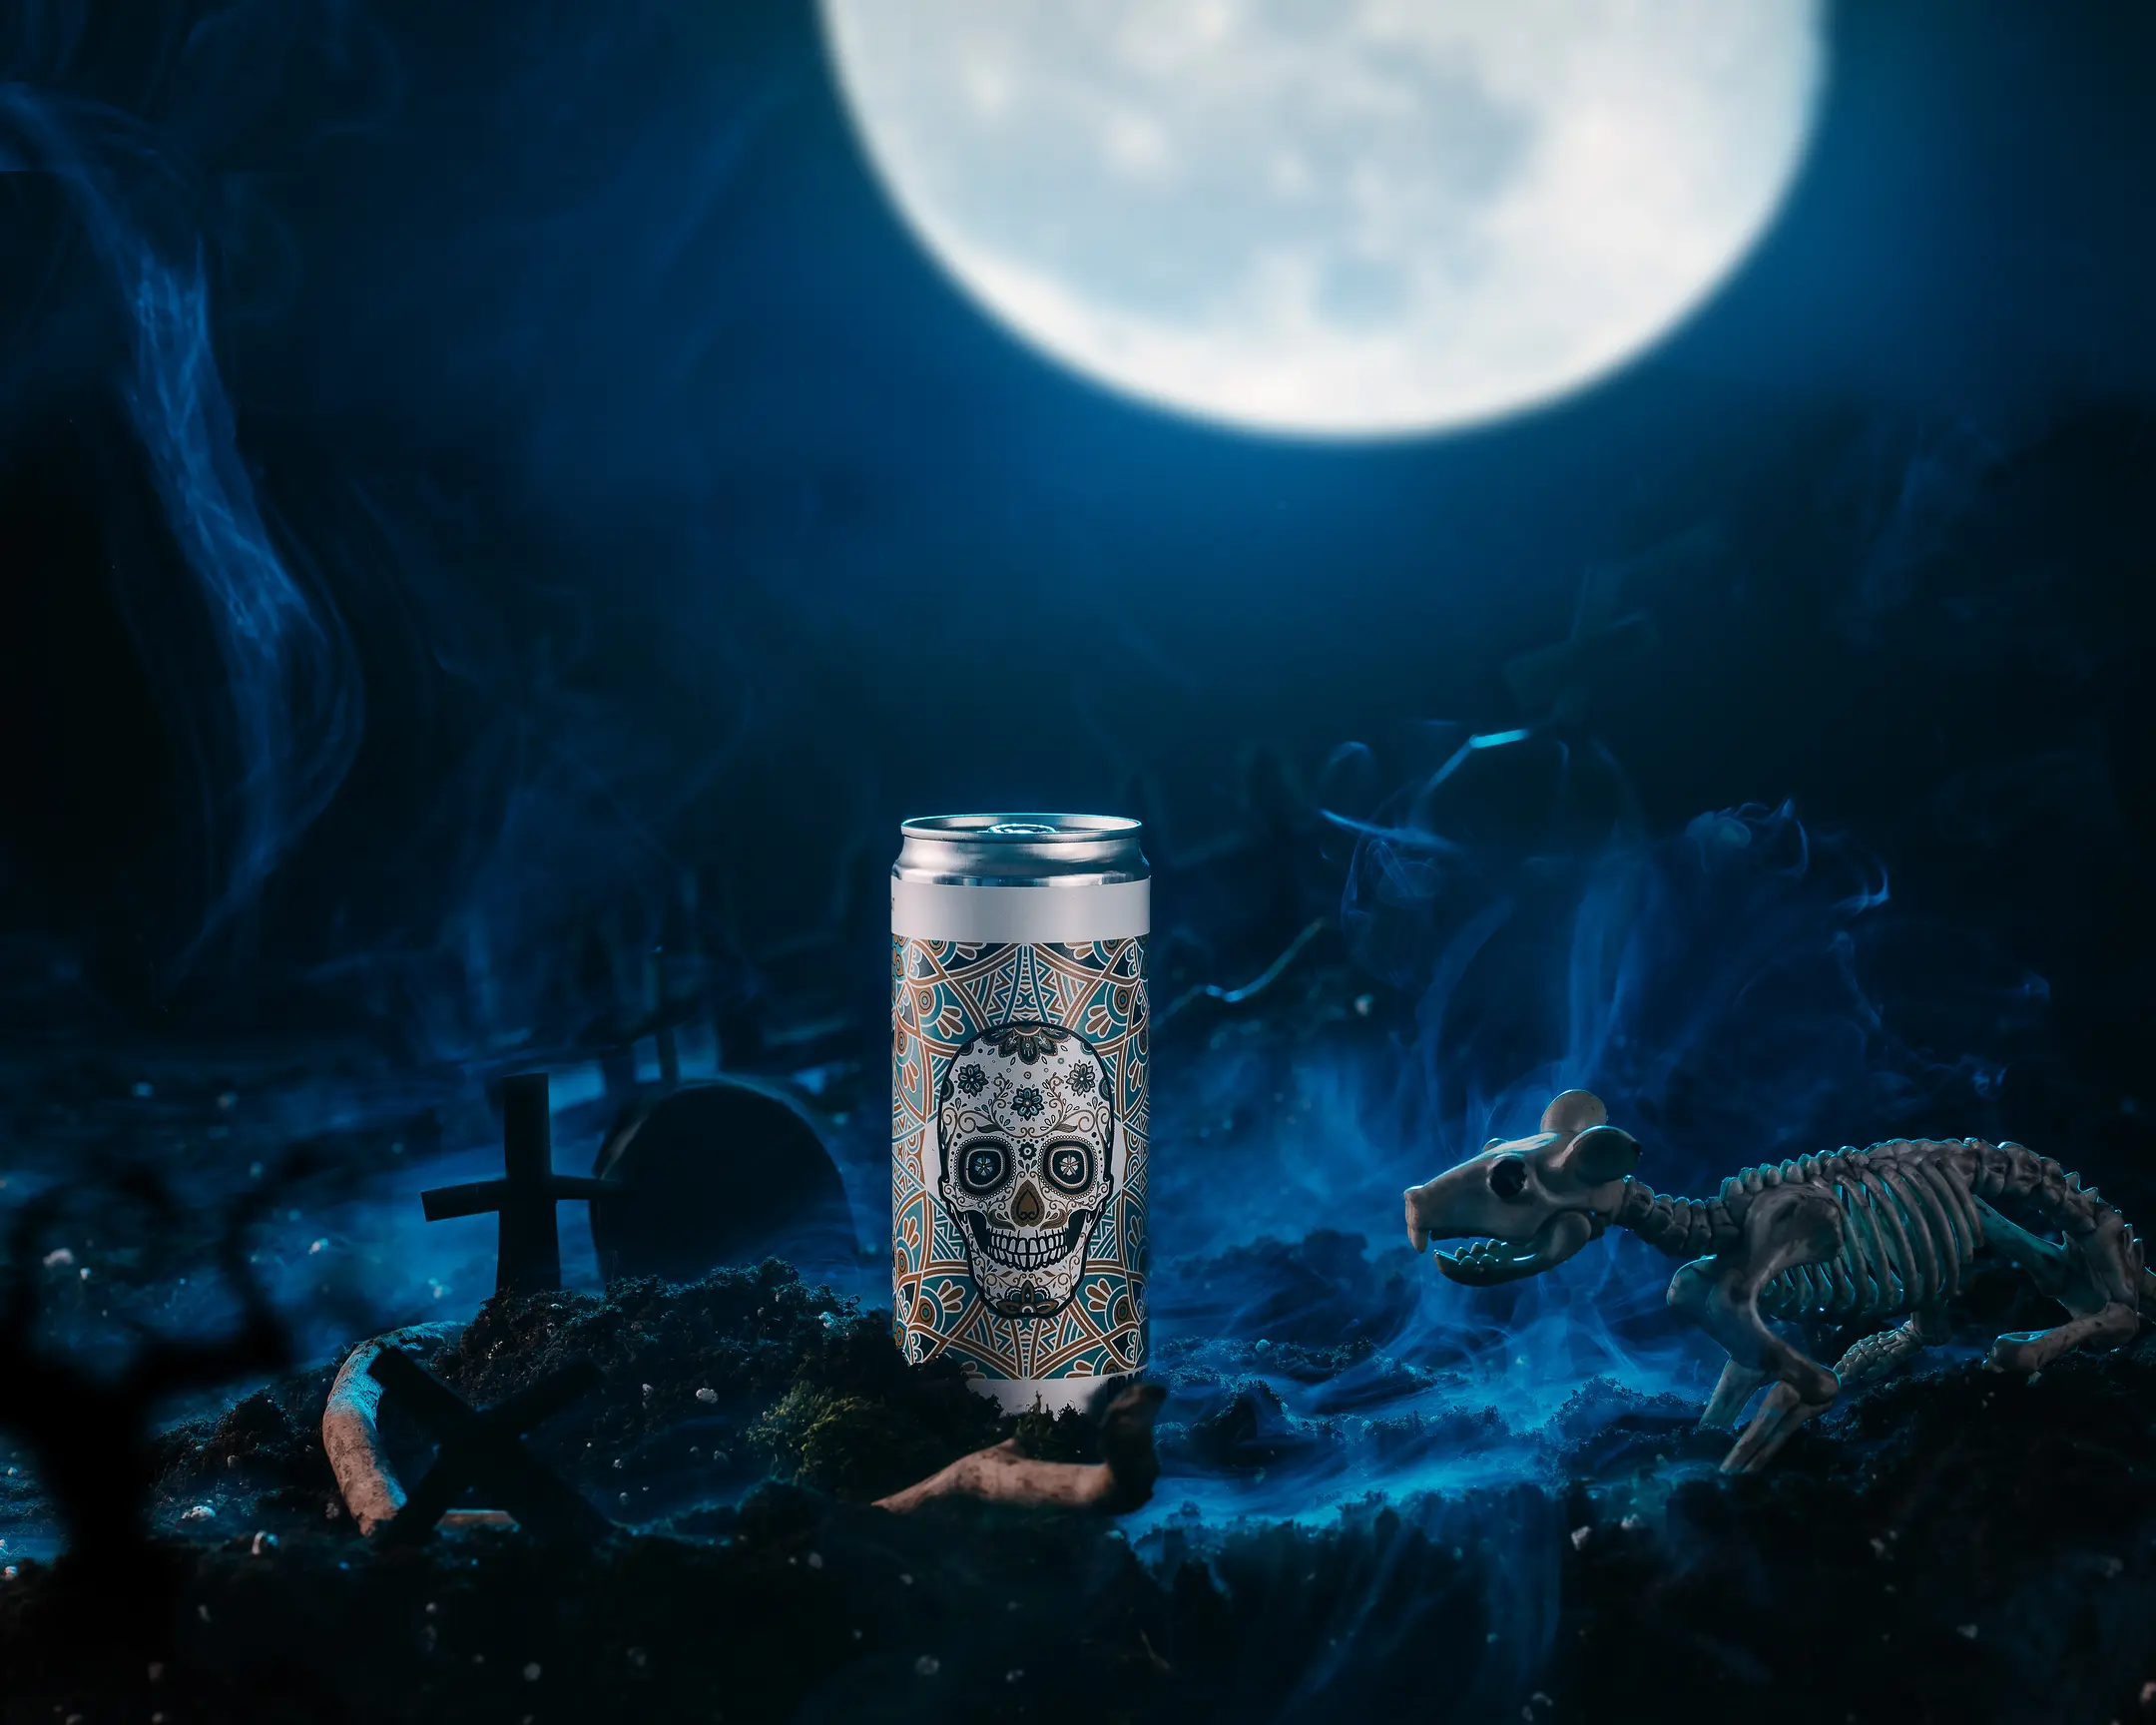
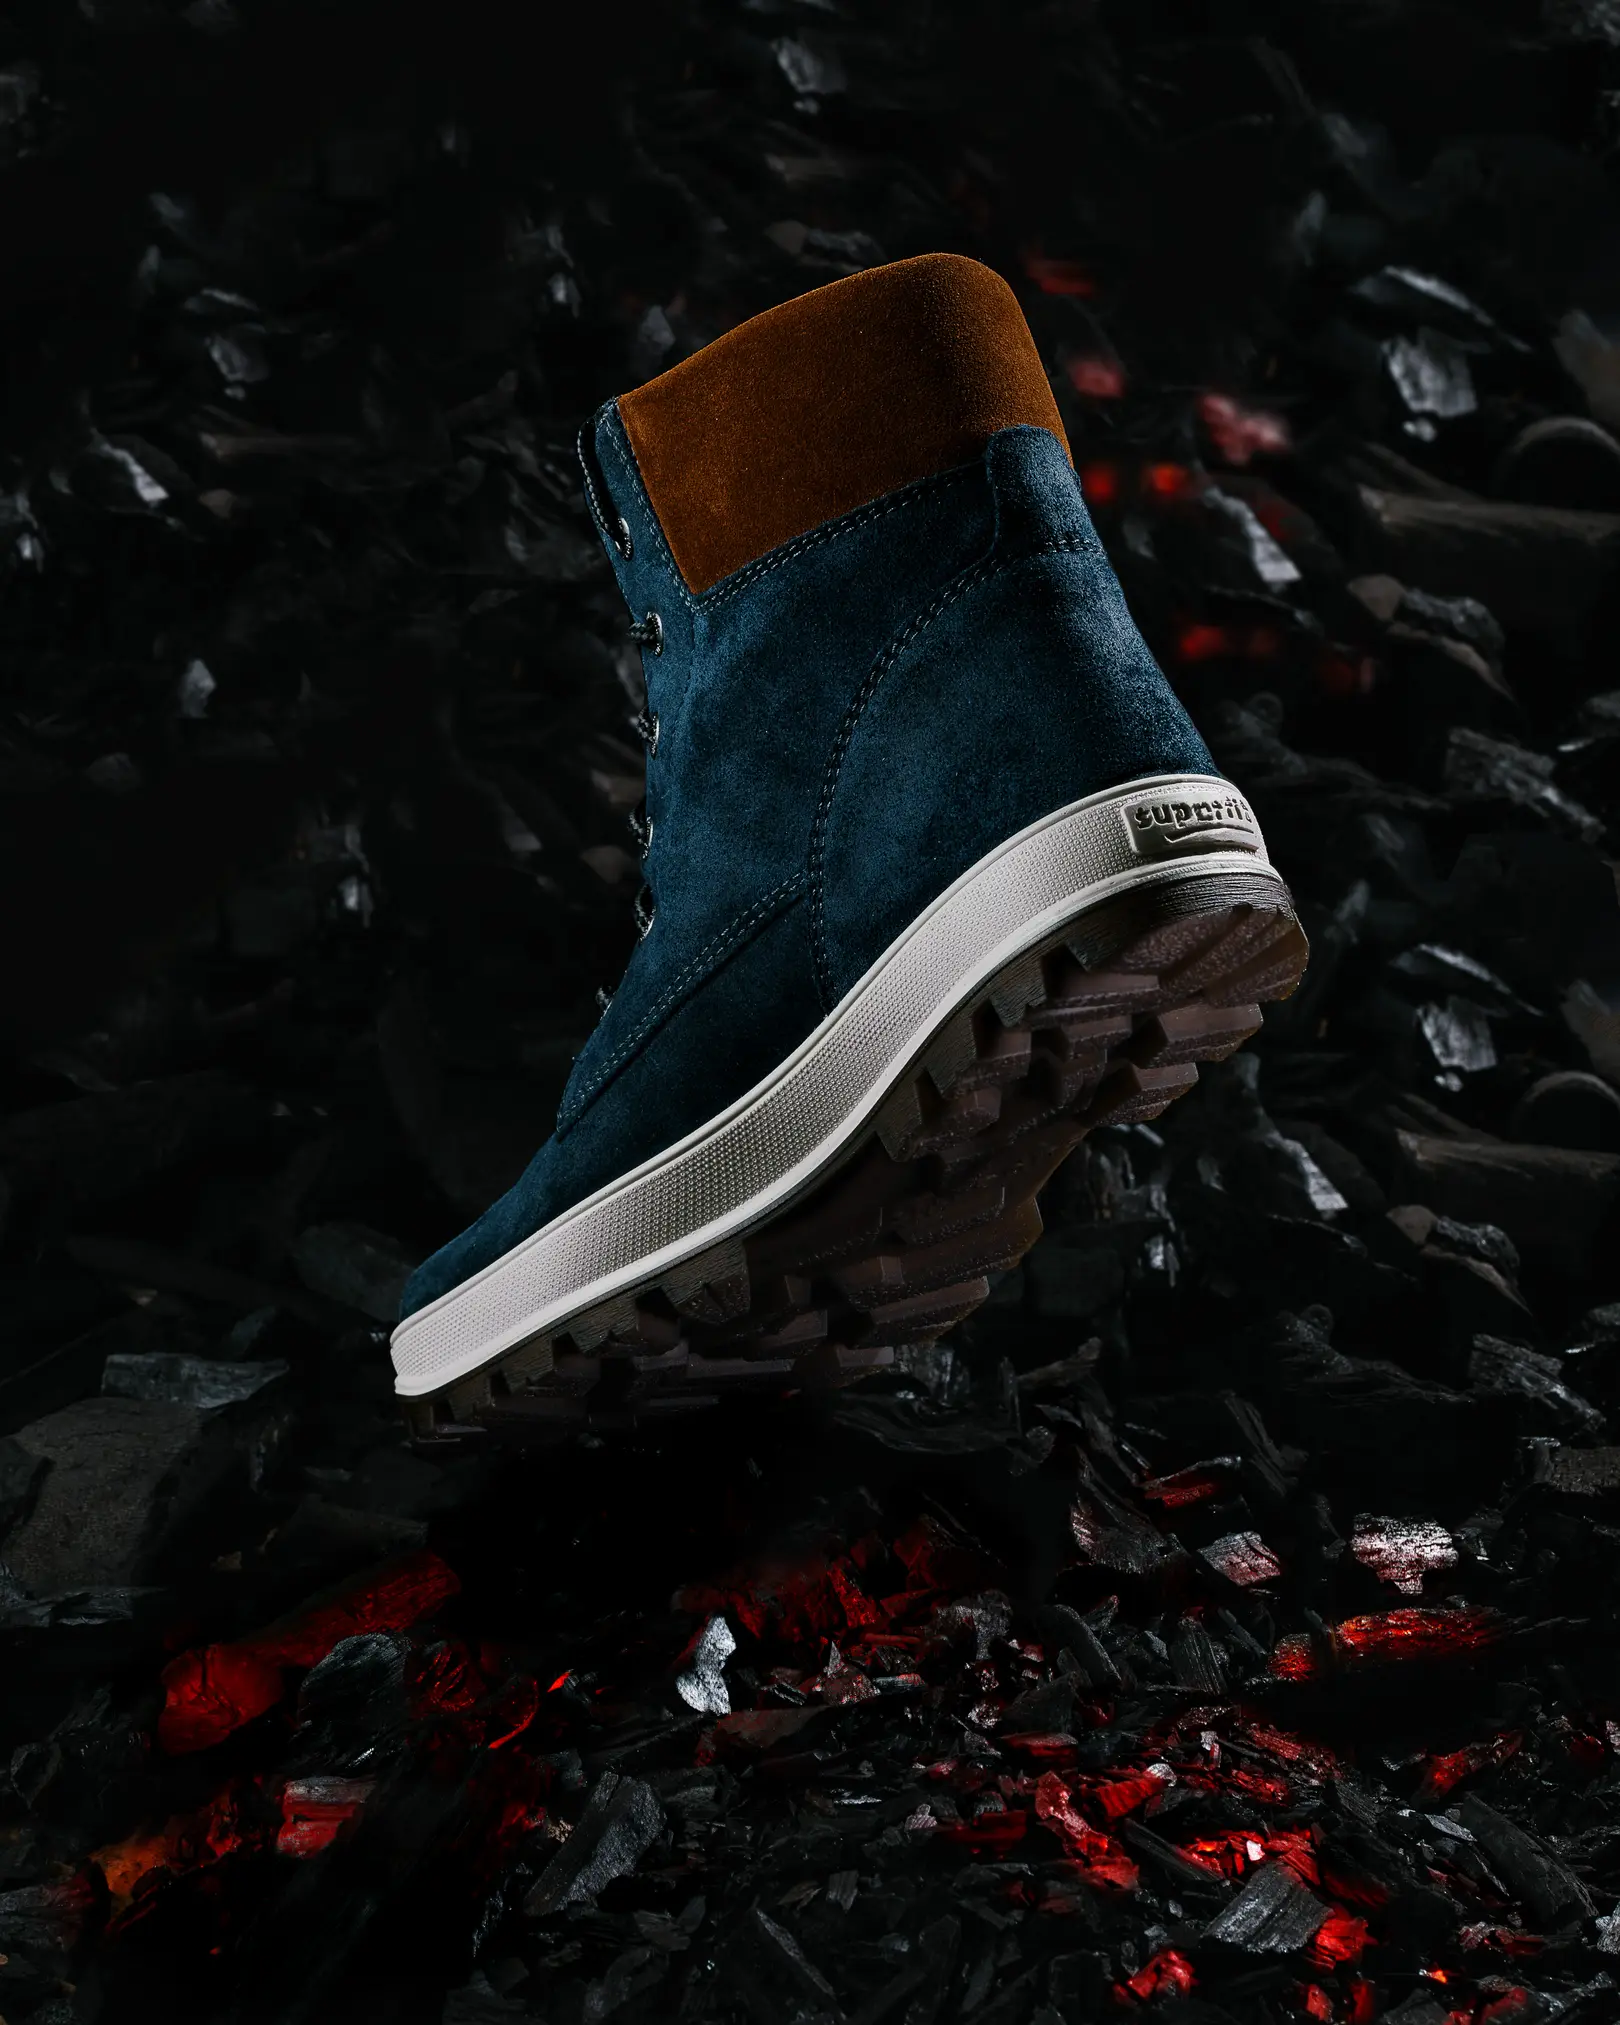
Together with Dynaphos we held a Master Class on shooting. The first photo was with real fire and the effect of flaming coal. The second one was an imitation of levitating objects.
The full video is available on Dynafos's Facebook page.
In connection with the shown activity of the audience and interest in the material shown, we decided to provide additional material explaining everything done in great detail. There will be some materials you can use to practice in making good photos even better!
In this material, you will find several tricks, using which you can create unique shots. Such as photos with coals, work with smoke, and, of course, pictures with real fire.


Grab a cup of tea or coffee. And let's start with the first one - the shot with a flame.
In the master class, we worked with Rakia (by Chilli Hills).
The product shooting begins long before the photographer receives the subject for shooting. The shooting begins with the first call with the client where they explain their wishes you later will multiply by your experience, inspiration, and ideas!
What will we shoot? How? From what perspective? What items to use in the frame? What special effects? All these questions you must have before shooting any product or food.
The selection of ideas begins with the search for interesting works on the Internet that match the idea or product. A great starting point is Pinterest. But every photographer usually has his list of favorite resources.
When there is an idea, further development of the project begins. Namely:
When I thought over the idea of shooting, I started from the play on words: "Lyuta Rakia" - Why fierce? Because it is with hot peppers. In addition, brandy is a strong drink, those with a high "degree", and even pepper and spices are added. Everything will definitely burn. Therefore, I decided to convey to the viewer the idea that alcohol is so "hot" that rakia placed on coals will heat them to red and cause a flame.
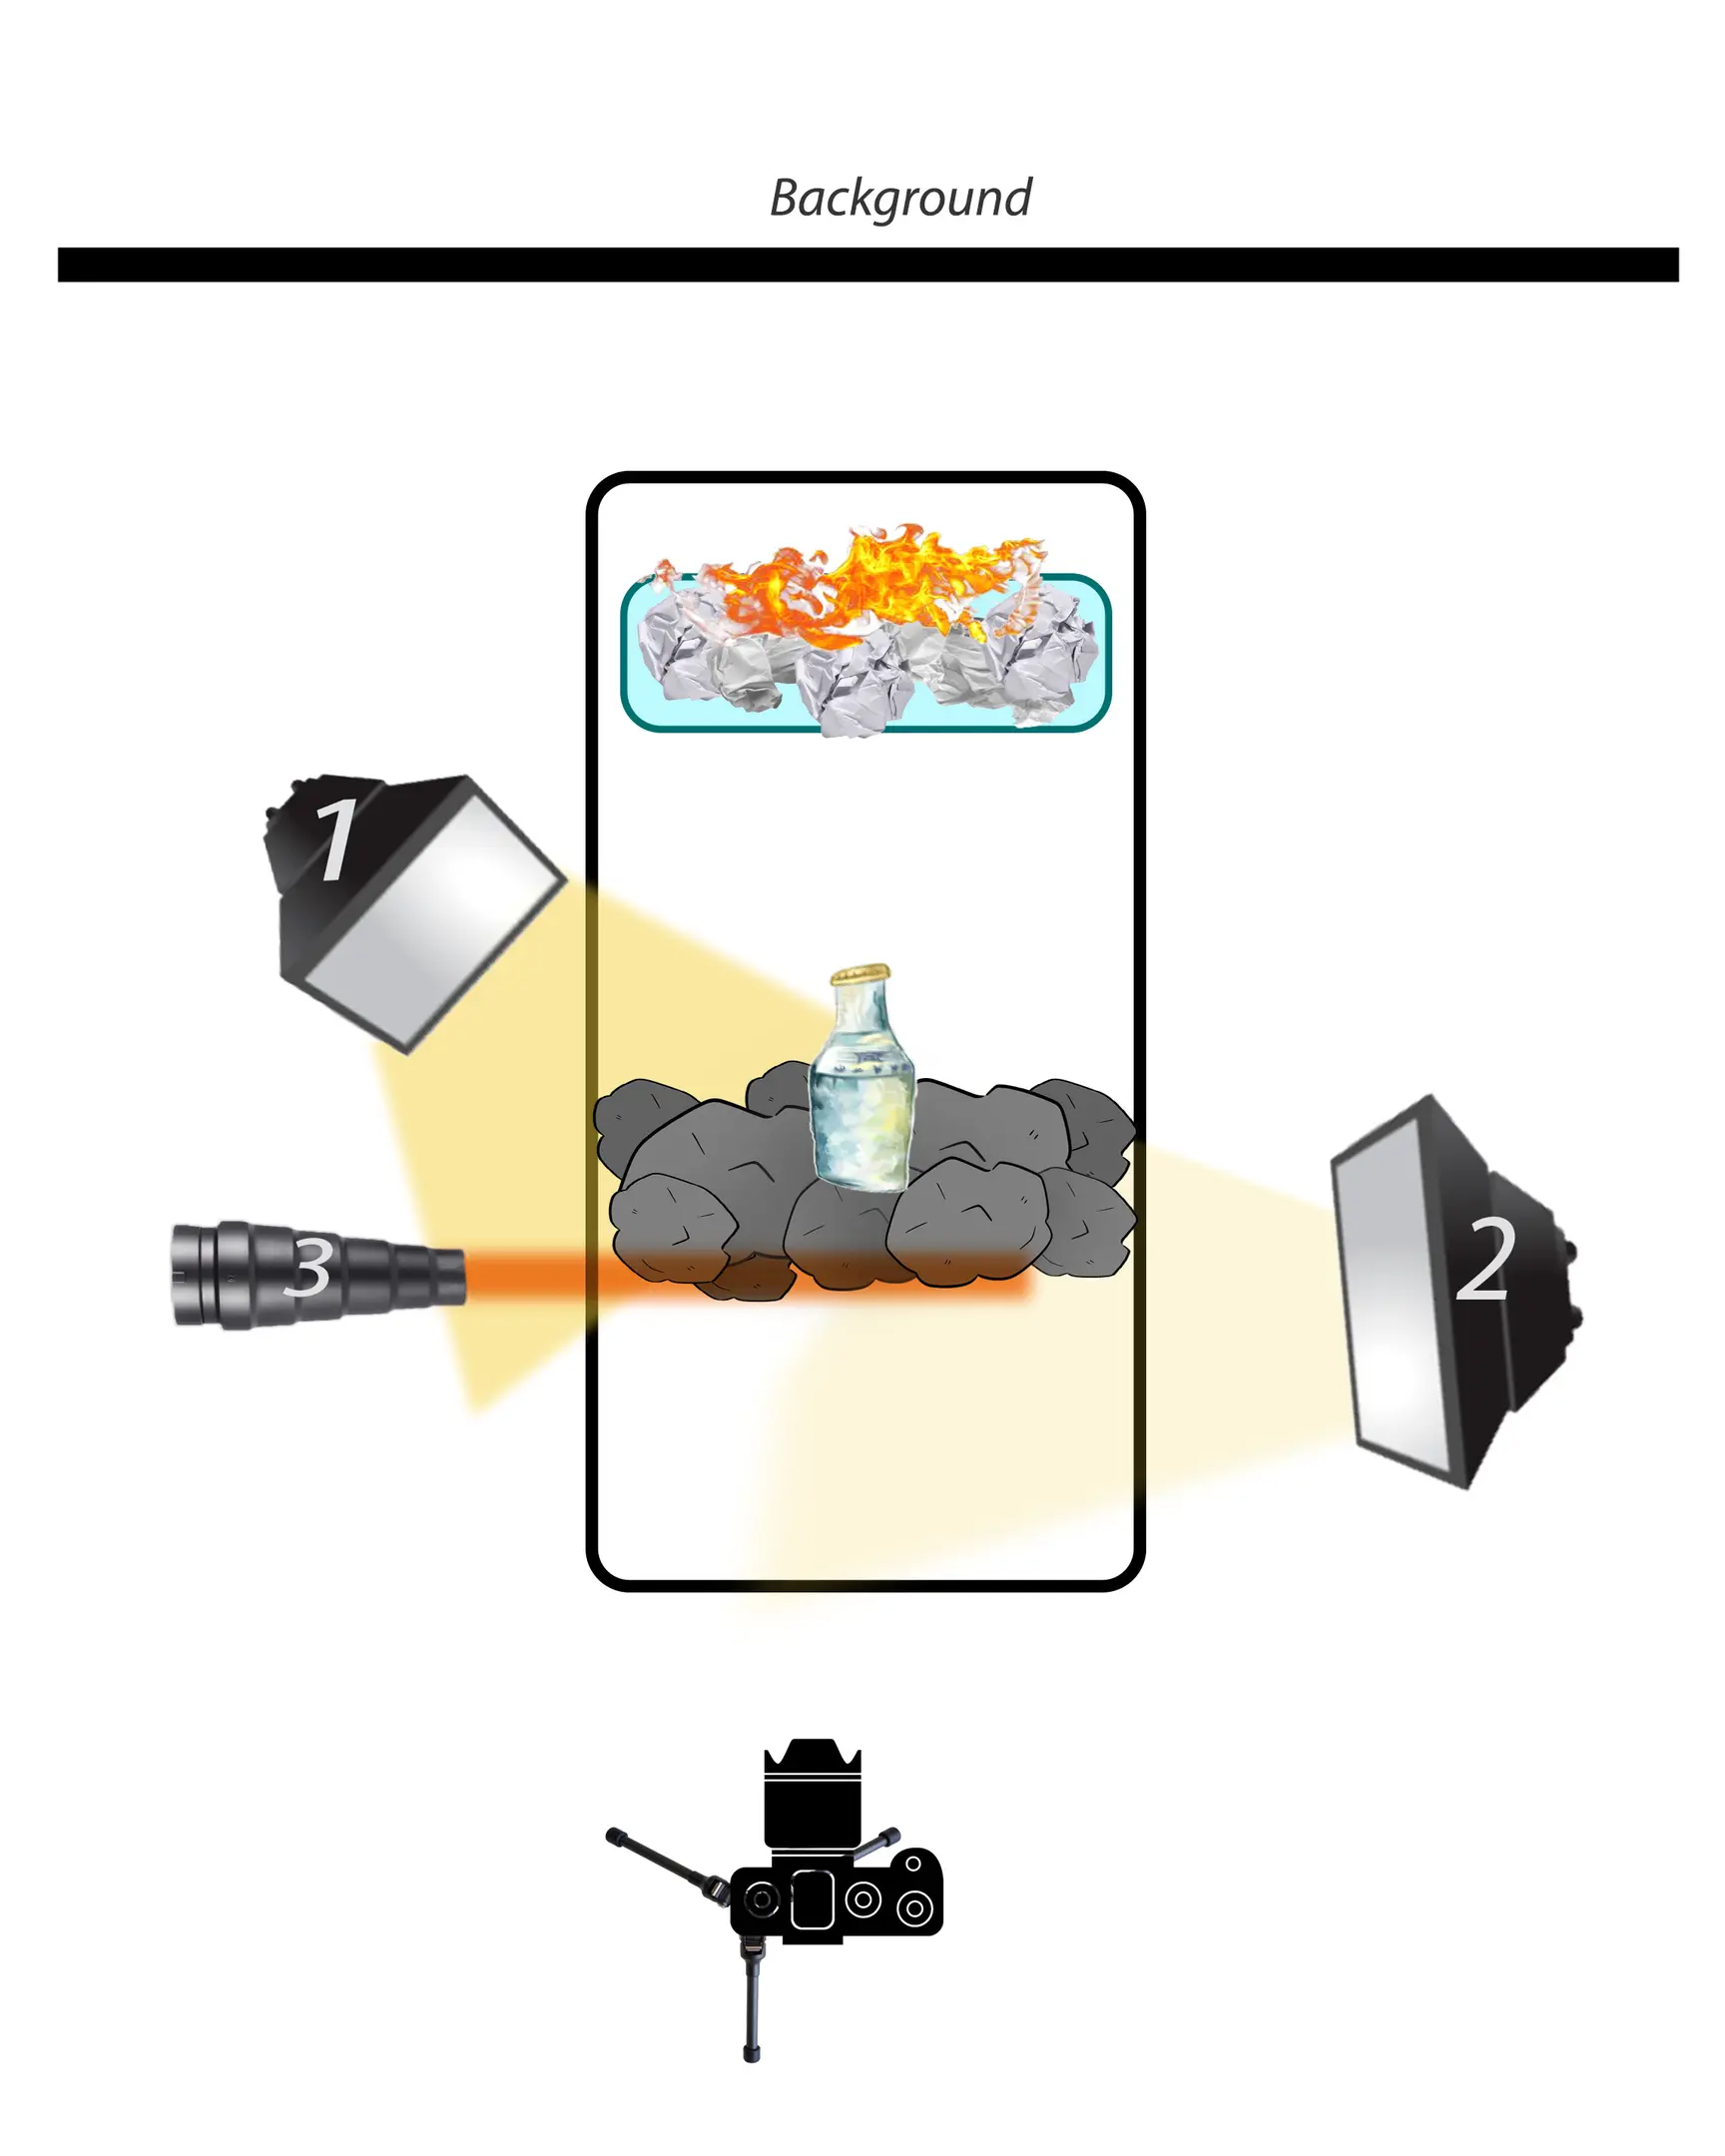
Then I began to think about how many light sources are needed. 1st - a flame in the background. You can't just put the paper on the table and set it on fire. Shooting is important, but fire safety must not be forgotten. Therefore, I took the paper, put it in a heat-resistant dish for the oven, and put it all together on a thick wooden board, which, even if it gets hot, at least will not save the countertop. 2nd - rakia is a transparent drink, and it also contains pepper. That is important for the client. And it is crucial to show the customer that there is pepper in the bottle. So, you need a light source that will solve the problem of highlighting the contents. 3rd - burning coals. Shooting with real hot coals is probably possible, but definitely not safe. This problem can be solved by another light source (flash) directed at coals. 4th - no one will agree to accept the result/picture if it is impossible to understand what kind of product it is on it. Therefore, the label must be shown. We have to add one more flash.
When shooting a master class, we used 4 light sources (spoiler: you could do with 1, but you would have to run around the object and work in Photoshop - but more on that later).
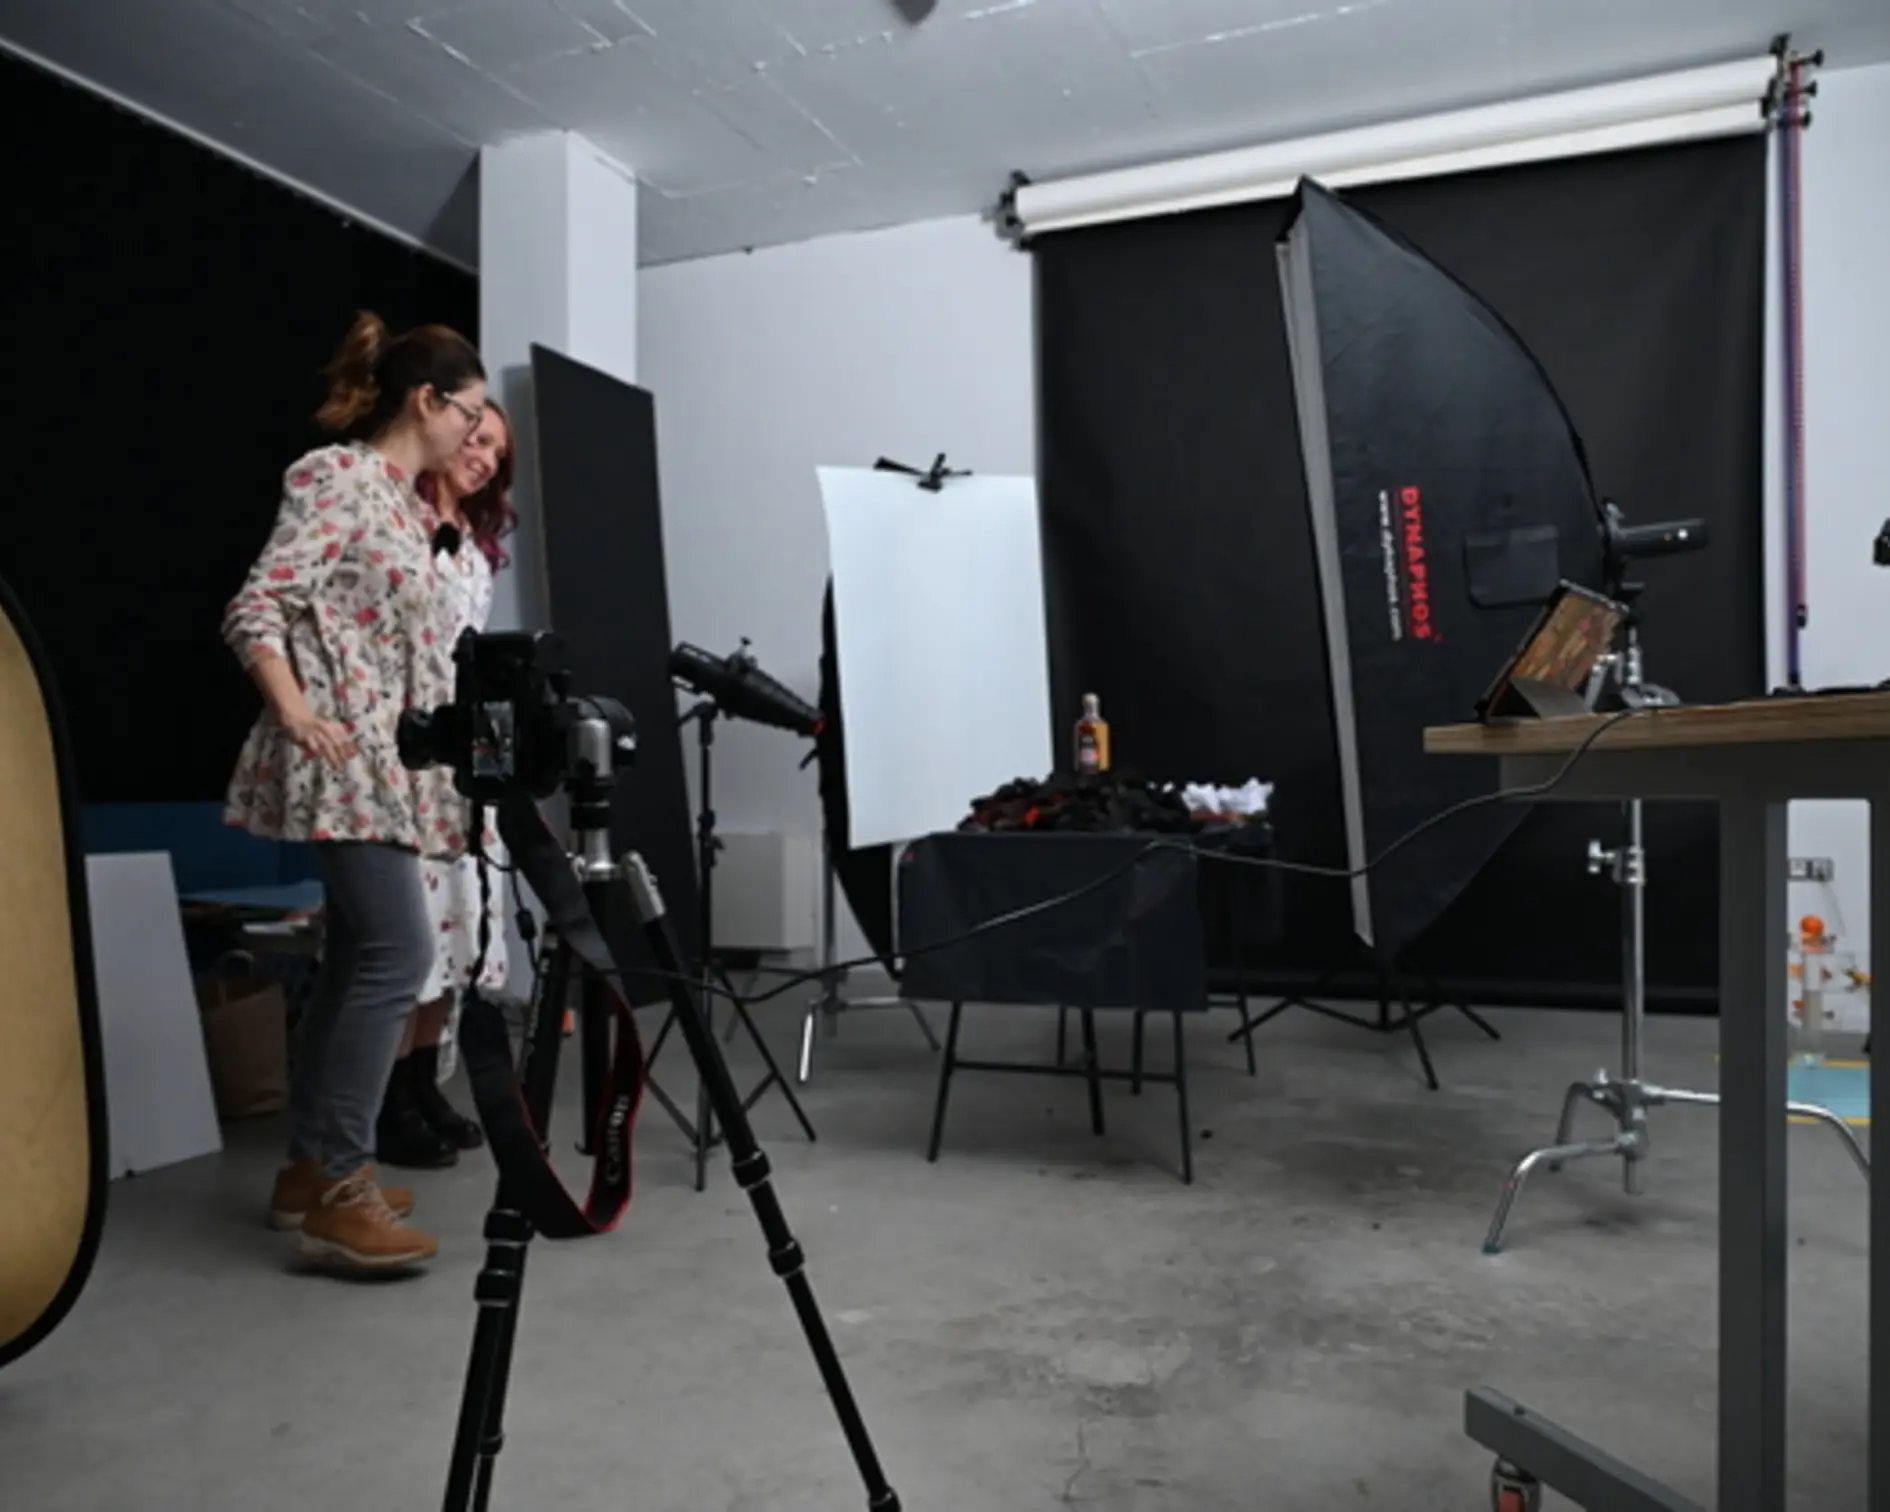
Perhaps one of the most important conditions in this shooting is that you have a tripod for the camera. The camera must not move! Shooting is done at a slow shutter speed - to capture the fire. For this reason, you need a tripod - to avoid blurring in the frame. In addition - we will combine frames in Photoshop - so be sure to put the camera on a tripod!
A "drawing" light. For everyday shooting and master classes, I used a GODOX AD200 Pro flash and a softbox (but you can also use a stripbox).
This light source had the maximum power of all and served to shine through the bottle through. In this case, it was essential to show the transparency of the drink. It also helped separate the bottle from the background and illuminate the left side of the bottle.
A "filling" light. I also used a GODOX AD200 Pro flash and a softbox diffuser (or stripbox). The power of the fill light source must be less than that of the main light source. Otherwise, you will have double shadows in the frame.
This light source illuminates the label. Every client wants, in addition to special effects, the details of the product to be clearly visible in the photo. This light source can be replaced by a reflector (e.g. a white foam board). At the same time, if you use not a flash, but a reflective surface, it must be located at such an angle that the light from source # 1, reflected from the cardboard, highlights the label.
GODOX AD300 Pro flash with snoot head and red gel filter. It was aimed only at coals to simulate combustion. As you understand, it could also be completely removed and not used - if such an effect is not needed.
Fire. For the camera to “see” the fire, it is not enough to set it on fire in the frame. Fire is the source of light. And the camera sees any light, provided that it is of sufficient power and duration. That is super important to understand. Flash is a powerful source of light. Therefore, it “draws” the frame in a fraction of a second (1/200 is usually enough to work with a flash), but when the photographer works with light sources such as flames or sparklers, the time comes to the rescue (a shutter speed). A shutter speed affects how long the light coming from the flame will fall on the camera matrix. Therefore, I advise you to set the shutter speed on the camera from 0.5 to 1 second for photos with fire, adjusting the rest of the parameters specifically for your task.
After you have set the lighting scheme, set the appropriate parameters on the camera and isolated all other light sources that can change the light and shade pattern in the frame (turned off the ceiling lamps, closed the windows with black-out curtains) - be sure - you need to turn off the synchronizer on the camera and take a shot without flashes. You should get a completely black frame.

If your frame looks absolutely black, then you are doing everything right. No other extraneous light sources - except for the flash - affect the light pattern in the frame, which means they will not make it dirty.
If on your frame you can distinguish the outlines of an object, then extraneous light interferes with the frame. And in the future, this will most likely complicate your retouching work.
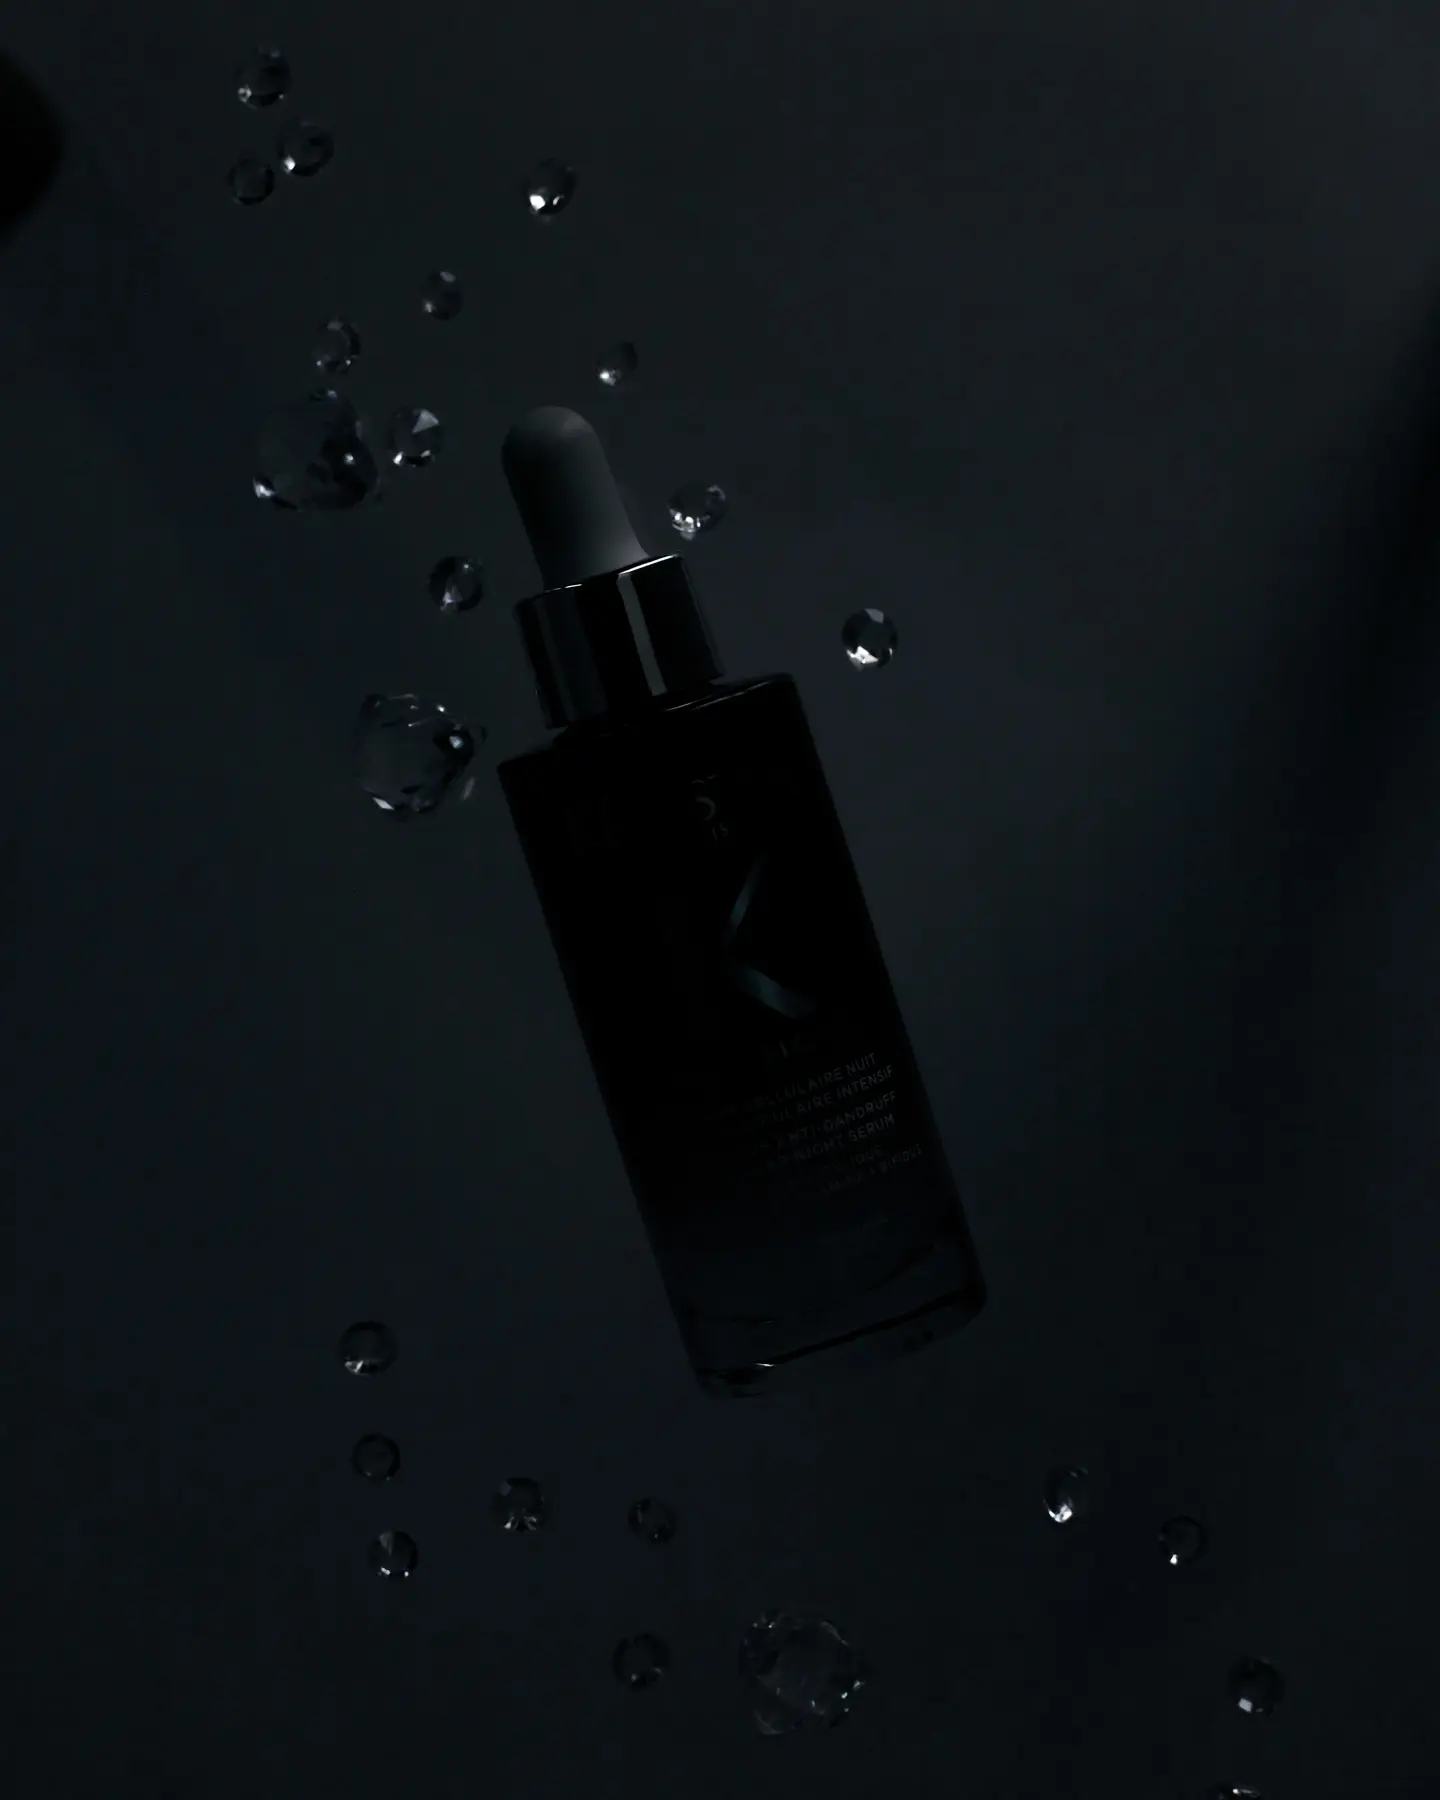
All photographers are interested in camera settings - specific numbers from which you can start shooting. I usually start with the following:
My favorite lenses are Canon 85mm 1.8 and Sigma 105 mm Macro. Camera Canon EOS 5D Mark IV. Godox X Pro-C Radio Synchronizer. And a tripod. I use Manfrotto (the only what I urge you to do is to make sure your tripod is really stable - to eliminate any chance of “blurring” in the frame).
If you don't have 3 lights or 2 lights and a reflector, you can still take this shot. To do this, first of all, you need to put the camera on a tripod and, preferably, control it remotely (via the application) in order to eliminate all chances of the camera moving relative to the shooting scene. If you only have 1 light source, then you should take 3 or 4 frames. Number of frames = number of lights that cannot be combined. For example, if in the second frame, you can also set fire to fire, then you can make only 3 frames.
Take your only light source and put it in position 1. Let's take the first frame.
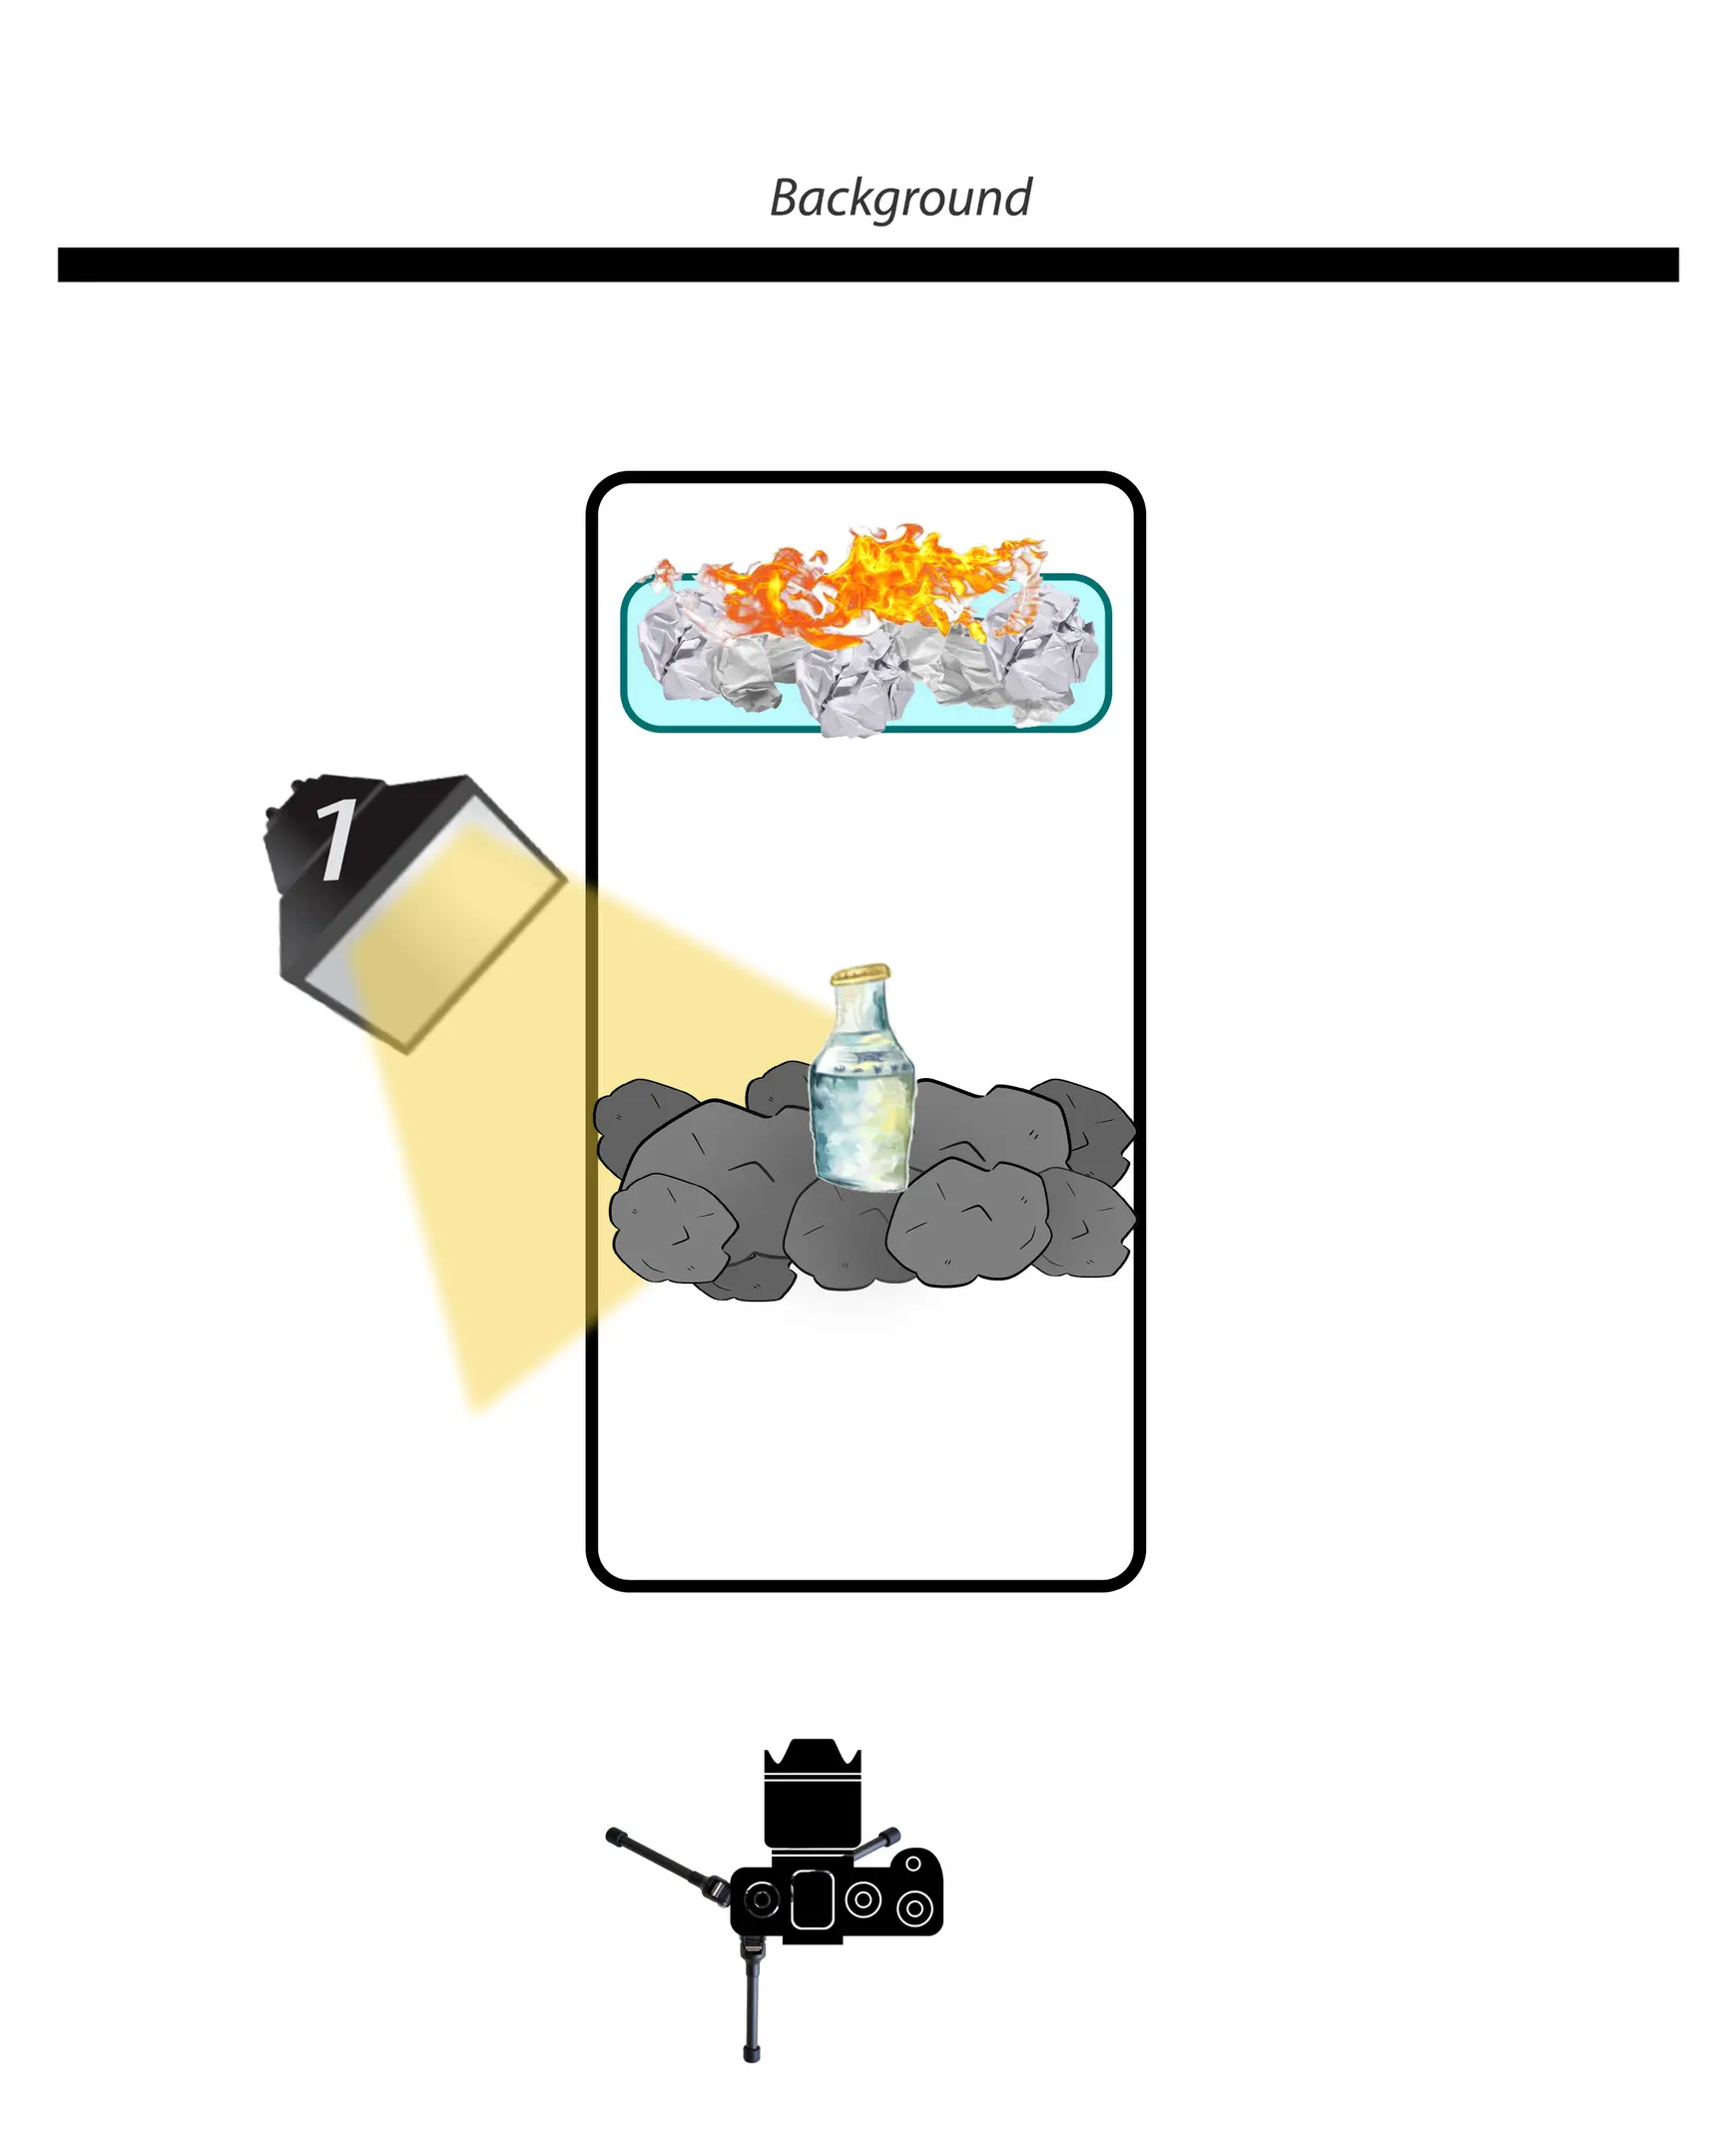
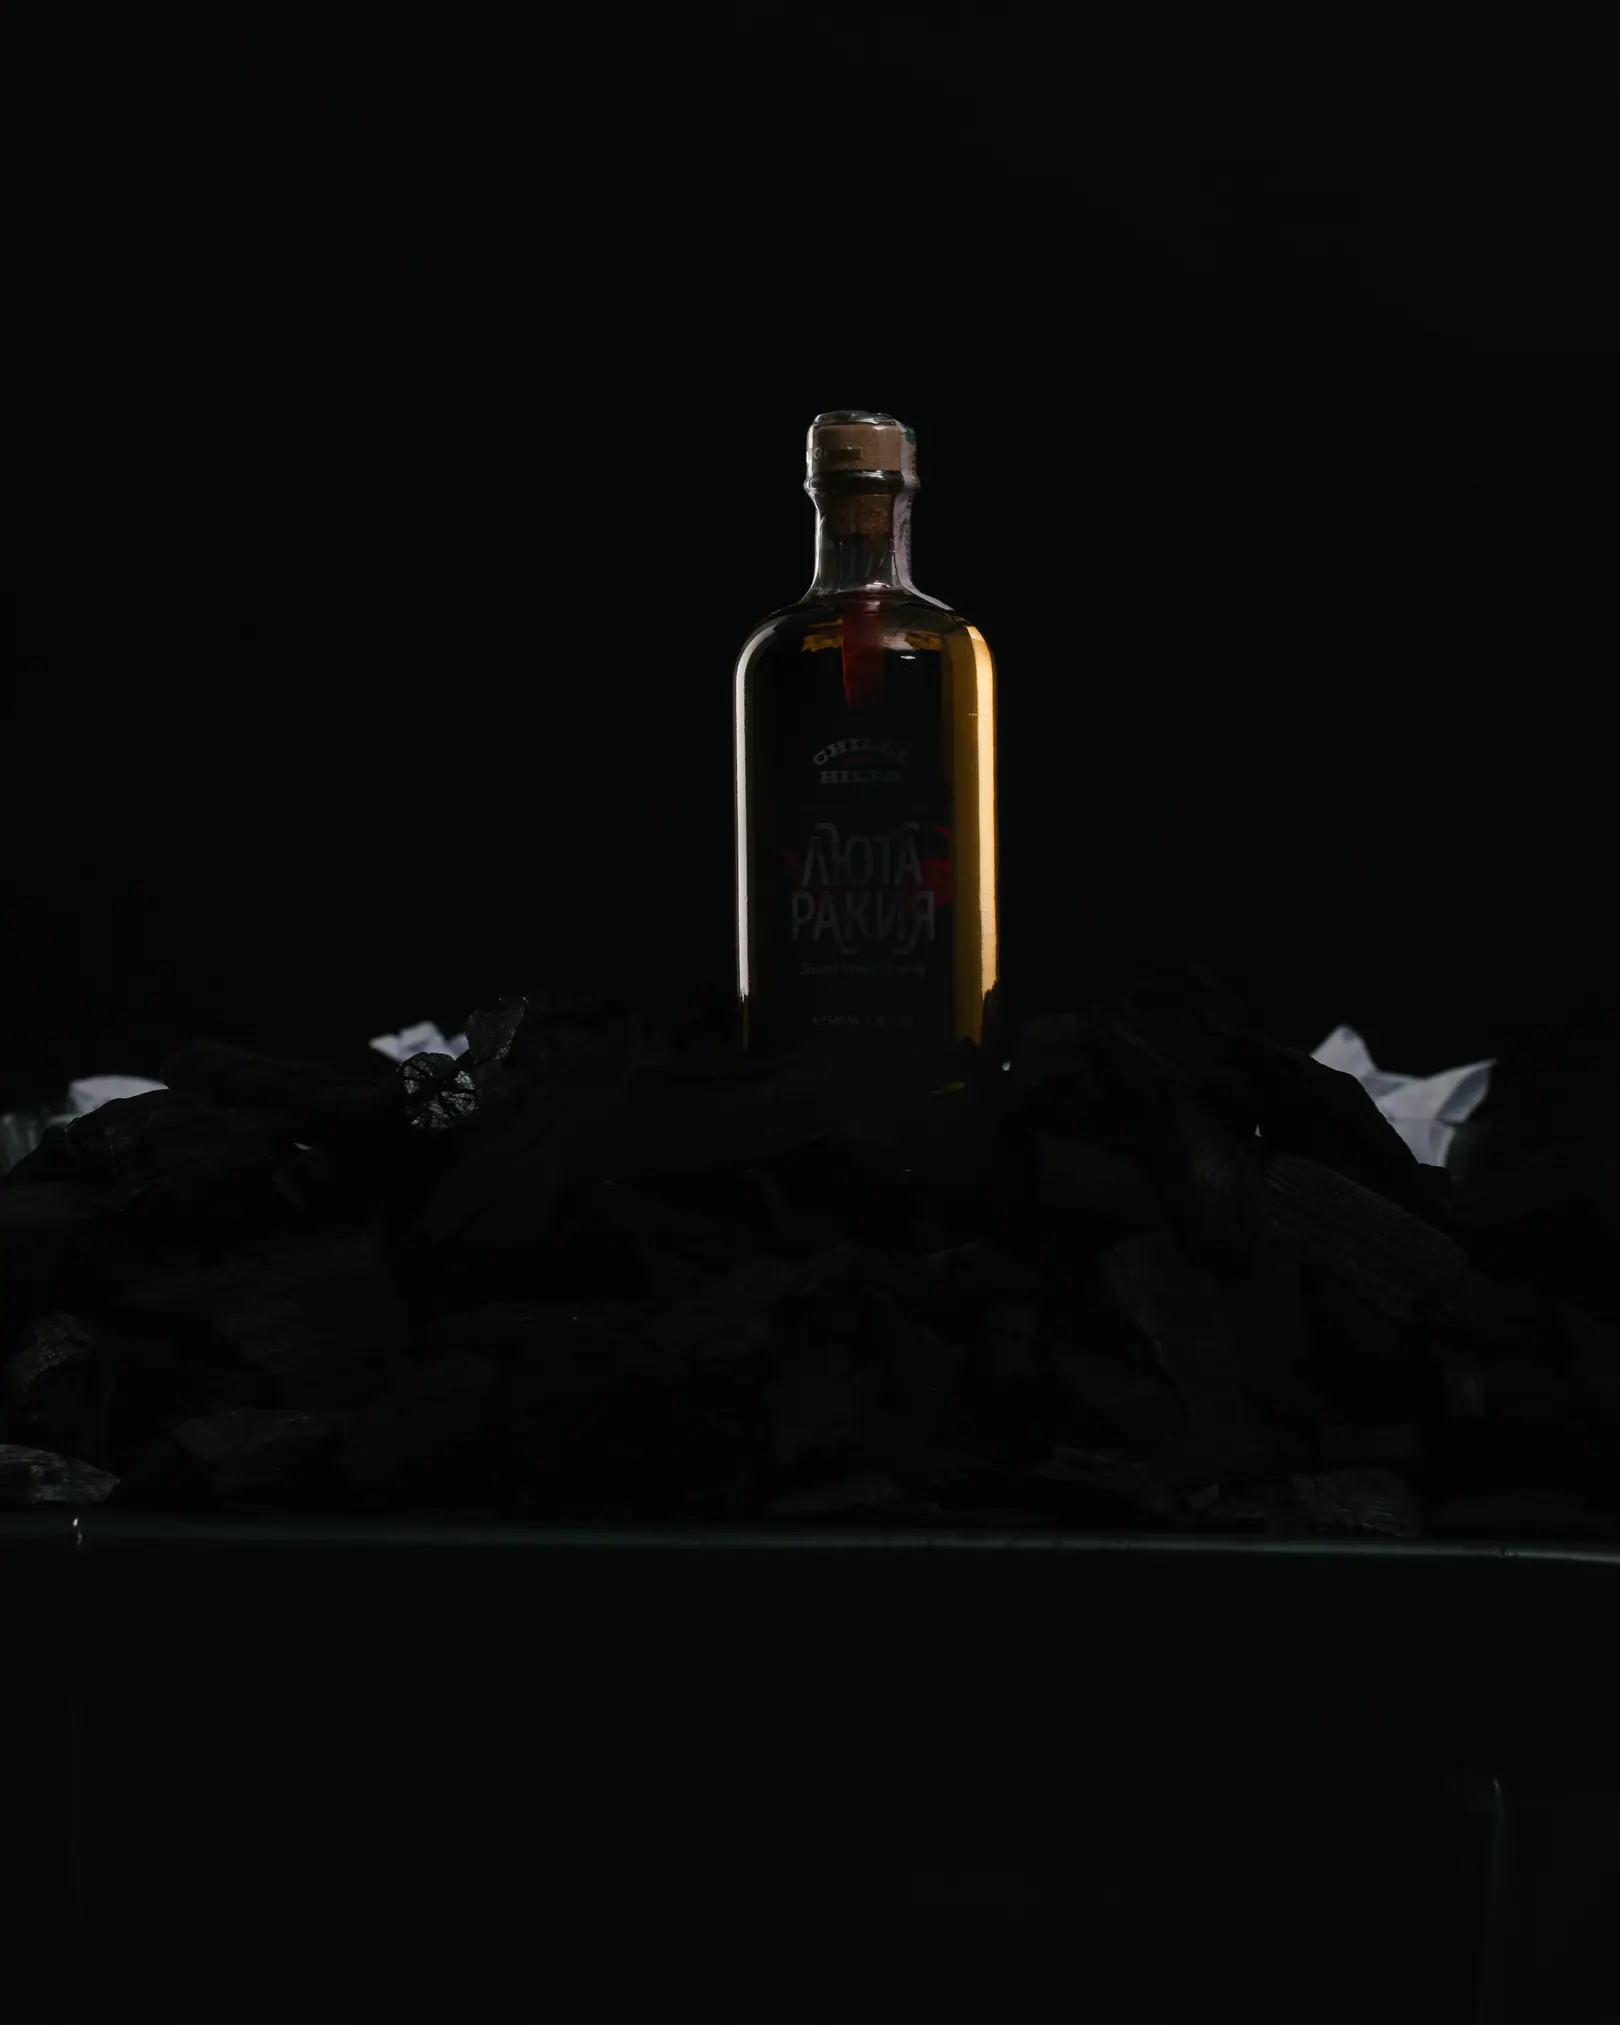
In this shot, we are lighting the object from behind.
Then we move the same light source to position 2. Reduce the power of the source by about ⅓ and take a picture. Don't move the camera! In no case! This frame is needed to highlight the label.
If you have one light source, I suggest you in this shot, where you are shining on the label, also set a fire on fire behind the bottle. Or you can take a separate frame with fire - it's not so important. The only important thing is that you must understand that light can be combined in post-processing.
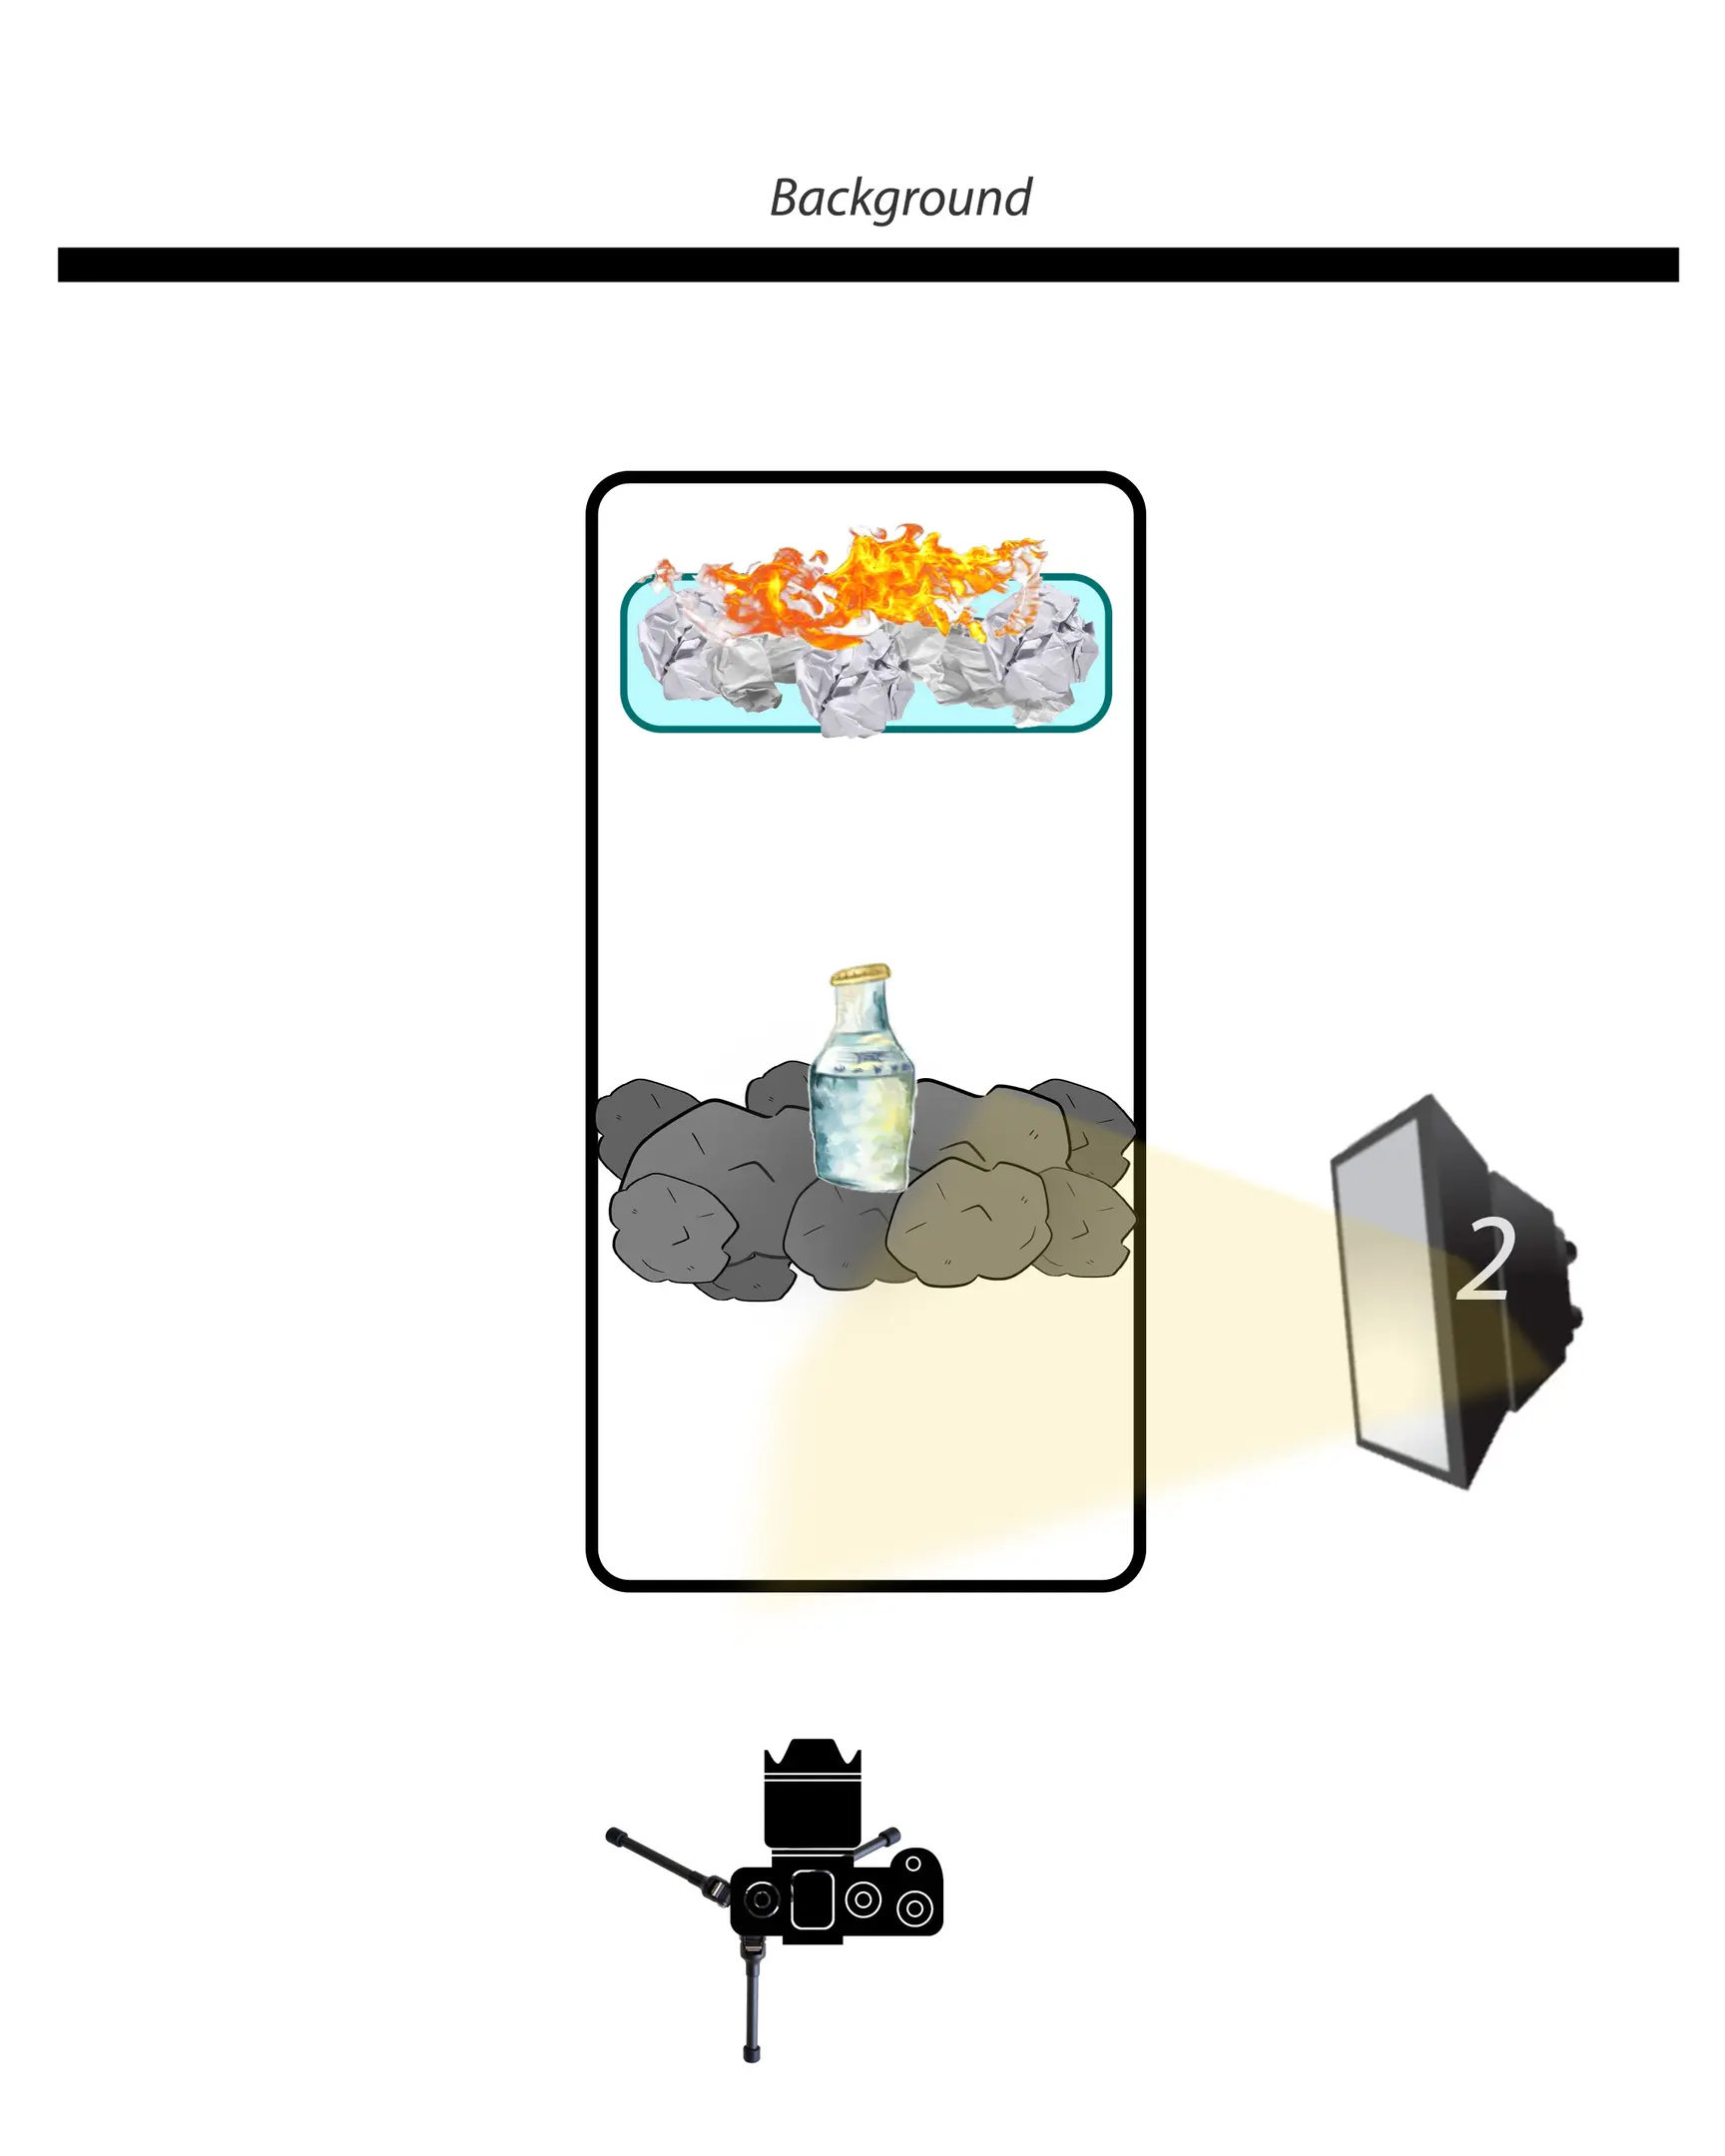
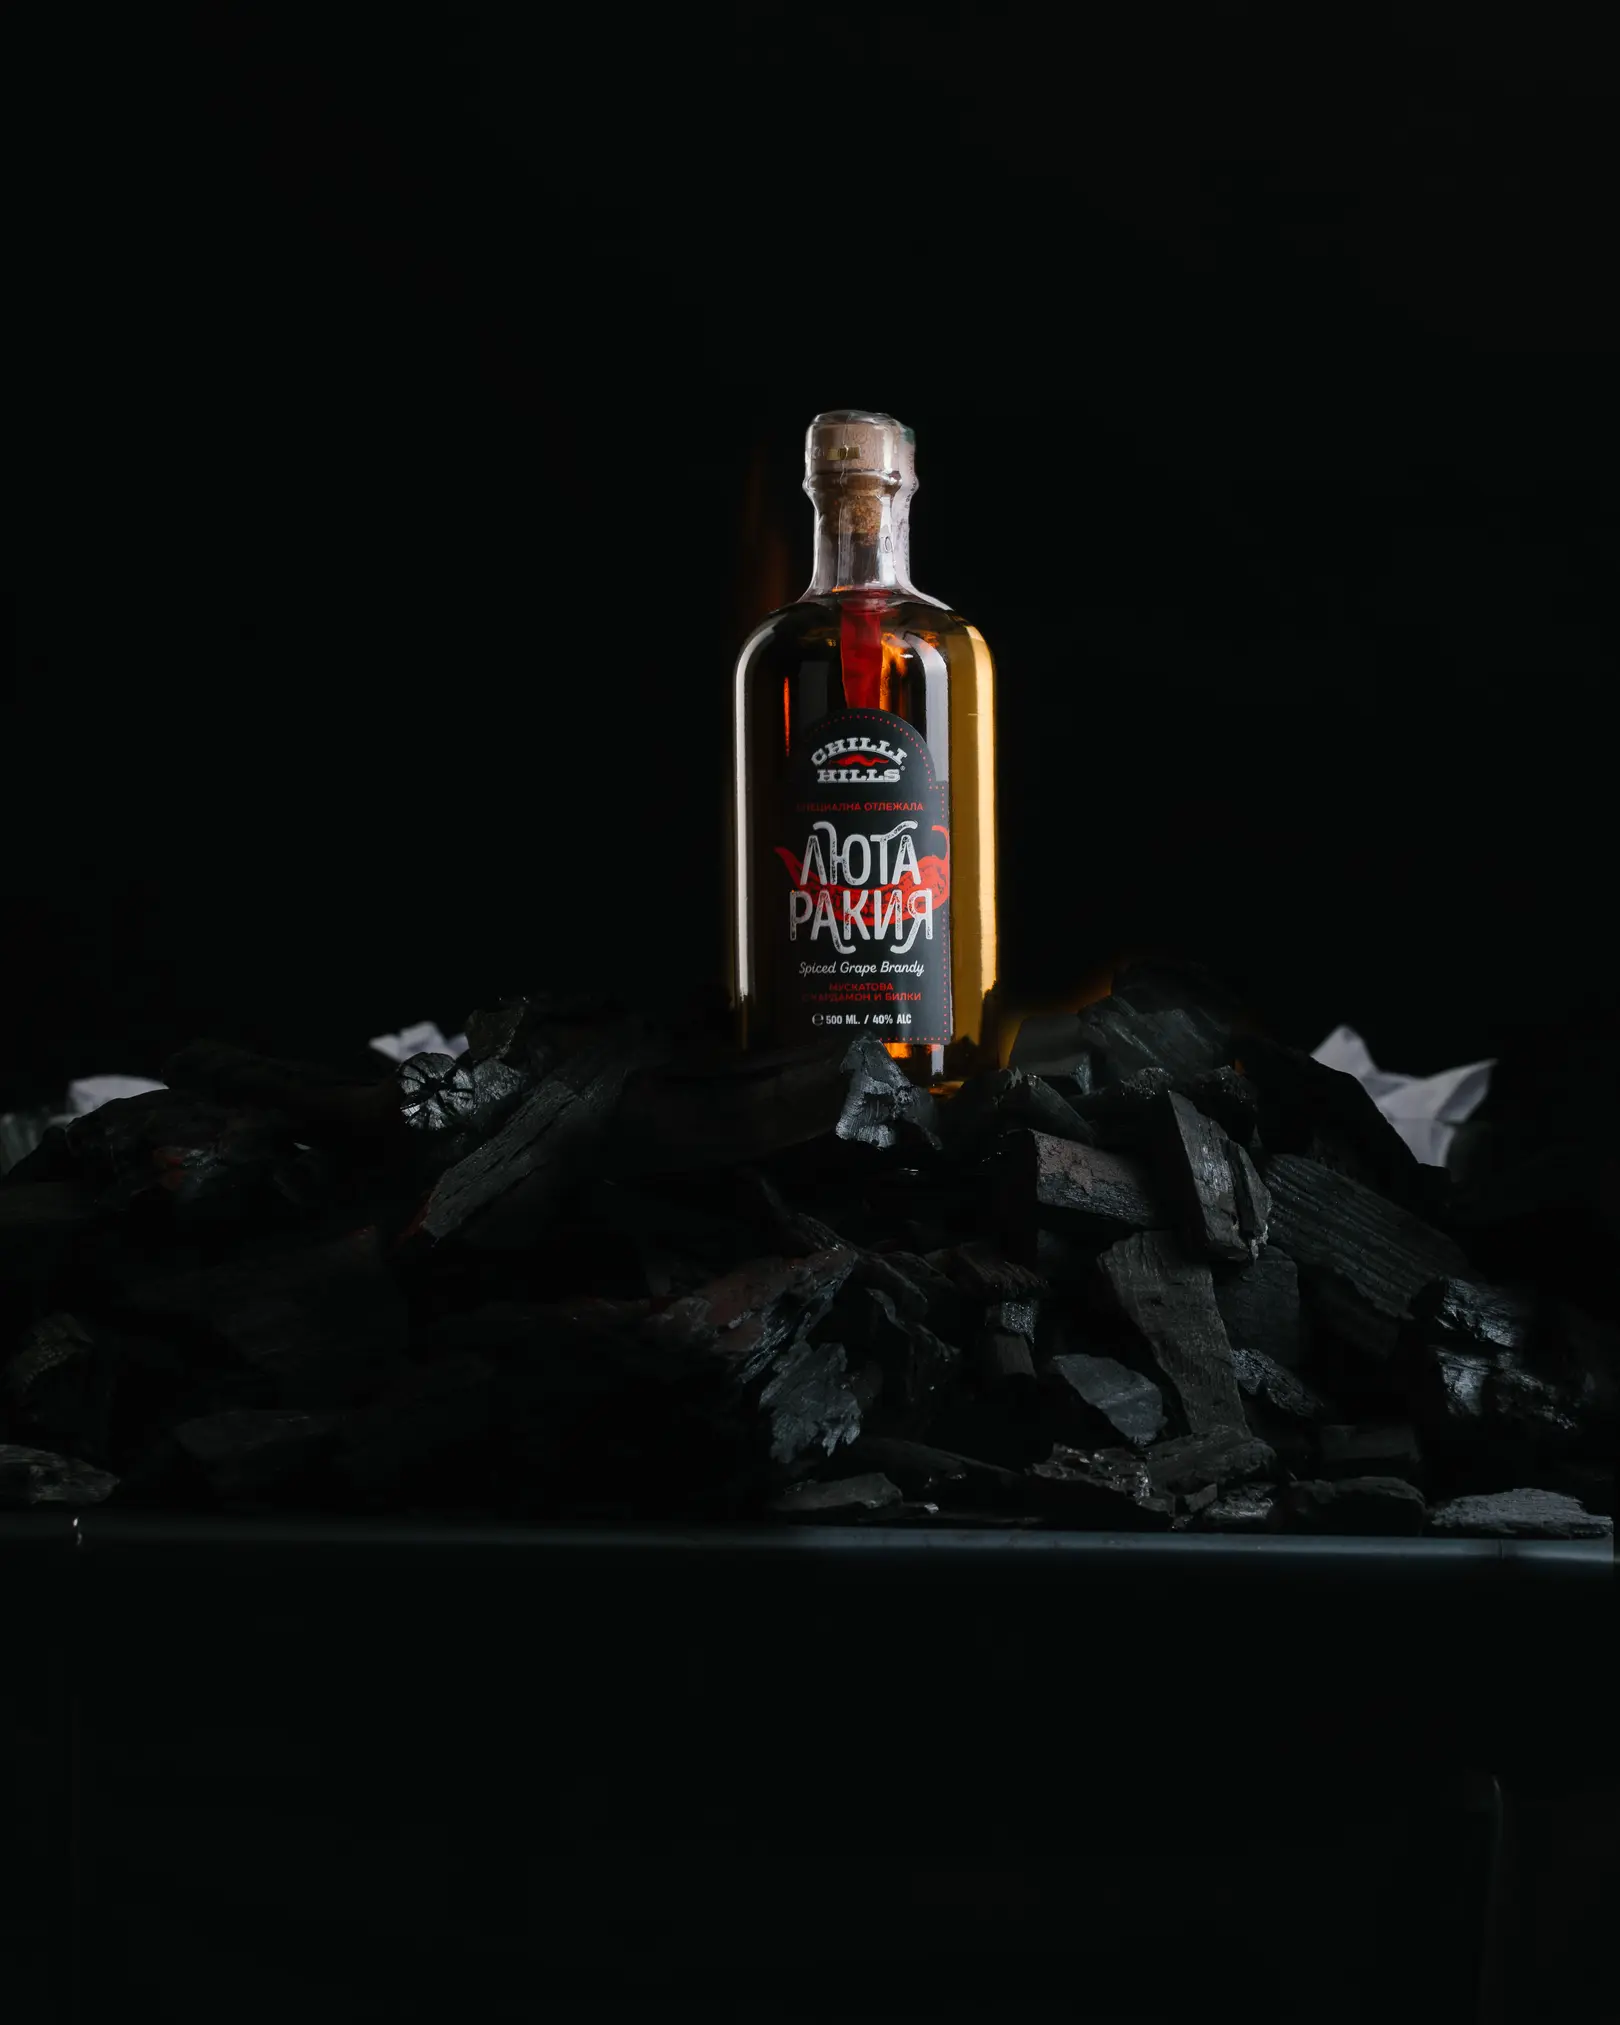
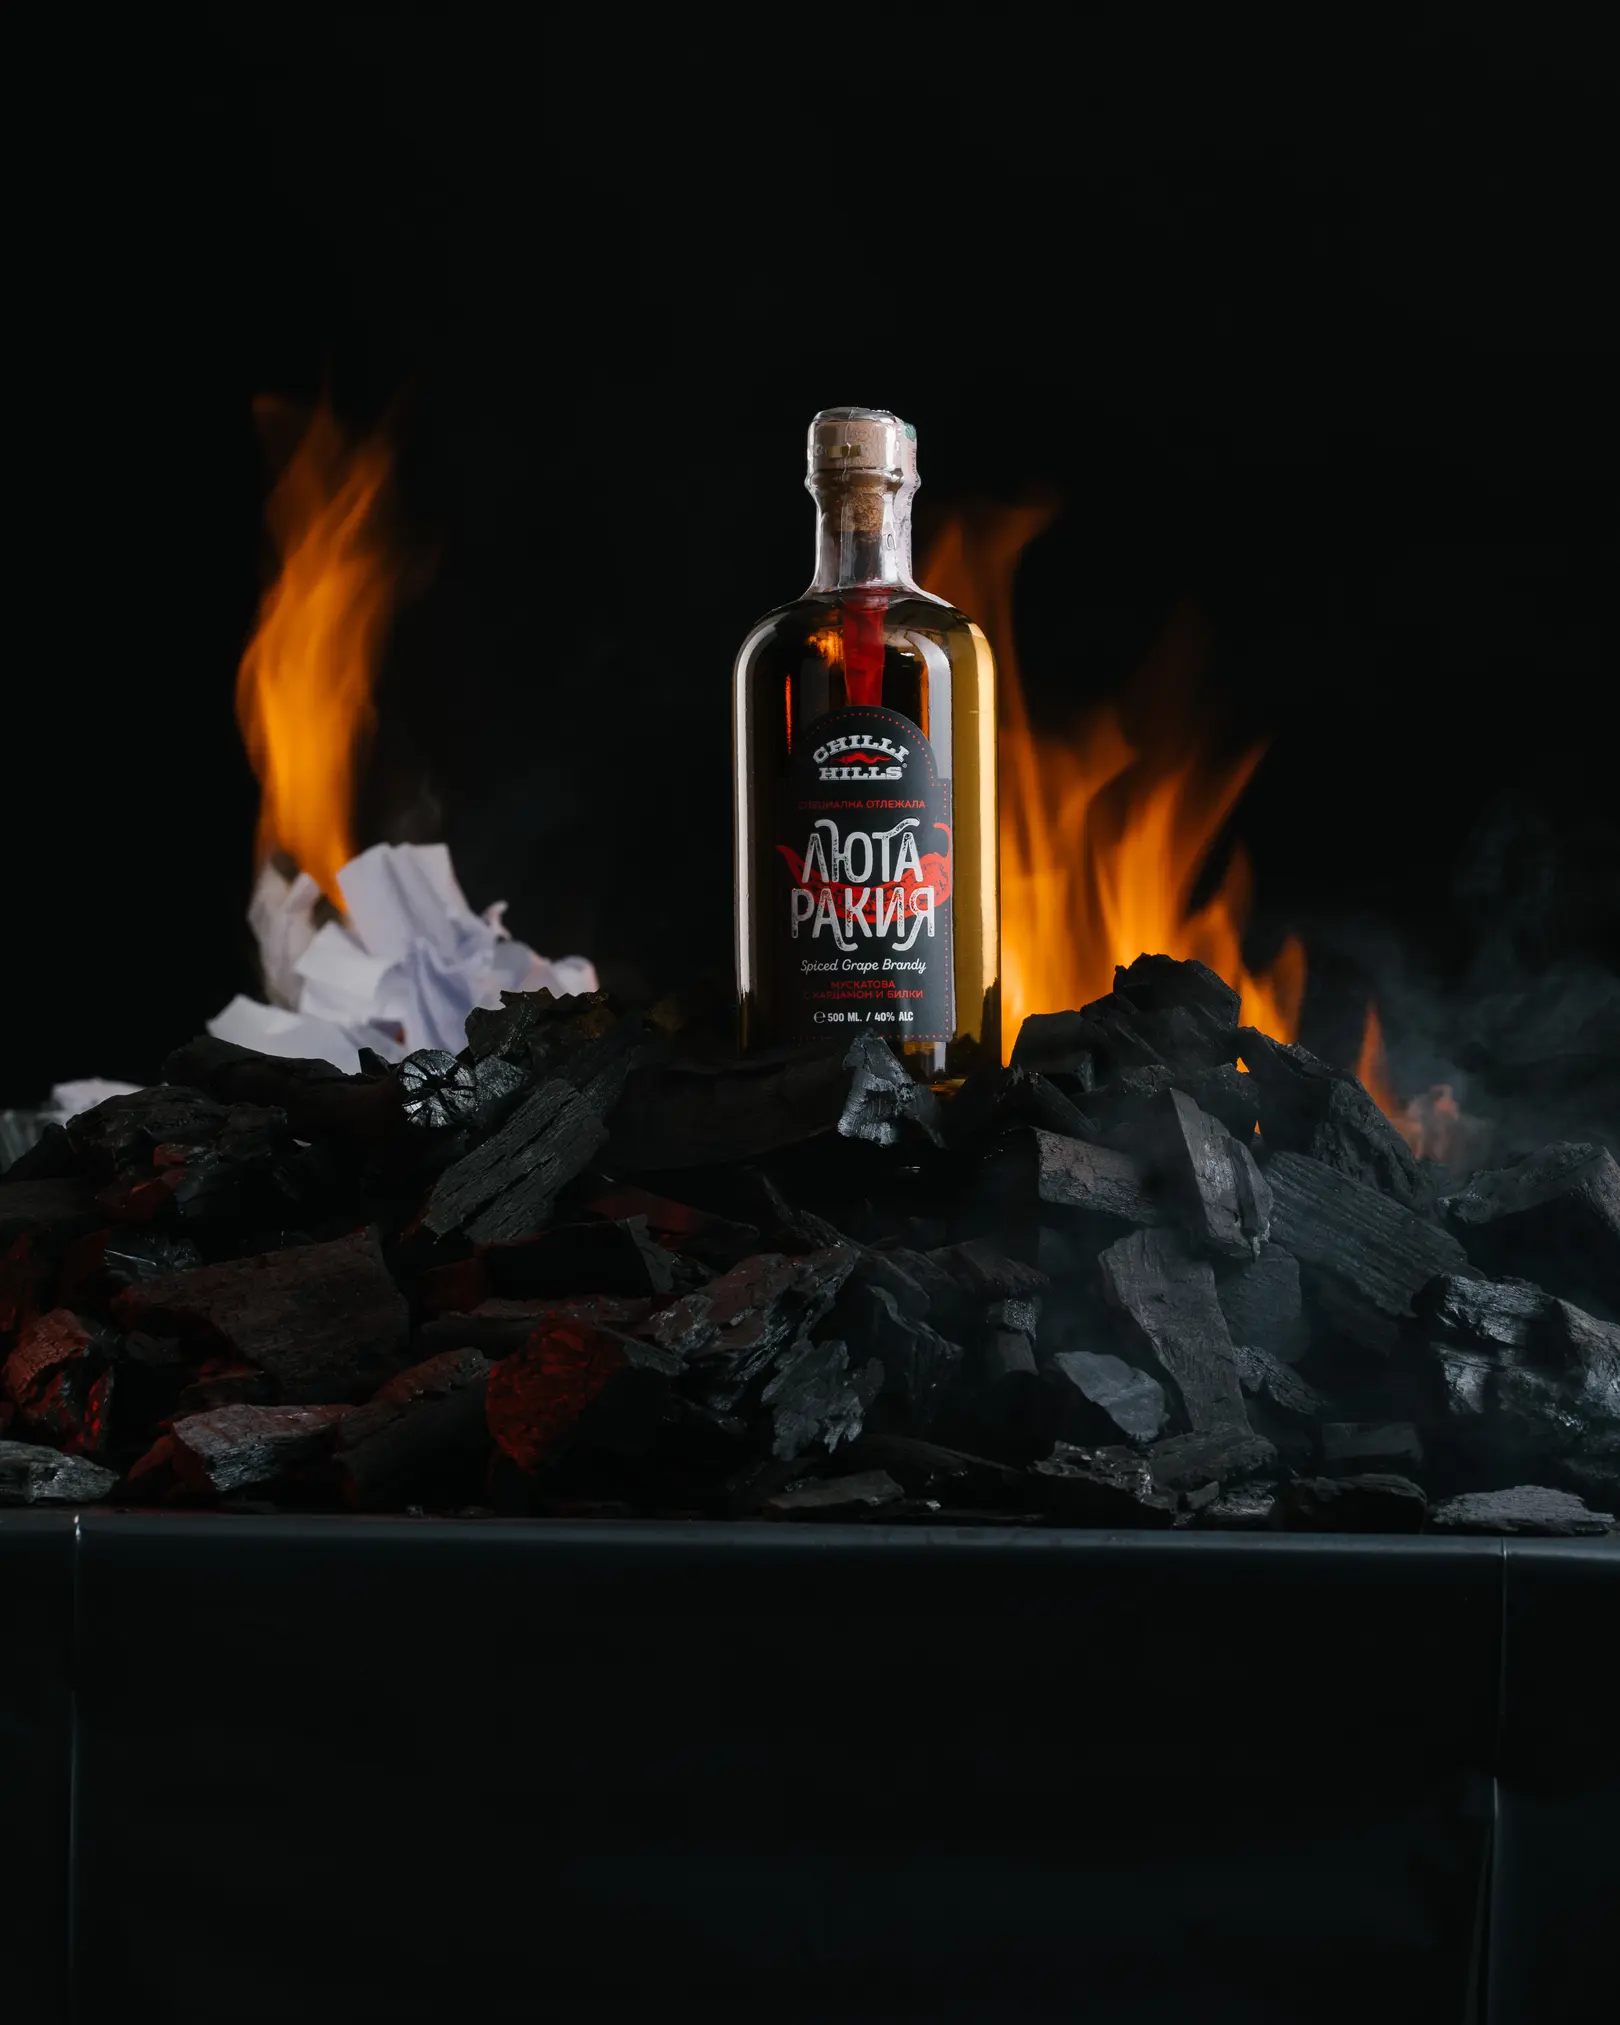
Then we put on a snood with a gel filter on our only source of light and move it to position 3. We make the 3rd frame.
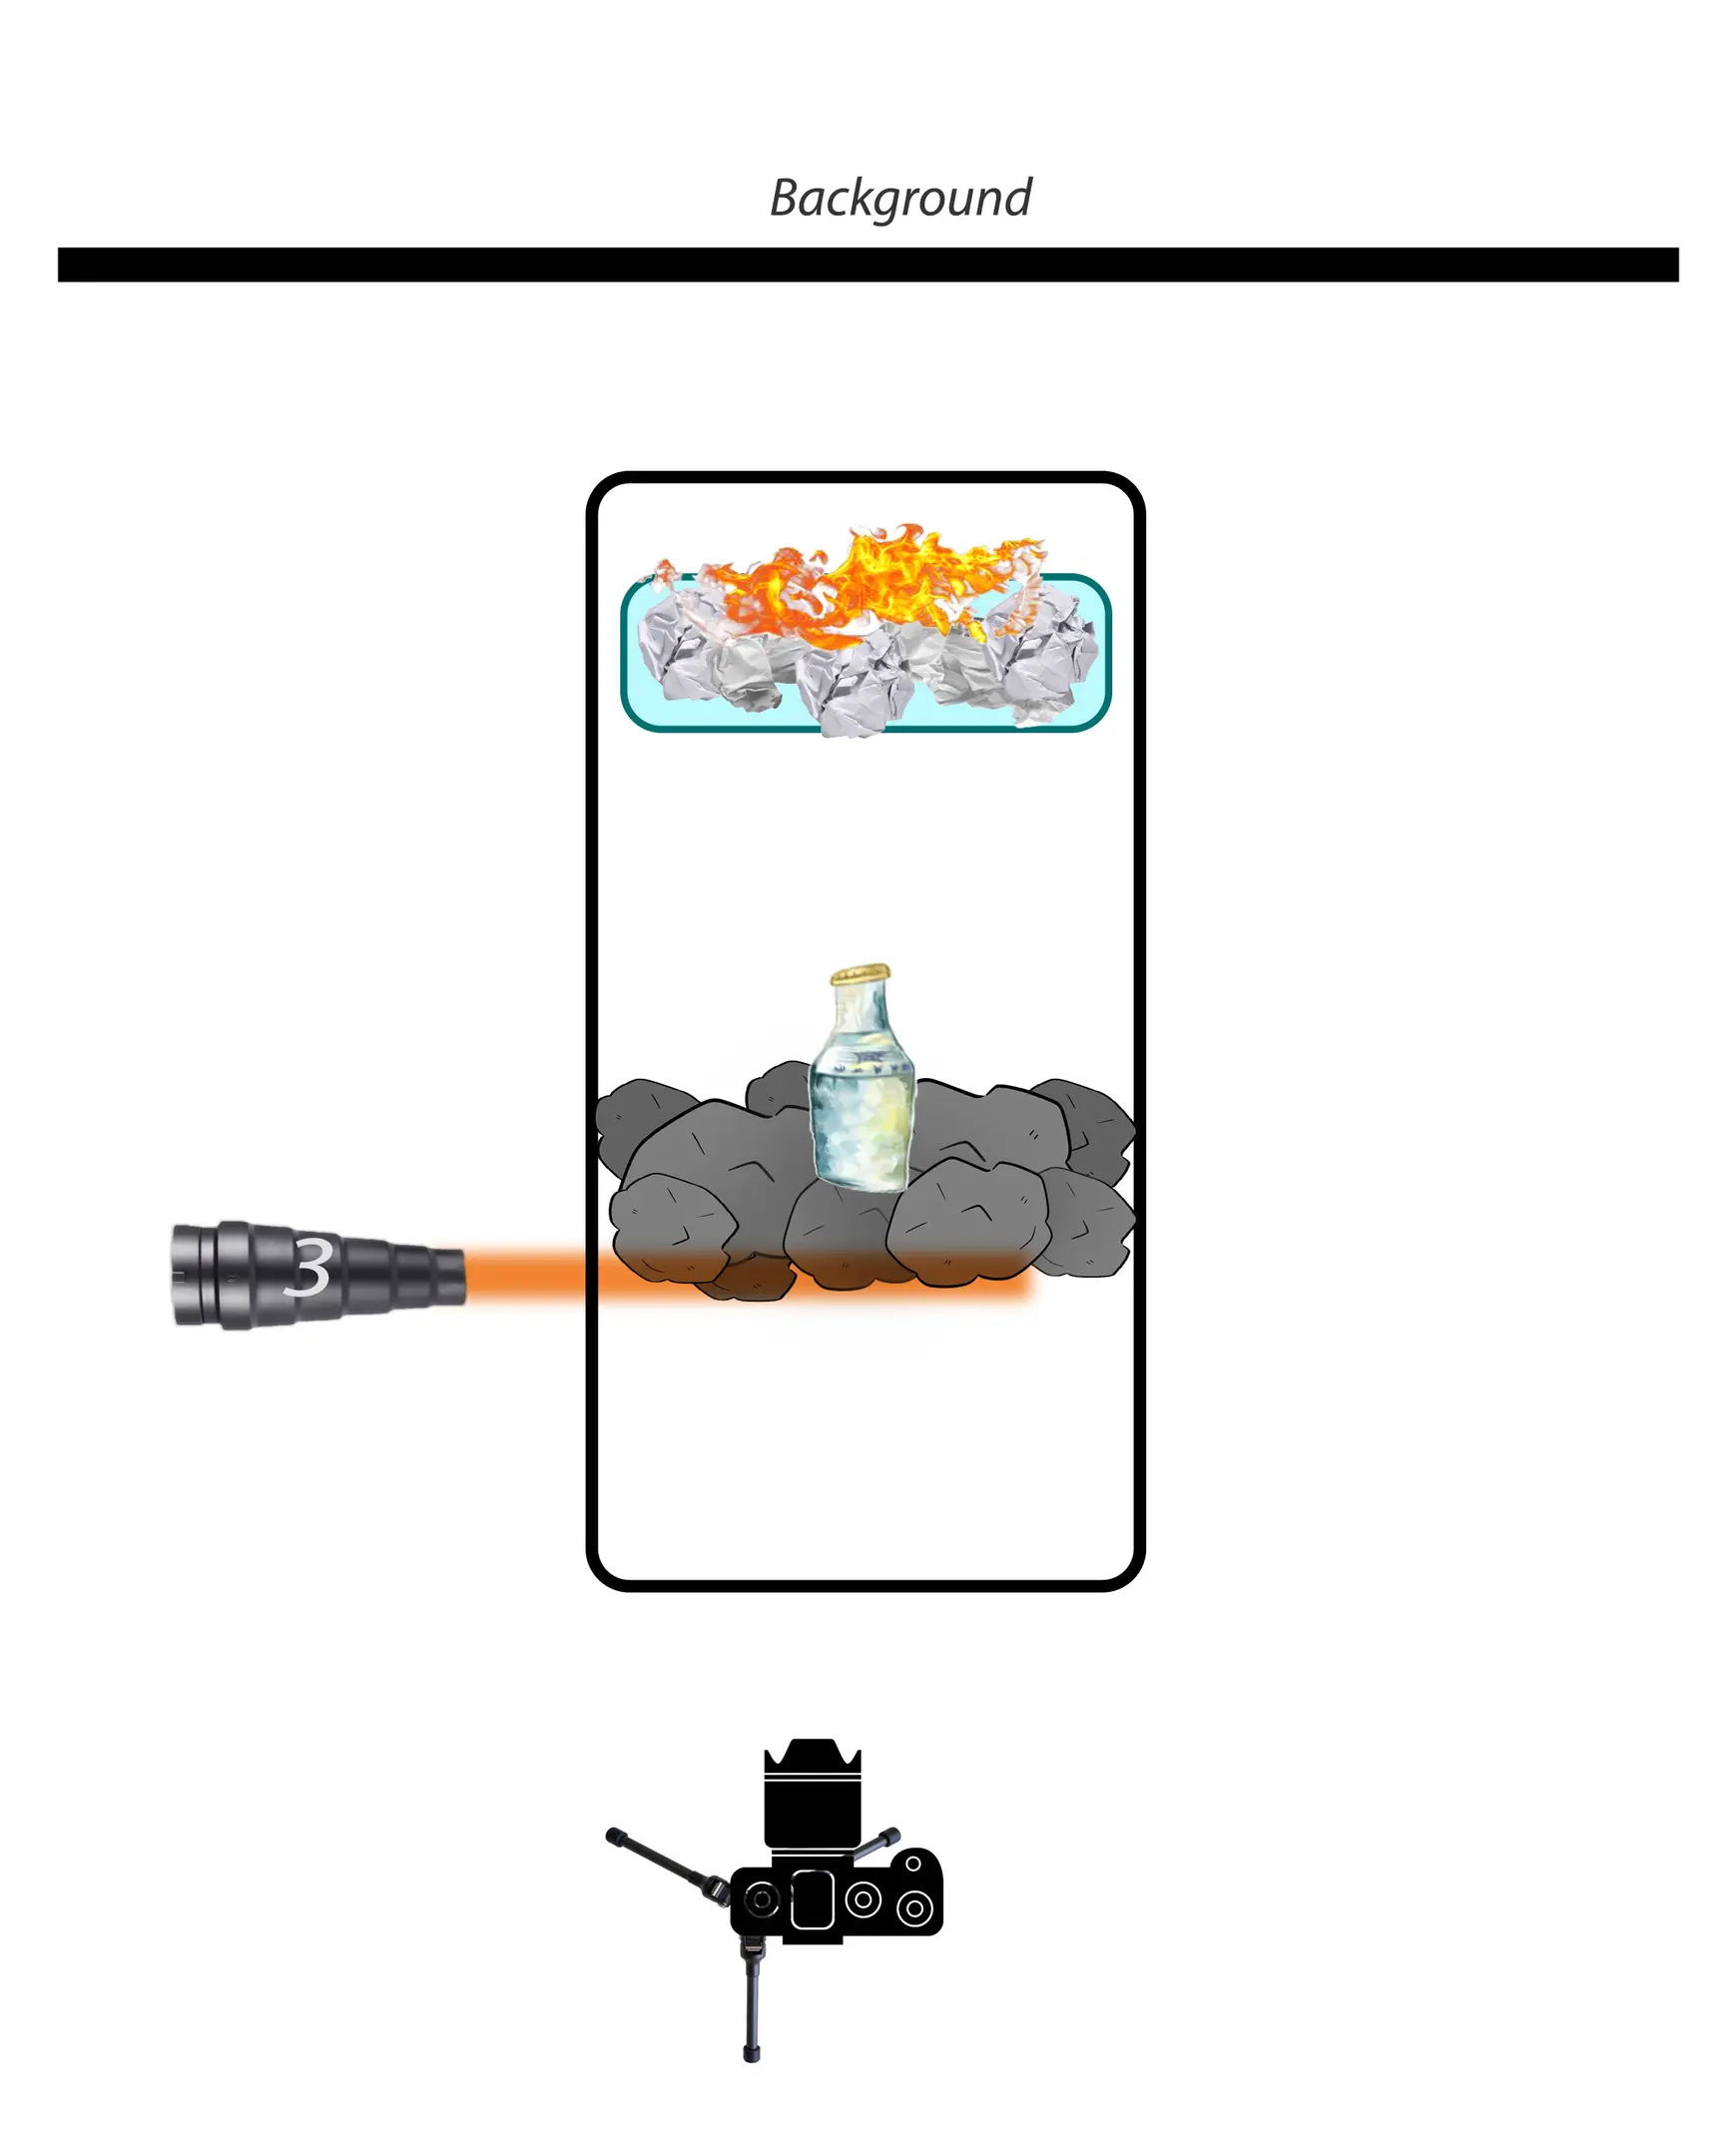
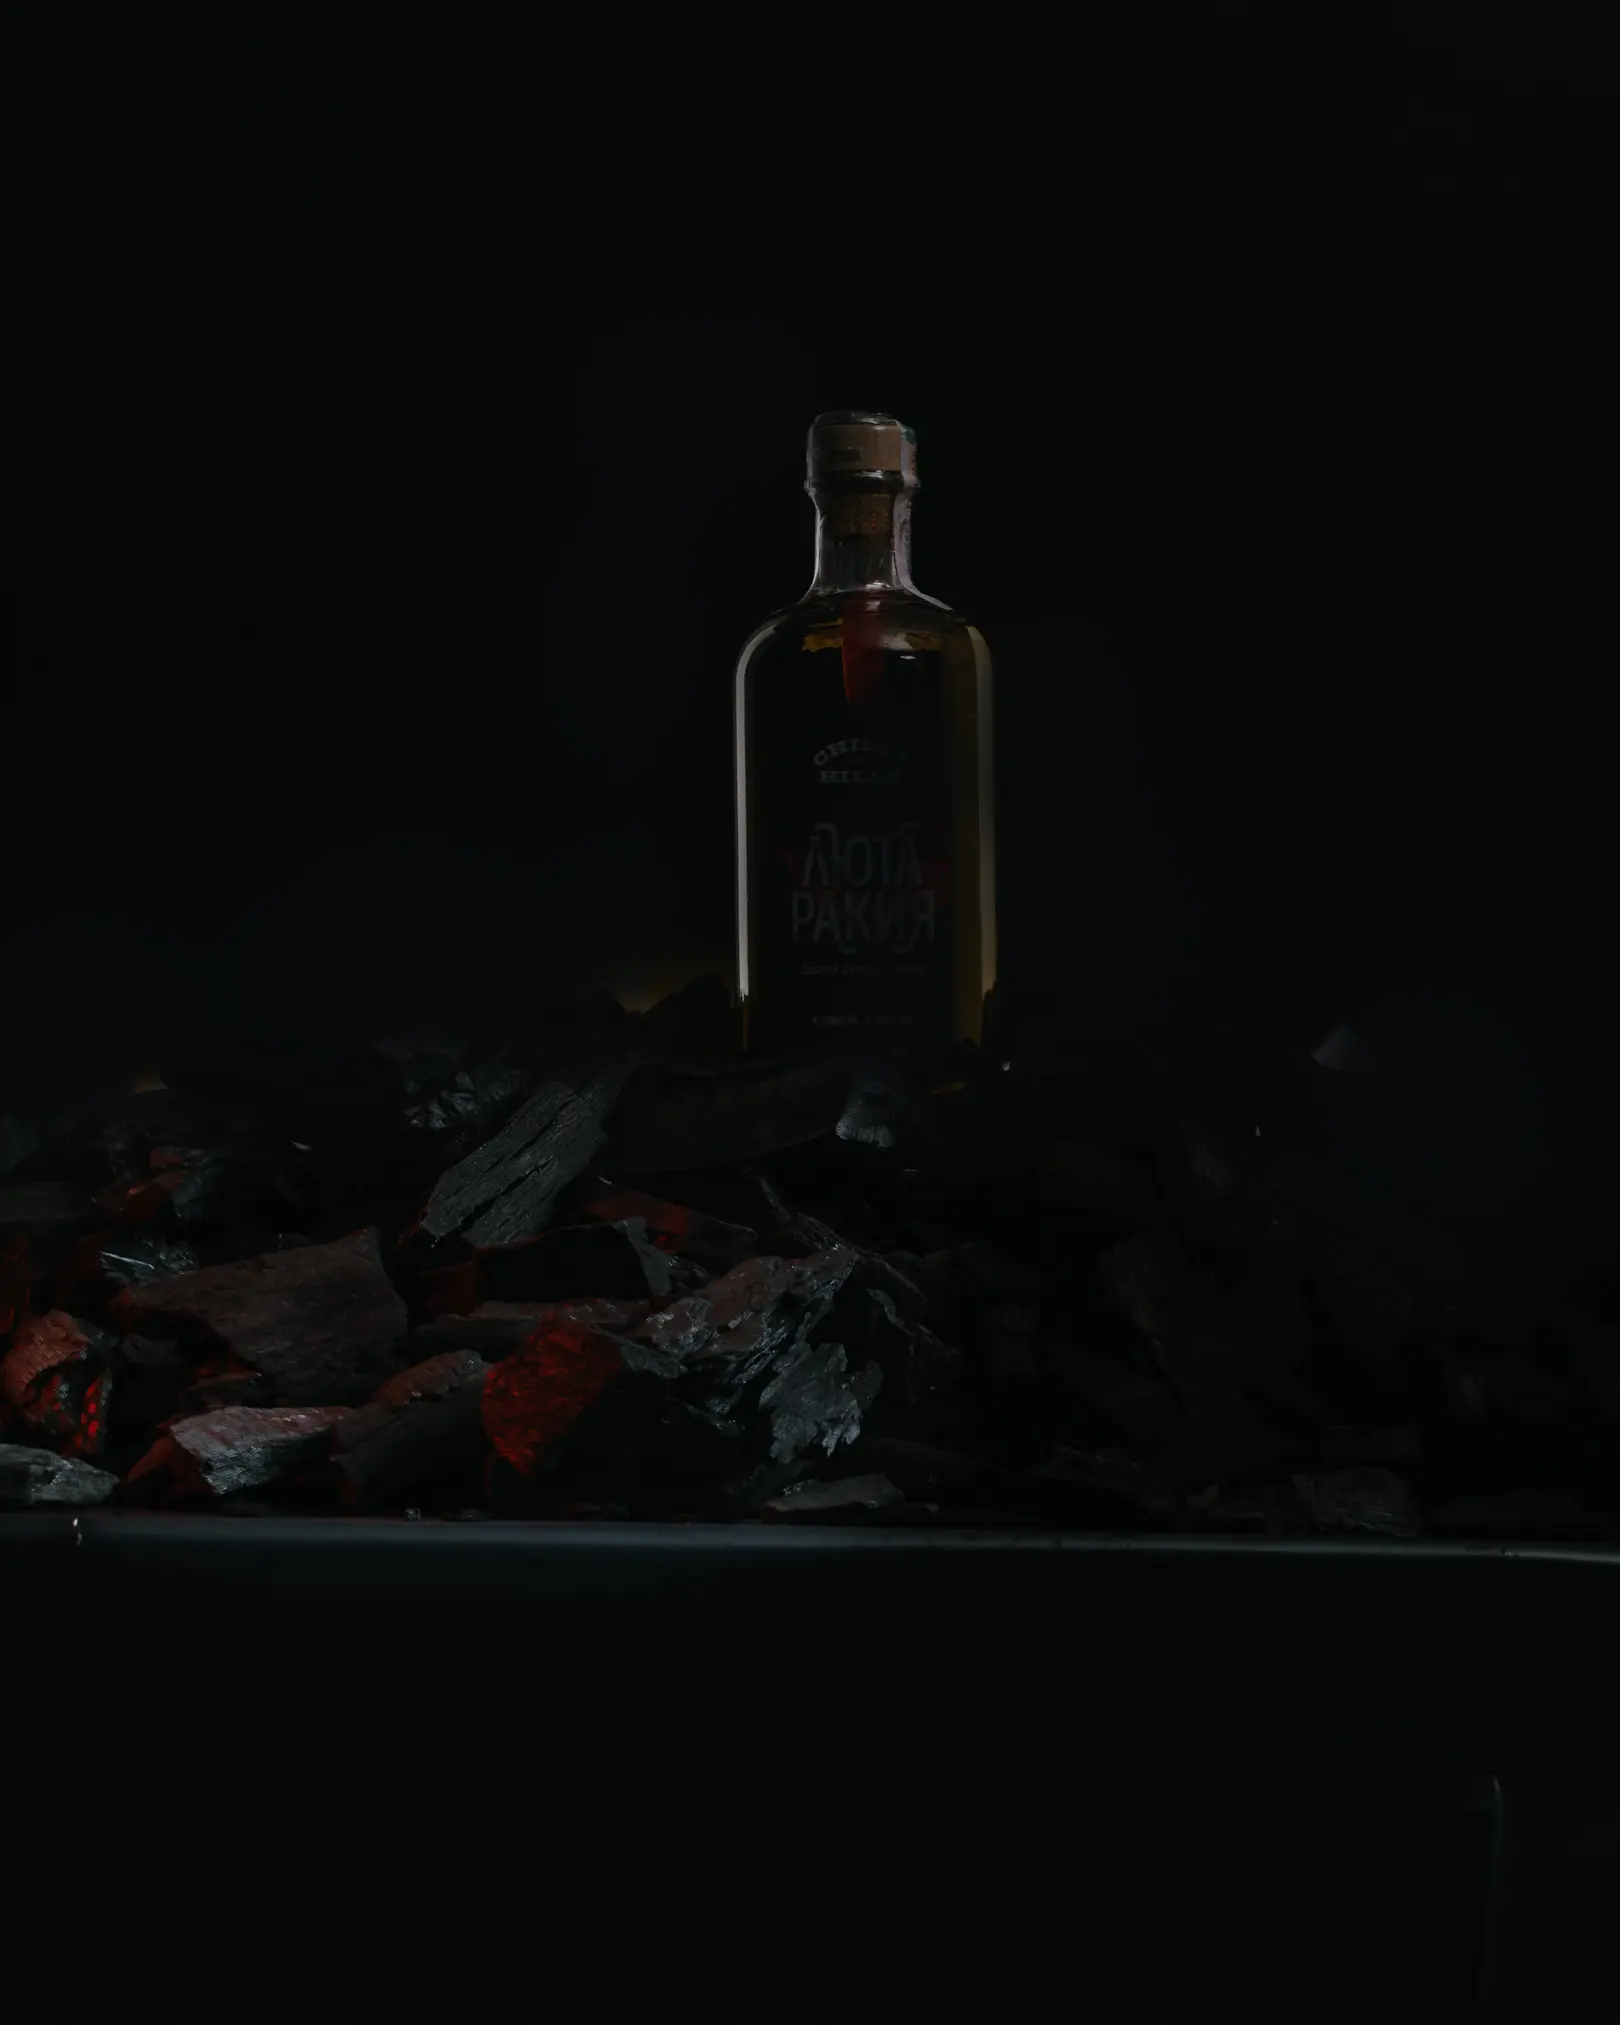
All 3 frames you will need to open in Photoshop and combine!
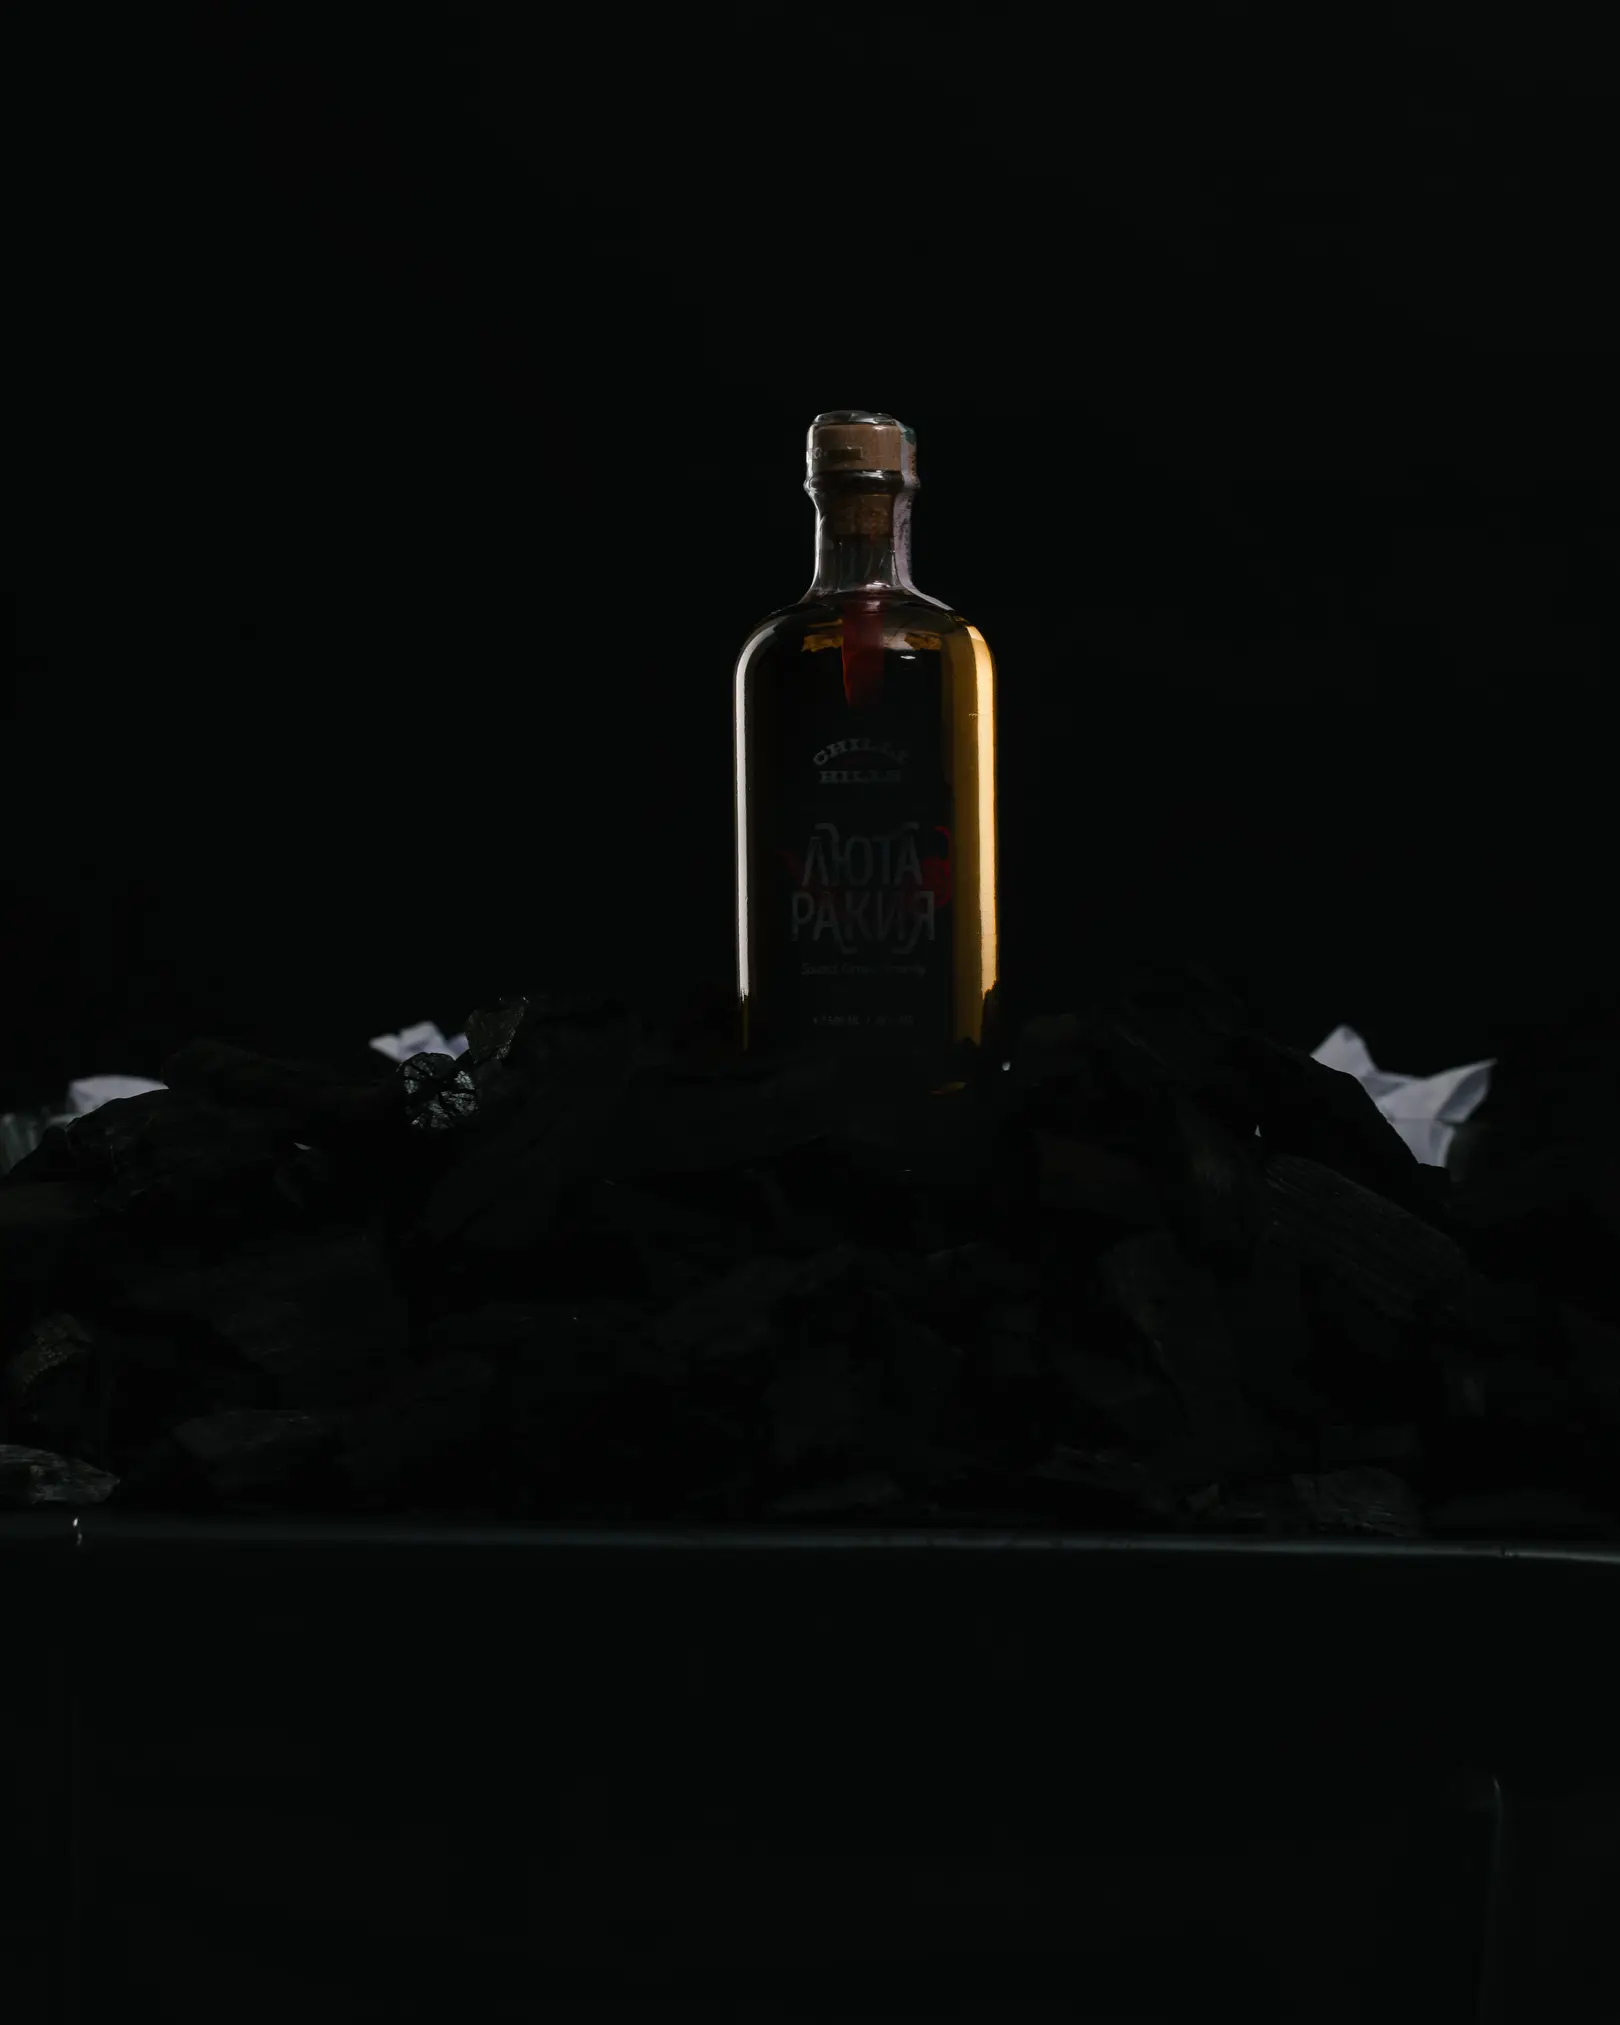
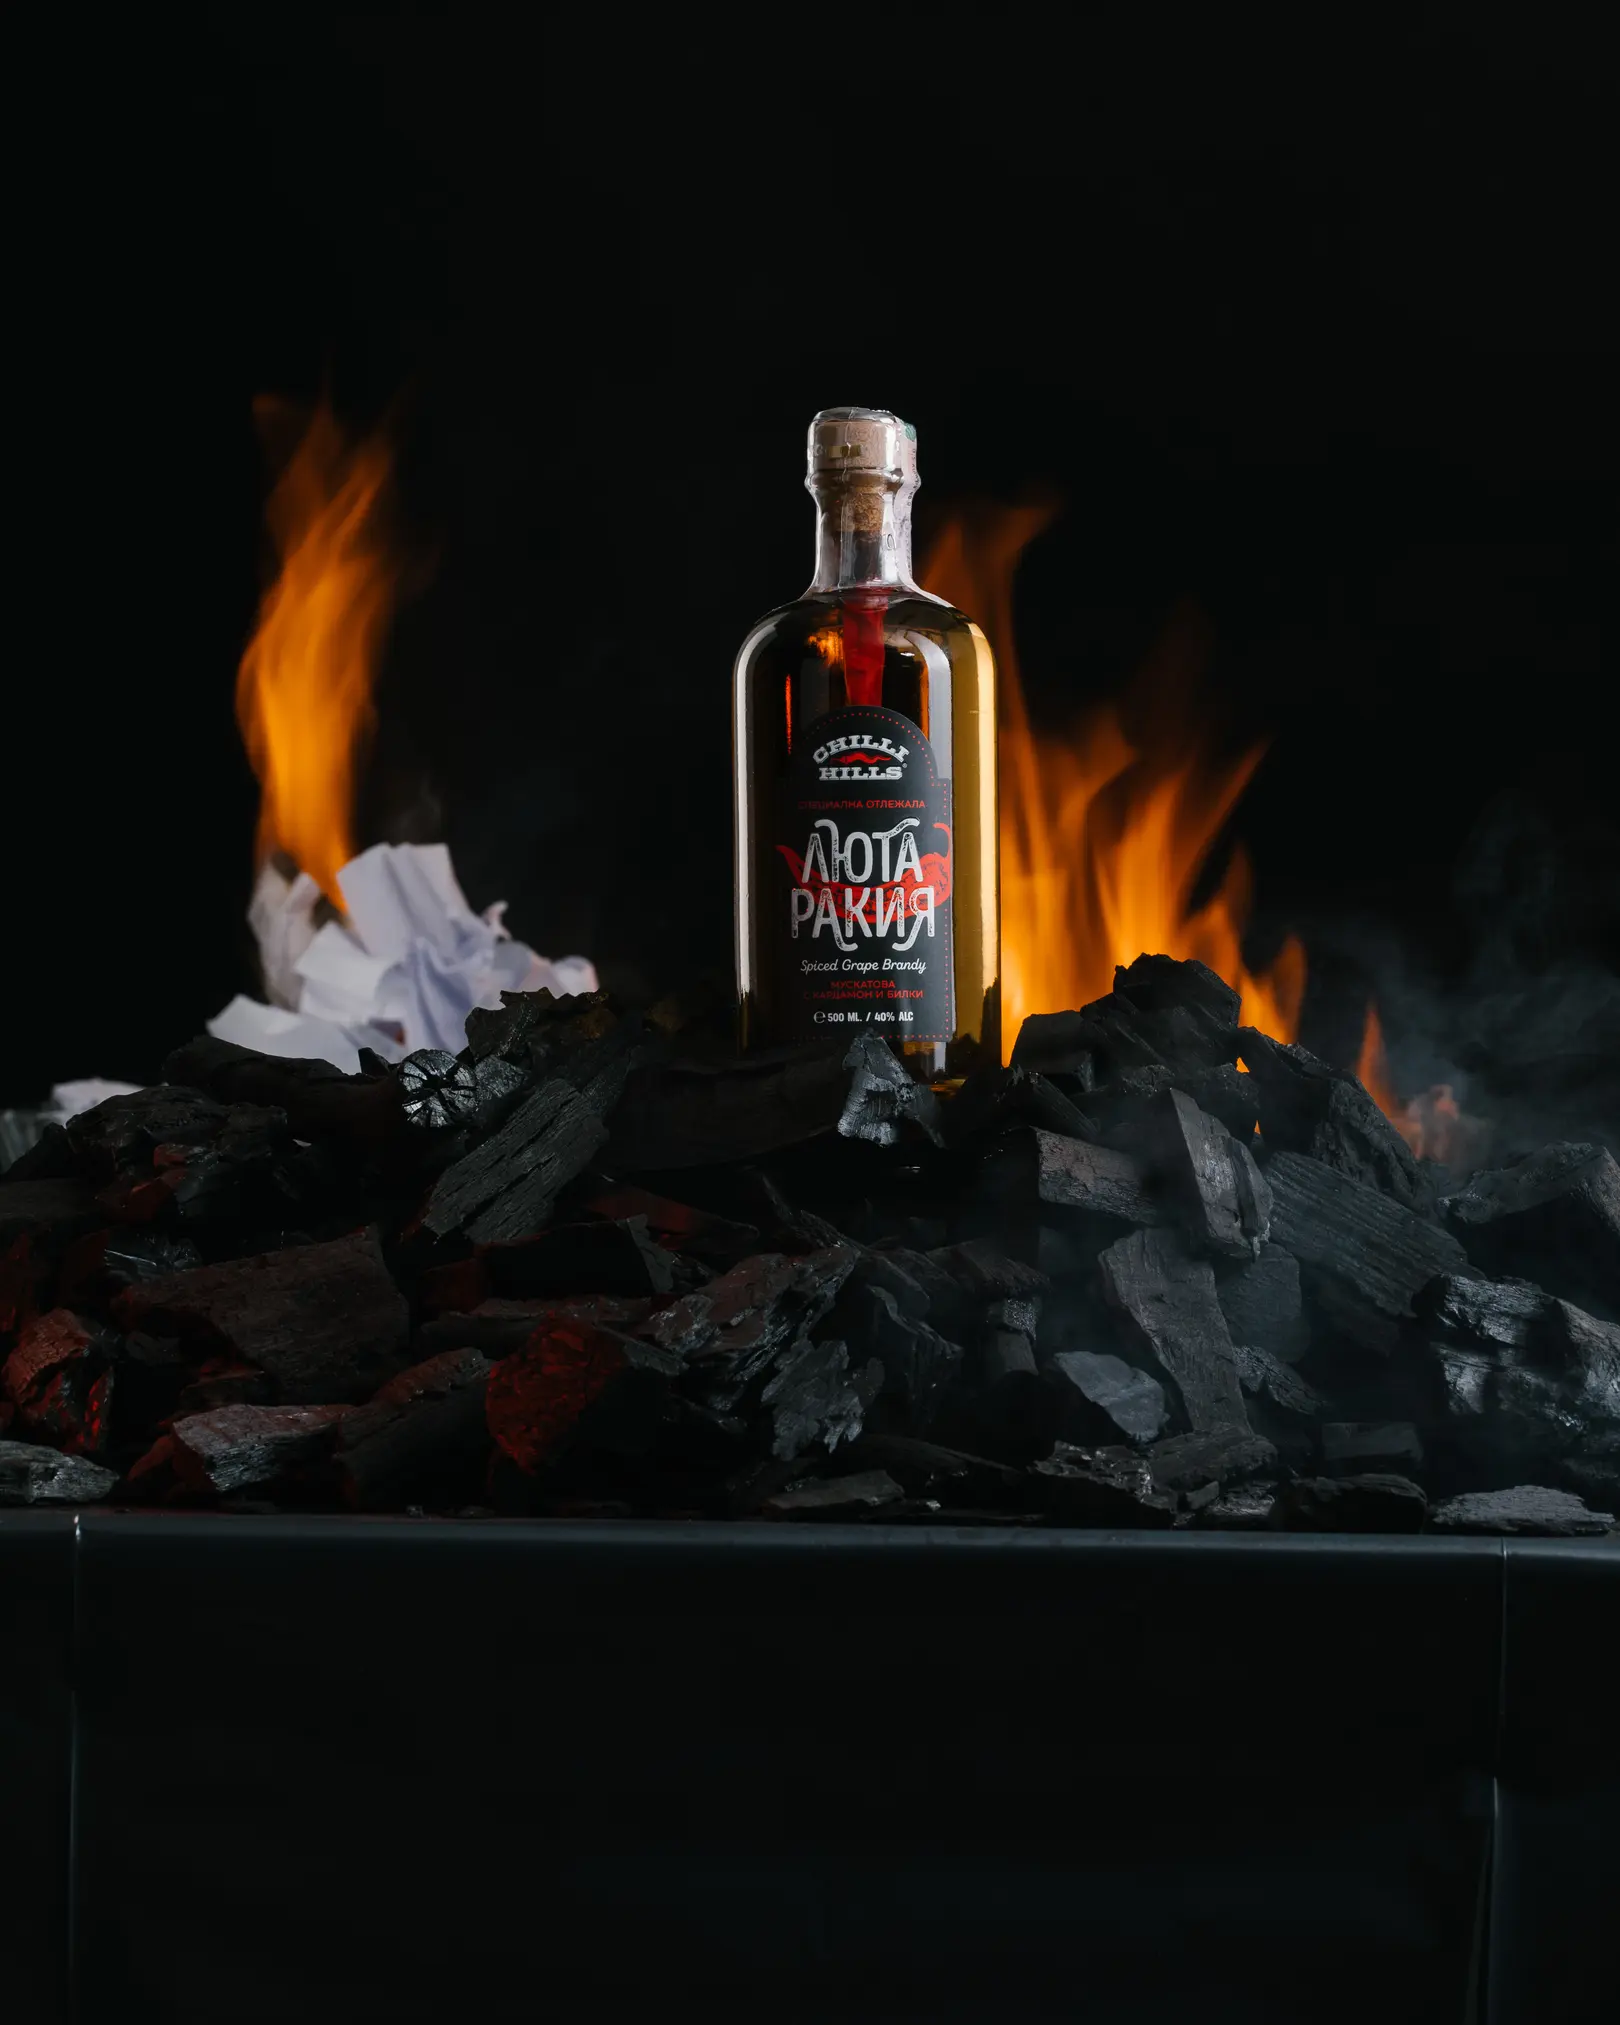
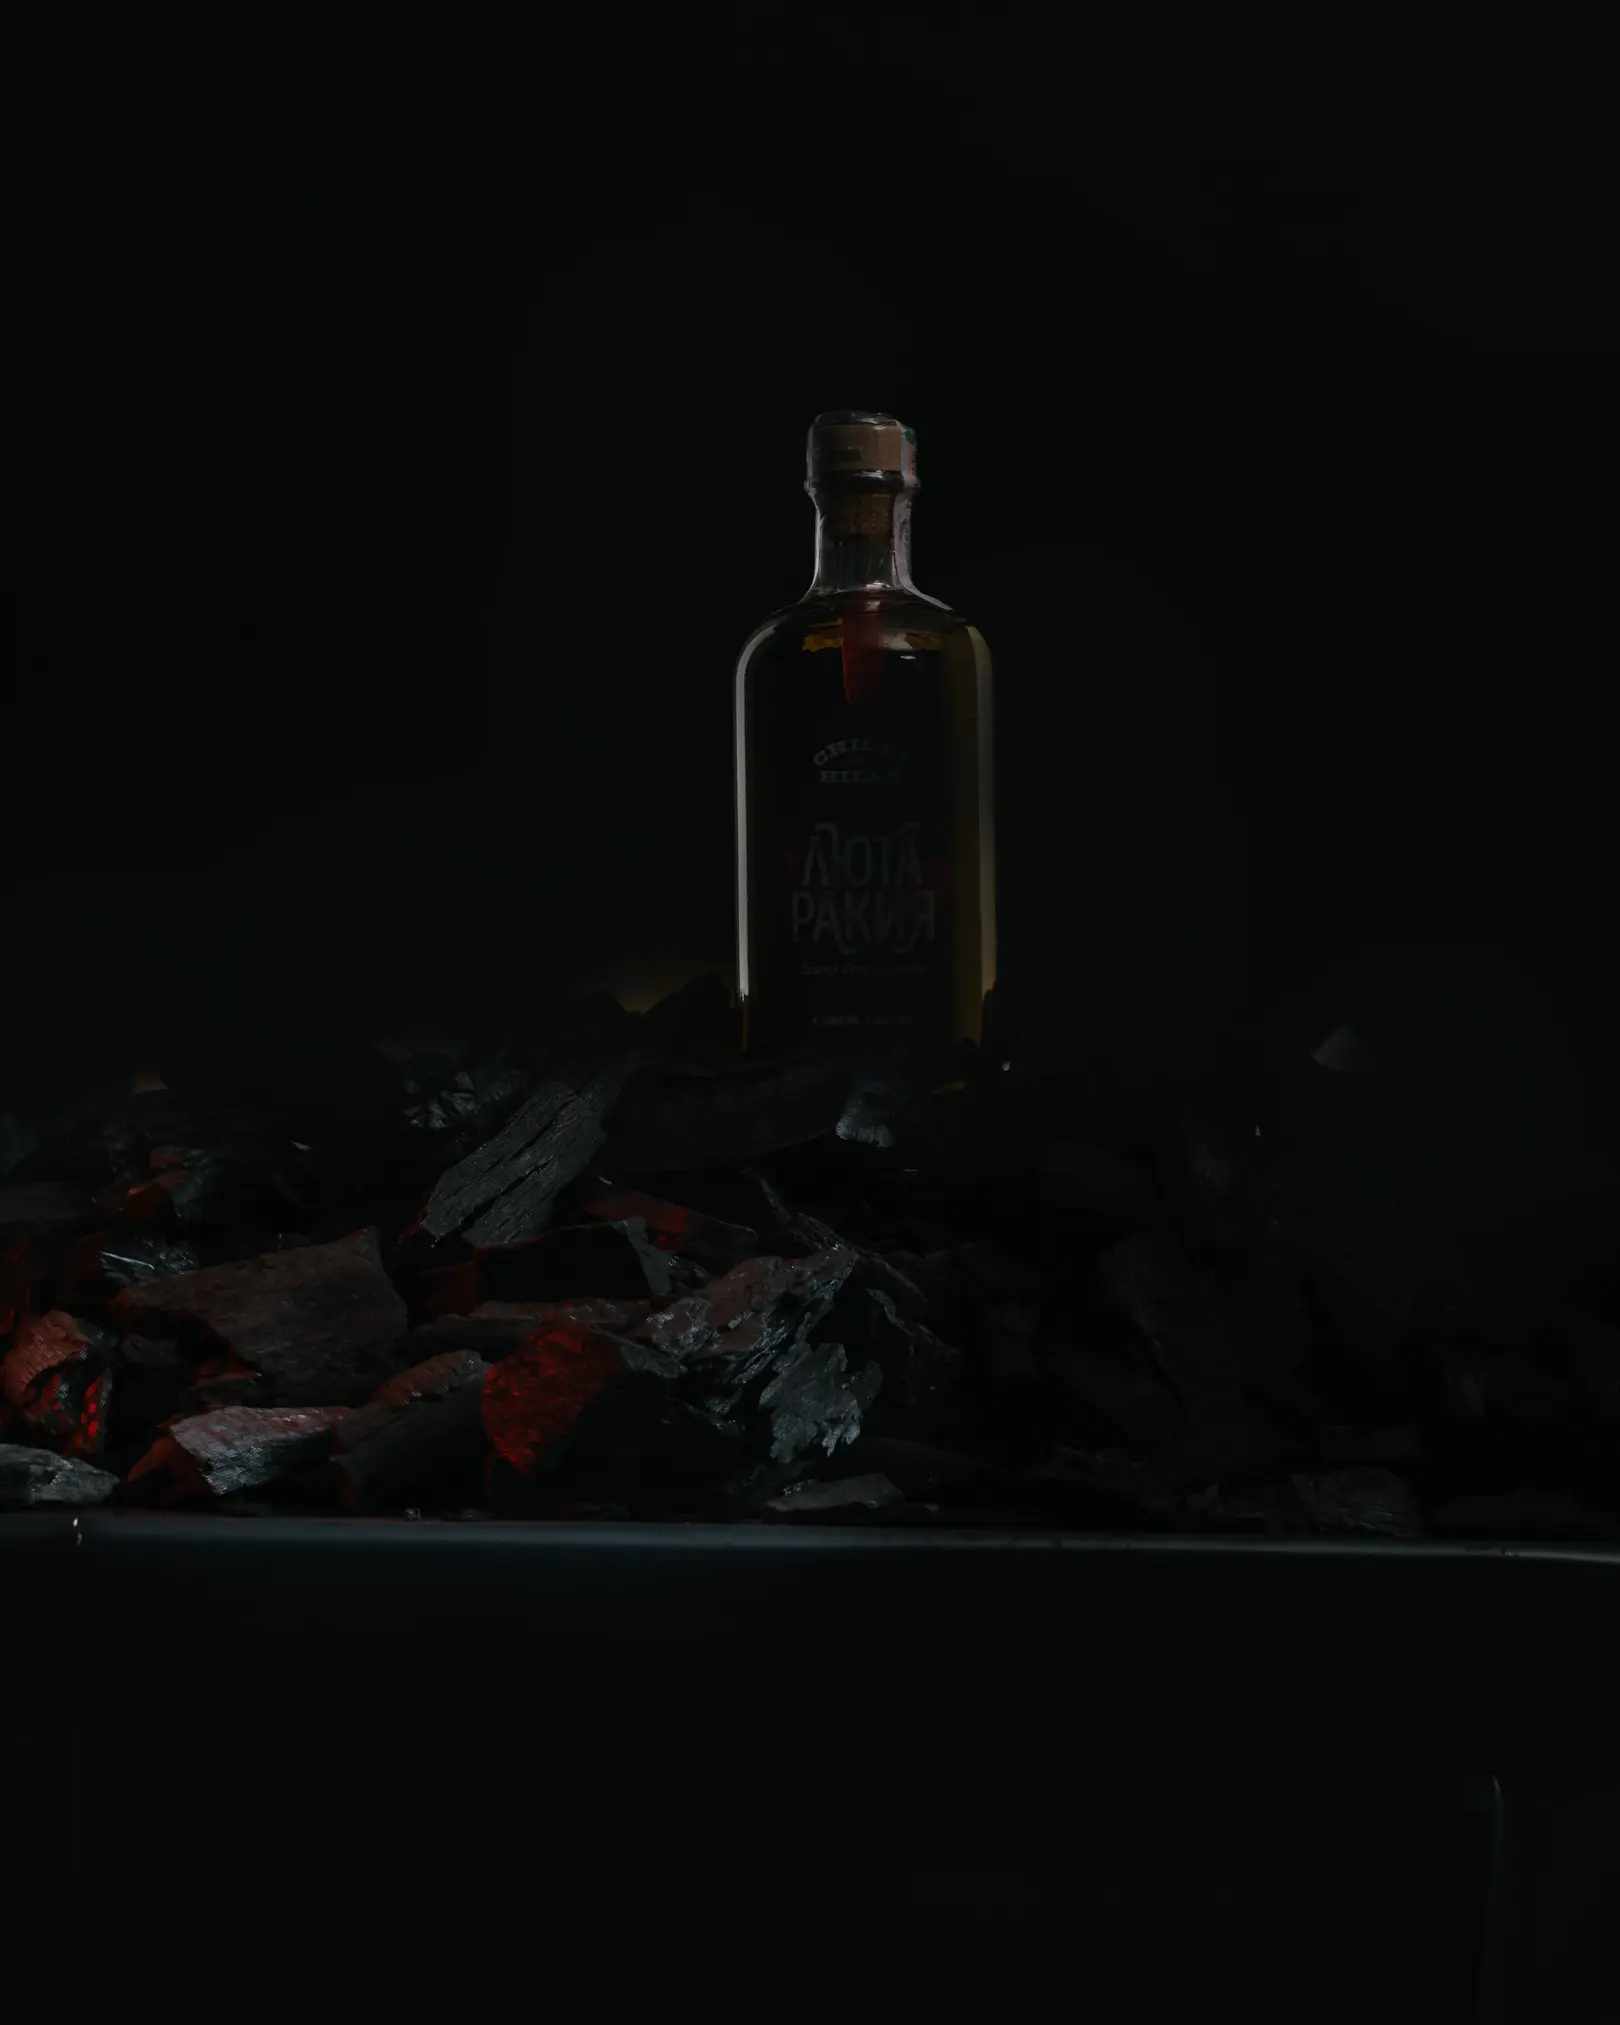
In my case, I can afford to turn on all 3 light sources at once, so I will show in my photos how I increase the amount of fire. To overlay (summation) in Photoshop the light on the label, the sides of the bottle, and the coals - the principle will be the same.

For example, you decide that the best and most “clean” frame is IMG_0011. It will be the frame on which we will “glue” the light - which is not enough there.
Go to the IMG_0014 tab. Press Ctrl+A, then Ctrl+C, and paste the frame IMG_0014 on IMG_0011 with the keyboard shortcut CTRL+V (you can do it differently - as you are used to).
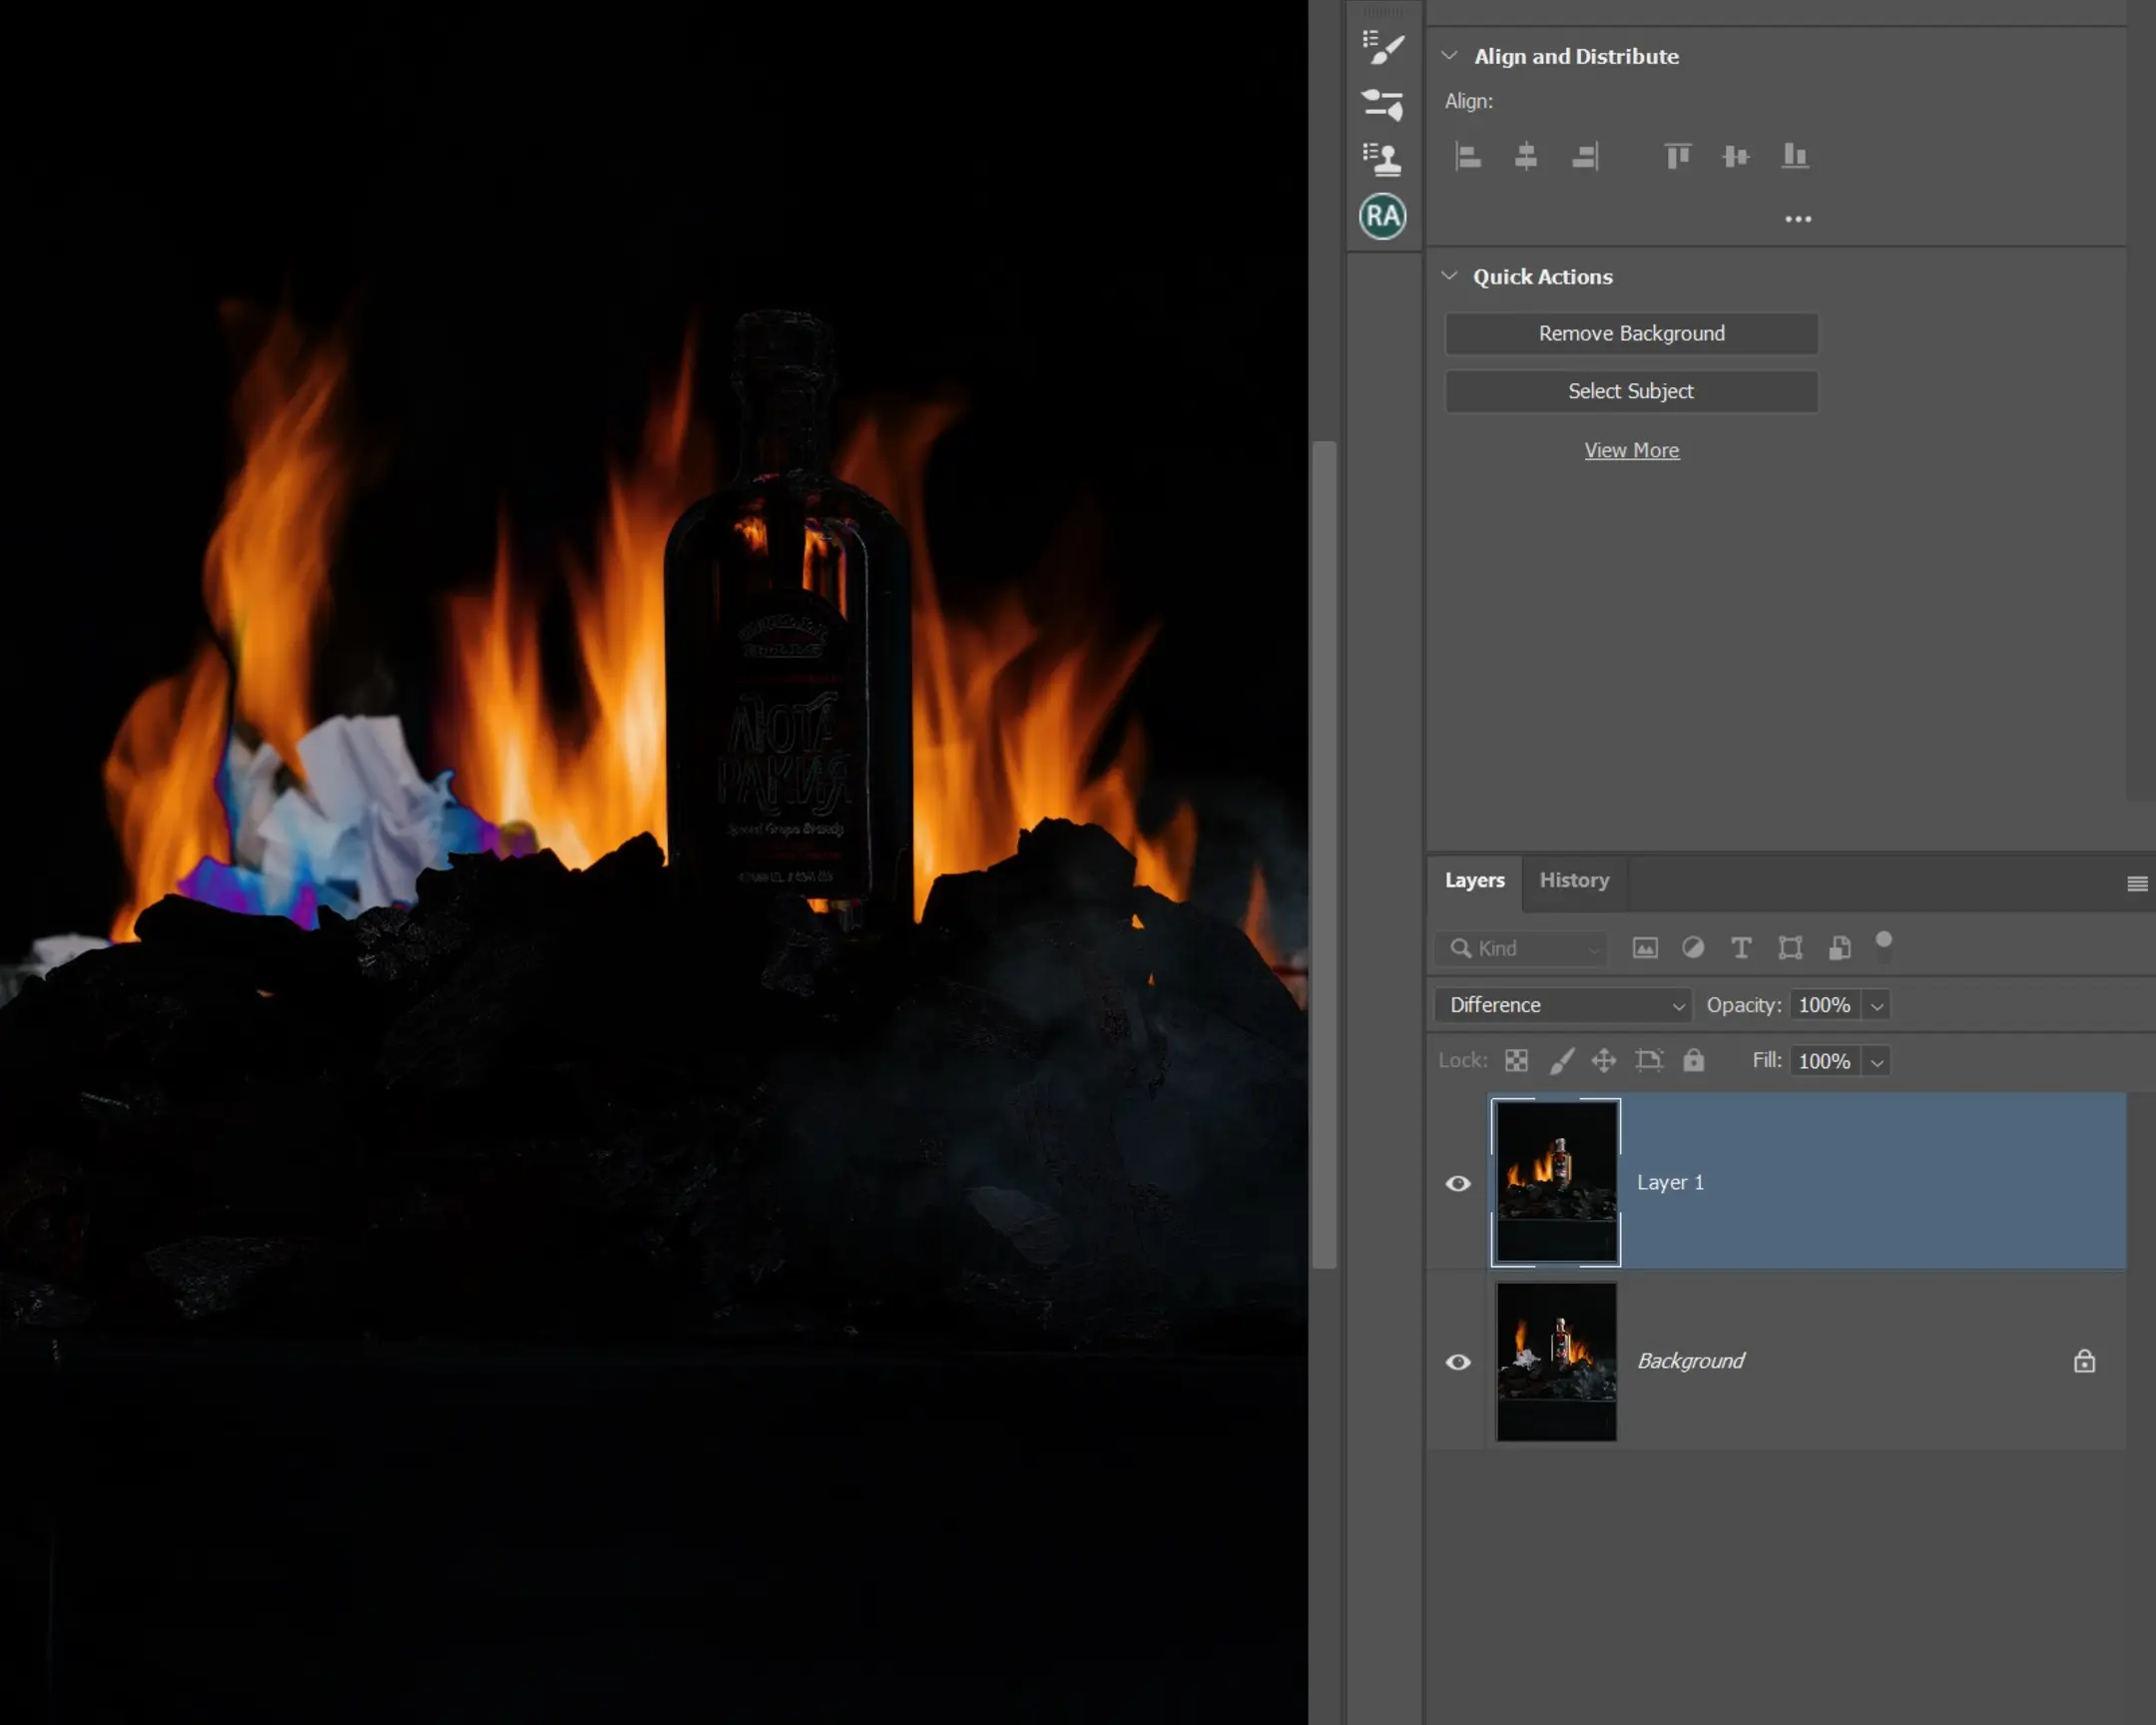
We translate the frame IMG_0014 (in layers, it is called LAYER1) to the DIFFERENCE blend mode (this is necessary to see the difference between the base layer and the layer superimposed on top). The differences are white stripes in the frame - you can see it well in letters.
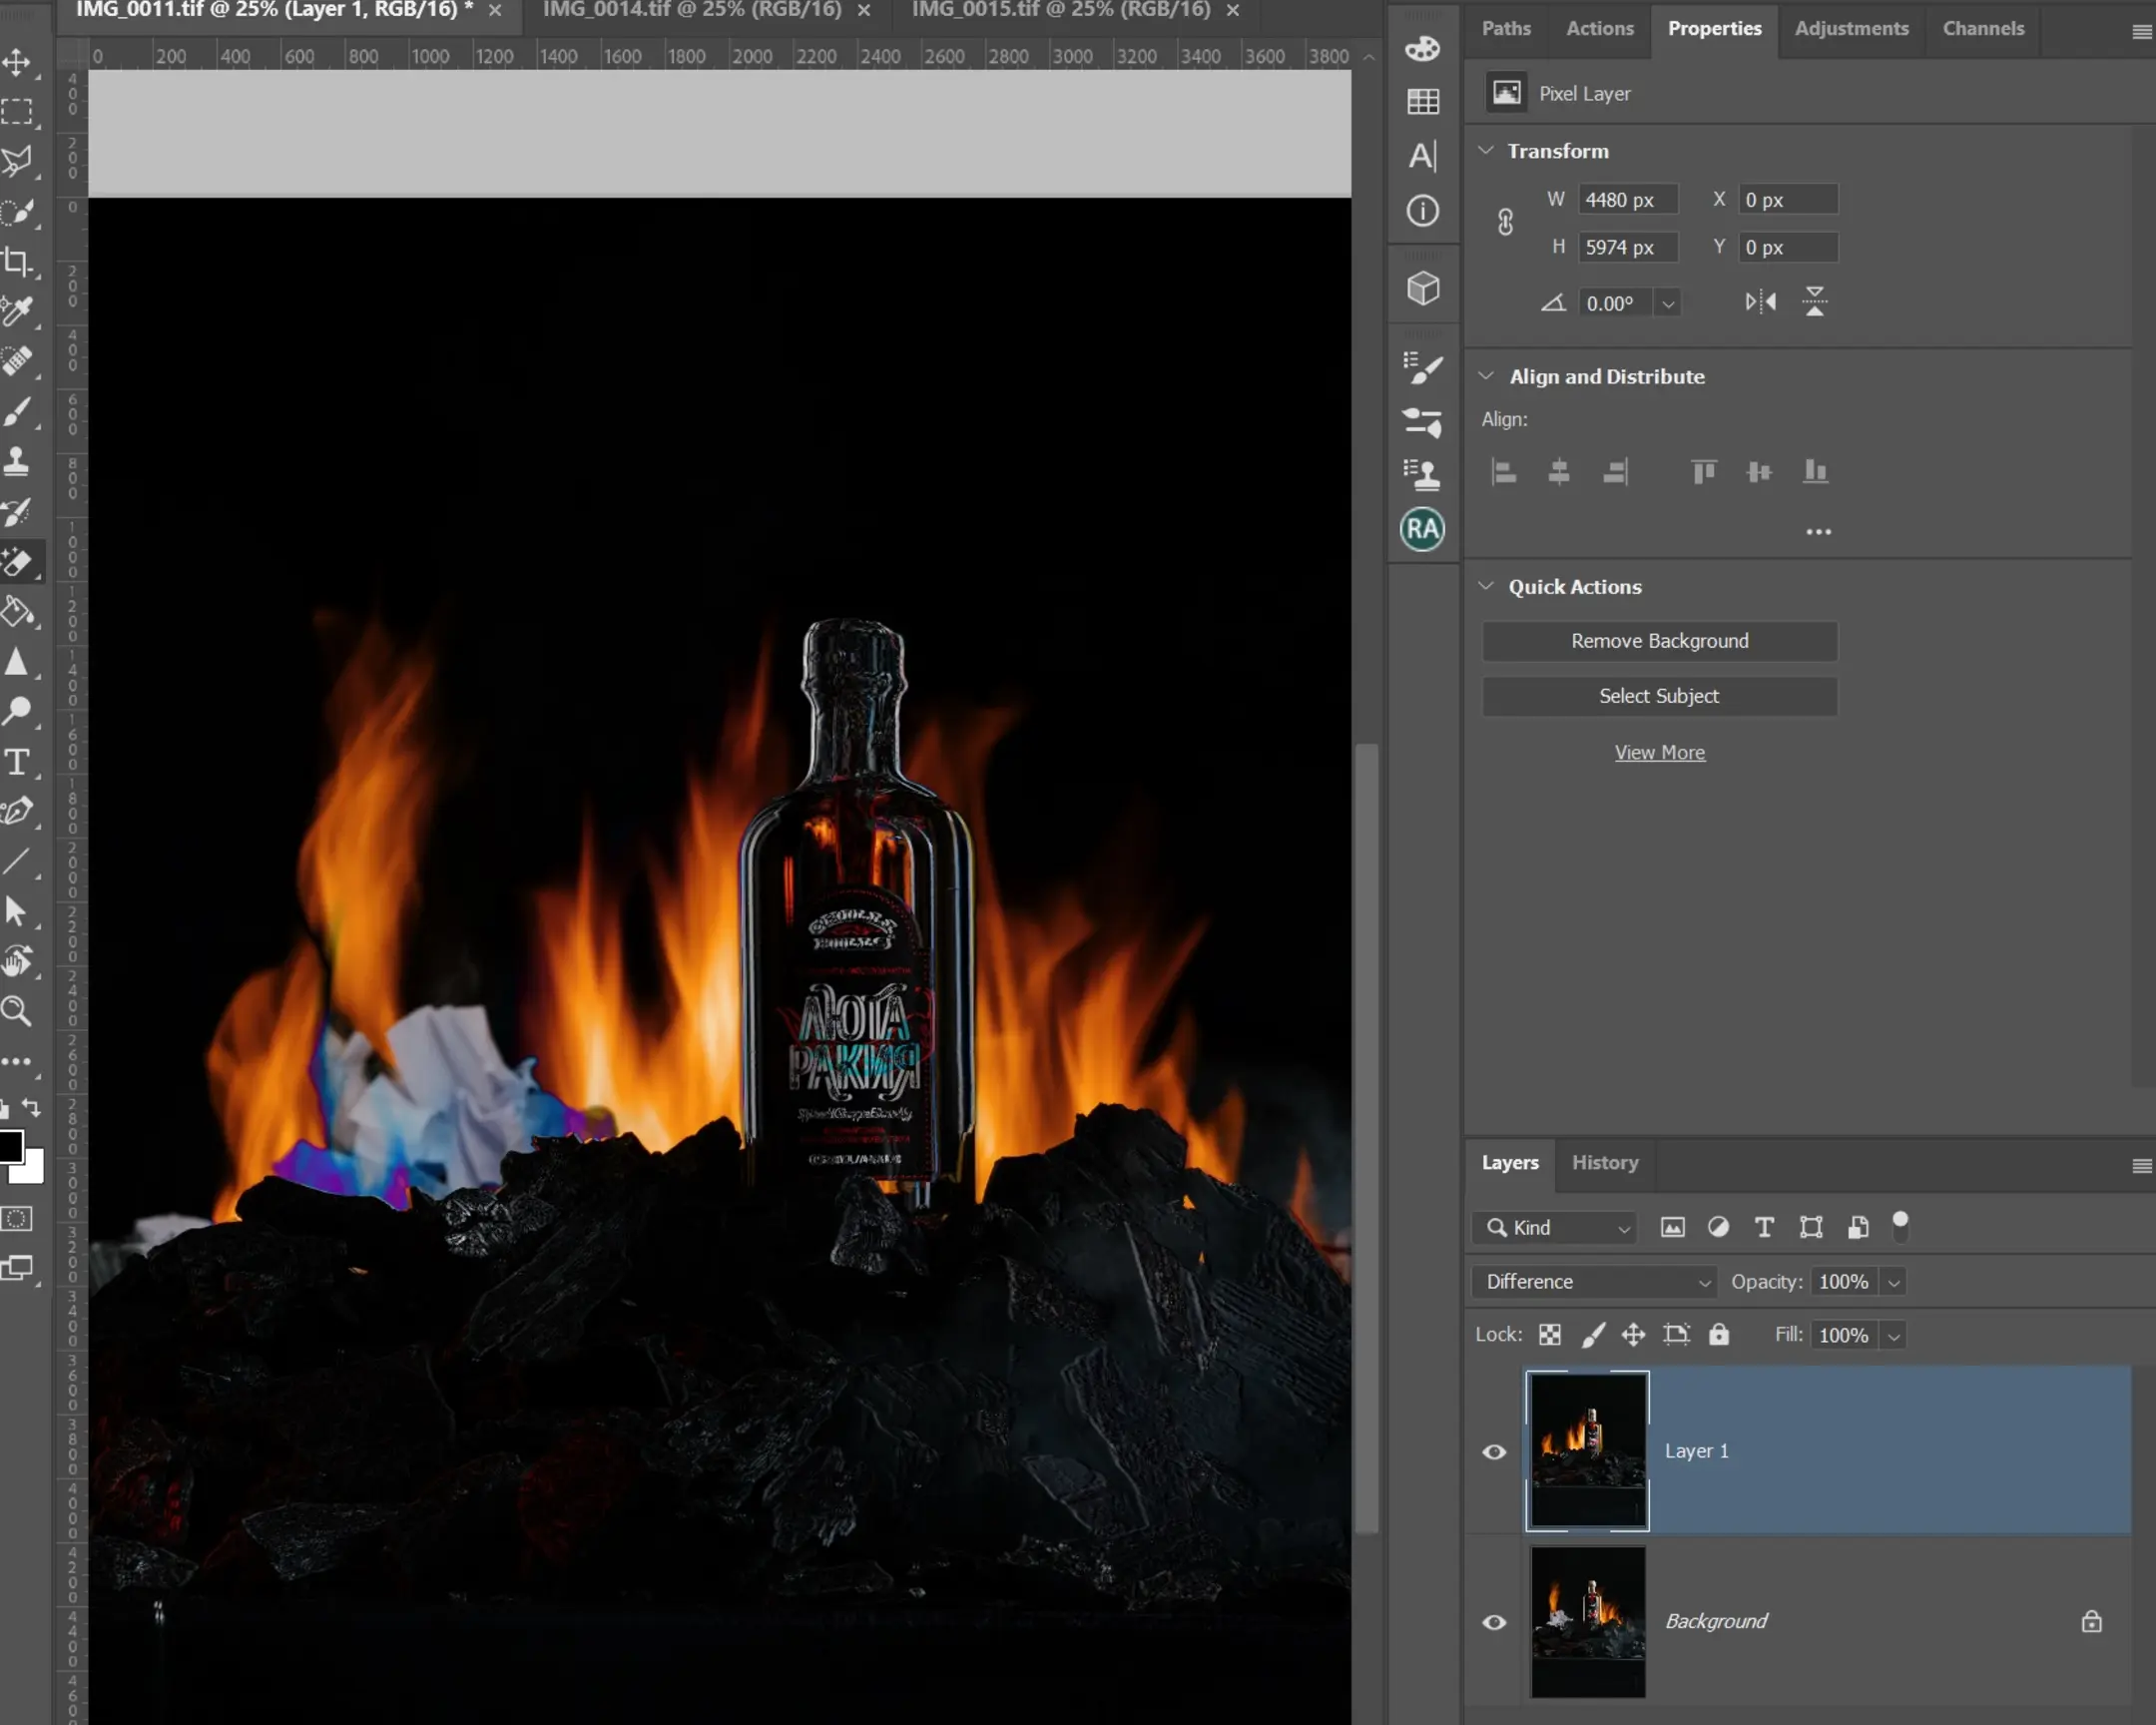
The result should look like the one in the next photo.
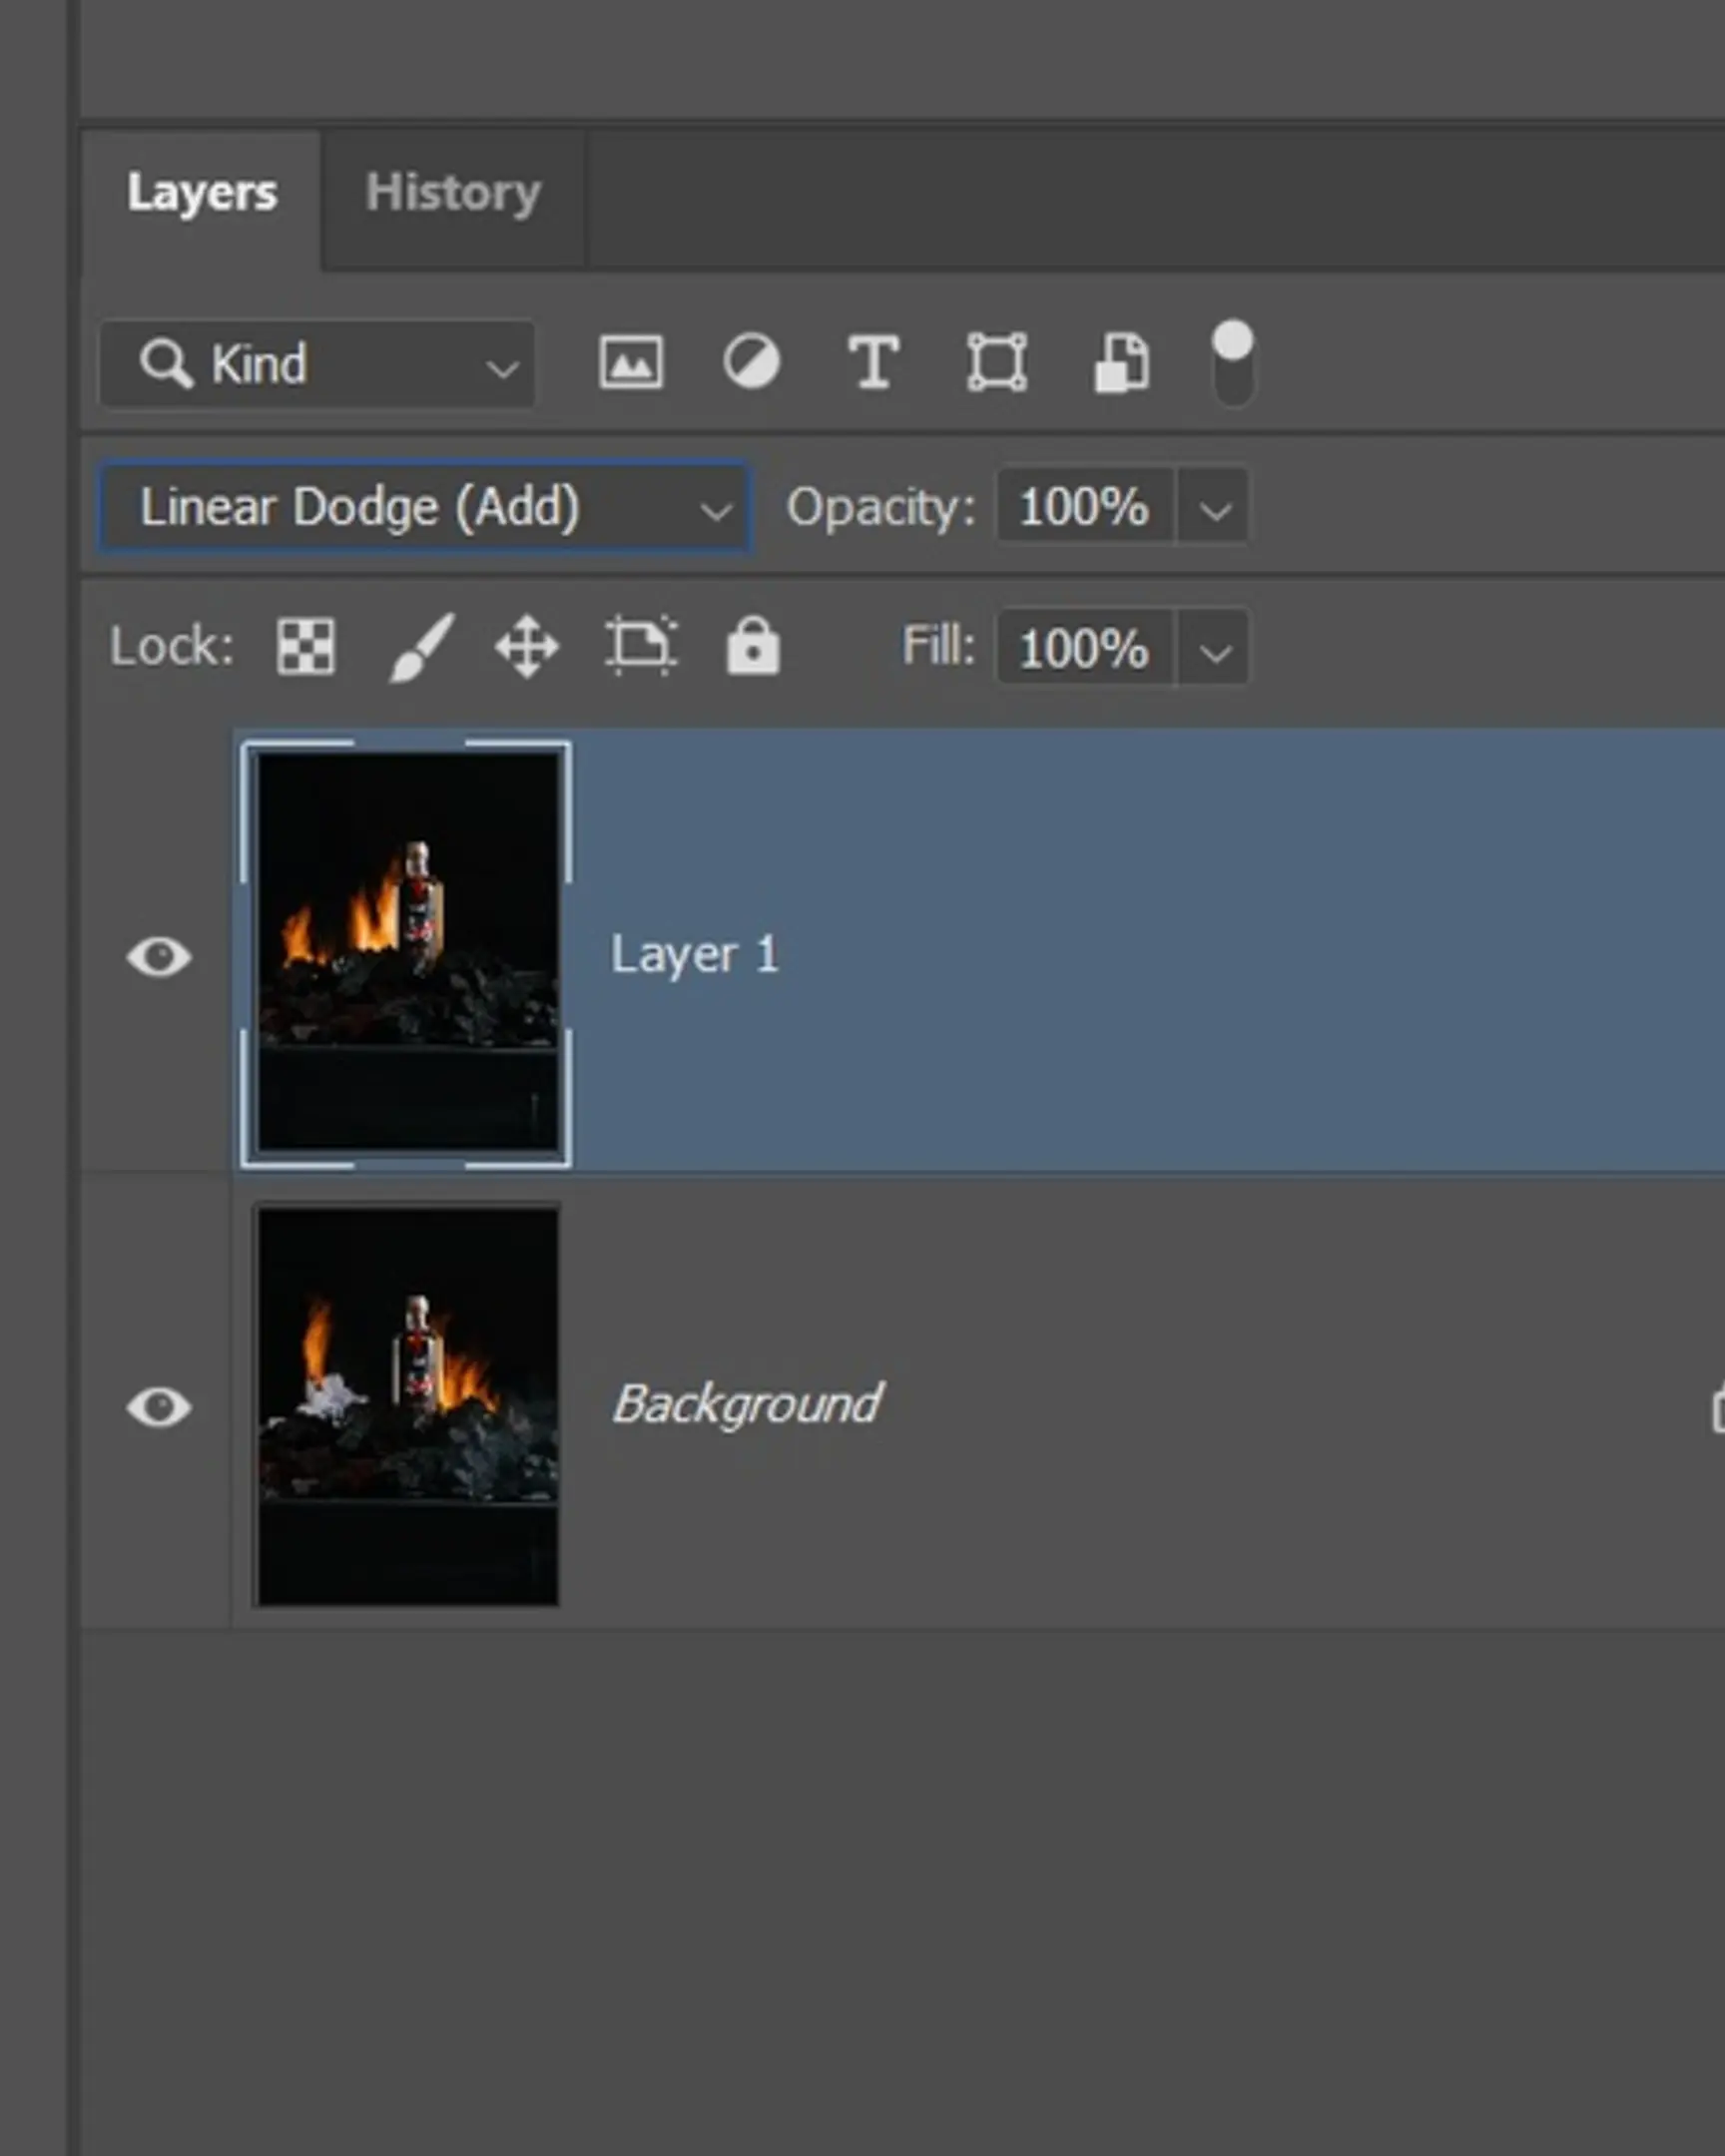
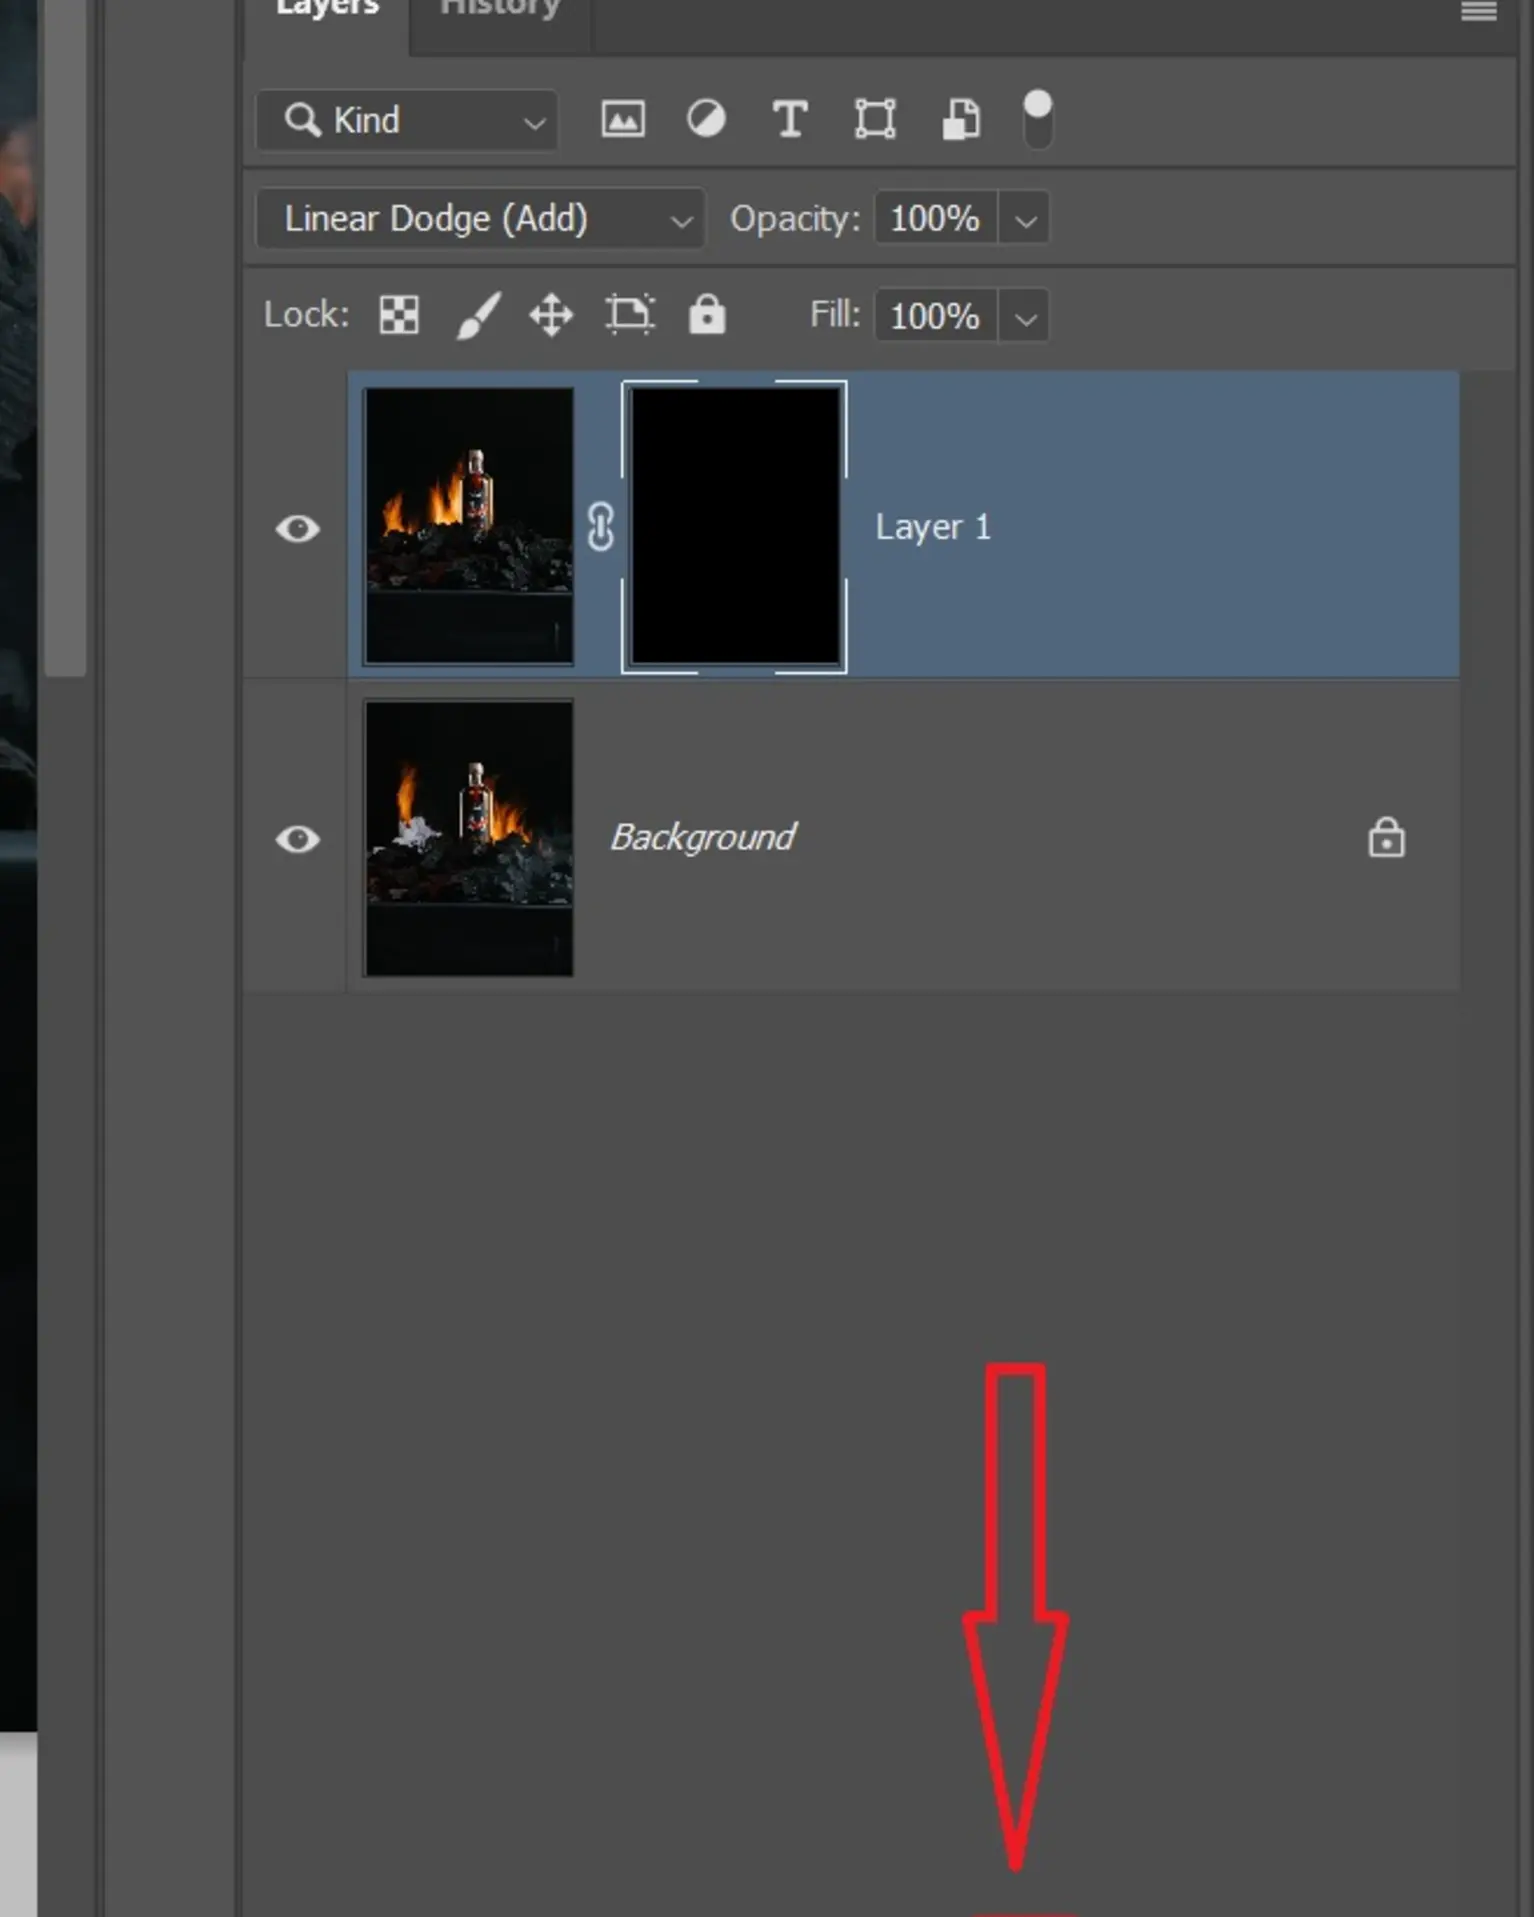
That can be done via the menu Layer->Layer Mask->Hide All.
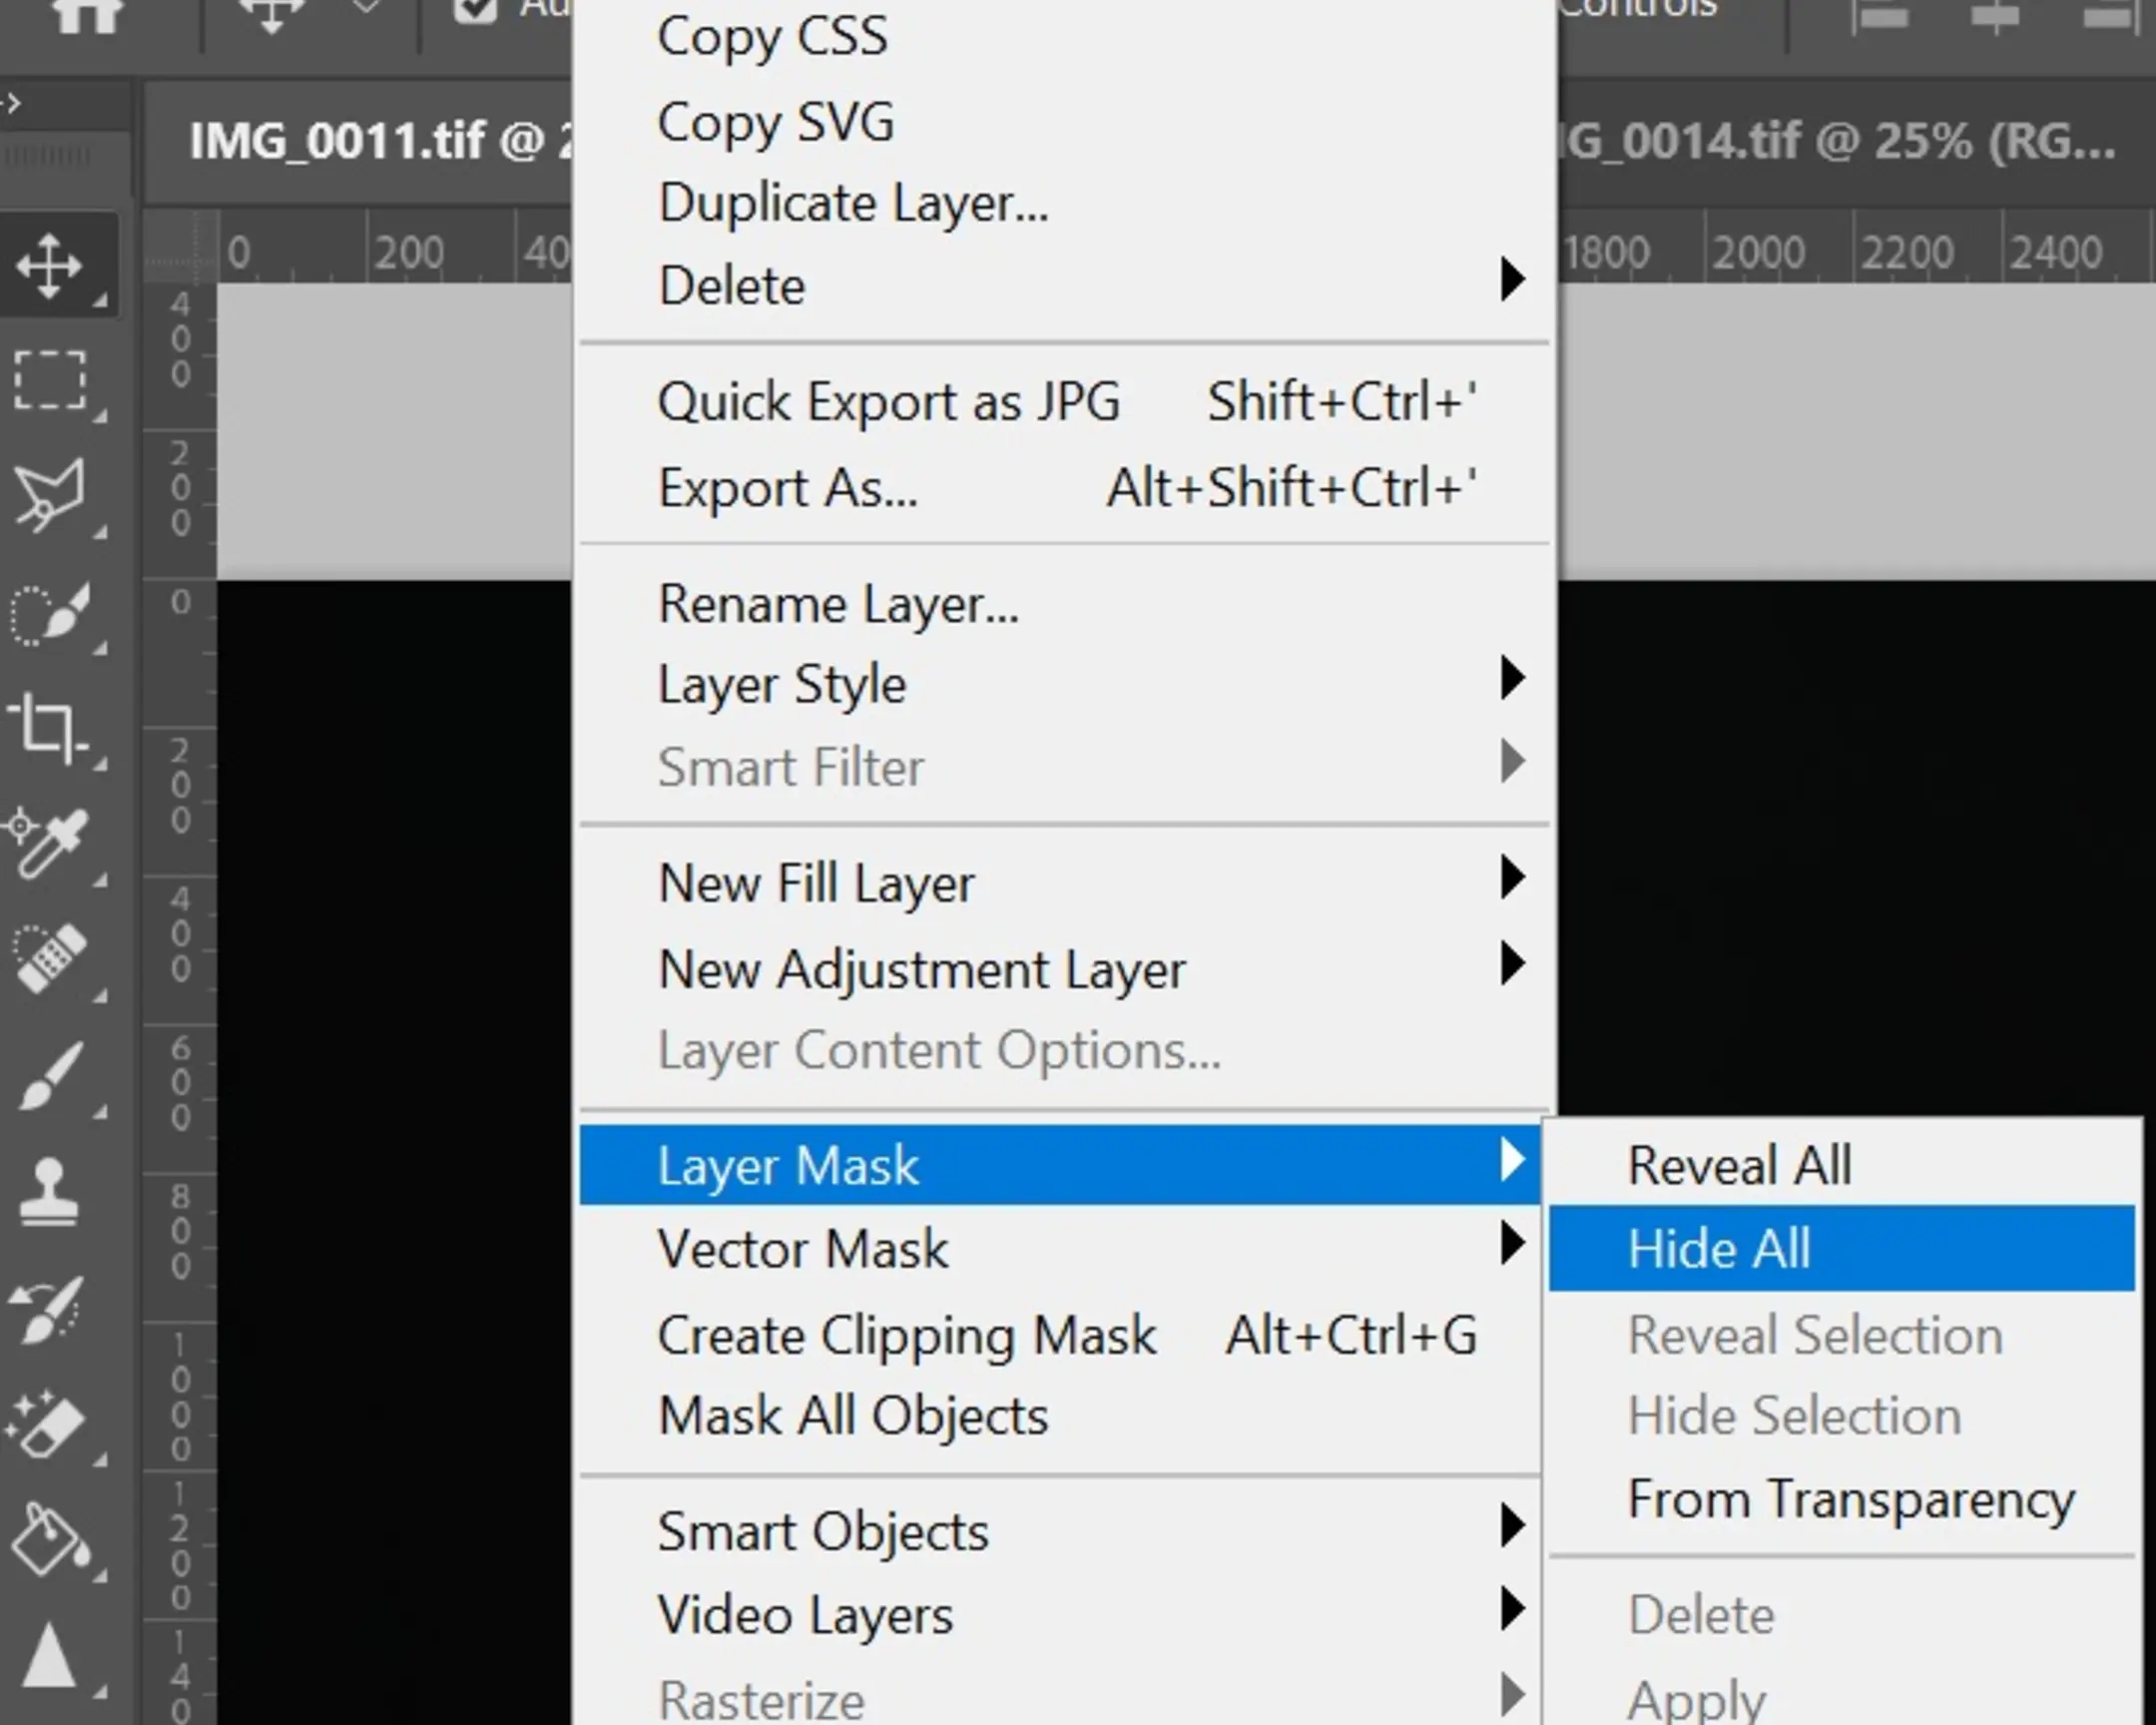
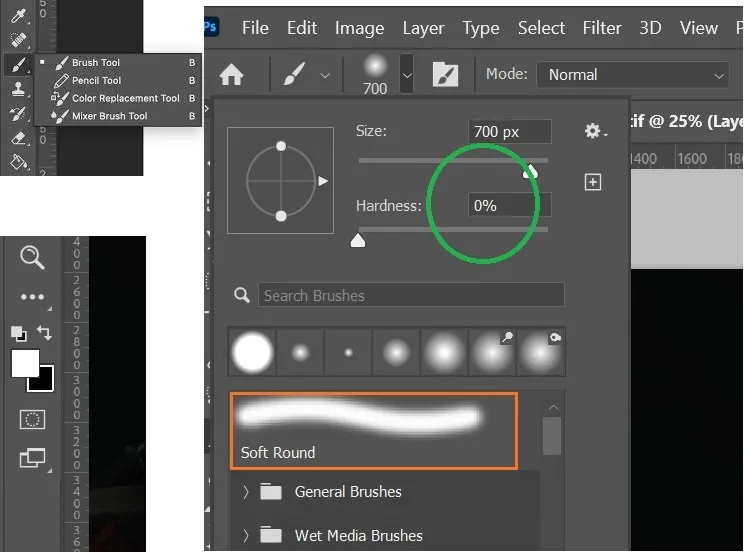
With the layer mask we just created, we begin to reveal the light where we need it: paint over the black mask with a white brush.
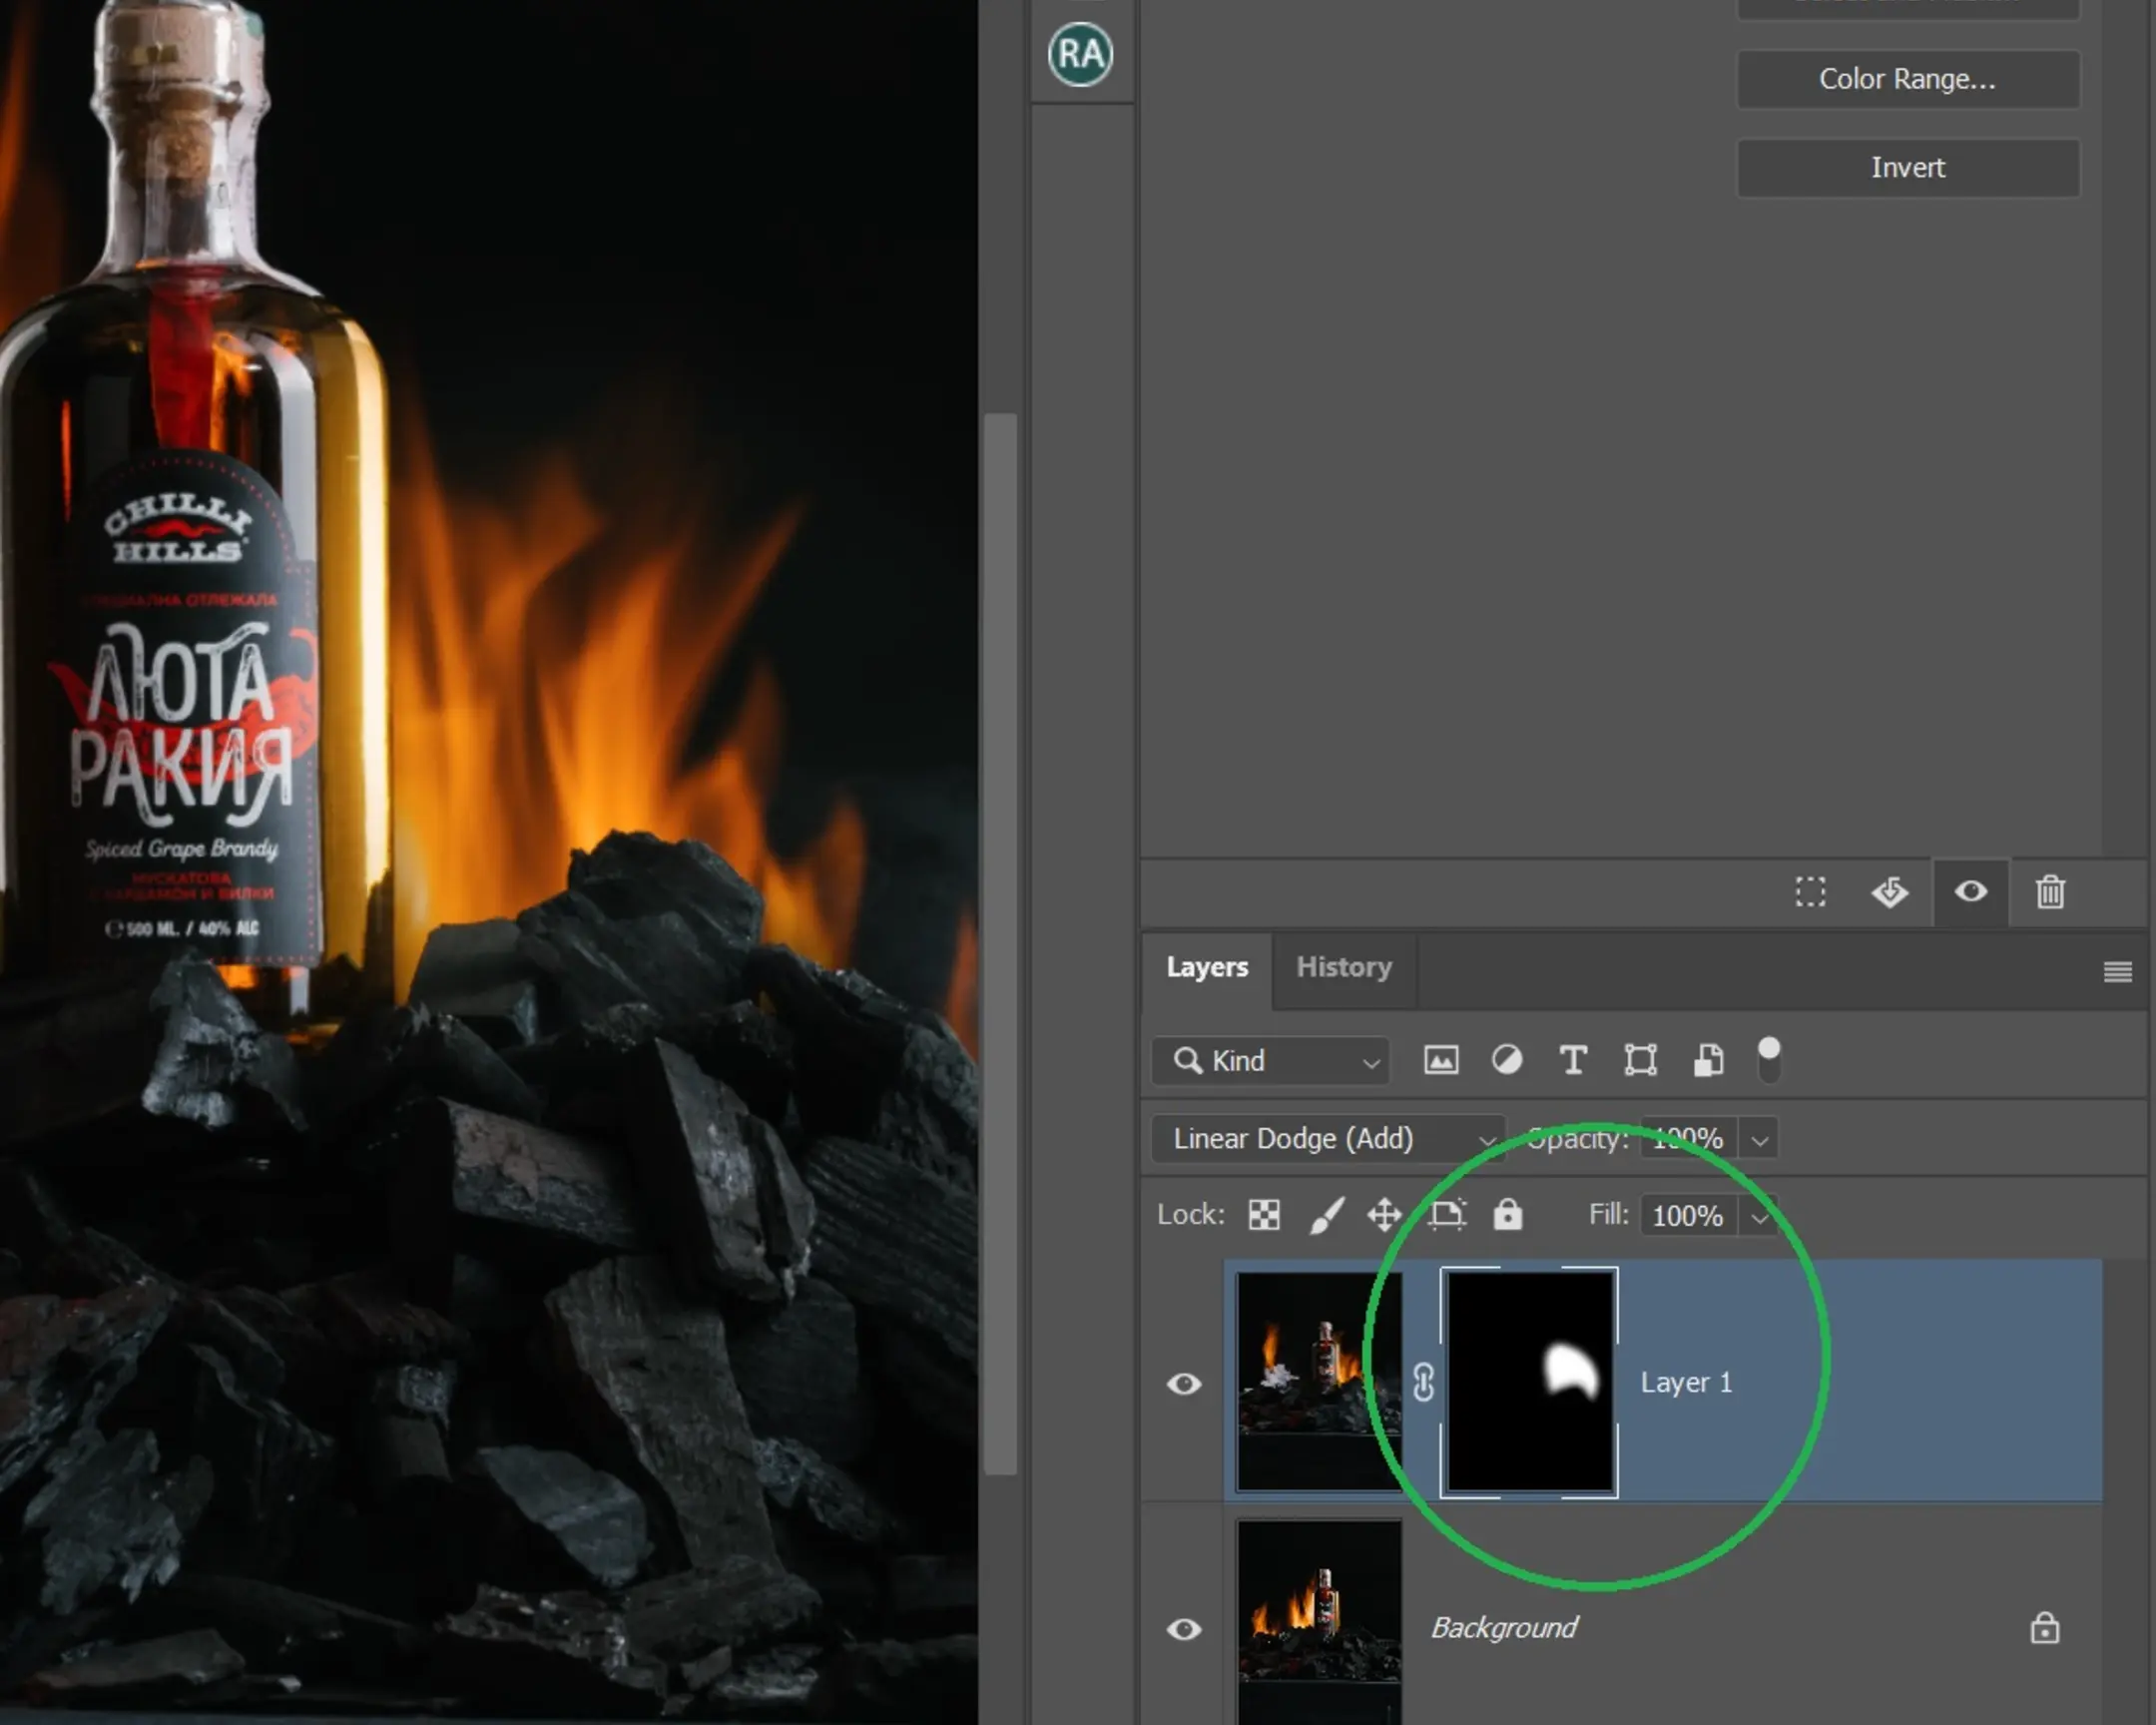
To see the before and after of the work done - you can click on the eye next to the selected layer. If suddenly something is not drawn, most likely you are not drawing on the mask. Make sure you are exactly on the mask of the layer you want. The layer that is active will be highlighted with a white frame. In the photo in the green circle, you can see that it is the Layer 1 layer mask that has been selected and the fire is drawn on it to the right of the bottle.
If you "showed" an extra amount of light - you can change the color of the brush to black. And - according to the layer mask - paint over the area you do not need in black, in fact, hide them even under a black mask.
Many people get confused about Photoshop masks. But if you practice a little bit, then you will understand that masks in Photoshop are a unique tool - without which it is no longer possible to live!
We do with frame number 3 (I have it IMG_0015) steps 2-7. We get this frame.
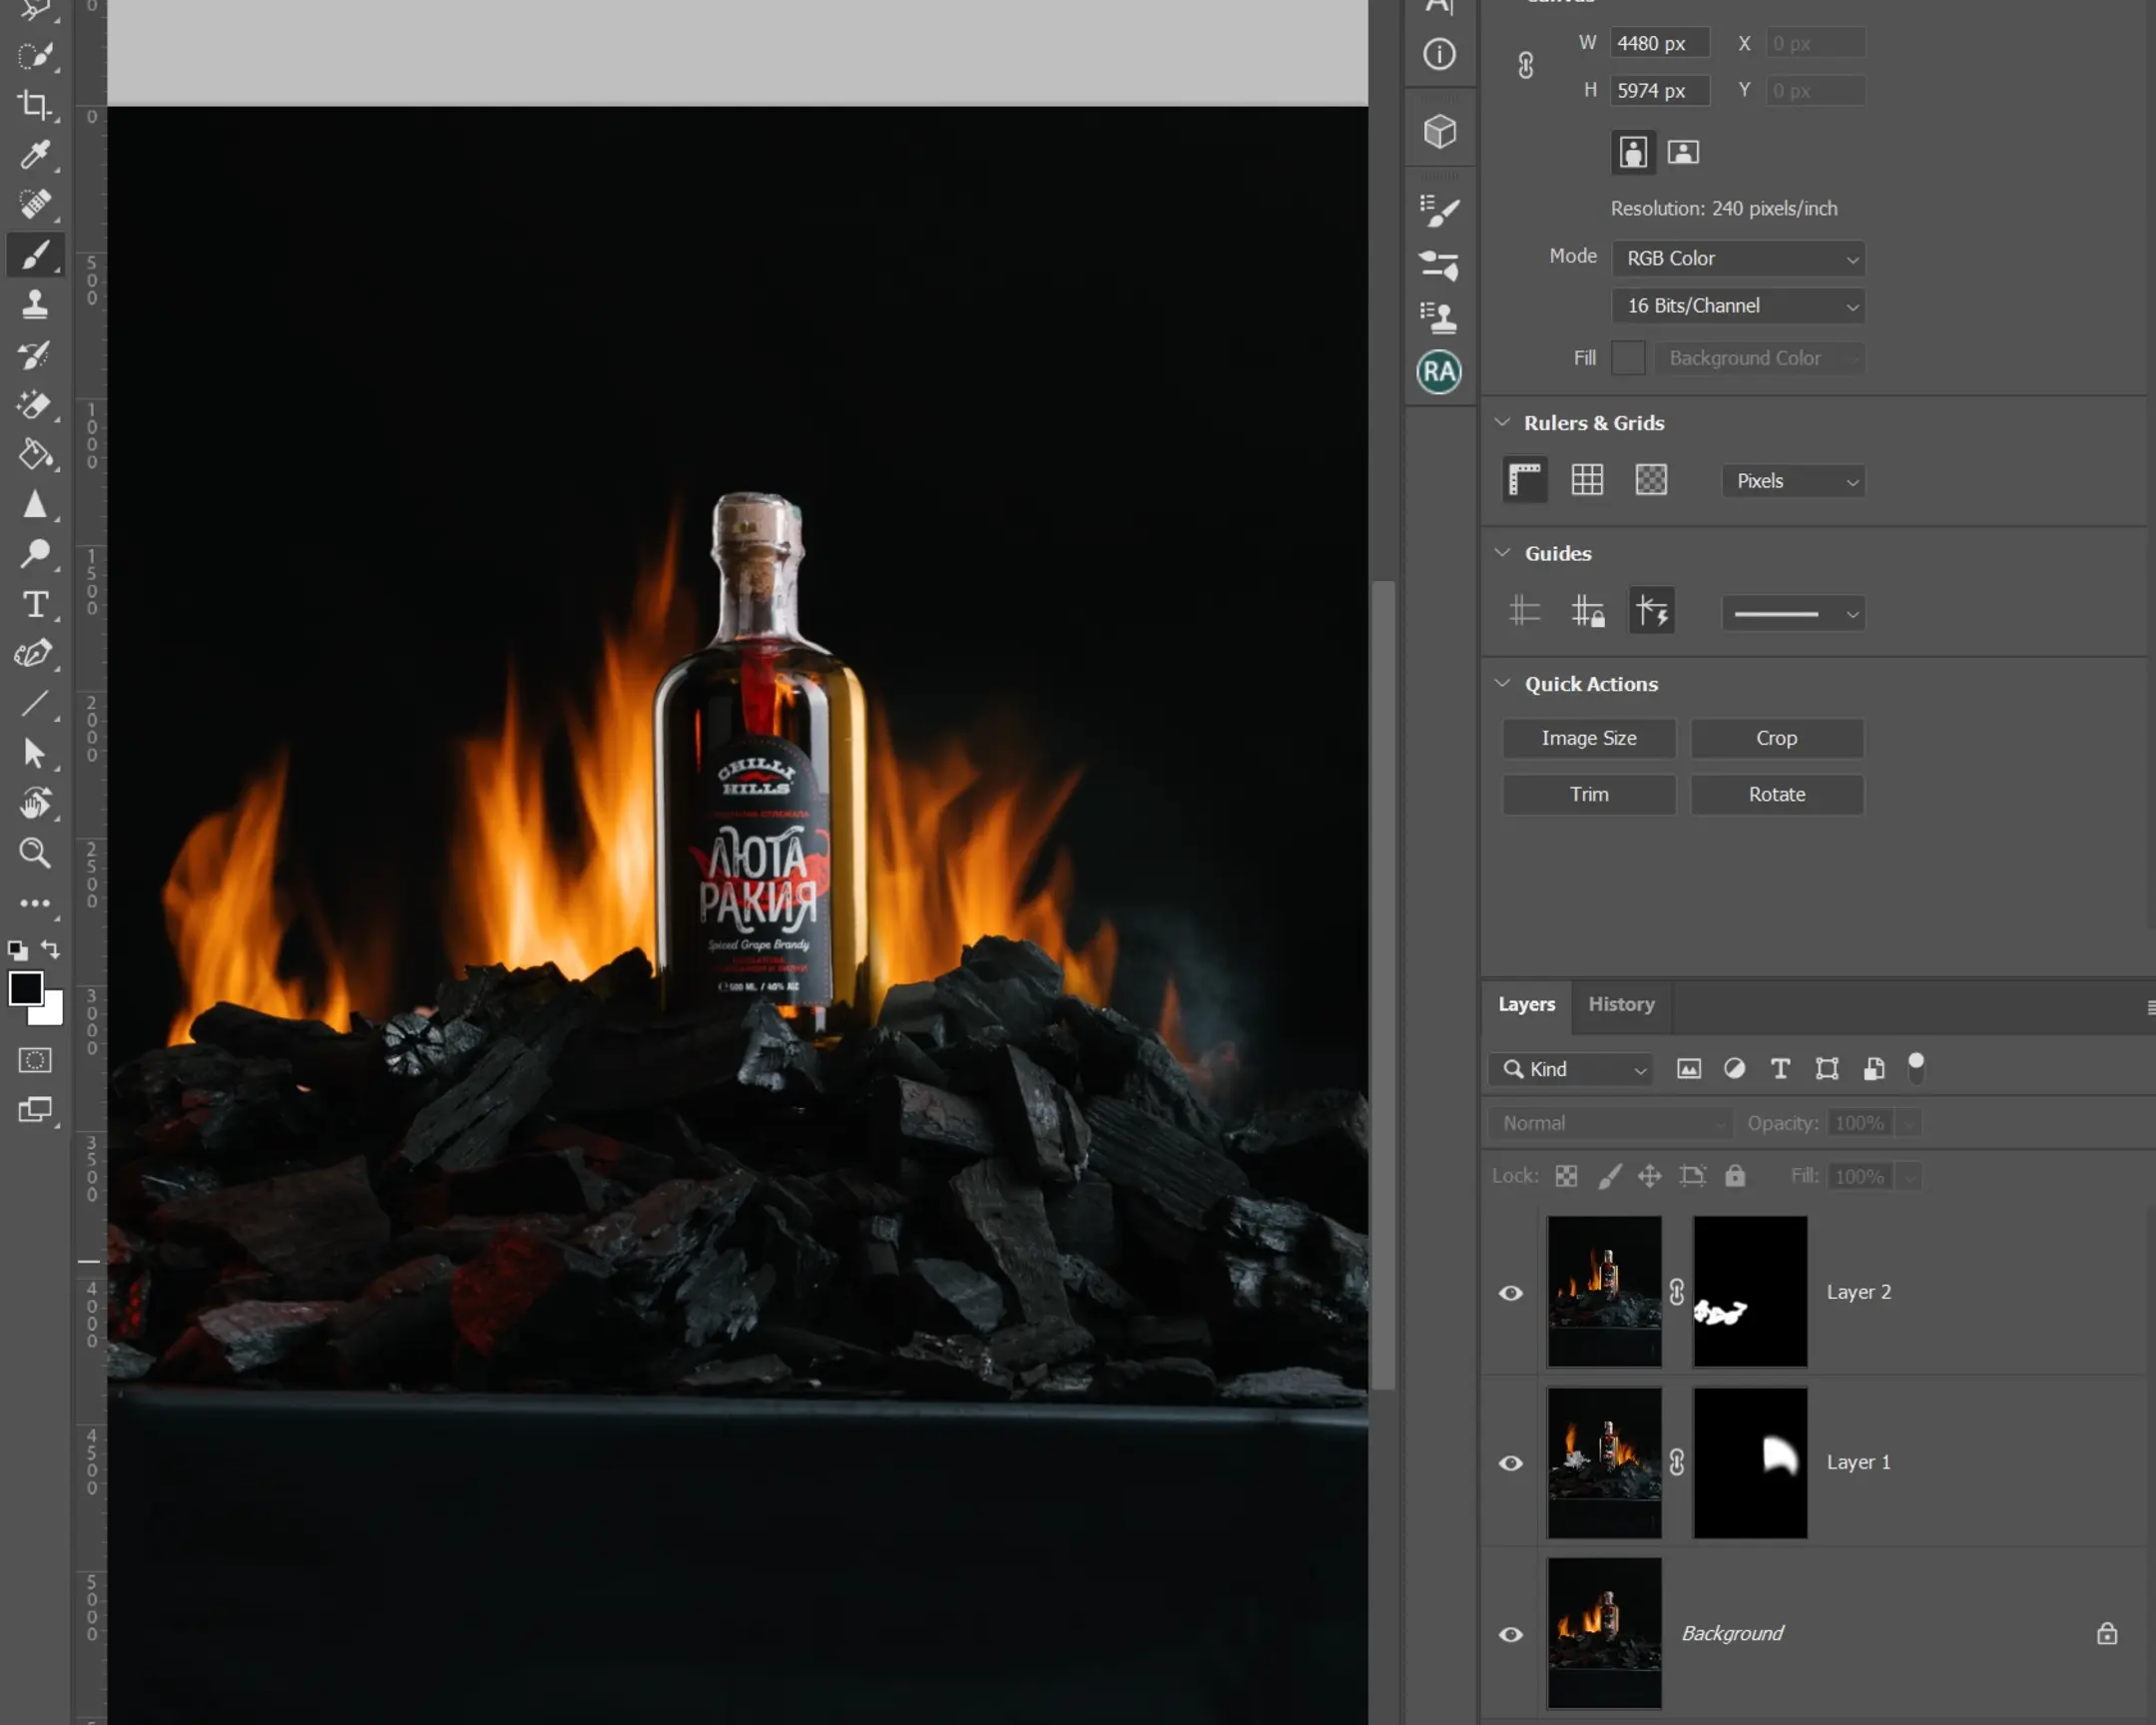
We bring the picture to the state you like (remove dust particles, crop, show brightness, add sharpness - in general, we process it the way you like).
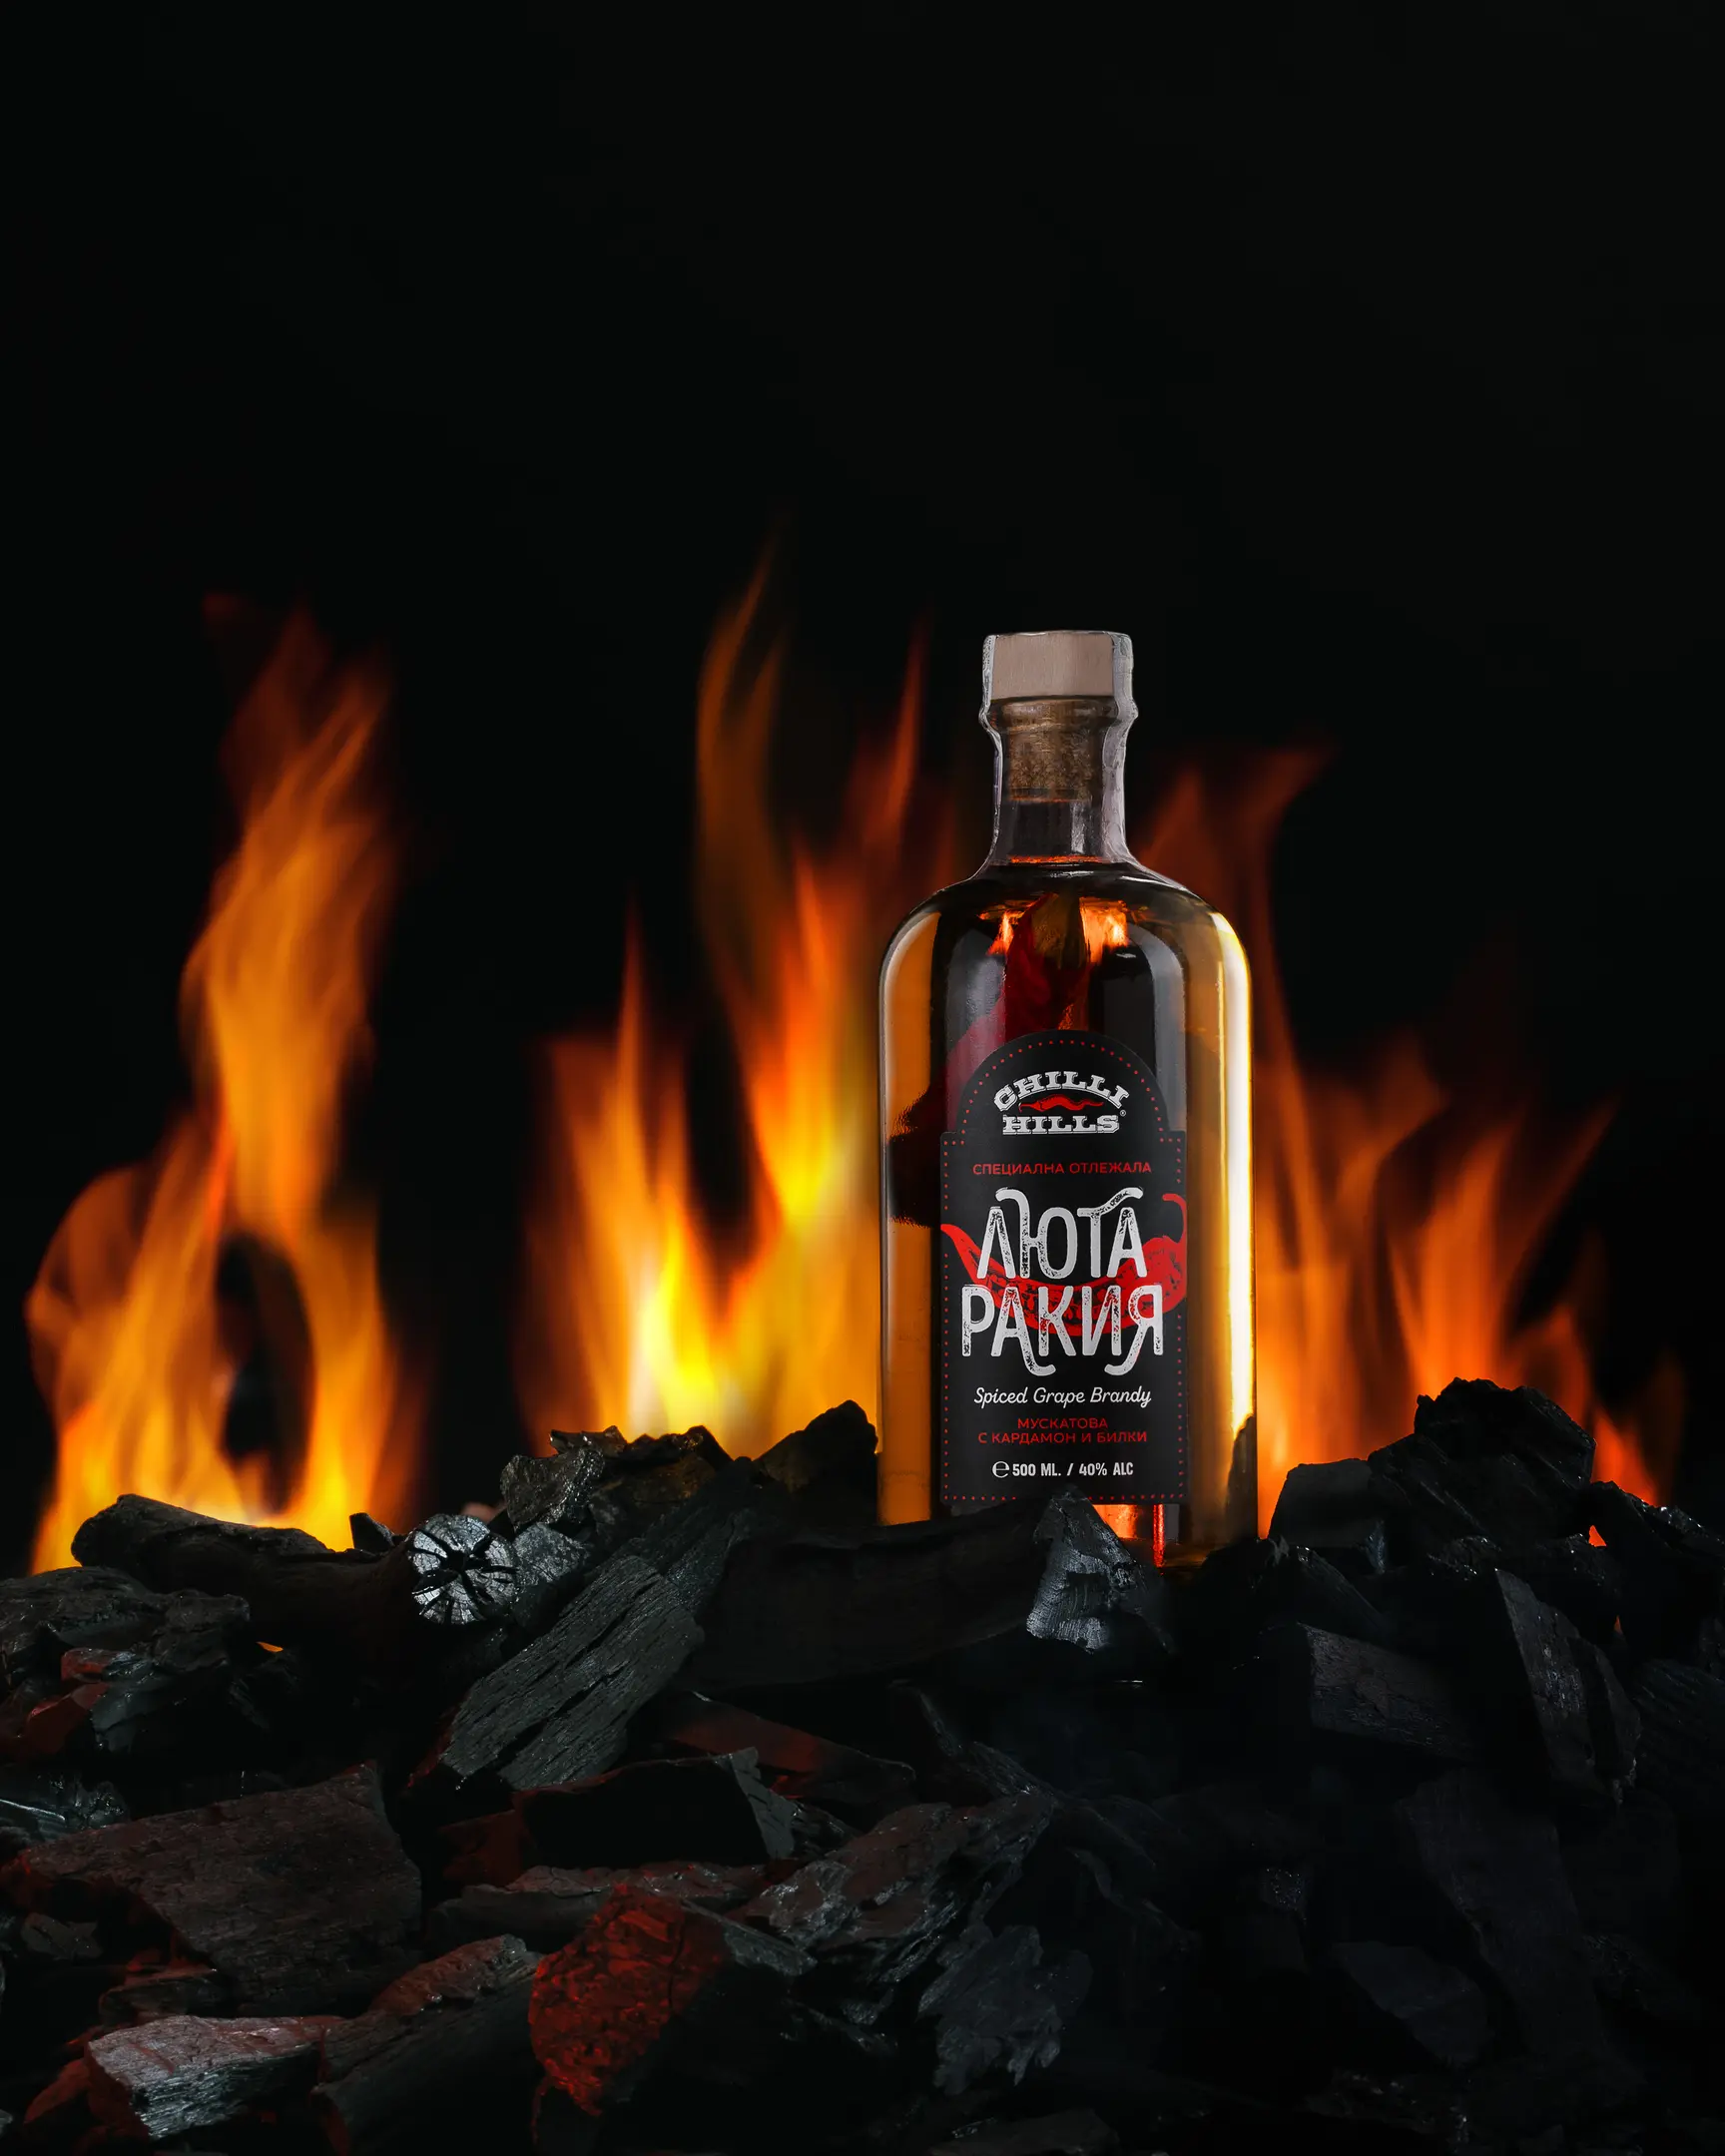
In order not to be unfounded and to show you that with 1 light source, you can shoot the same frame, I made another small photo session of a similar type, and to improve your life a little more, I give the source files from this shooting, which you can collect yourself in the program Photoshop.
So - I'll start again from the beginning - with the scheme of light.
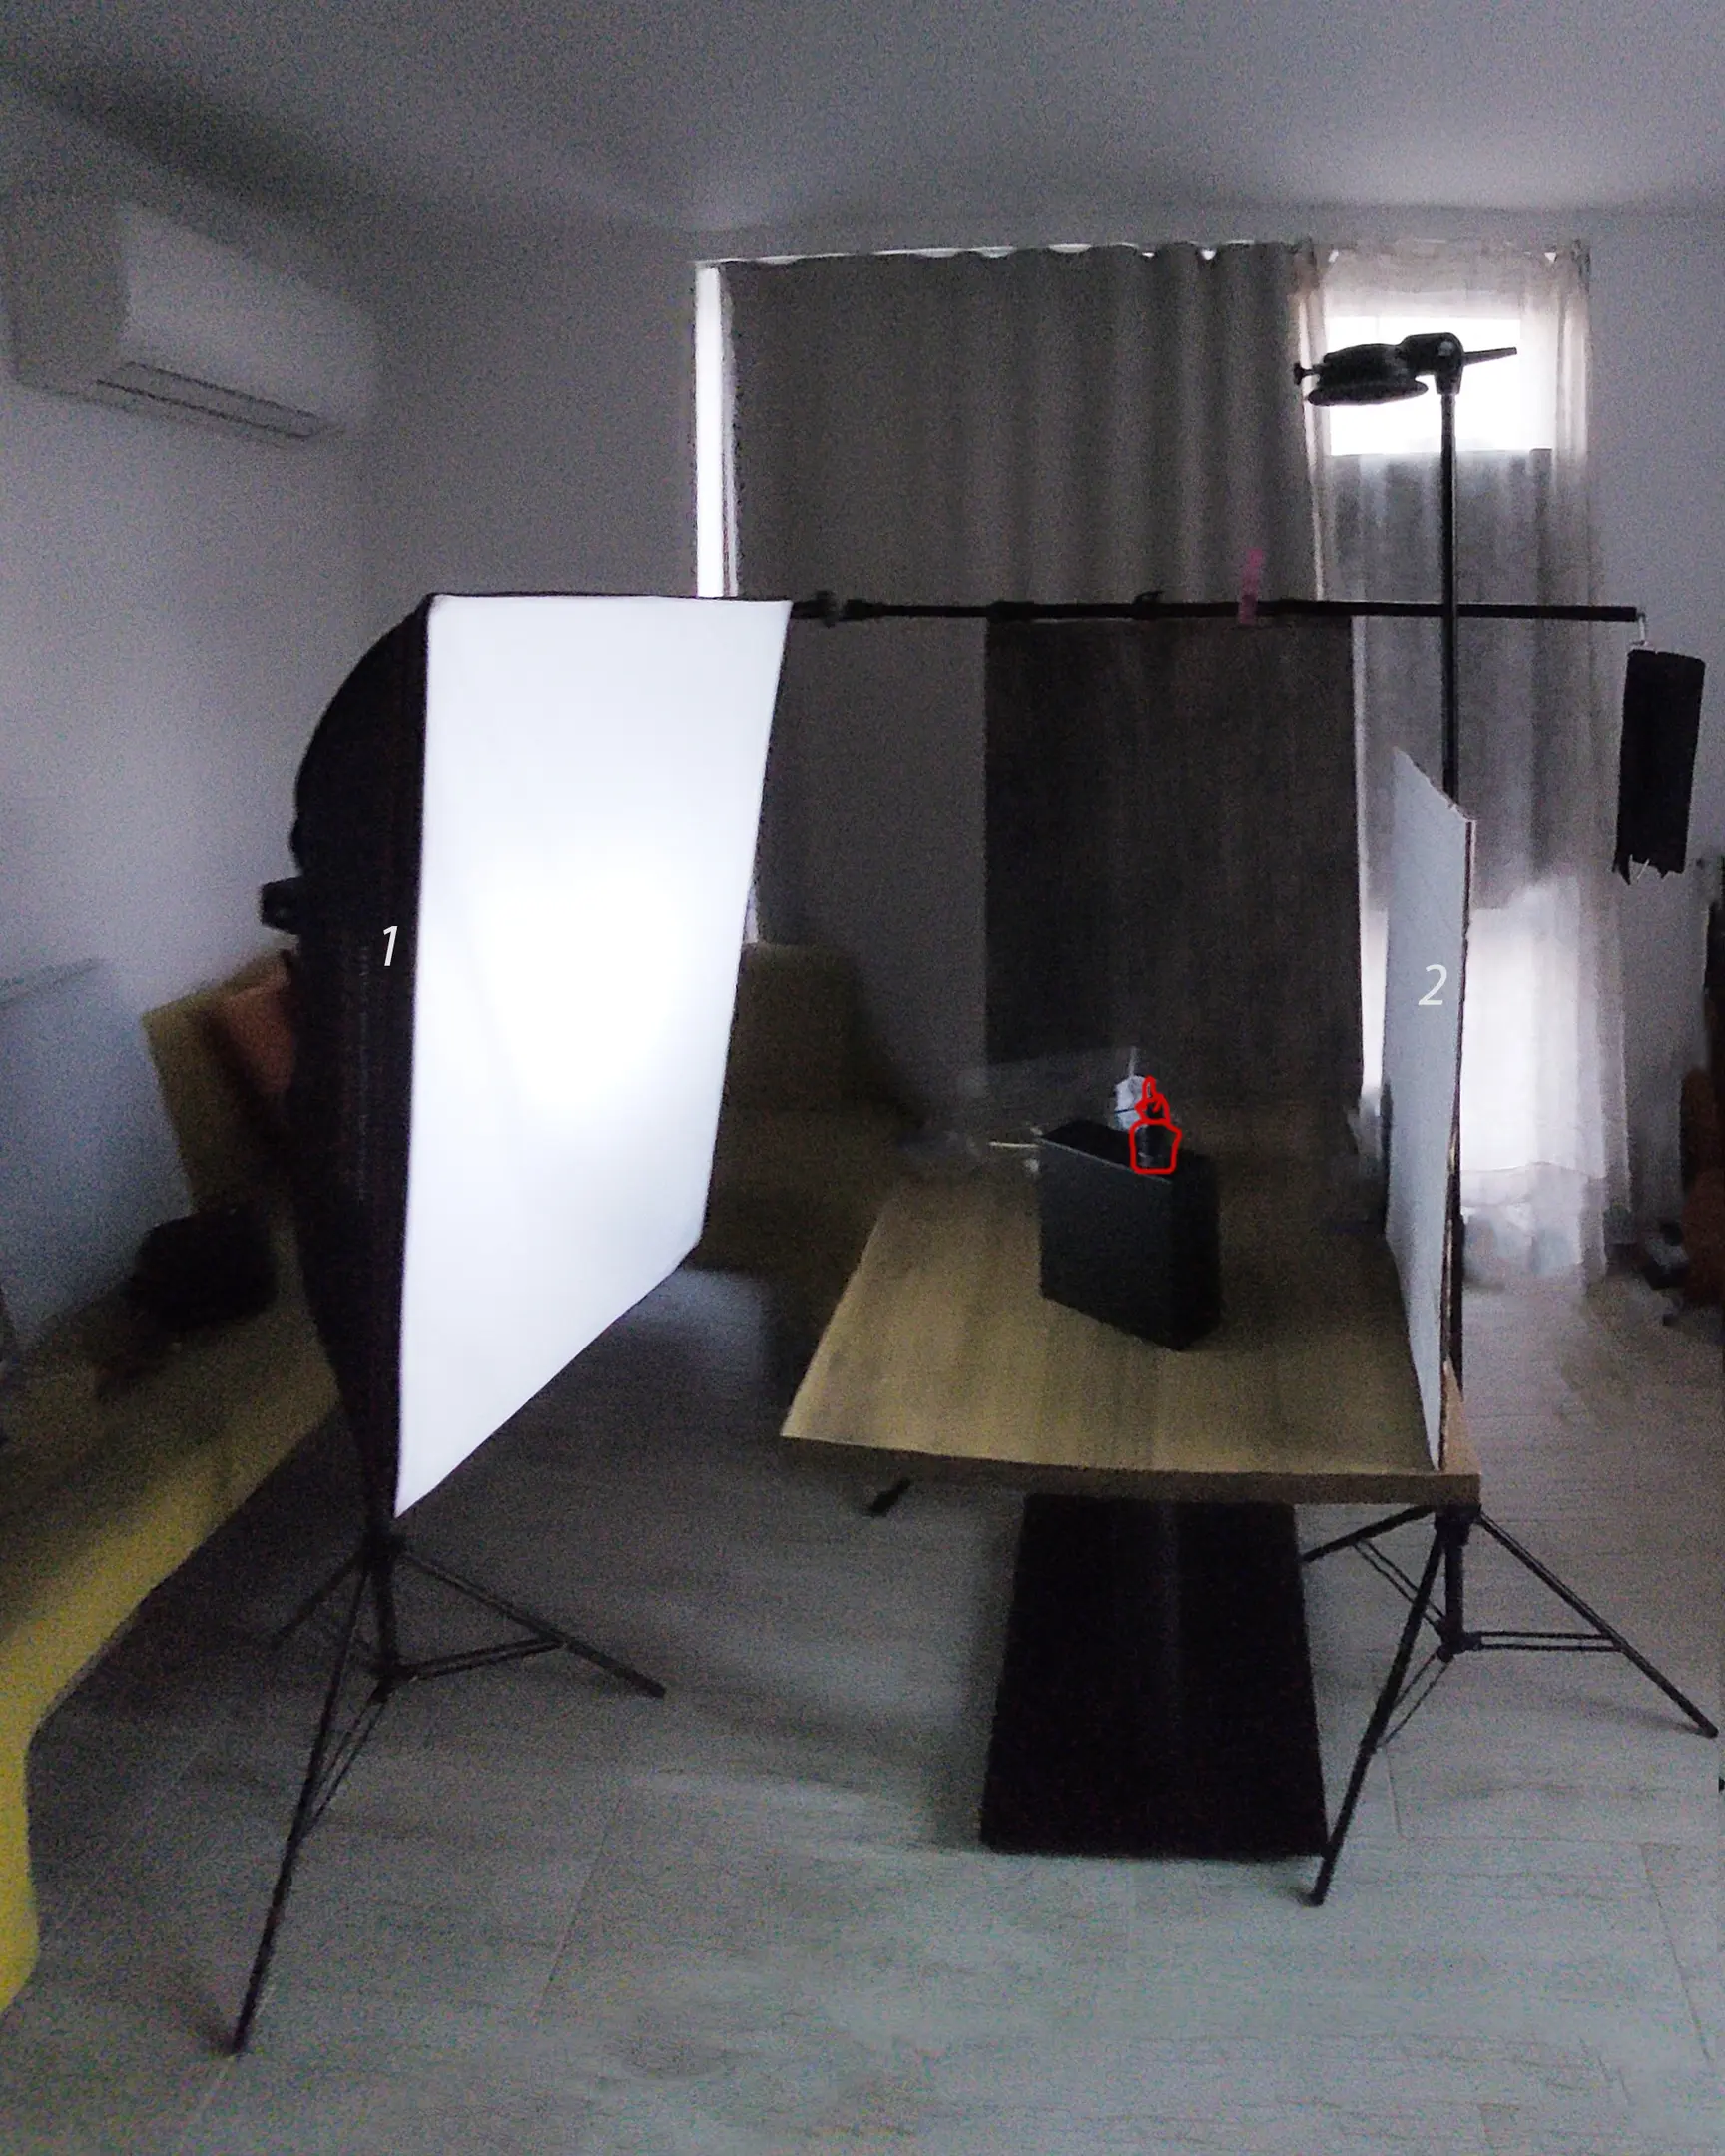
And again - the first thing to do is to put the camera on a tripod! The camera must not move! You are shooting at a slow shutter speed - to capture the fire! In addition, you will need to combine the frames in Photoshop - so be sure to put the camera on a tripod!
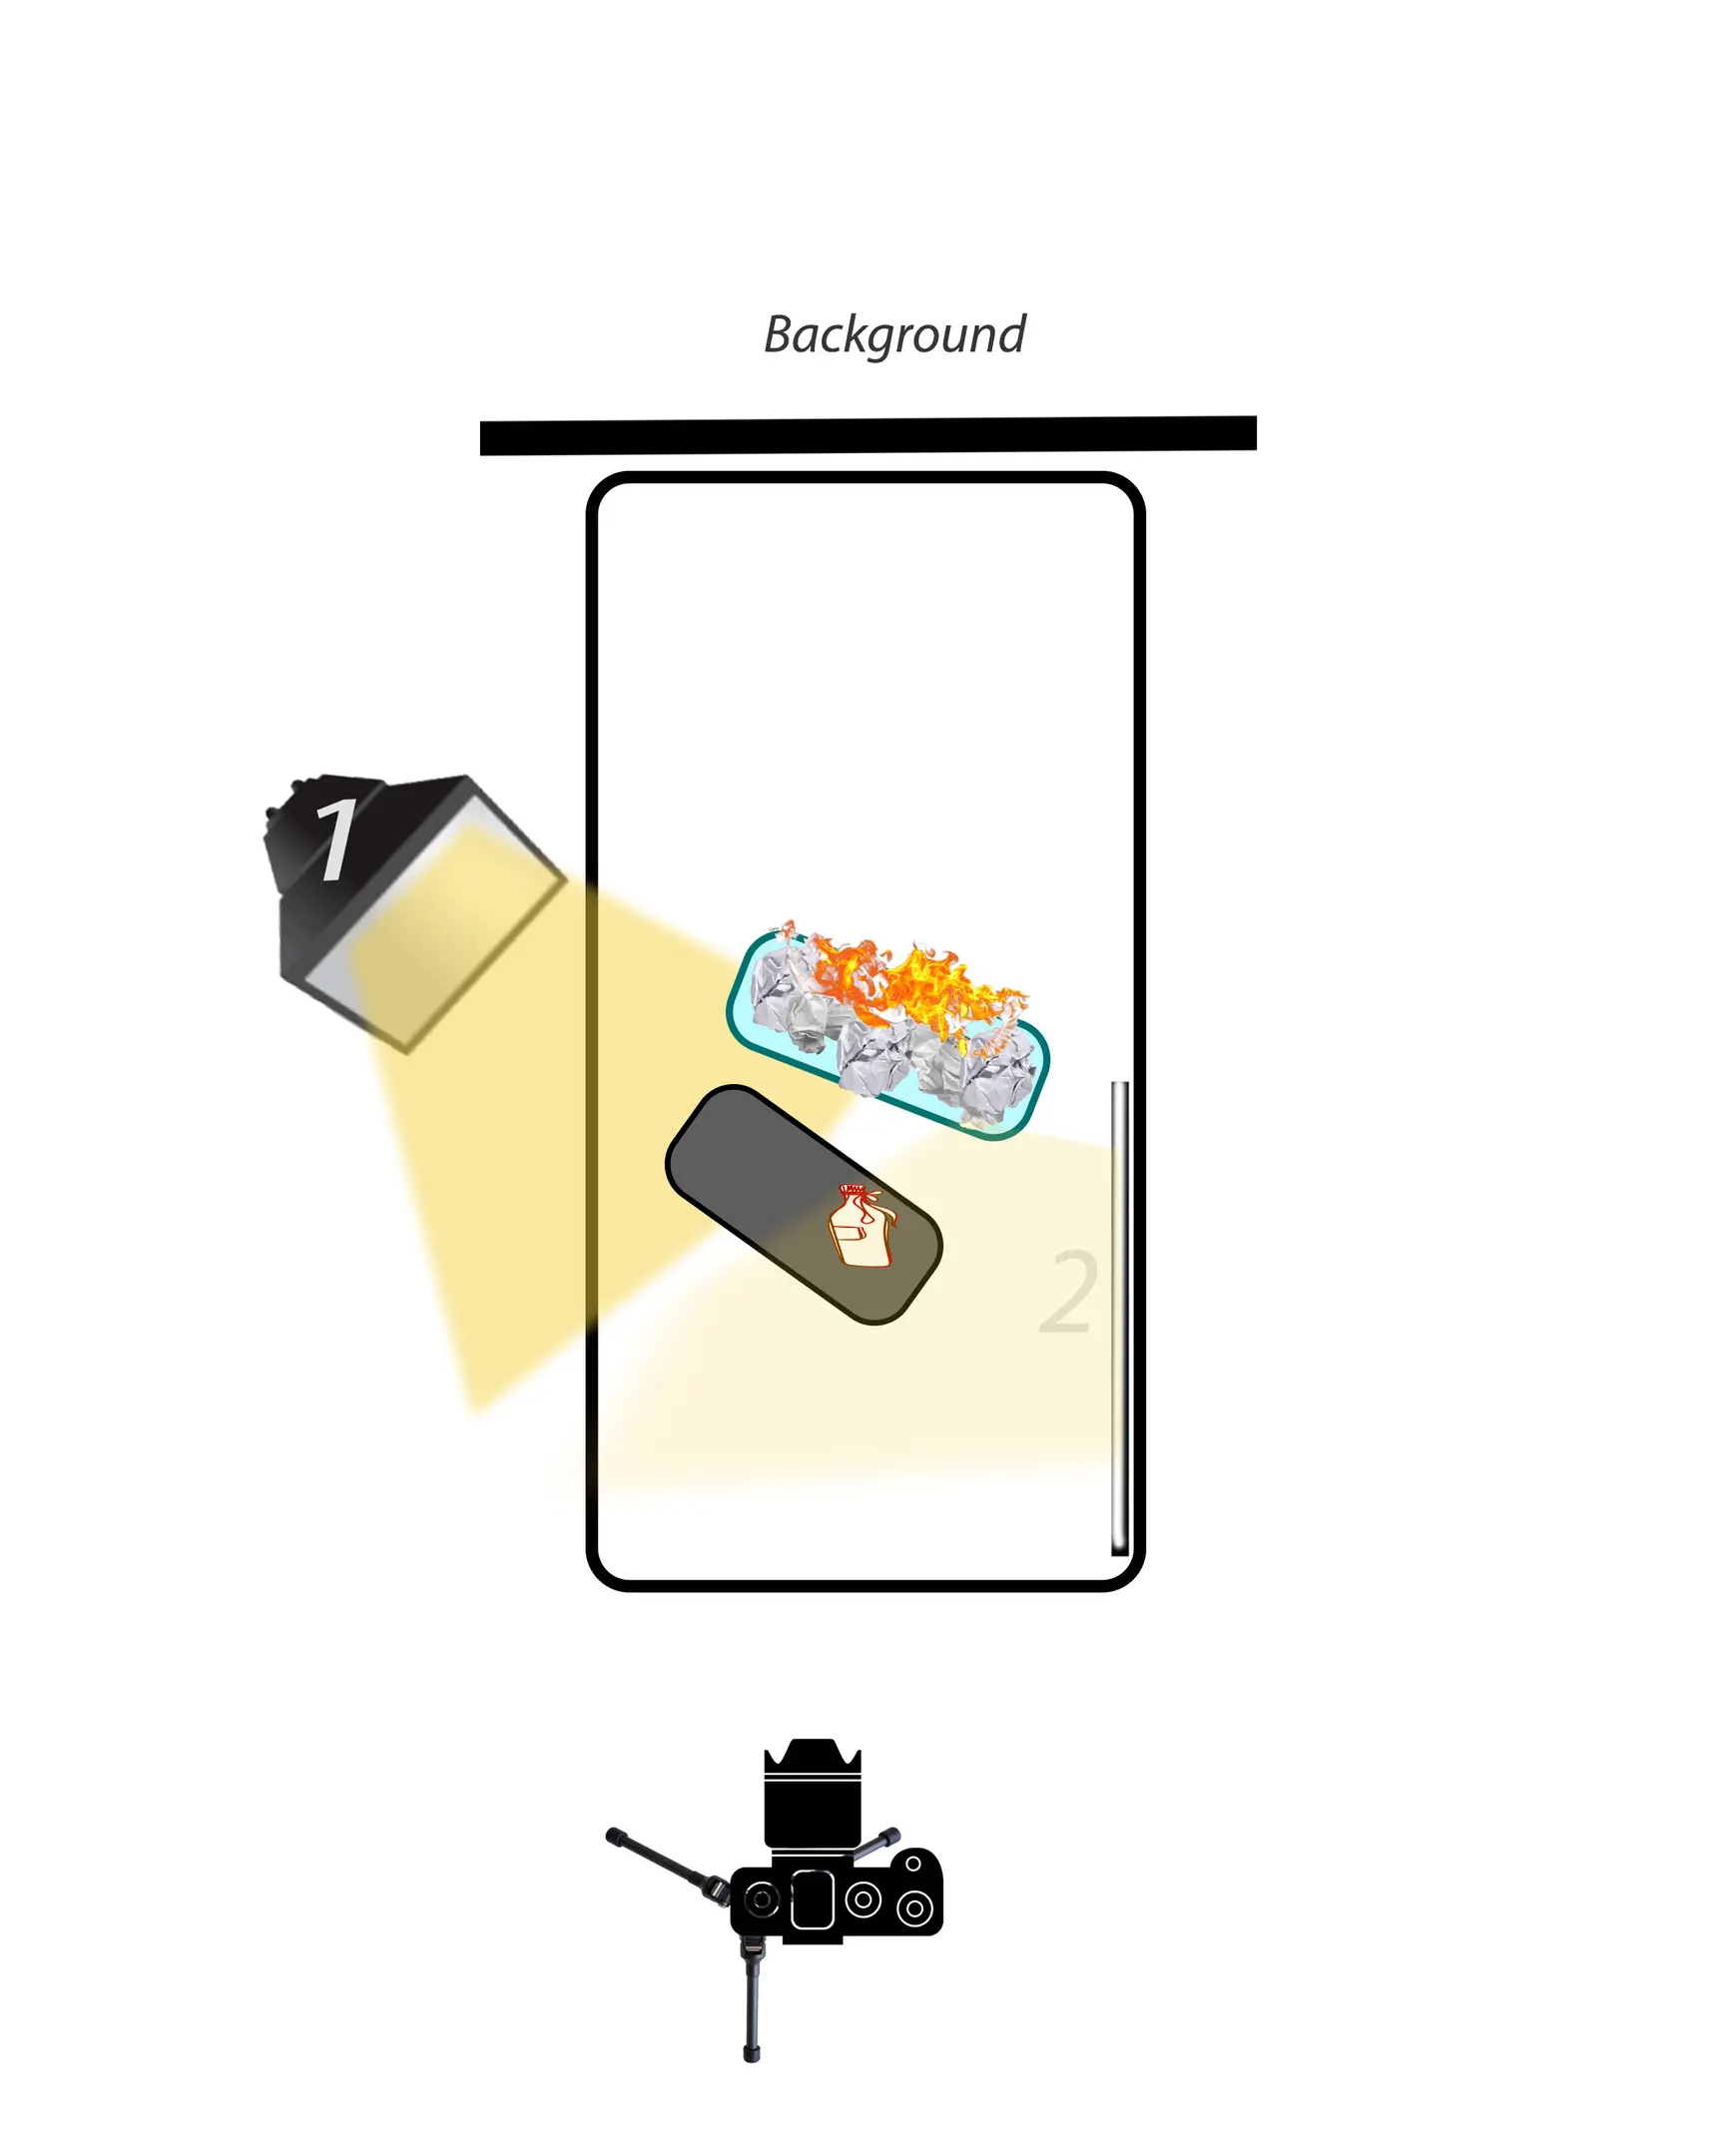
A "drawing" light. Flash GODOX AD200 Pro, softbox 60x90 cm. The light shines on the object from the rear left - to separate the bottle from the background, illuminating the pedestal on which the object is standing and illuminating the left side of the object.
A "filling" one. The power of the fill source is ⅓ less than the power of the "drawing" source, or, as in my example, you can use white foam board. You can buy it at an art supply store or you can use any other reflective white surface. Source #2 (reflector) helps illuminate the label and the right side of the object. The reflector should stand so that the light from source #1, reflected from it, illuminates the label. However, in order to have more options for processing or retouching photos, I always take an extra frame for the label, by moving light 1 (softbox) to the front-side position.
Fire. After you have set the light, set the settings on the camera, closed all the curtains, and turned off all the lights in the room, so that it plunges into darkness, you need to turn off the synchronizer on the camera and, with the settings set, took a picture without flashes. And get a completely black frame. That means that, except for flashes, no other extraneous light sources will change the light-shadow pattern in the frame.
You must be ready that the first time the frame with fire may not work. Here is an example of a frame with a shutter speed of 1 second (left) and 0.5 seconds (right).
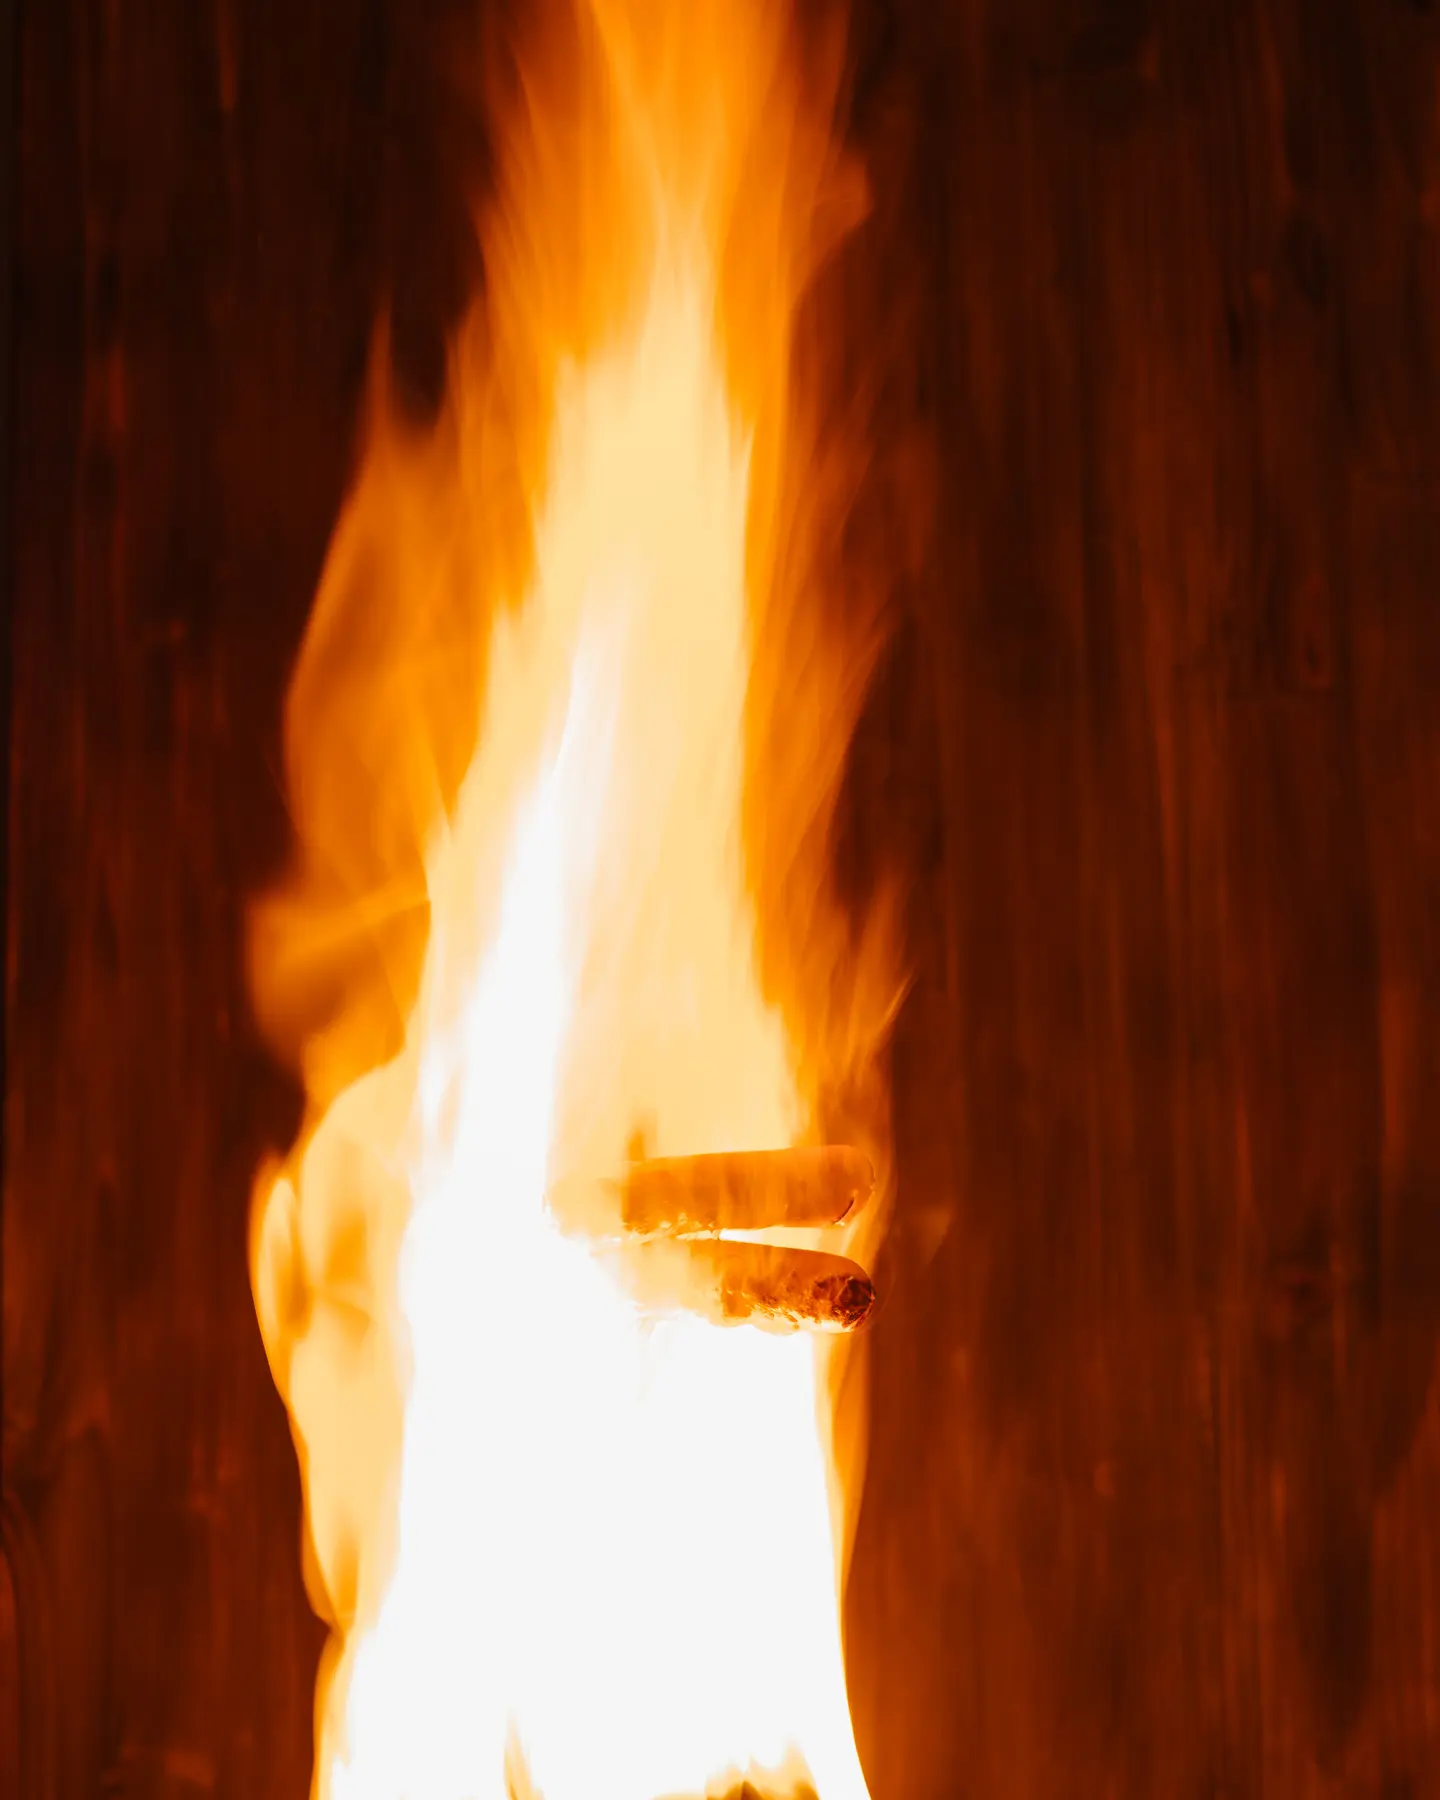
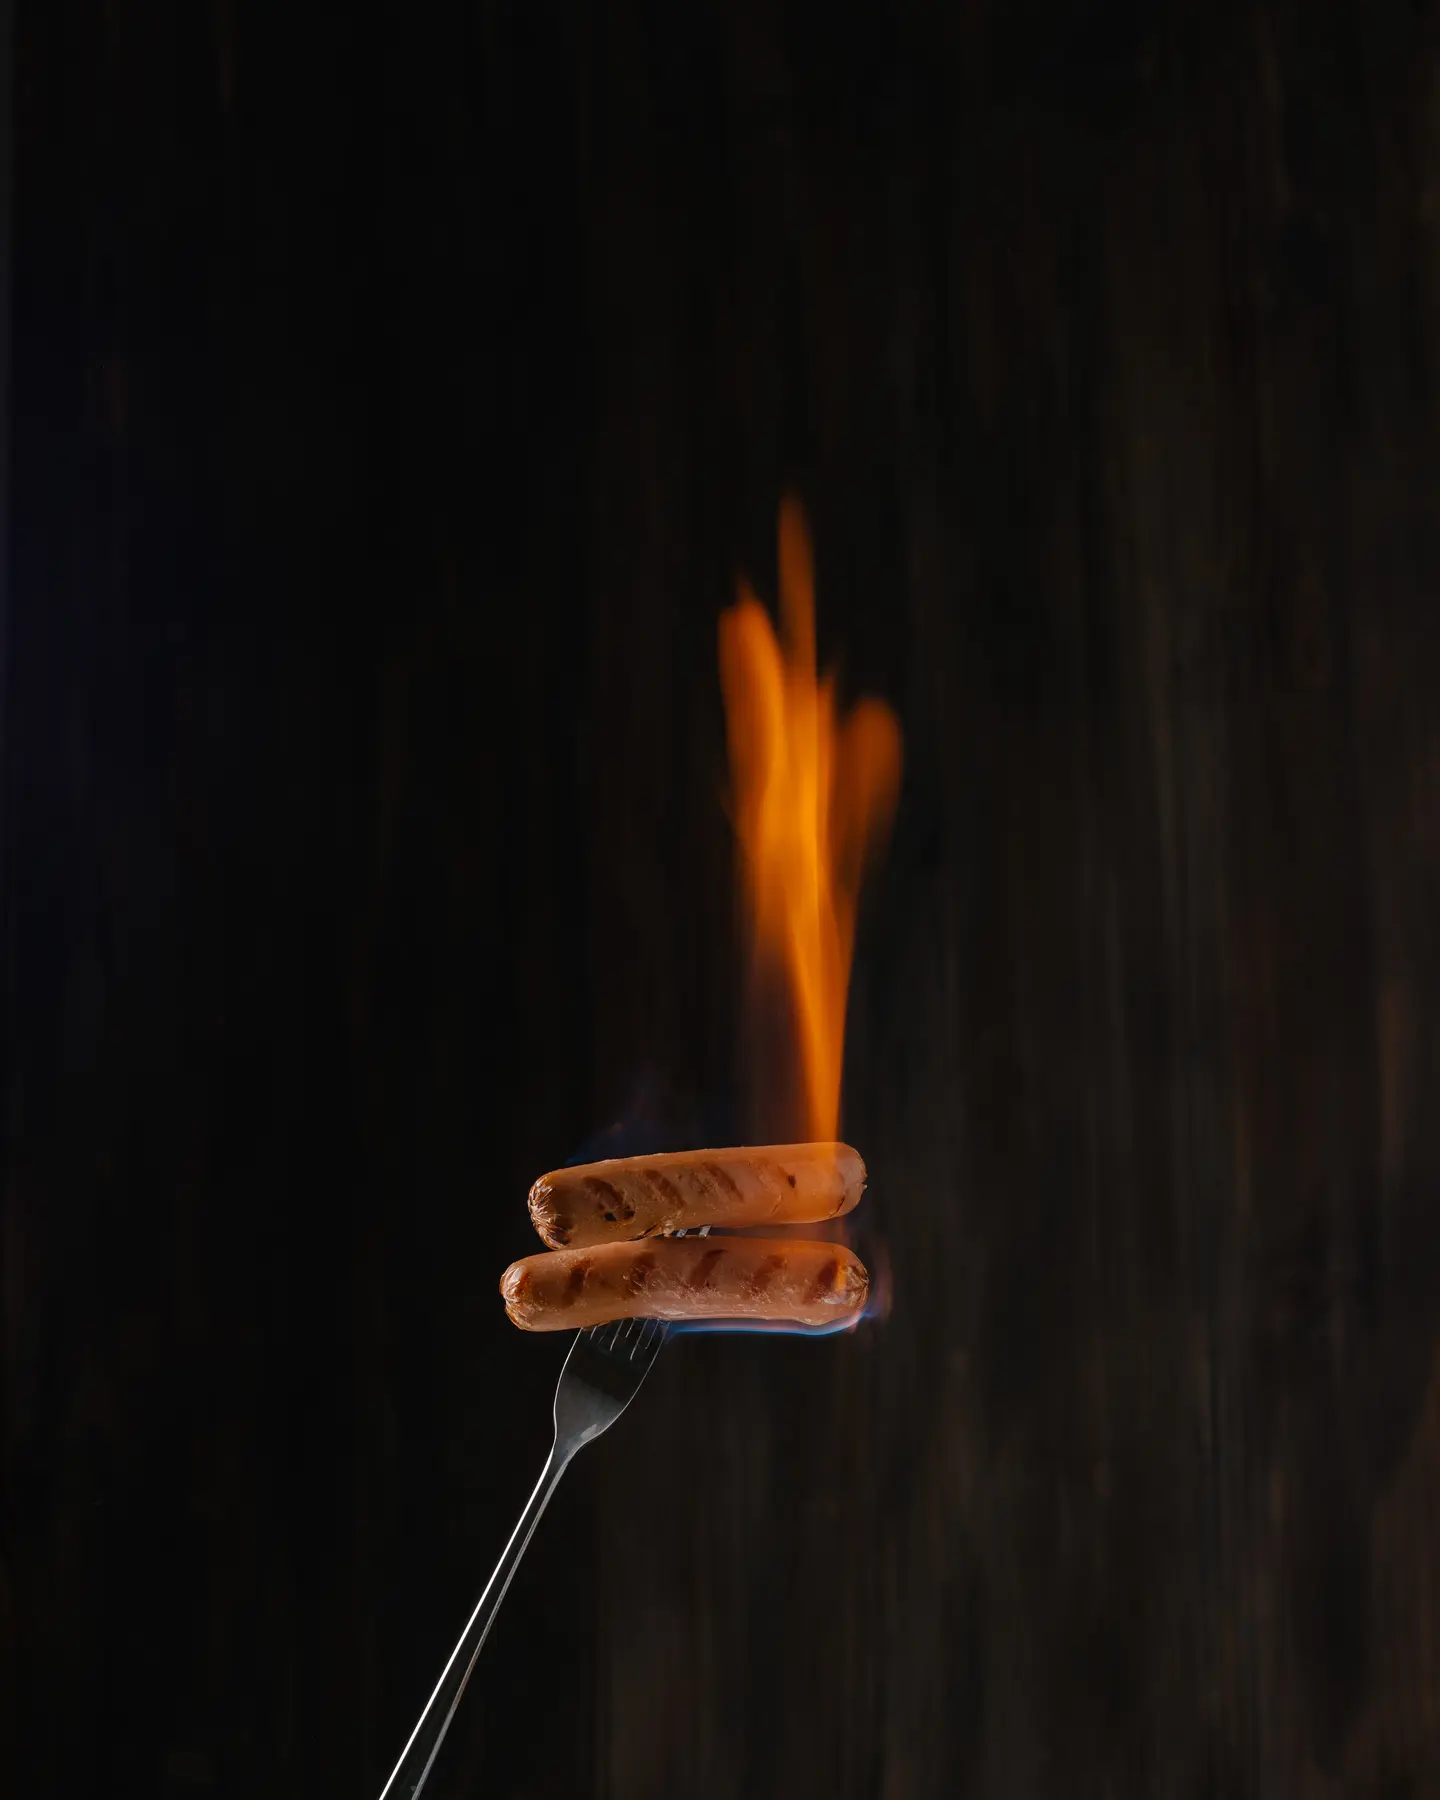
As you understand, fire is still an element that is difficult to control! Therefore, be sure to prepare enough water and a room before you start shooting (a wet towel, heat-resistant dishes, and a fire extinguisher). And also - prepare yourself mentally for the fact that it will take several attempts to make a flame that you like!
What camera settings did I have?
You may need other settings, but probably they will be close to the following:
I used one GODOX AD200 Pro, Canon EOS 5D Mark IV. And one of my favorite lenses - Canon 85mm 1.8.
As a result, I got 5 frames and assembled them into the final picture in Photoshop. 1 and 2 for drawing the background and label.
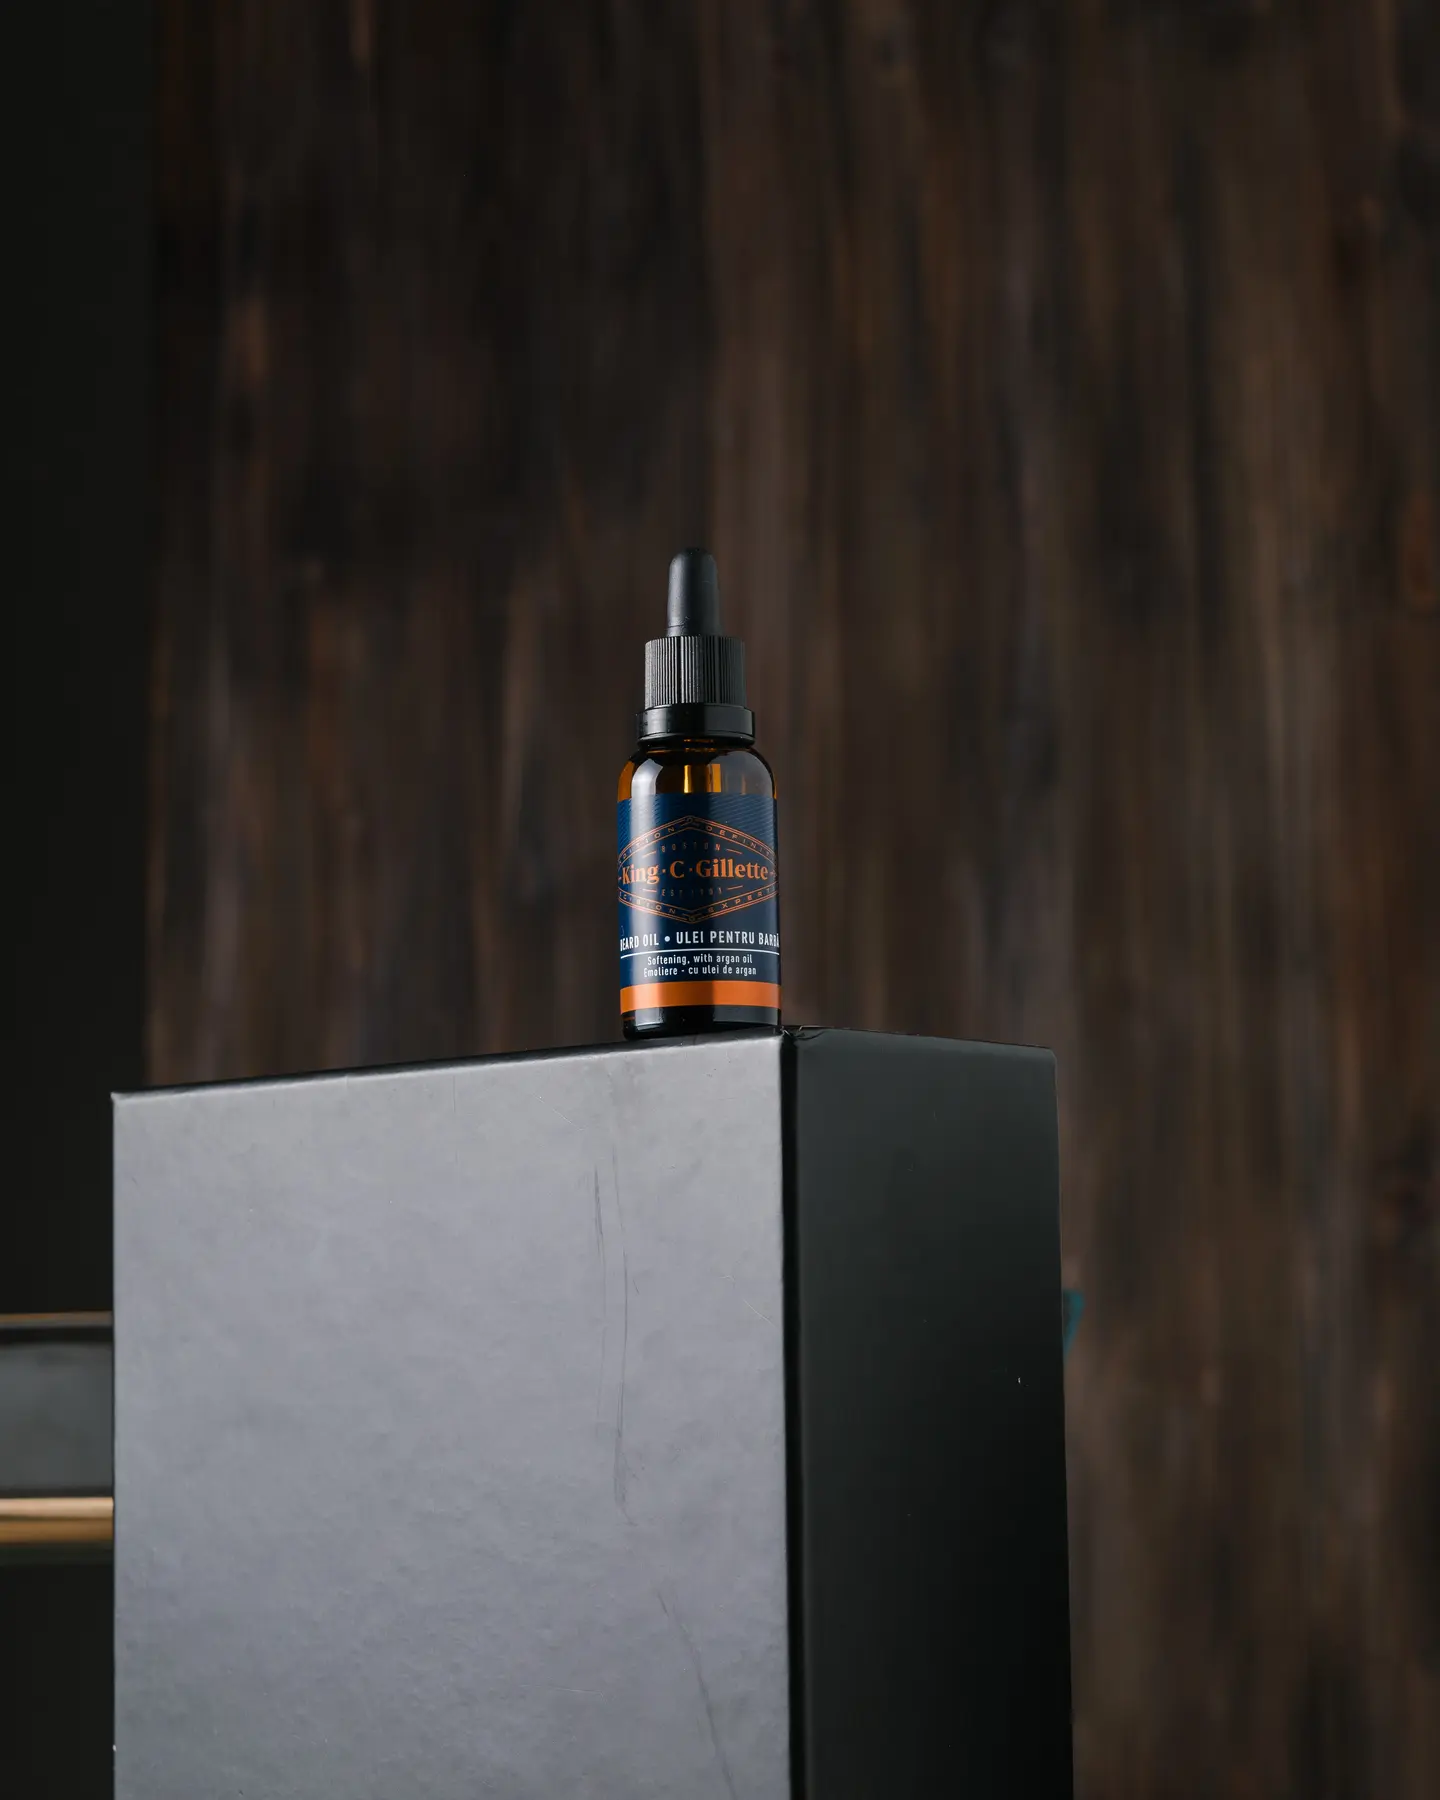
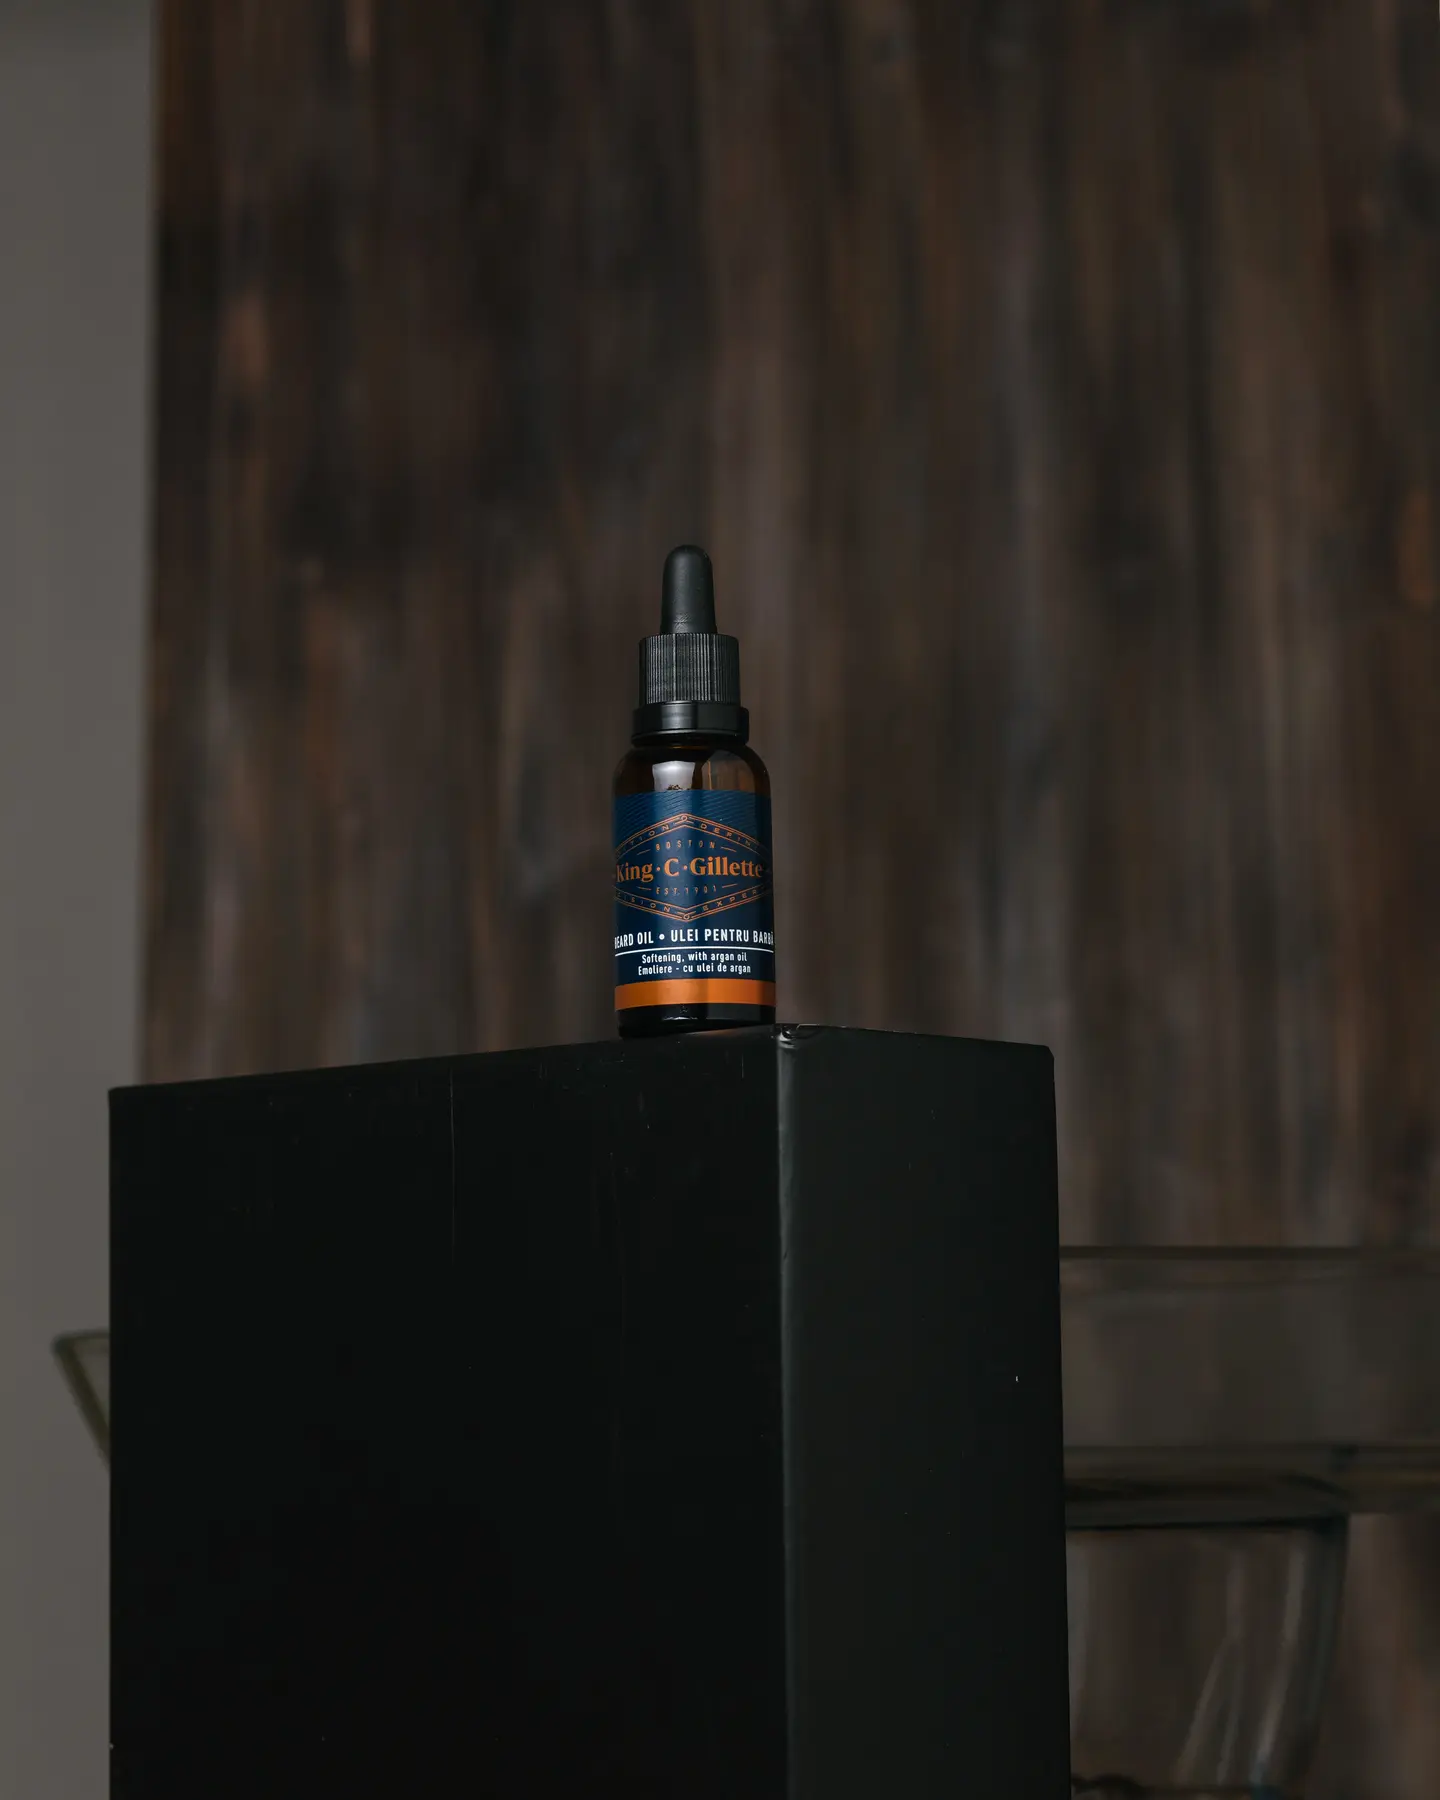
3, 4, and 5 became flame donors.
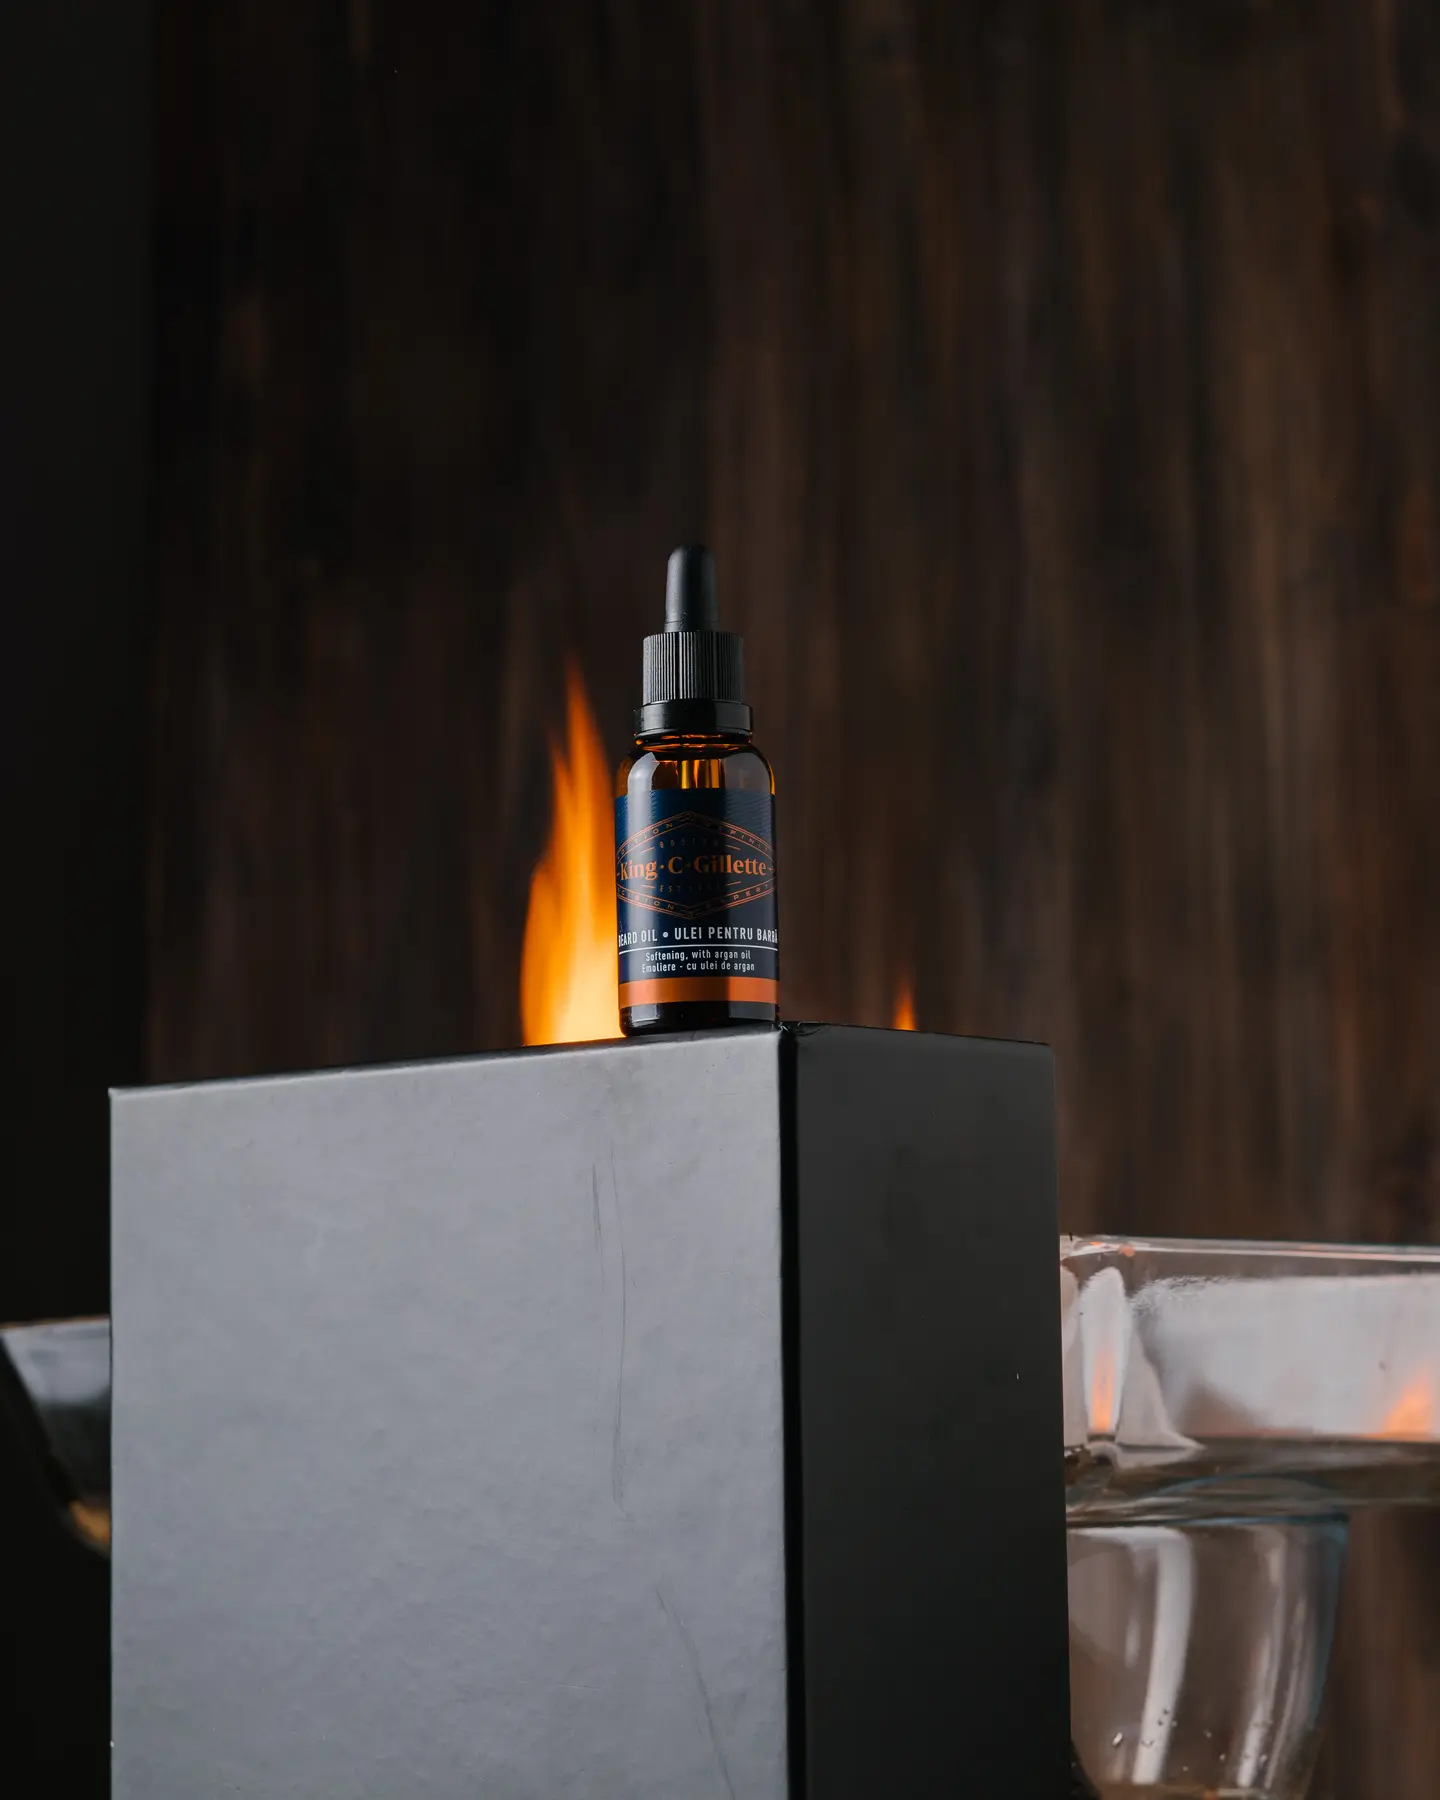
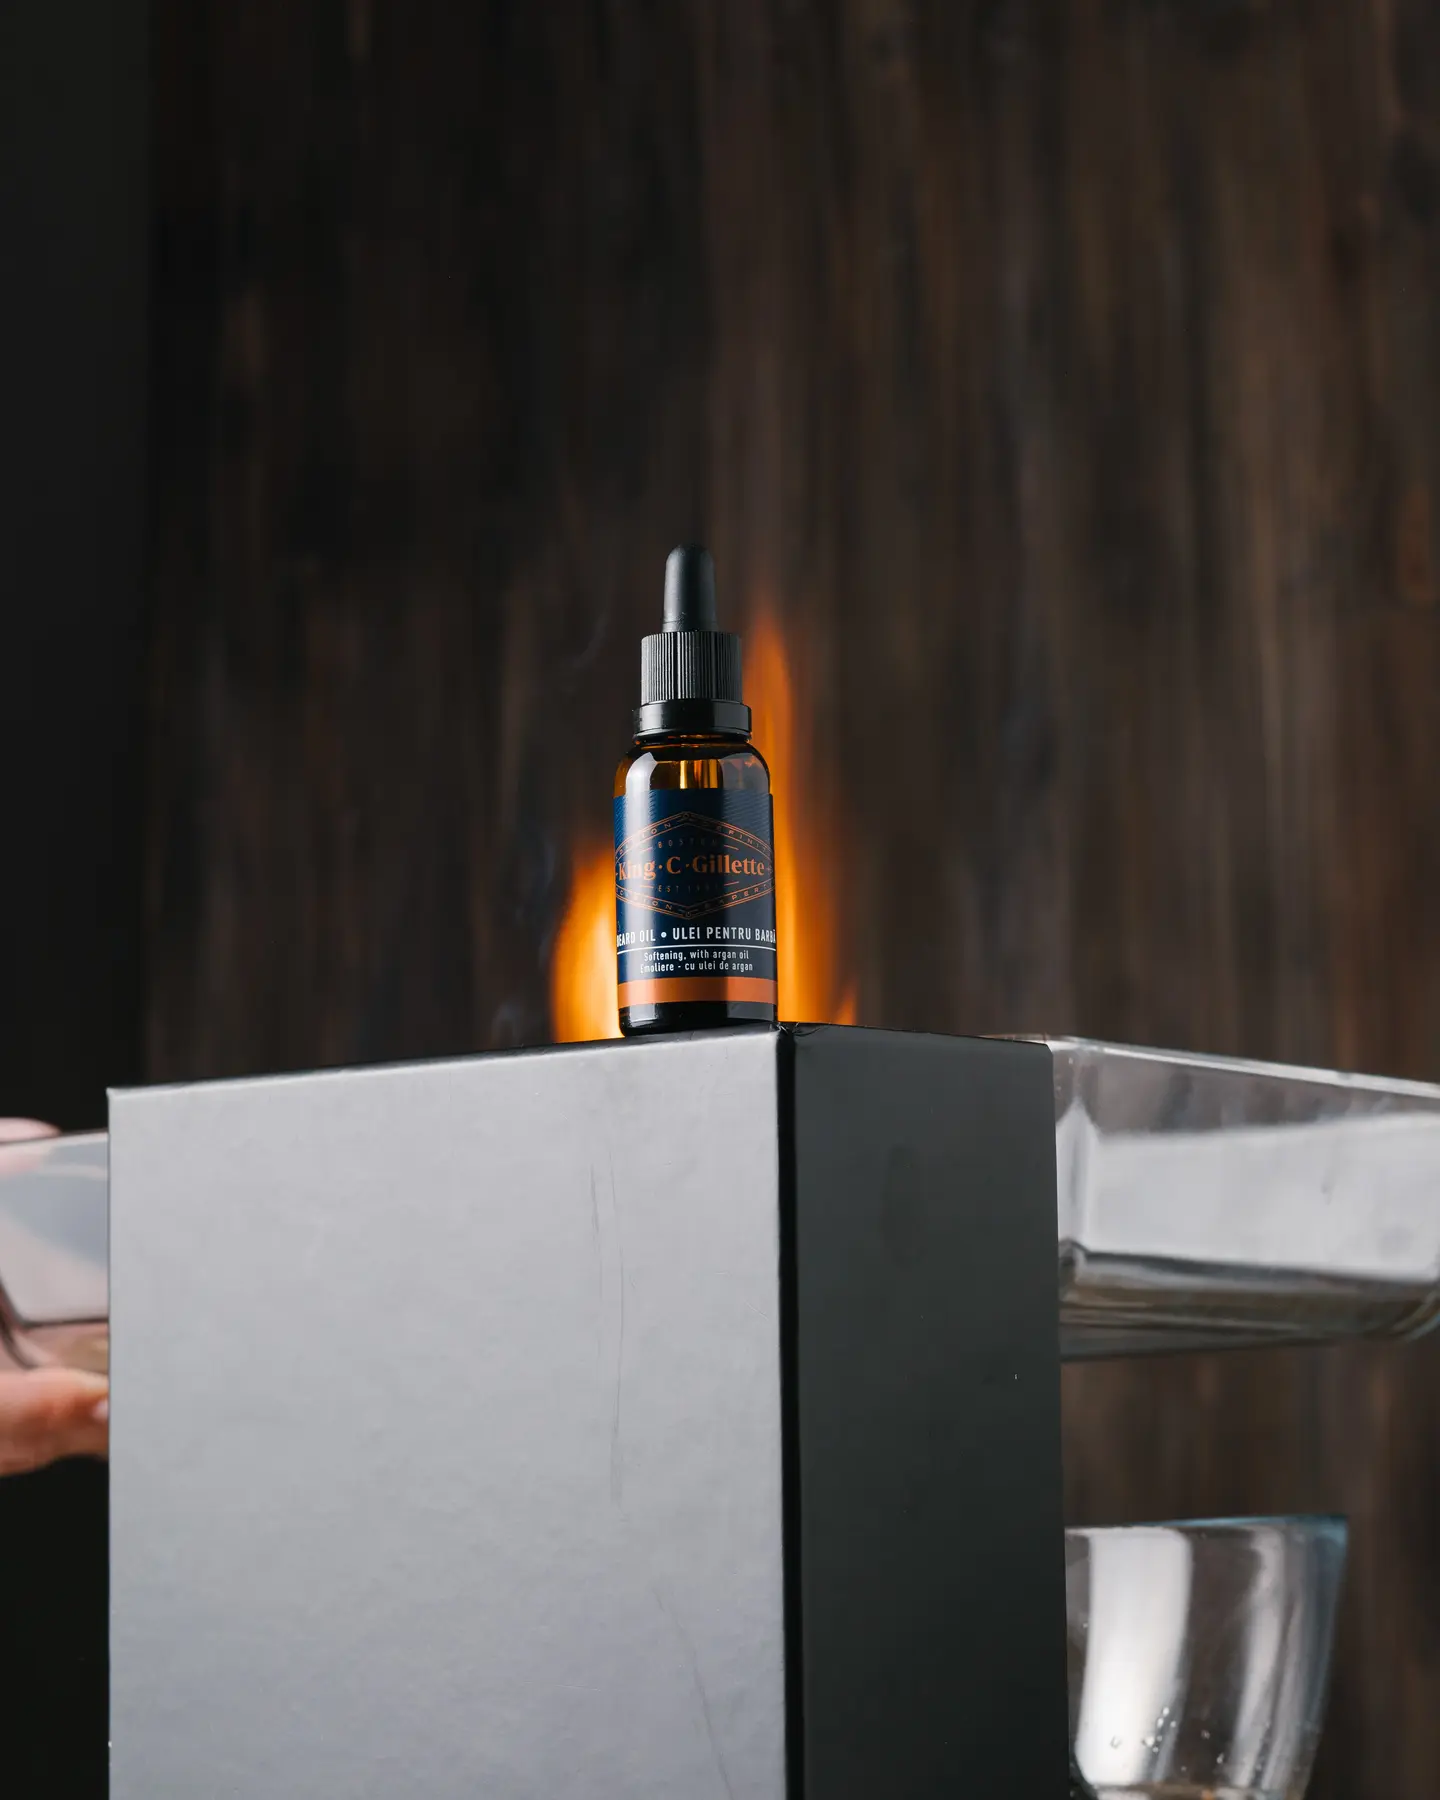
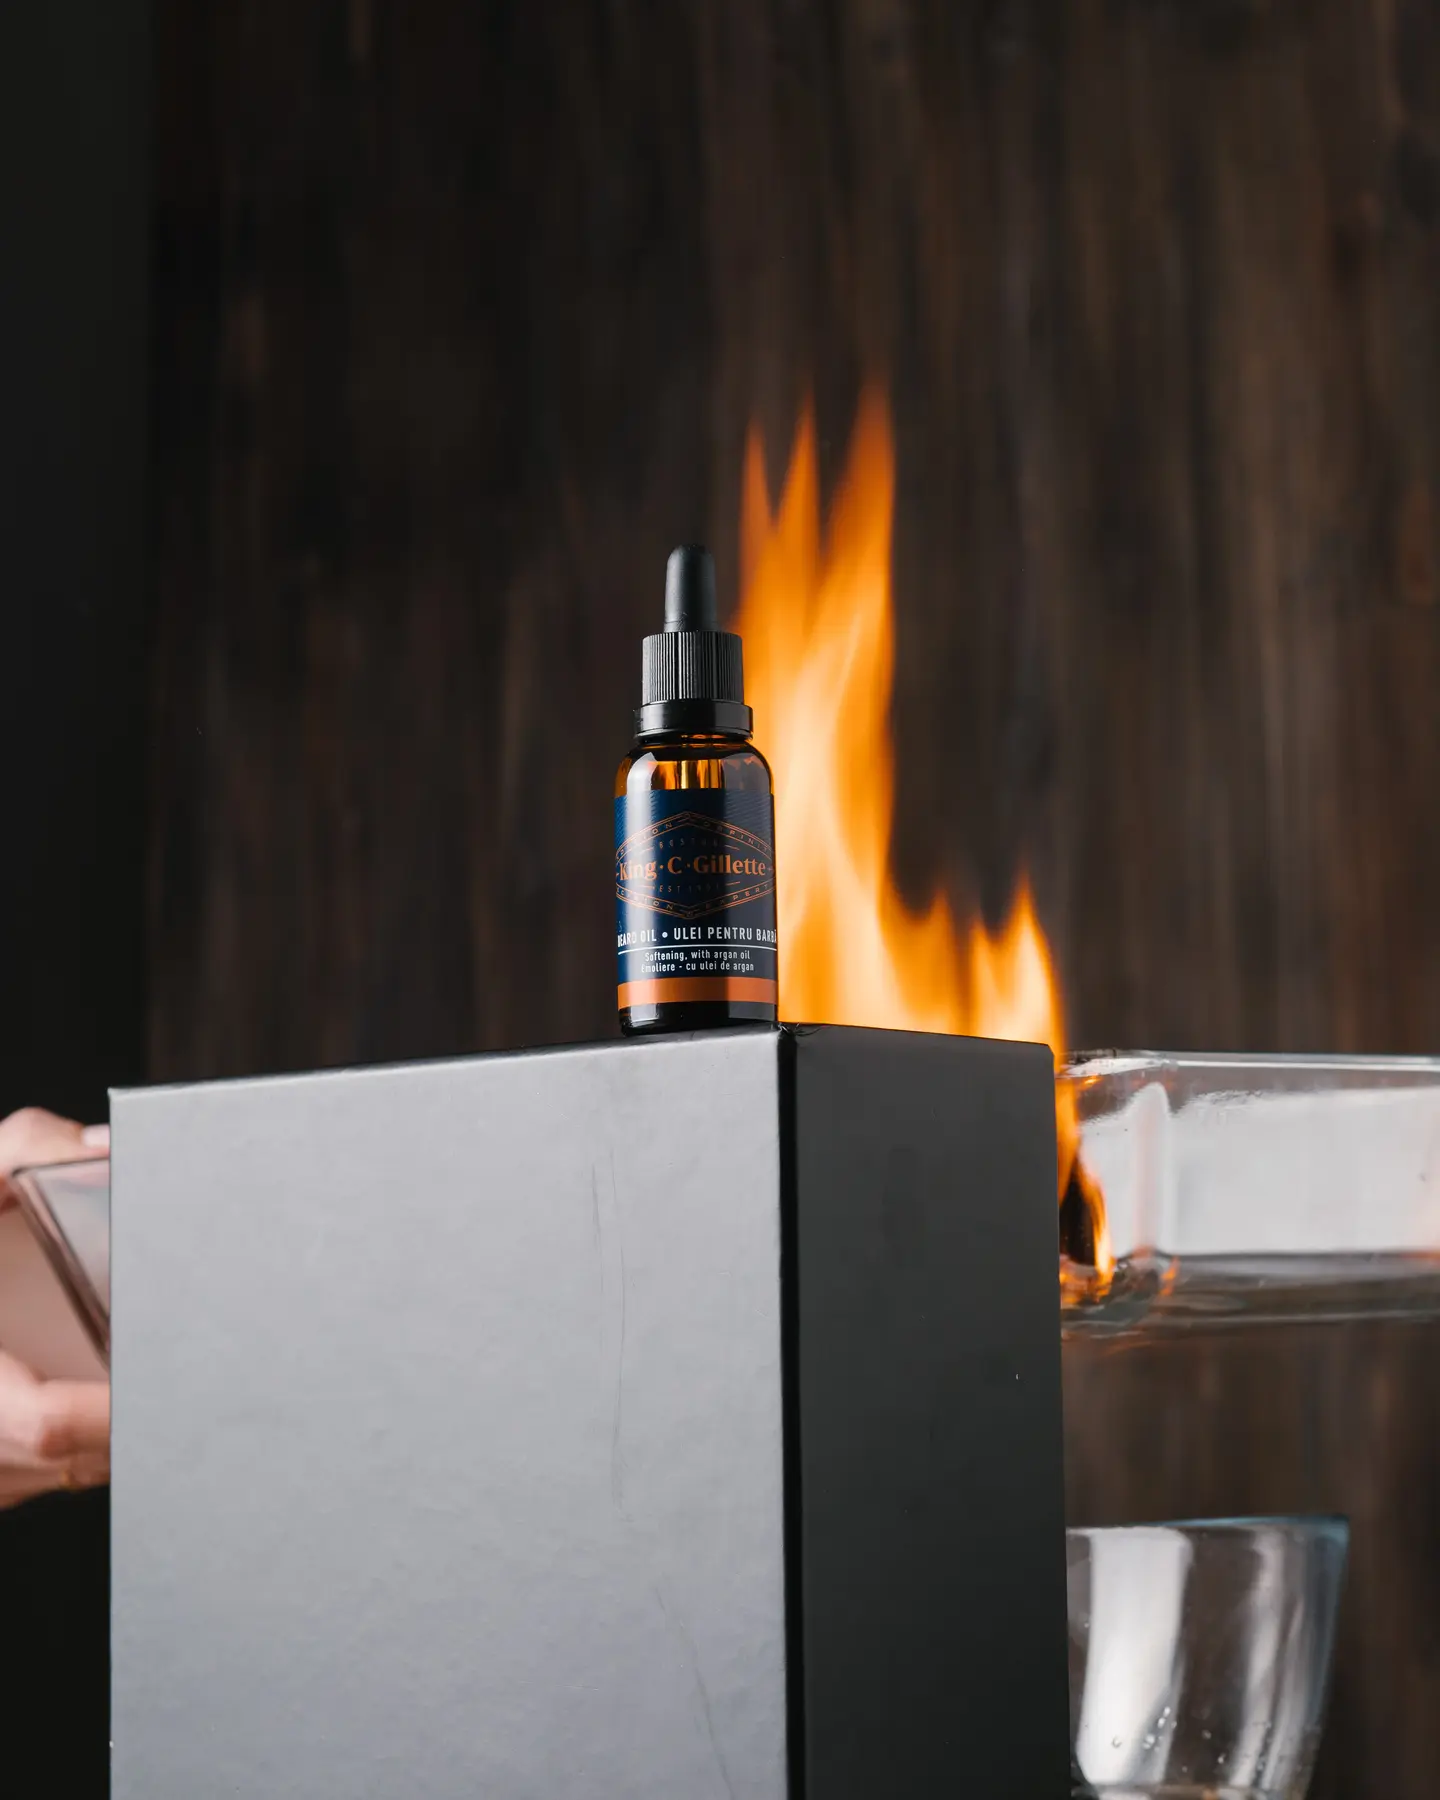
I decided that the best and most “clean” is the BASE frame. It will be the photo on which I will overlay layers to make the final picture.
In Photoshop, you need to open all 5 images. Go to the Label tab. Press Ctrl+A, Ctrl+C and insert the Label frame on the Base frame with the CTRL+V key combination (you can do it differently, as you are used to).
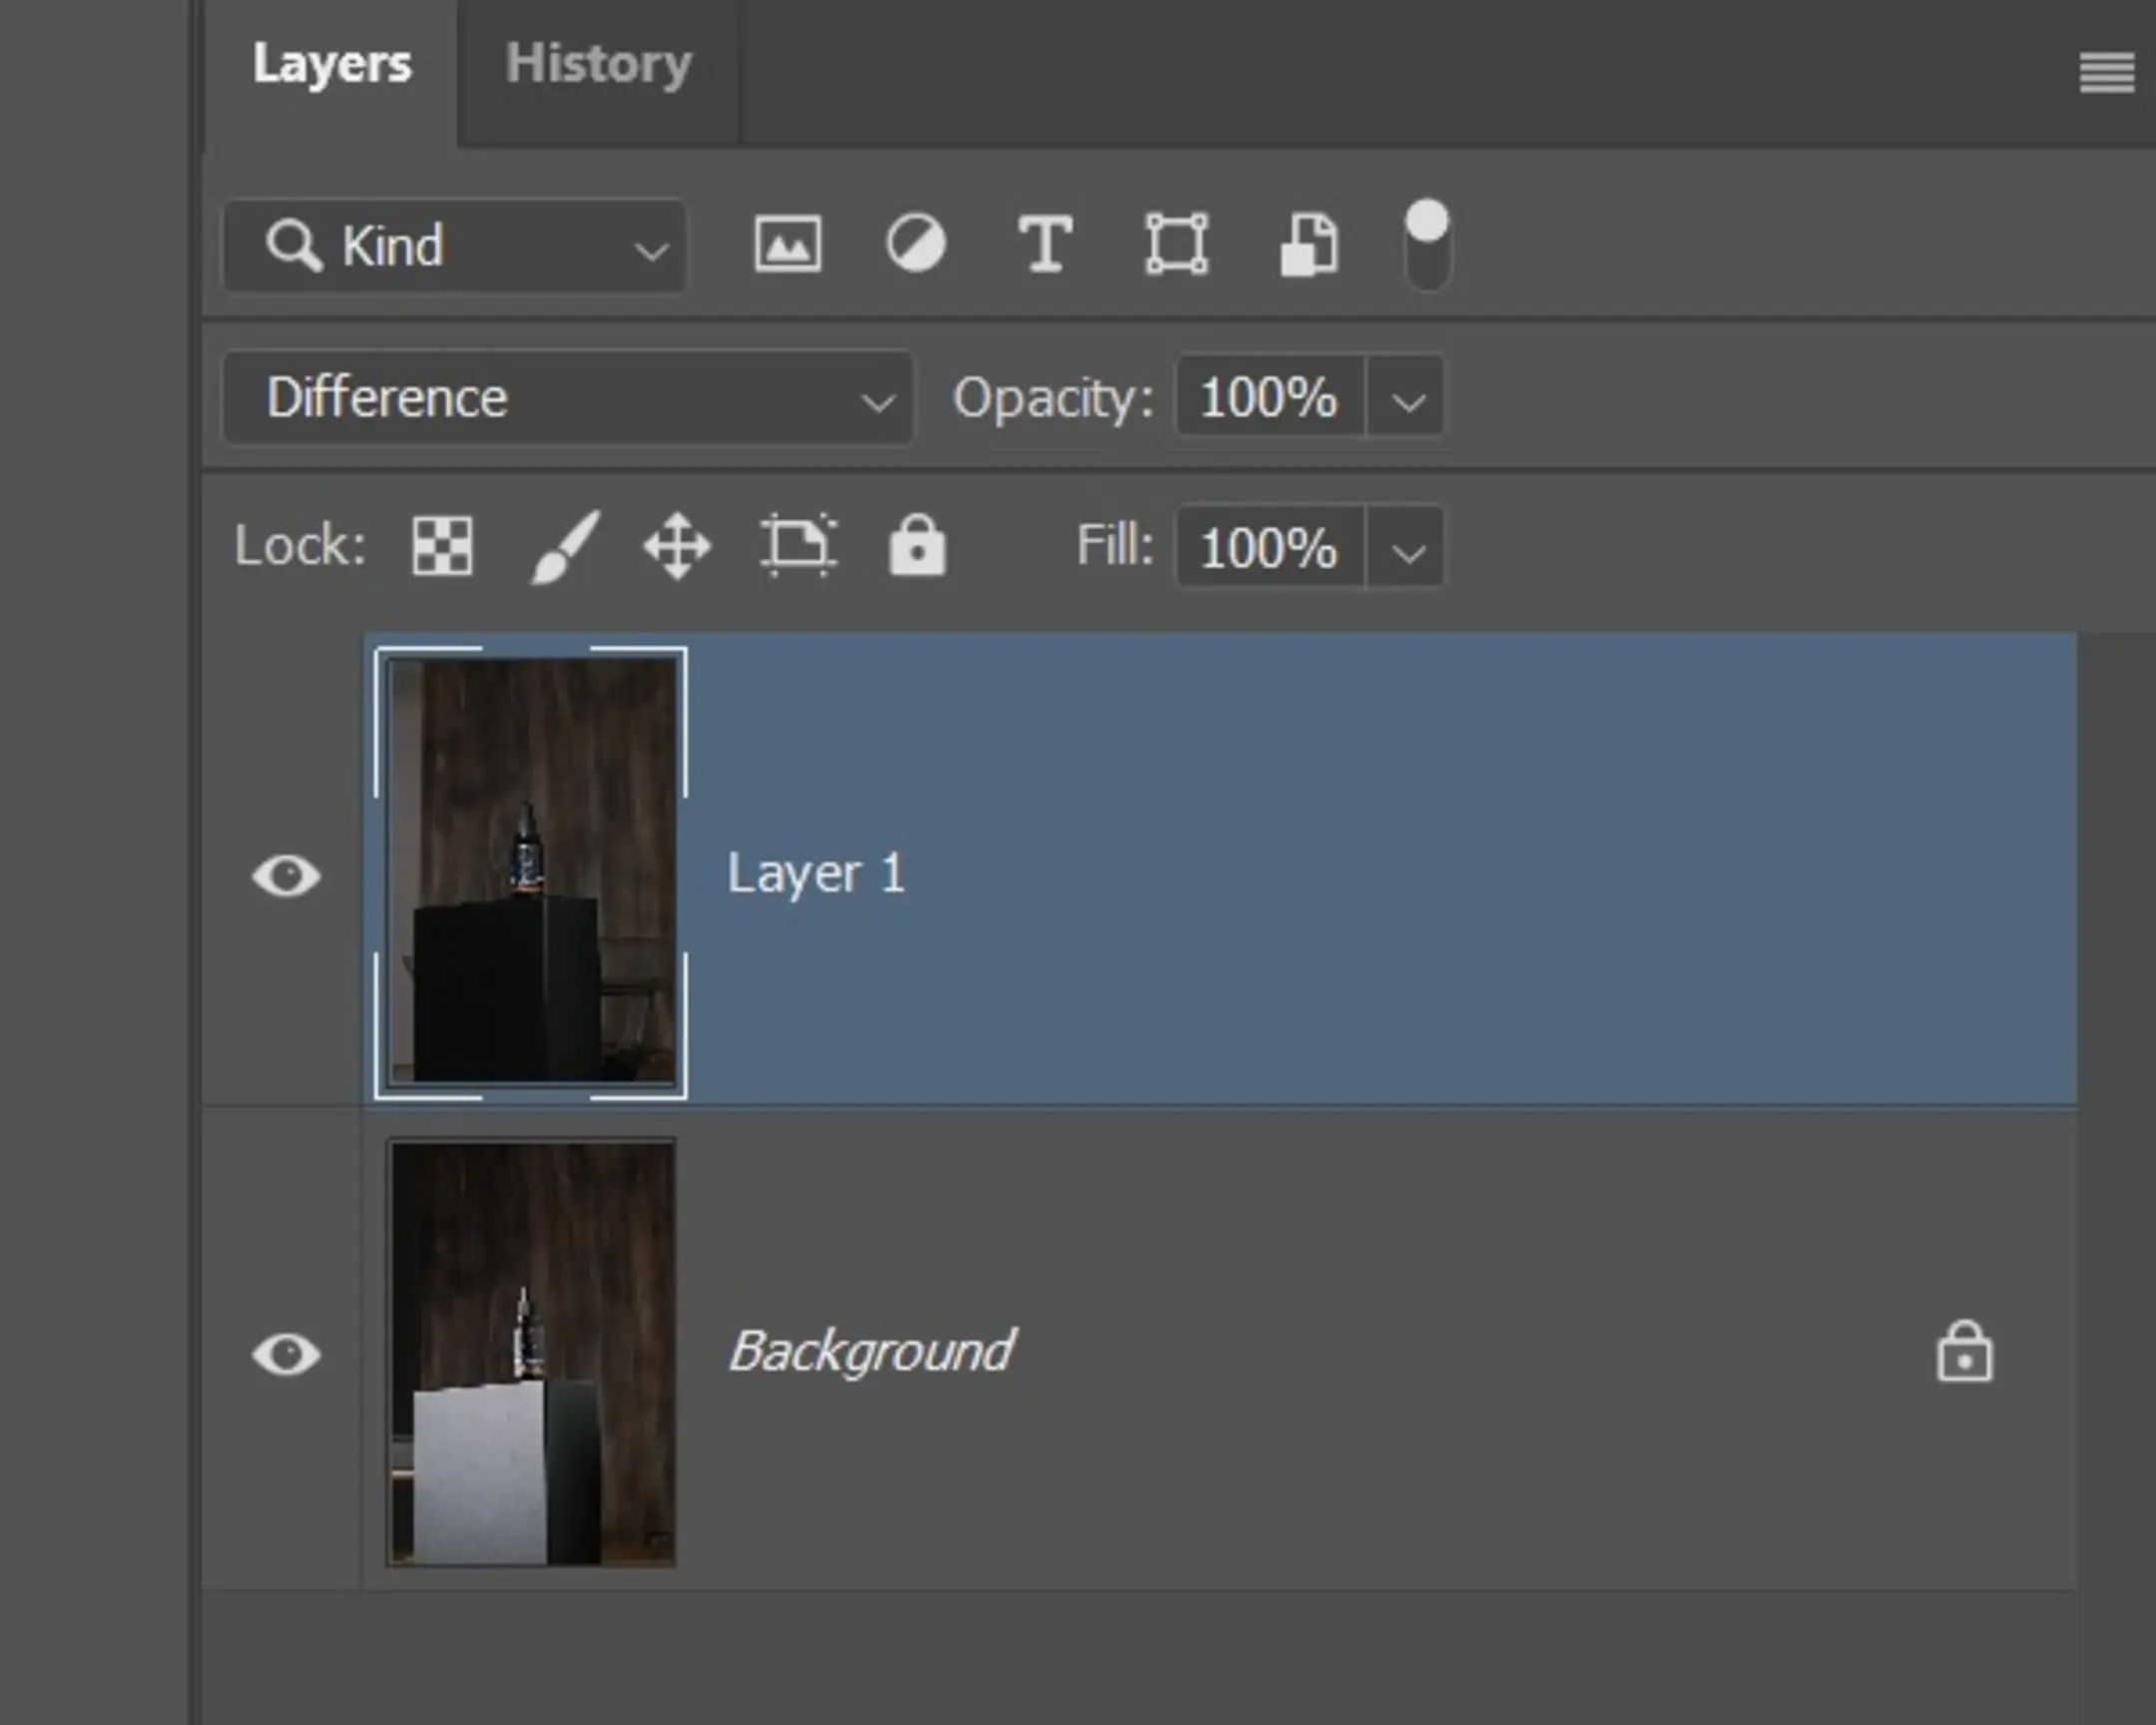
Set the Label to Difference blend mode and try to shift the image so that the letters on the label match perfectly.
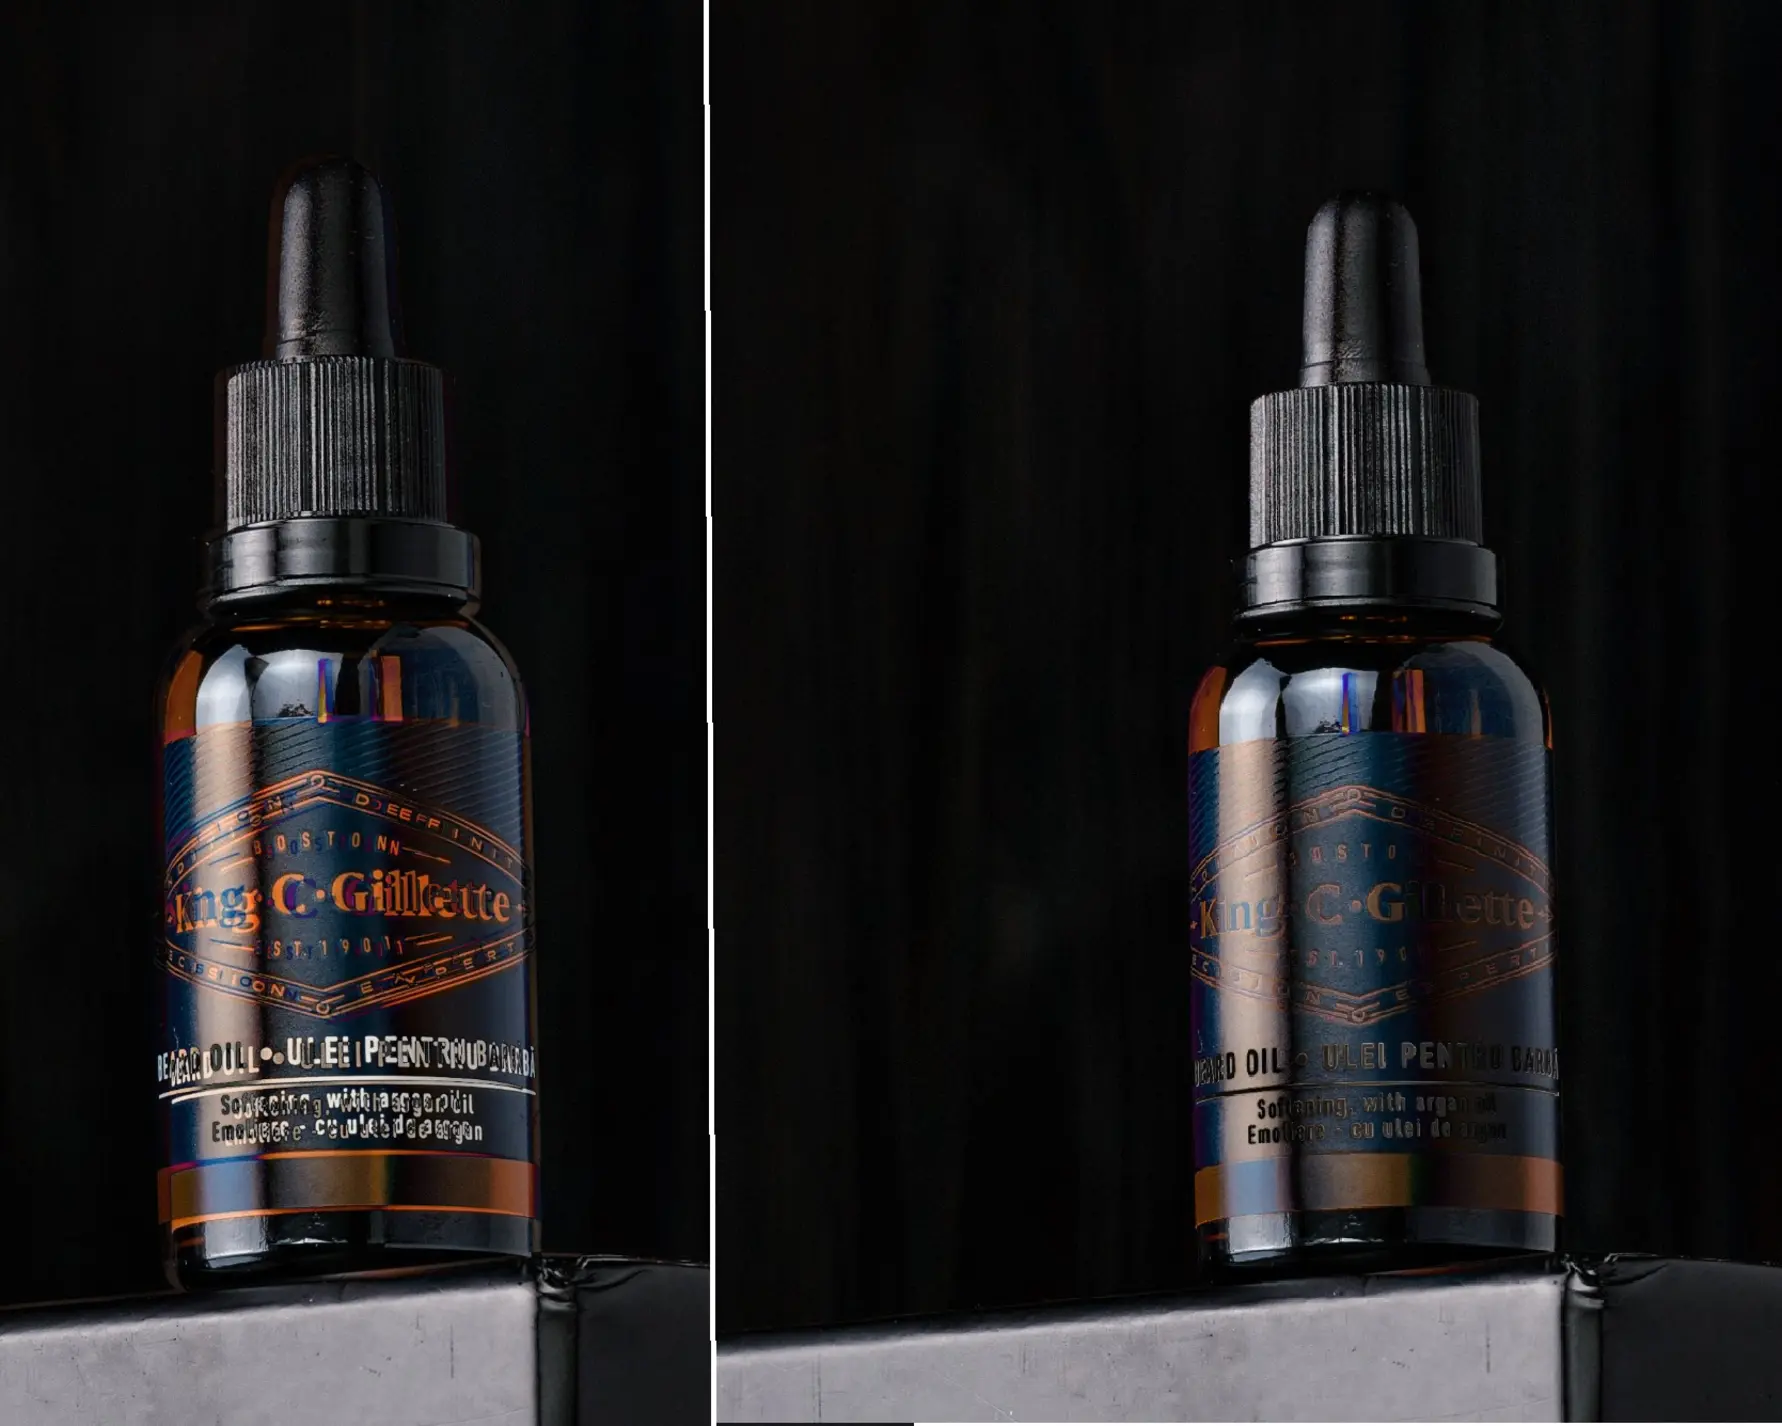
Using CTRL+T and arrows on the keyboard (or the Move Tool on the Photoshop toolbar), move the label layer relative to the background and combine the frames so that the contours of the main objects coincide perfectly. That will happen when the lines of the subject become completely black.
In the example on the left, a bifurcation of the letters on the label. On the right, the letters have already completely coincided and turned black.
Time to put on the masks and show the light. While on the Label layer, hold down the Alt key and click on the mask icon at the bottom right, or Layer->Layer Mask->Hide All. Select a white soft brush (hotkey B) and draw the light on the mask on the Label layer.
I set the layer LABEL to blend mode Linear Dodge (Add) adding light. And...
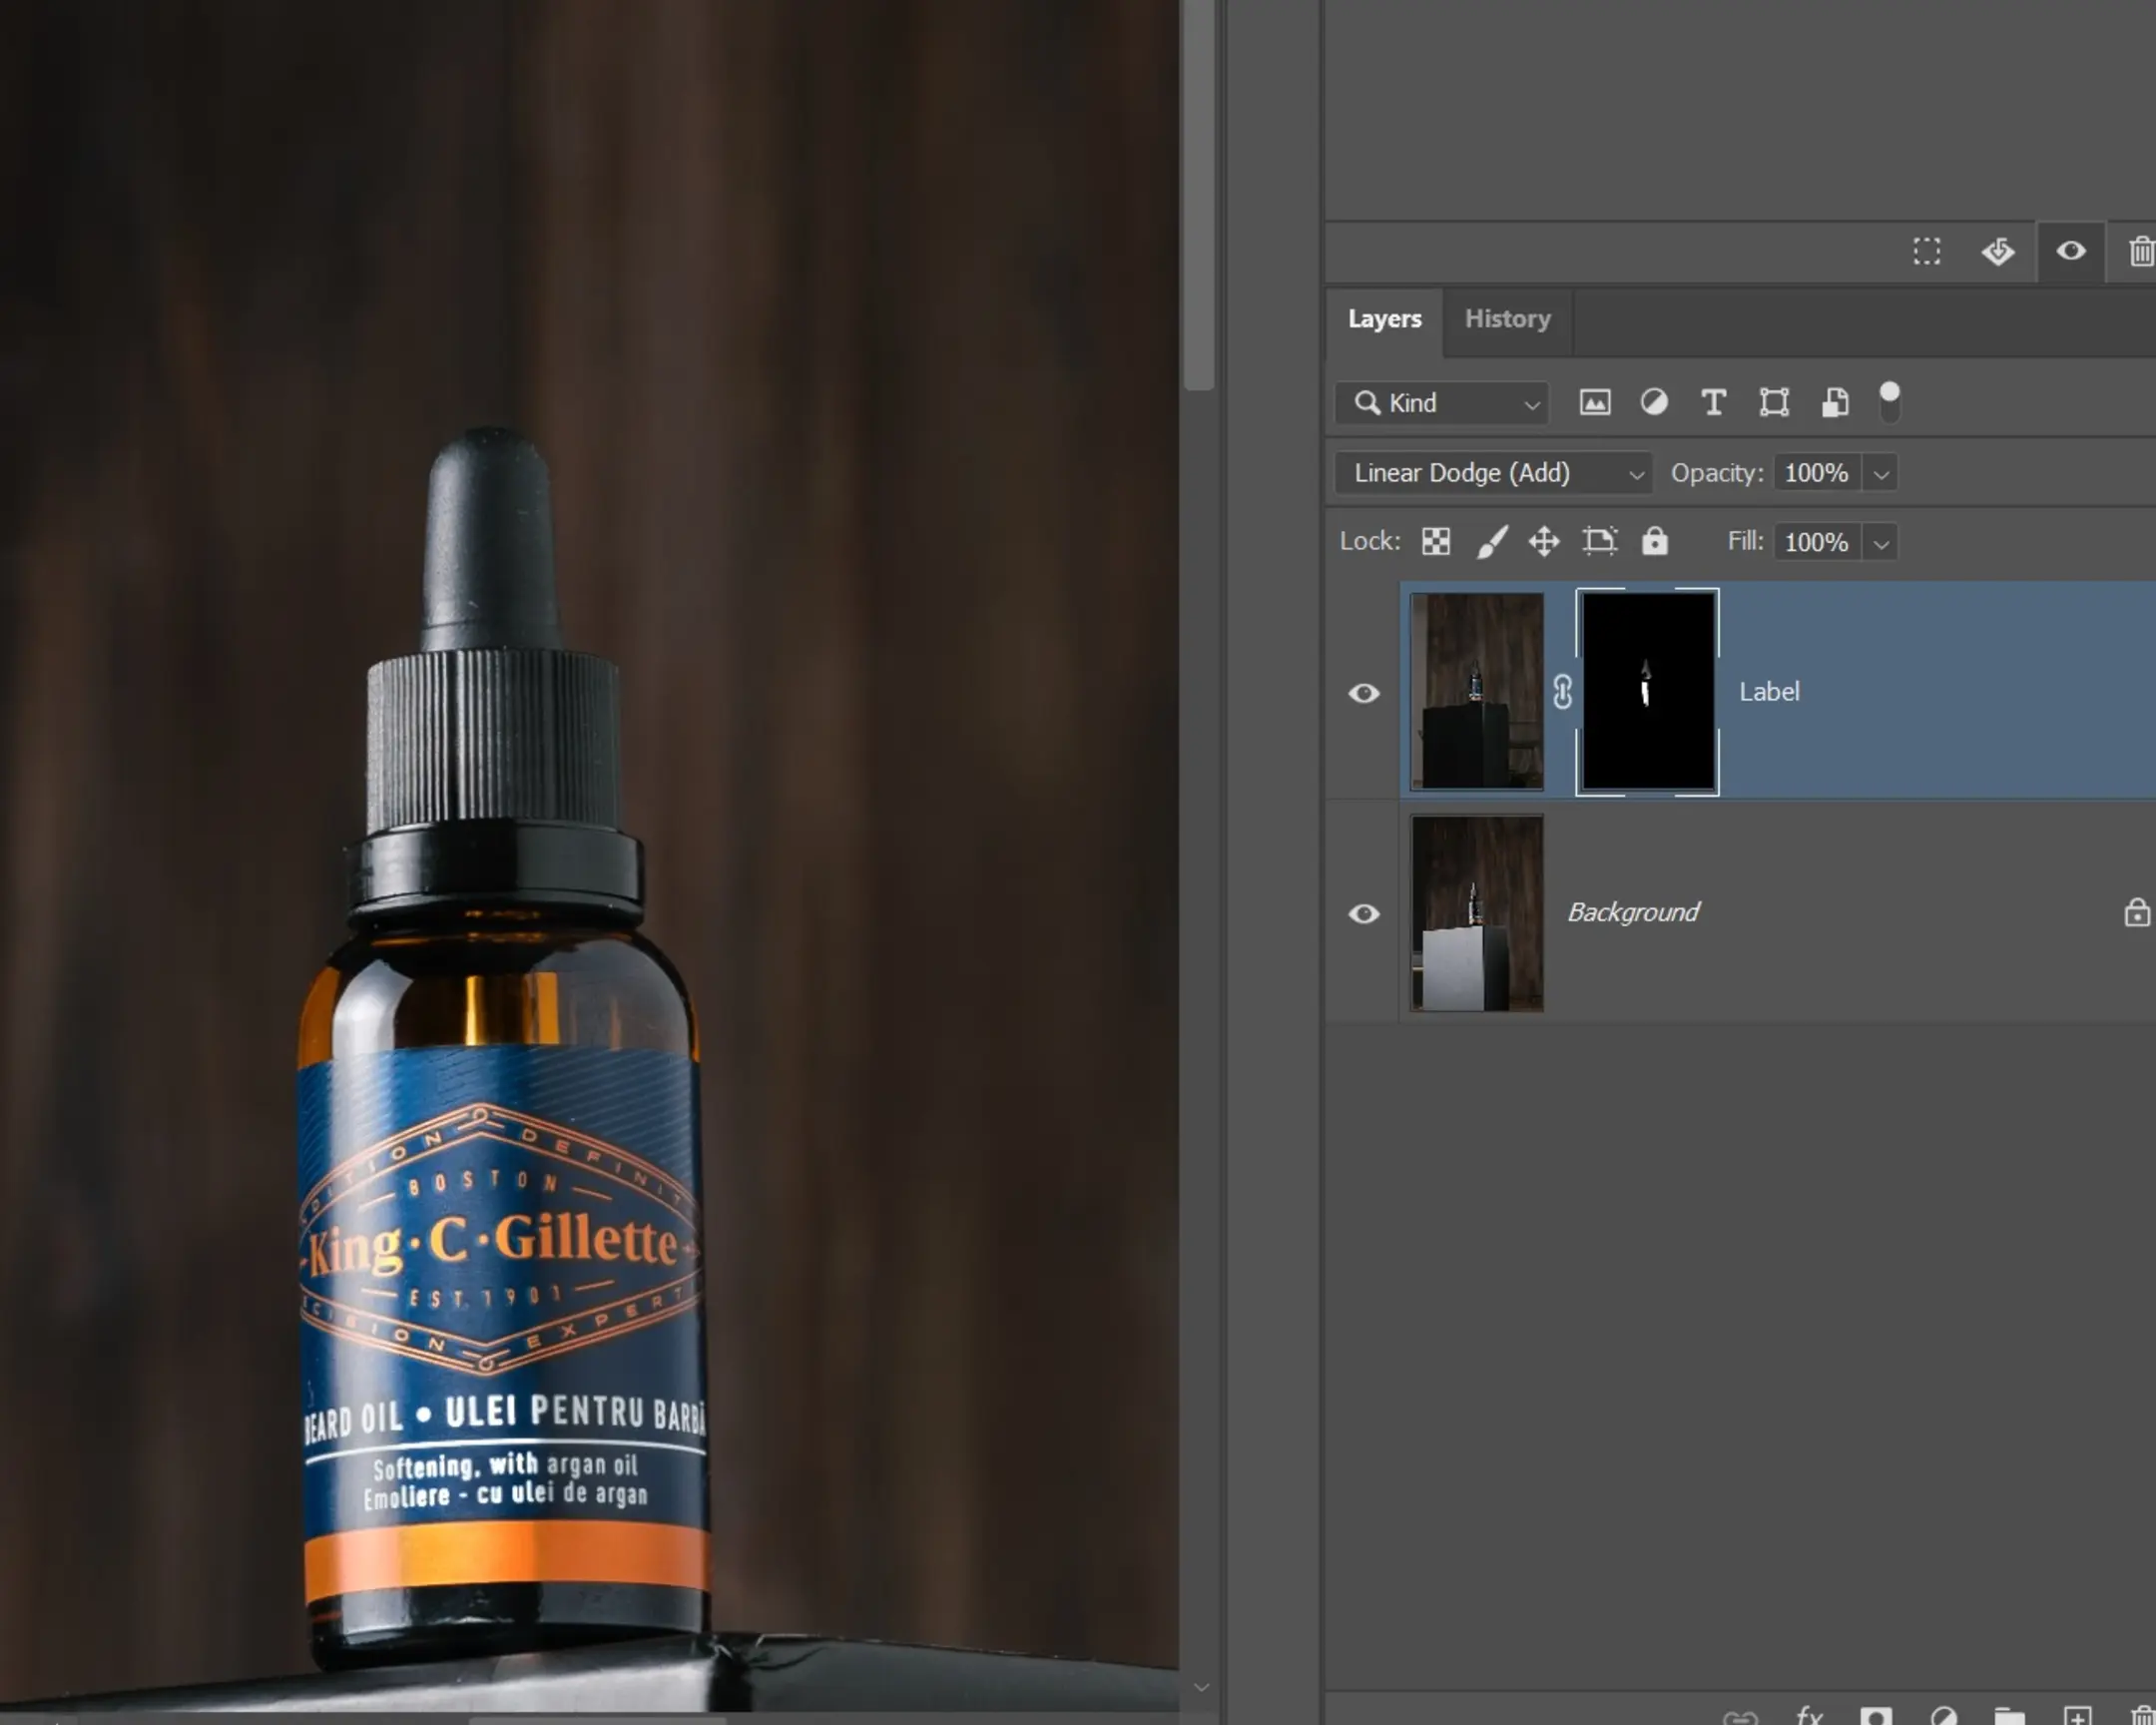
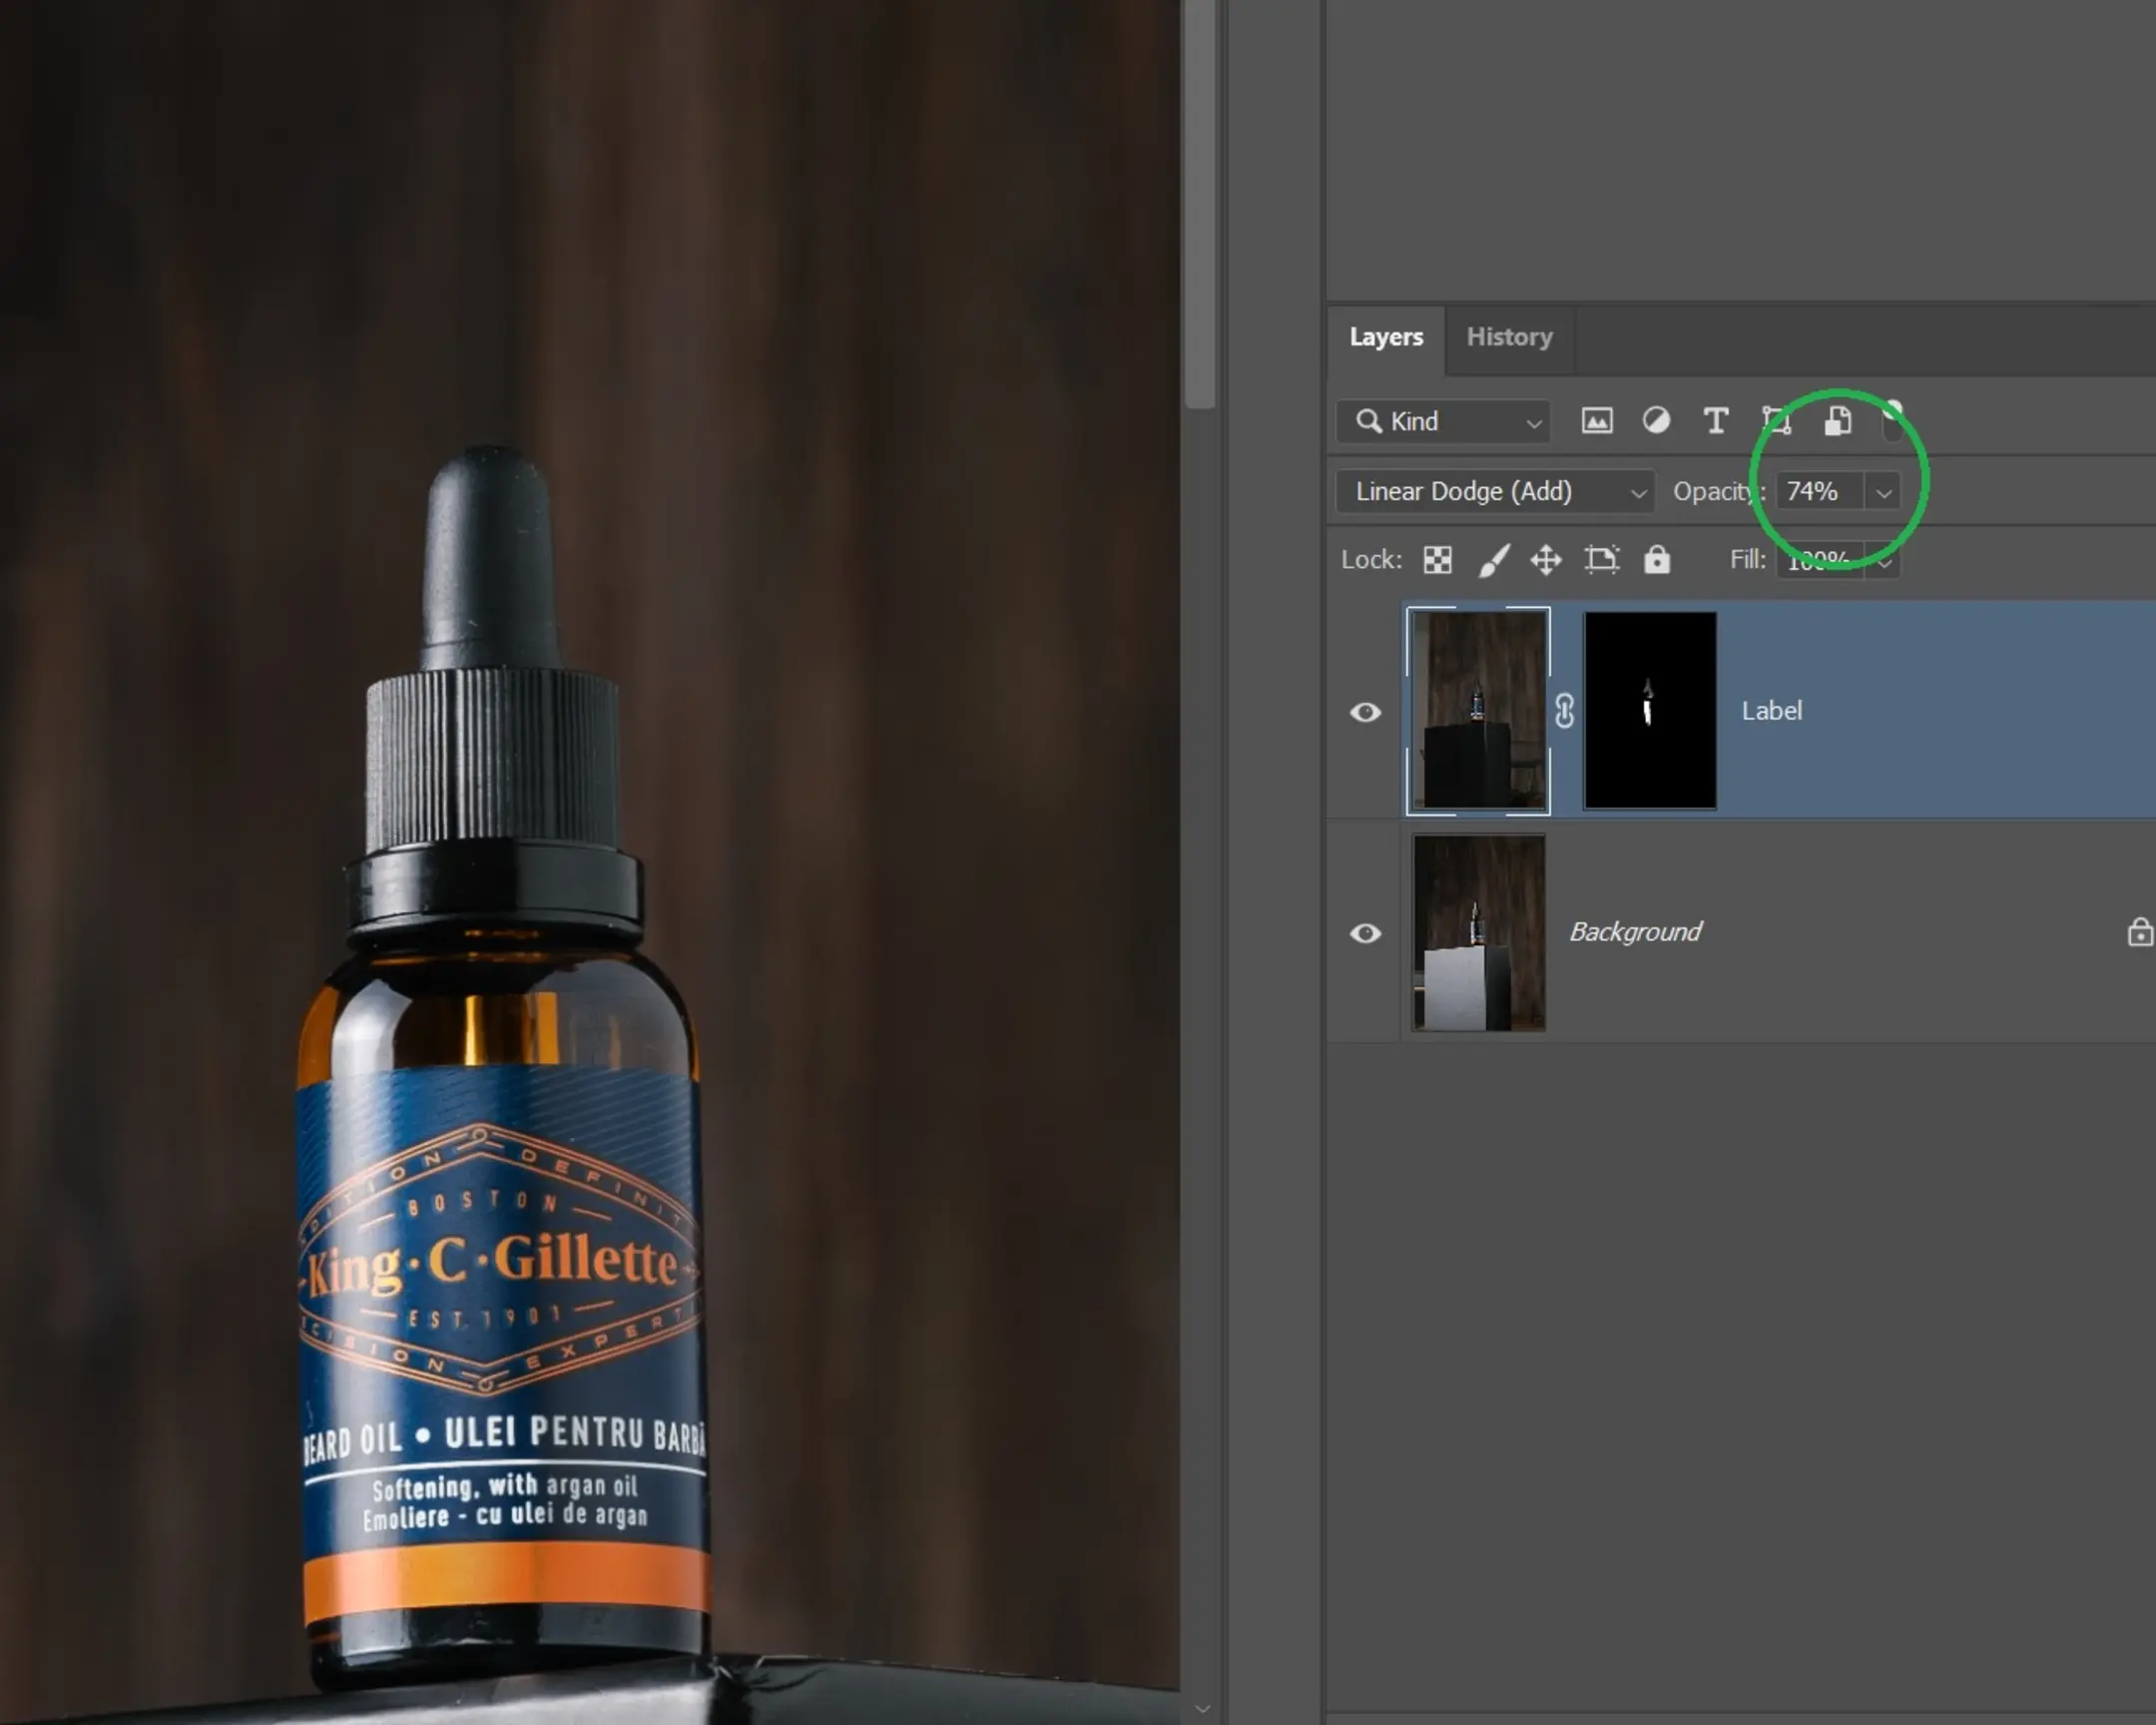
And I thought that for the label such an amount of illumination is already redundant. That can be fixed by changing the blend mode to NORMAL (which is essentially overlapping one layer with another) or changing the layer's transparency (which I did).
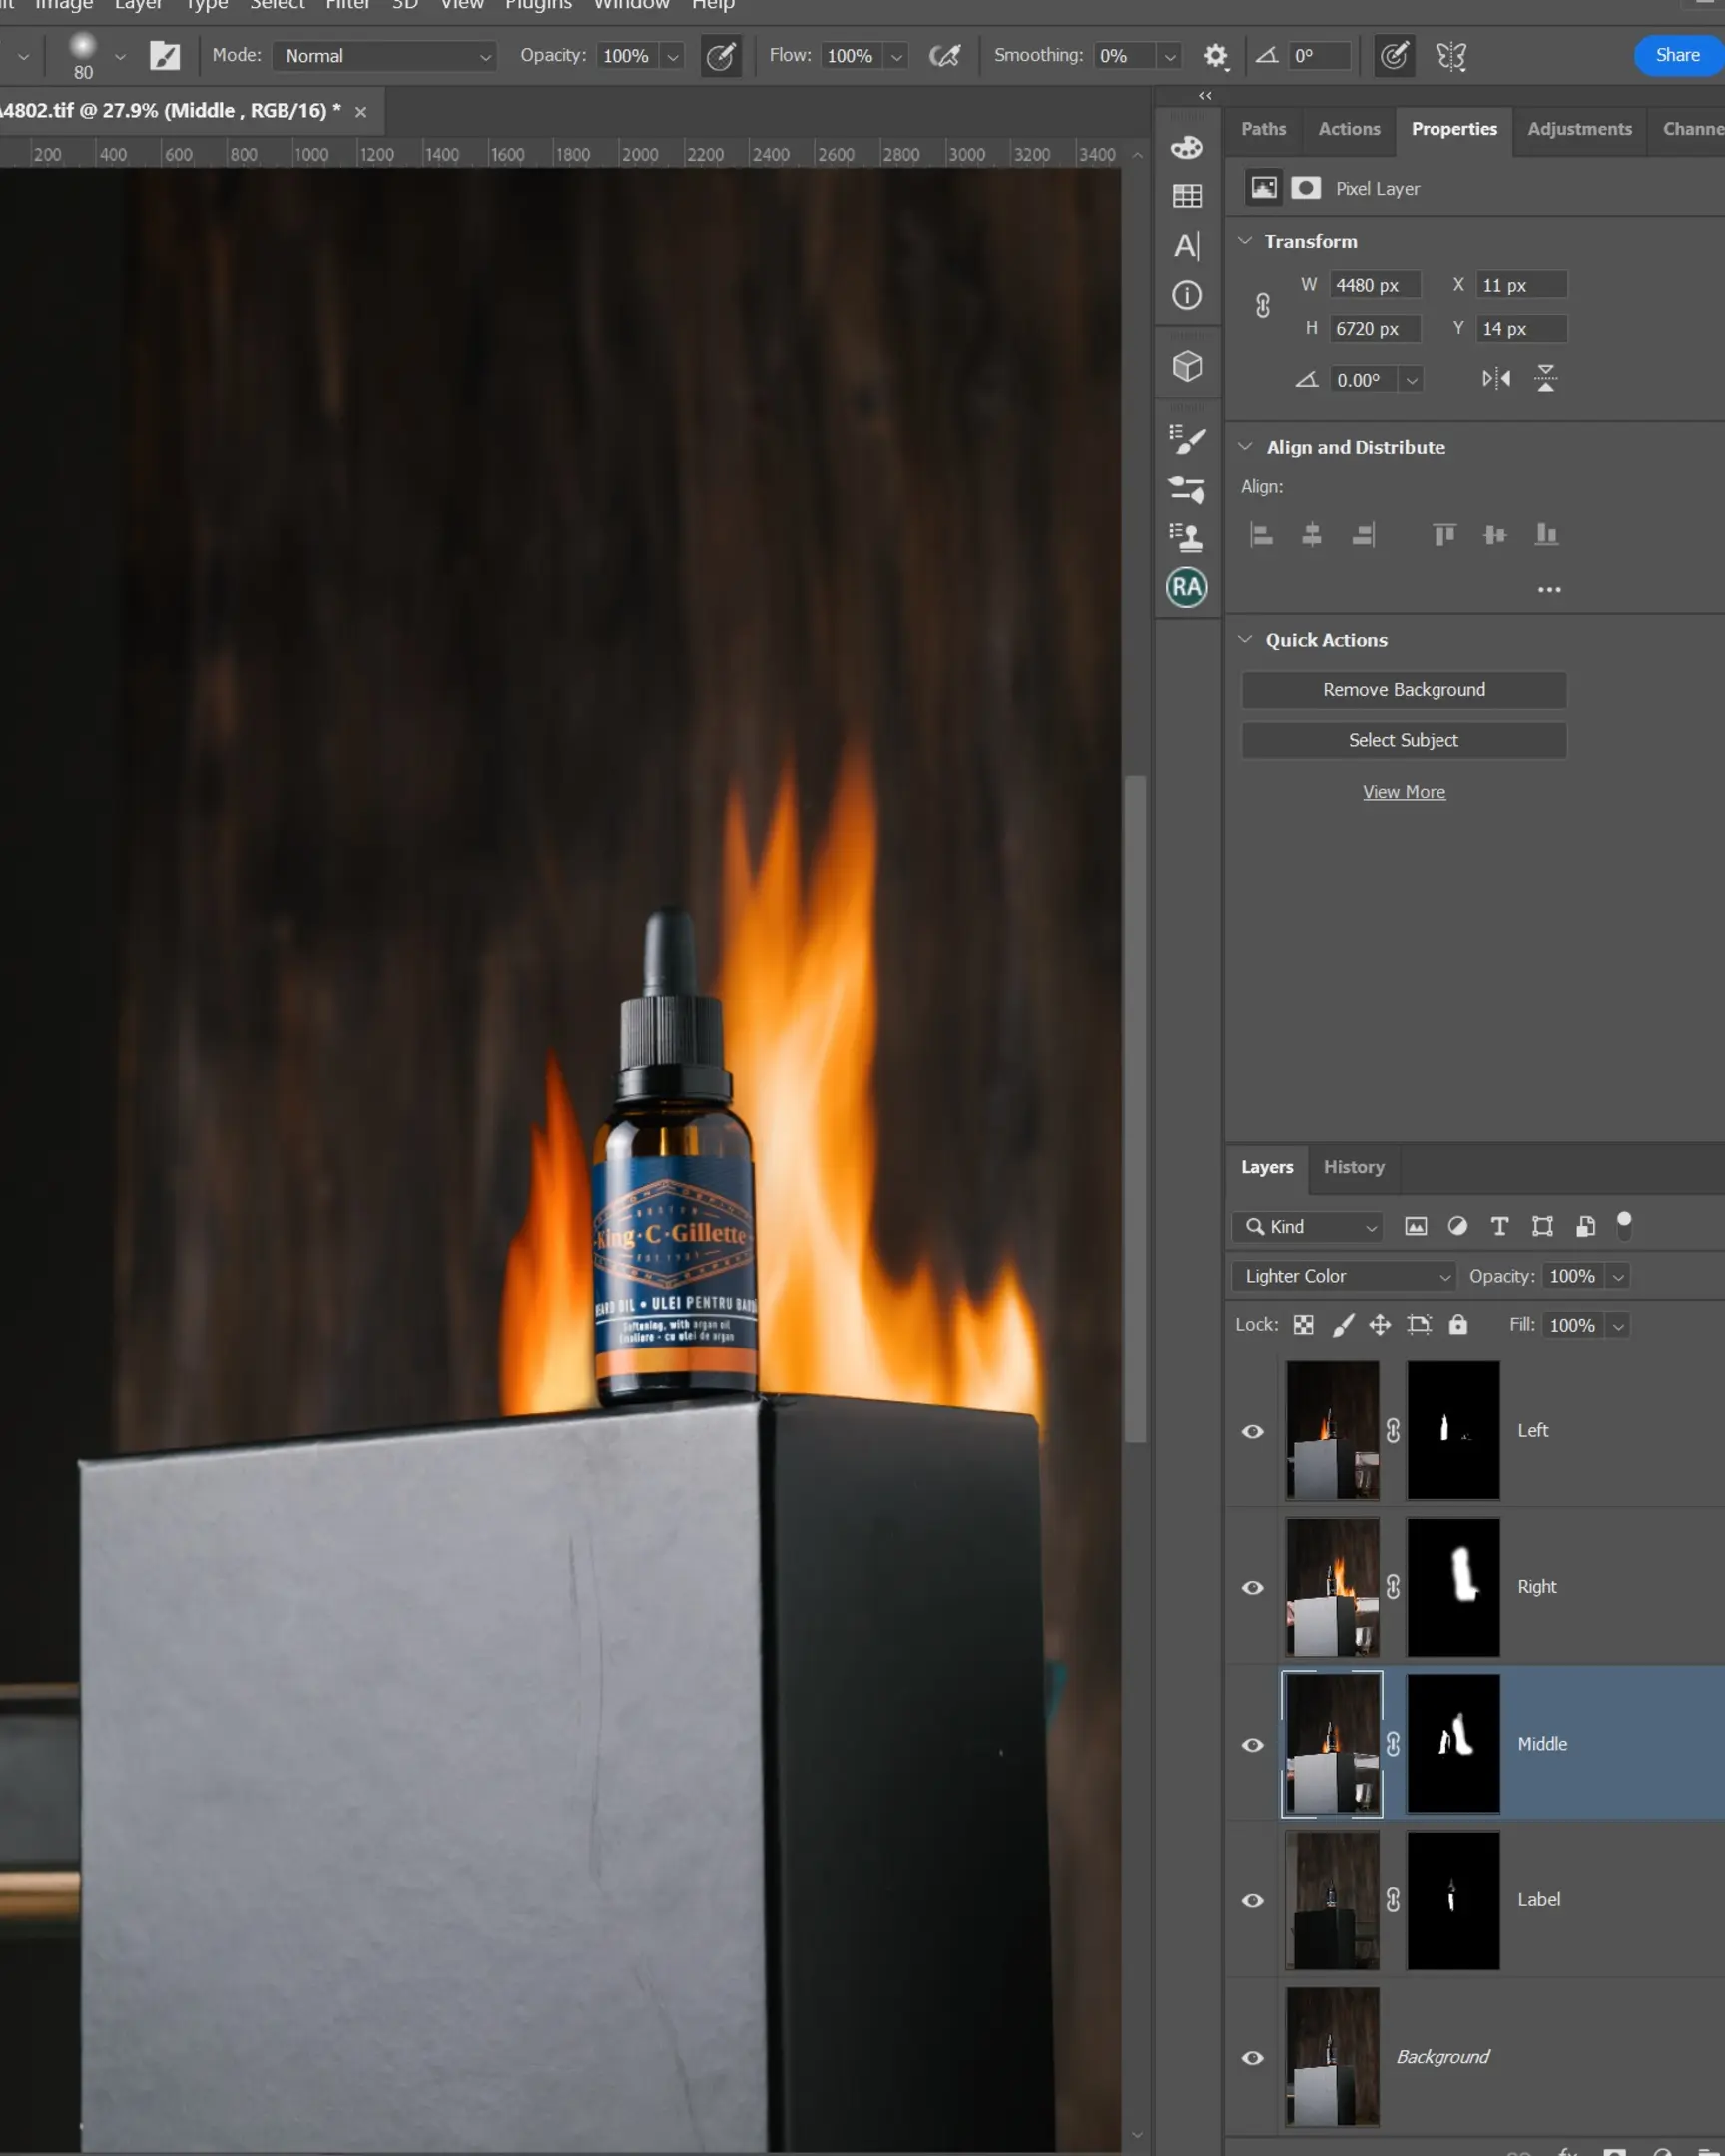
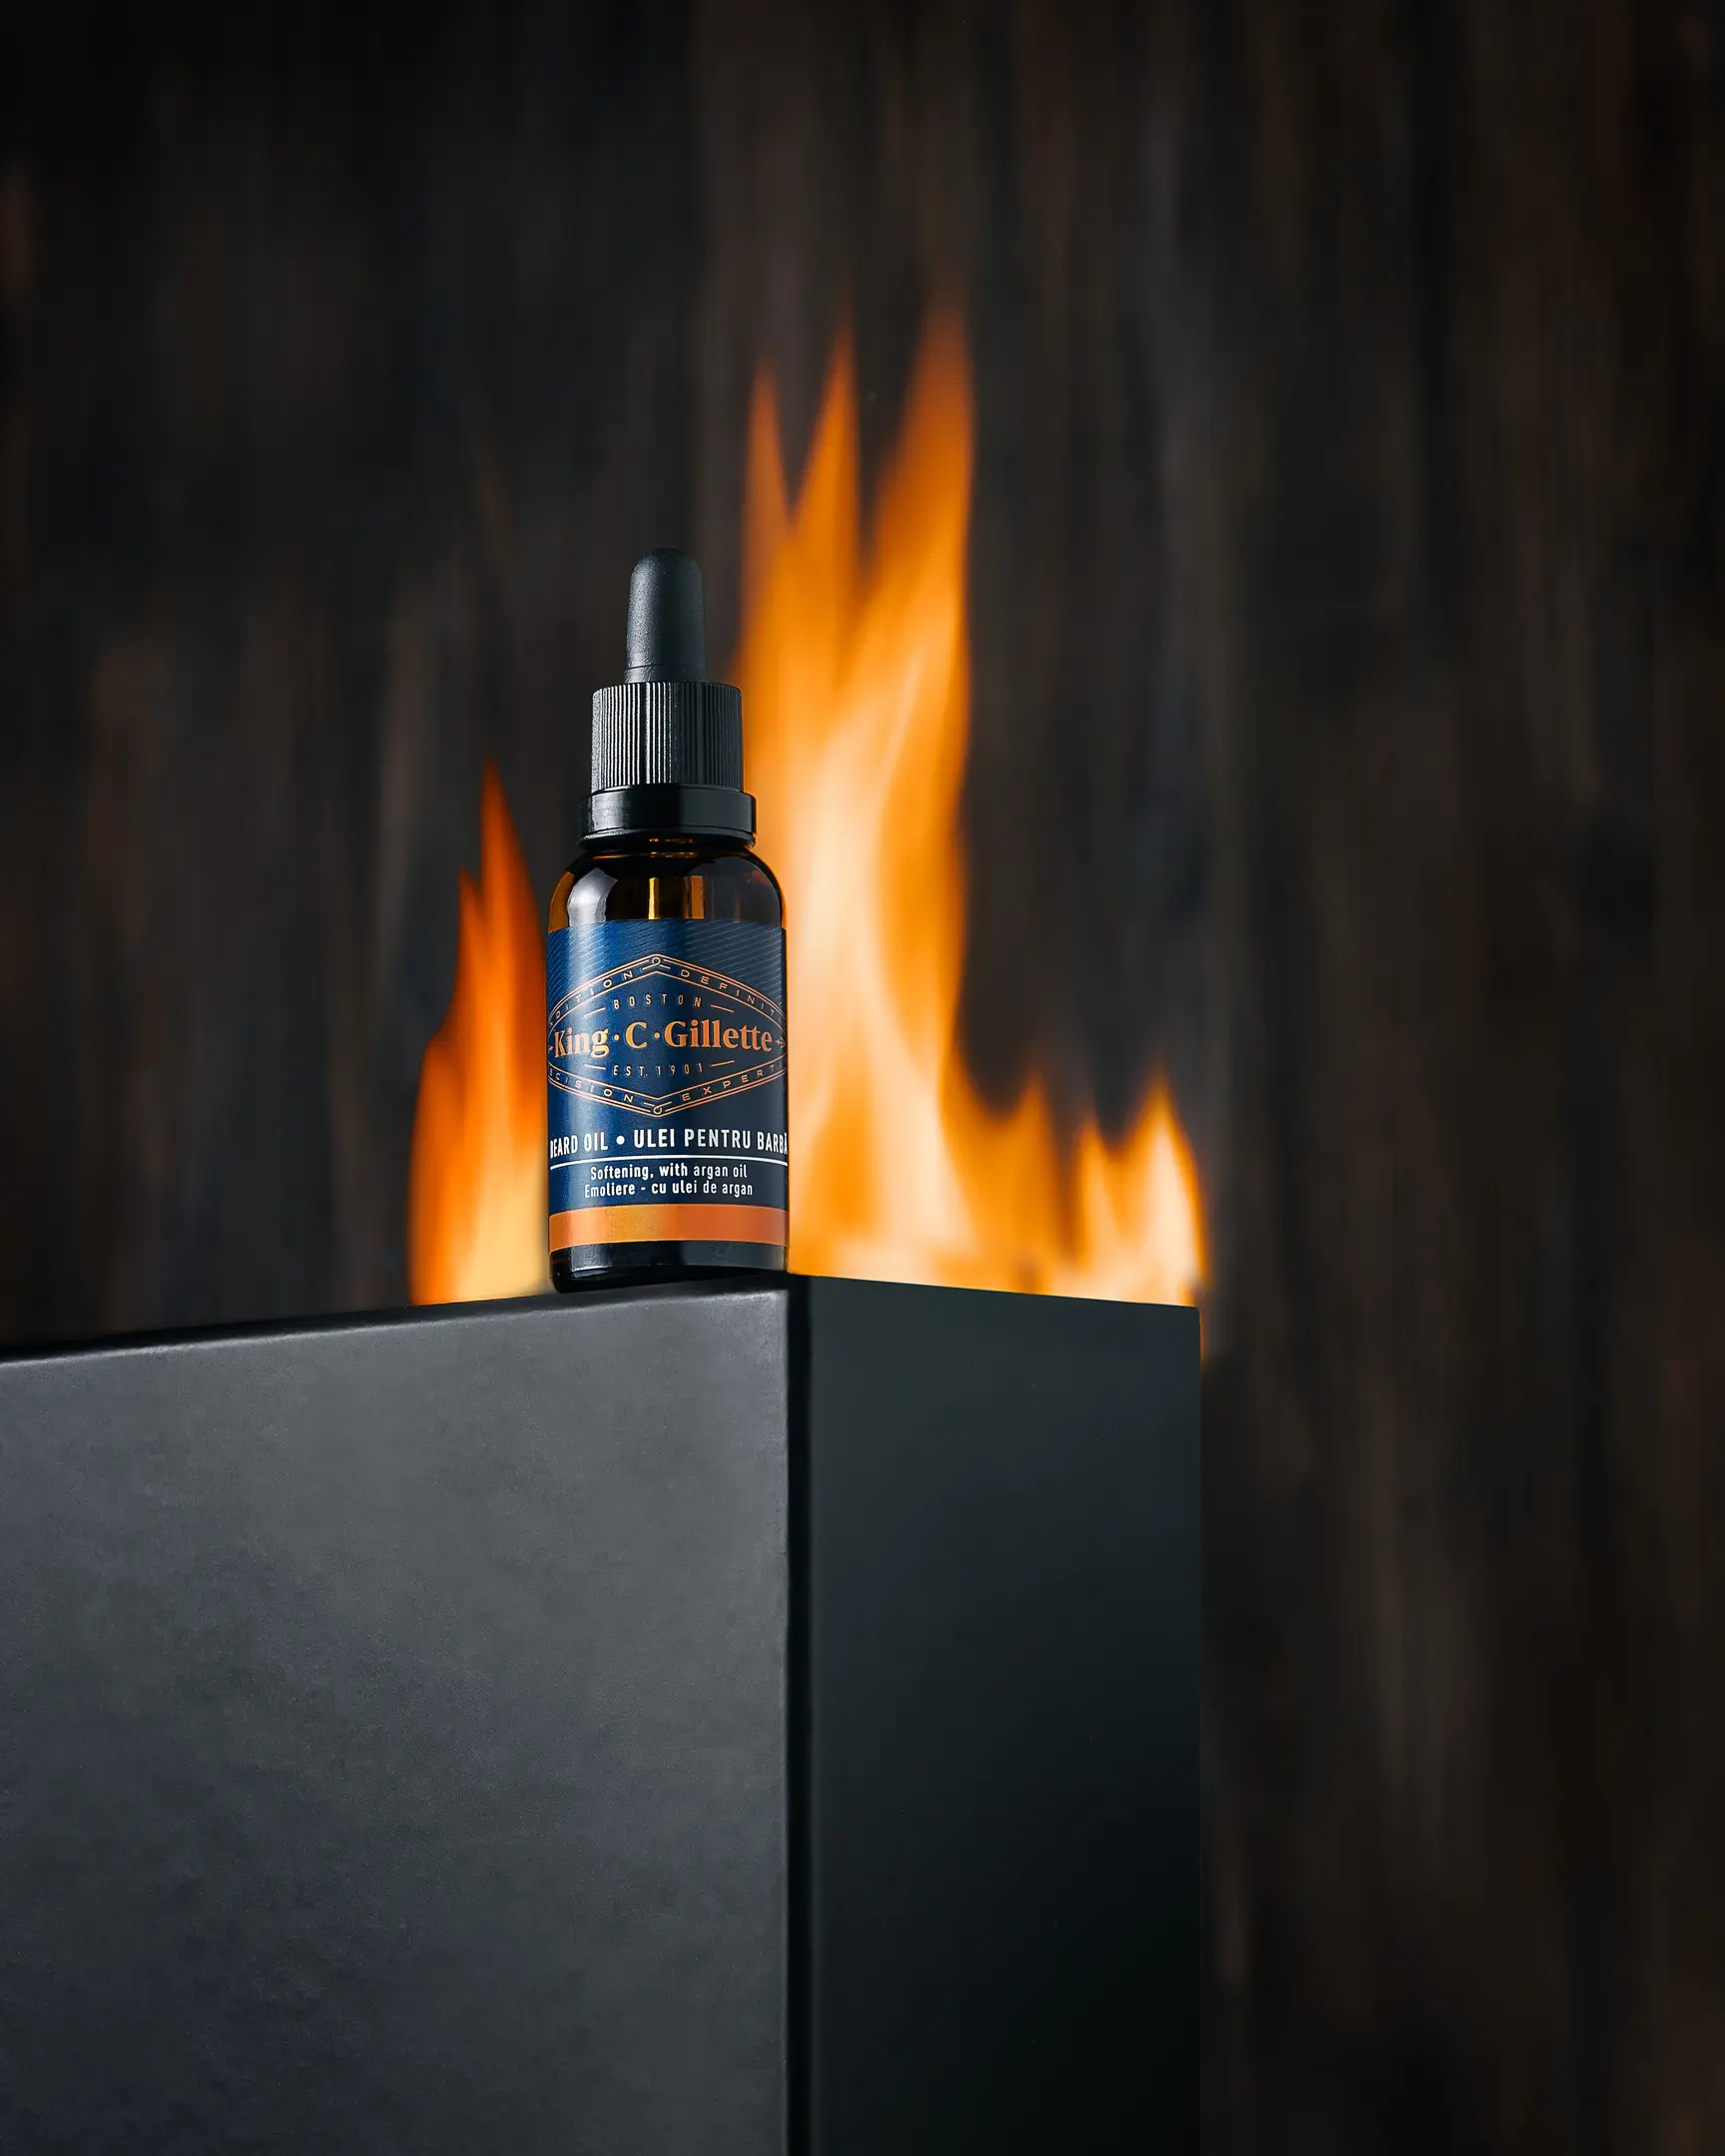
Time to add fire. And this means doing all steps 2-6 for other frames and using the mask to show on each of the layers a certain amount of fire. Let me remind you that the blending mode is either Liner Dodge (Add) adding light, or Lighten Color.
In this case, I liked using the Lighter Color layer blend mode better.
If you have any questions, would like to receive any clarifications or, maybe, share your results or experience - just shot me a message at Olga.Babitskaya@praleska.eu or on Facebook and Instagram.