How to put on fire and not get burned
Unveiling Creative Product Photography Techniques: A Dynaphos Master Class
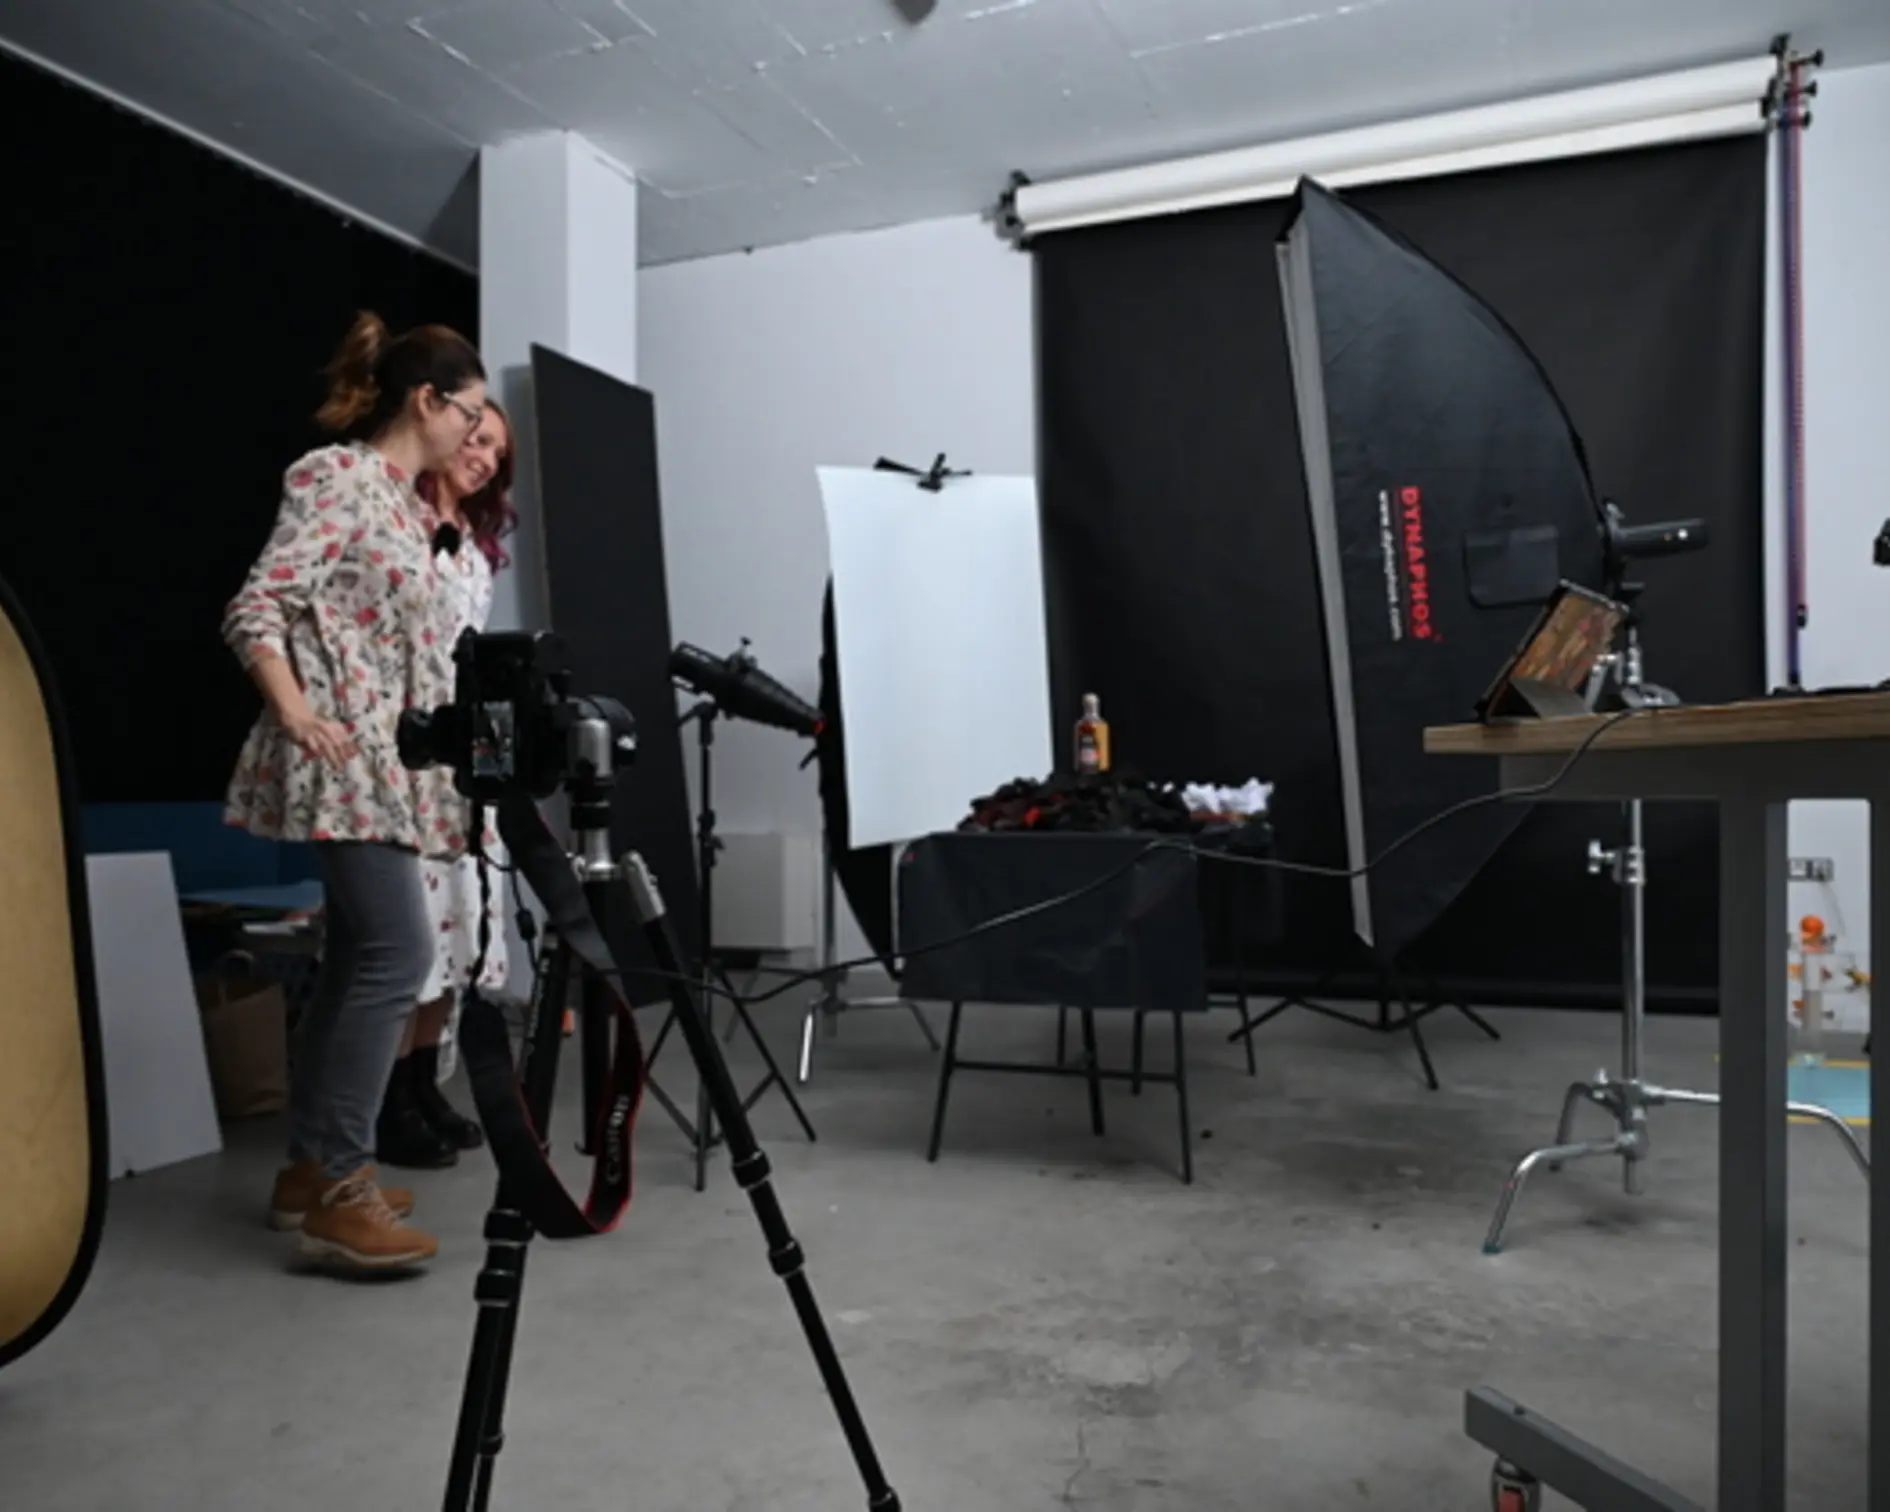
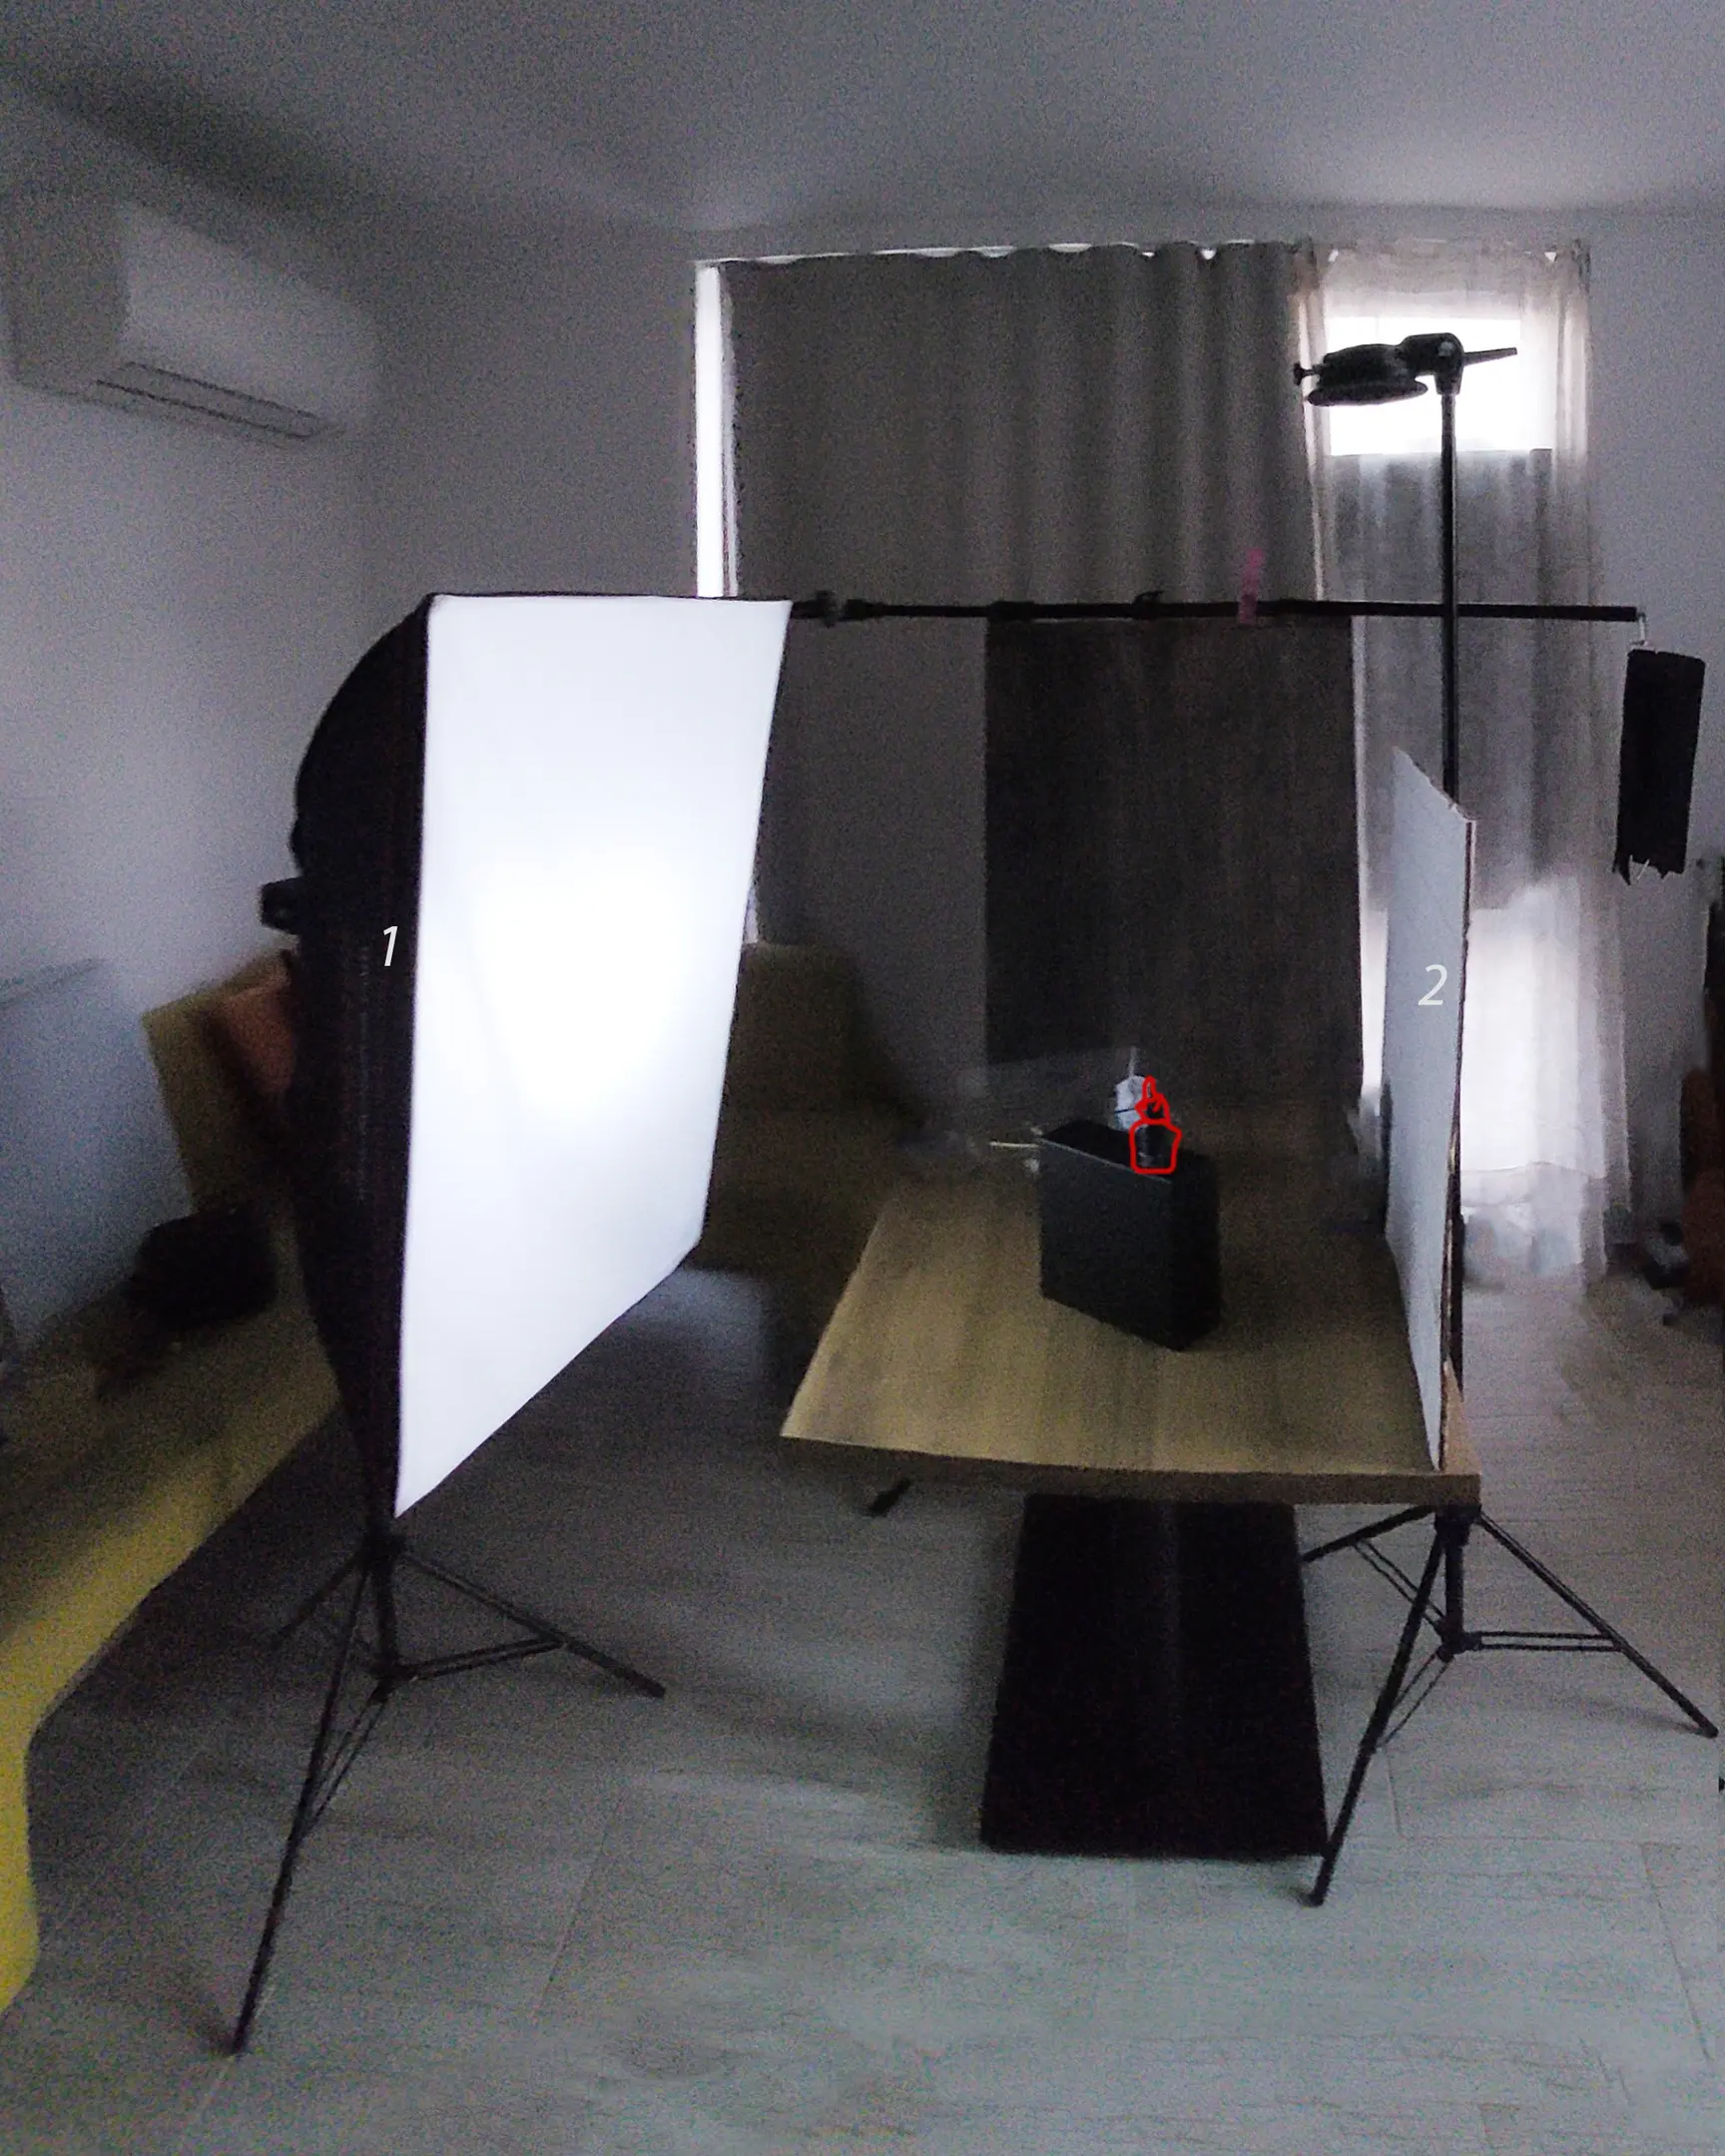
Together with Dynaphos, we recently hosted an exclusive photography master class that delved deep into creative shooting techniques. The first demonstration showcased realistic fire effects and the dramatic impact of flaming coal, while the second revealed the illusion of levitating objects through clever special effects.
The full video of this insightful session, packed with advanced product photography techniques, is available on Dynaphos’s Facebook page.
Dive Deeper into Creative Product Photography: Master Class Insights
Due to the active audience participation and immense interest in the material shown during our master class, we decided to provide this additional, detailed guide. It explains every step taken in depth, offering practical tricks you can immediately apply. You’ll even find materials here to practice and elevate your own photos!
In this comprehensive guide, you will discover several advanced approaches to creating truly unique shots. This includes captivating photos with coals, mastering the art of working with smoke, and, of course, stunning pictures with real fire.
Grab a cup of tea or coffee, and let’s begin our detailed journey into fire product photography with the first impressive shot – featuring a real flame.
The Art of Product Photography: From Concept to Capture
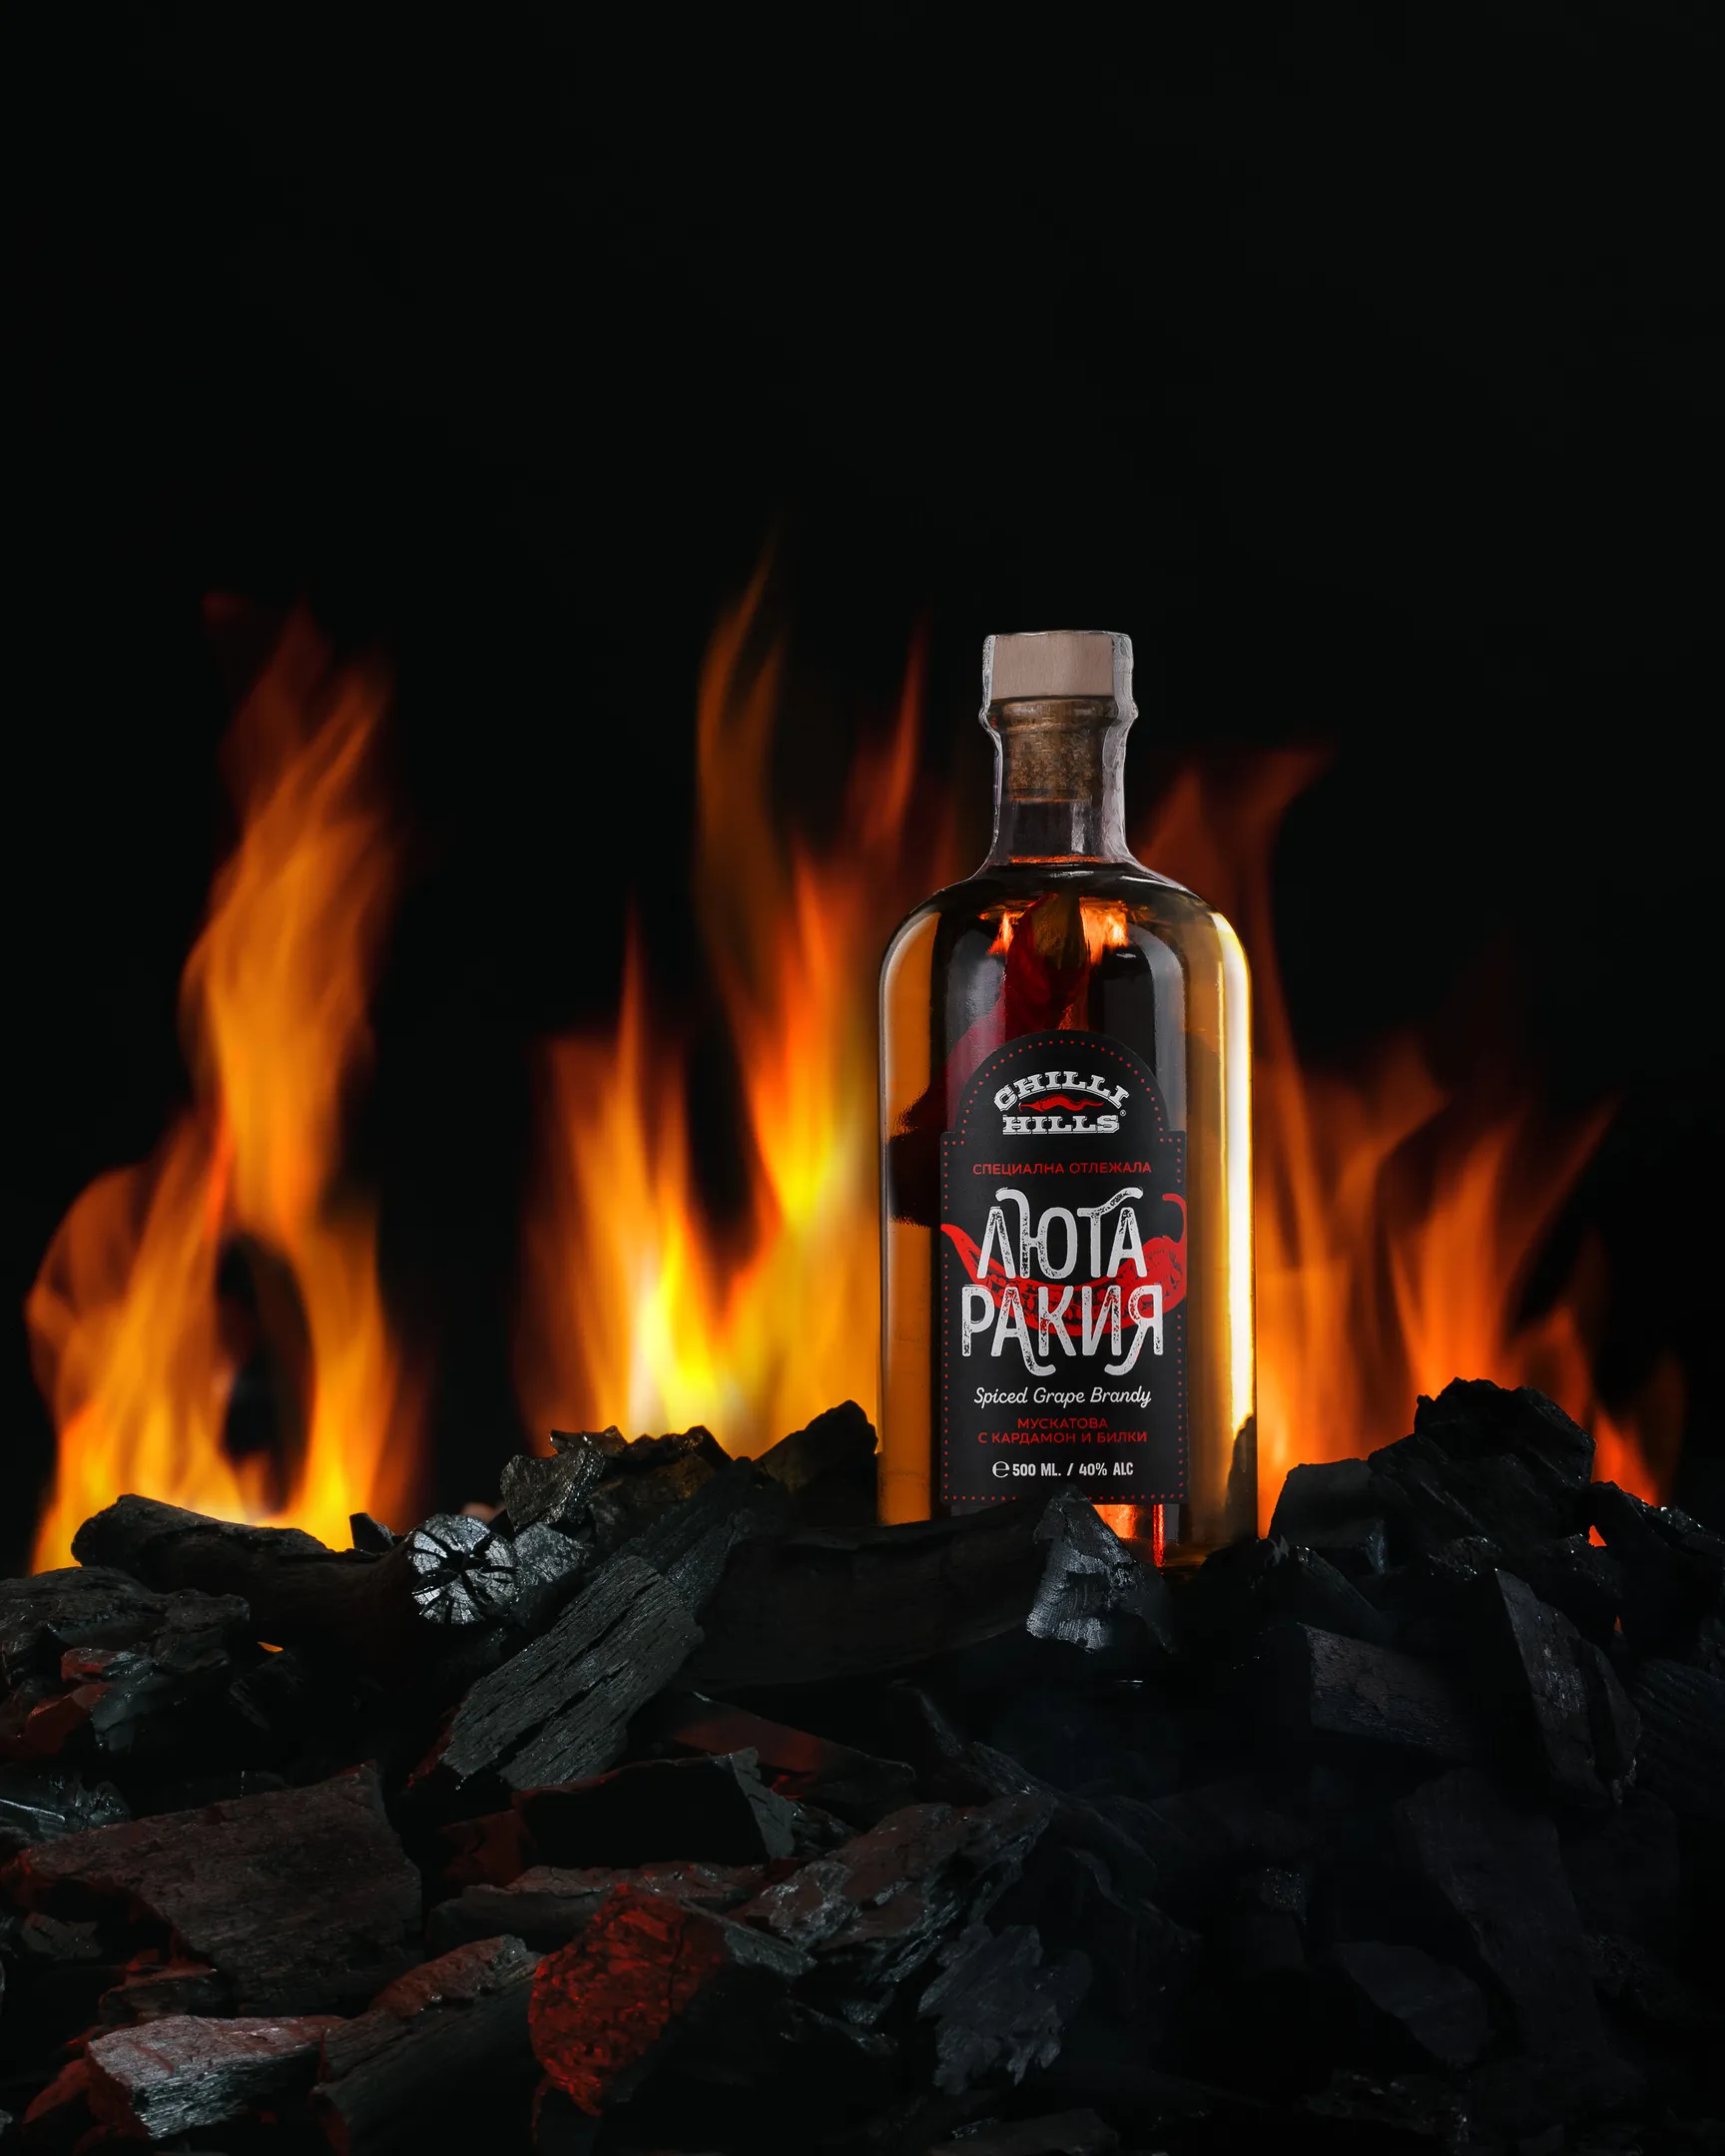
In the workshop, we specifically worked with Rakia (by Chilli Hills), focusing on the intricacies of capturing their specific brand identity.
The entire process begins long before the photographer even receives the subject. It starts with the initial client consultation where they articulate their wishes. You then amplify these wishes with your expertise, inspiration, and creative ideas for the entire photoshoot.
What exactly will we shoot? How? From what perspective? What supporting items should be used in the frame? What special effects are necessary? All these crucial questions must be thoroughly considered before shooting any product or food.
Brainstorming and Pre-Production for Unique Product Shots
The selection of ideas starts with searching for interesting works on the Internet that align with the concept or the specific product. A fantastic starting point for visual inspiration is Pinterest. However, every professional photographer typically has their own curated list of favorite resources.
Once a solid idea is established, further development of the project commences. Specifically, this involves determining:
- What stunts and special effects will be incorporated into the shot?
- What equipment and props are essential for this creative session?
- How to effectively arrange the studio lighting?
- What key features are absolutely important to highlight in the object?
- How do I need to illuminate the object for optimal presentation and clarity?
- Is it necessary (and will the client allow it?) to remove labels or make other modifications?
Crafting the Fiery Concept for Chilli Hills Rakia
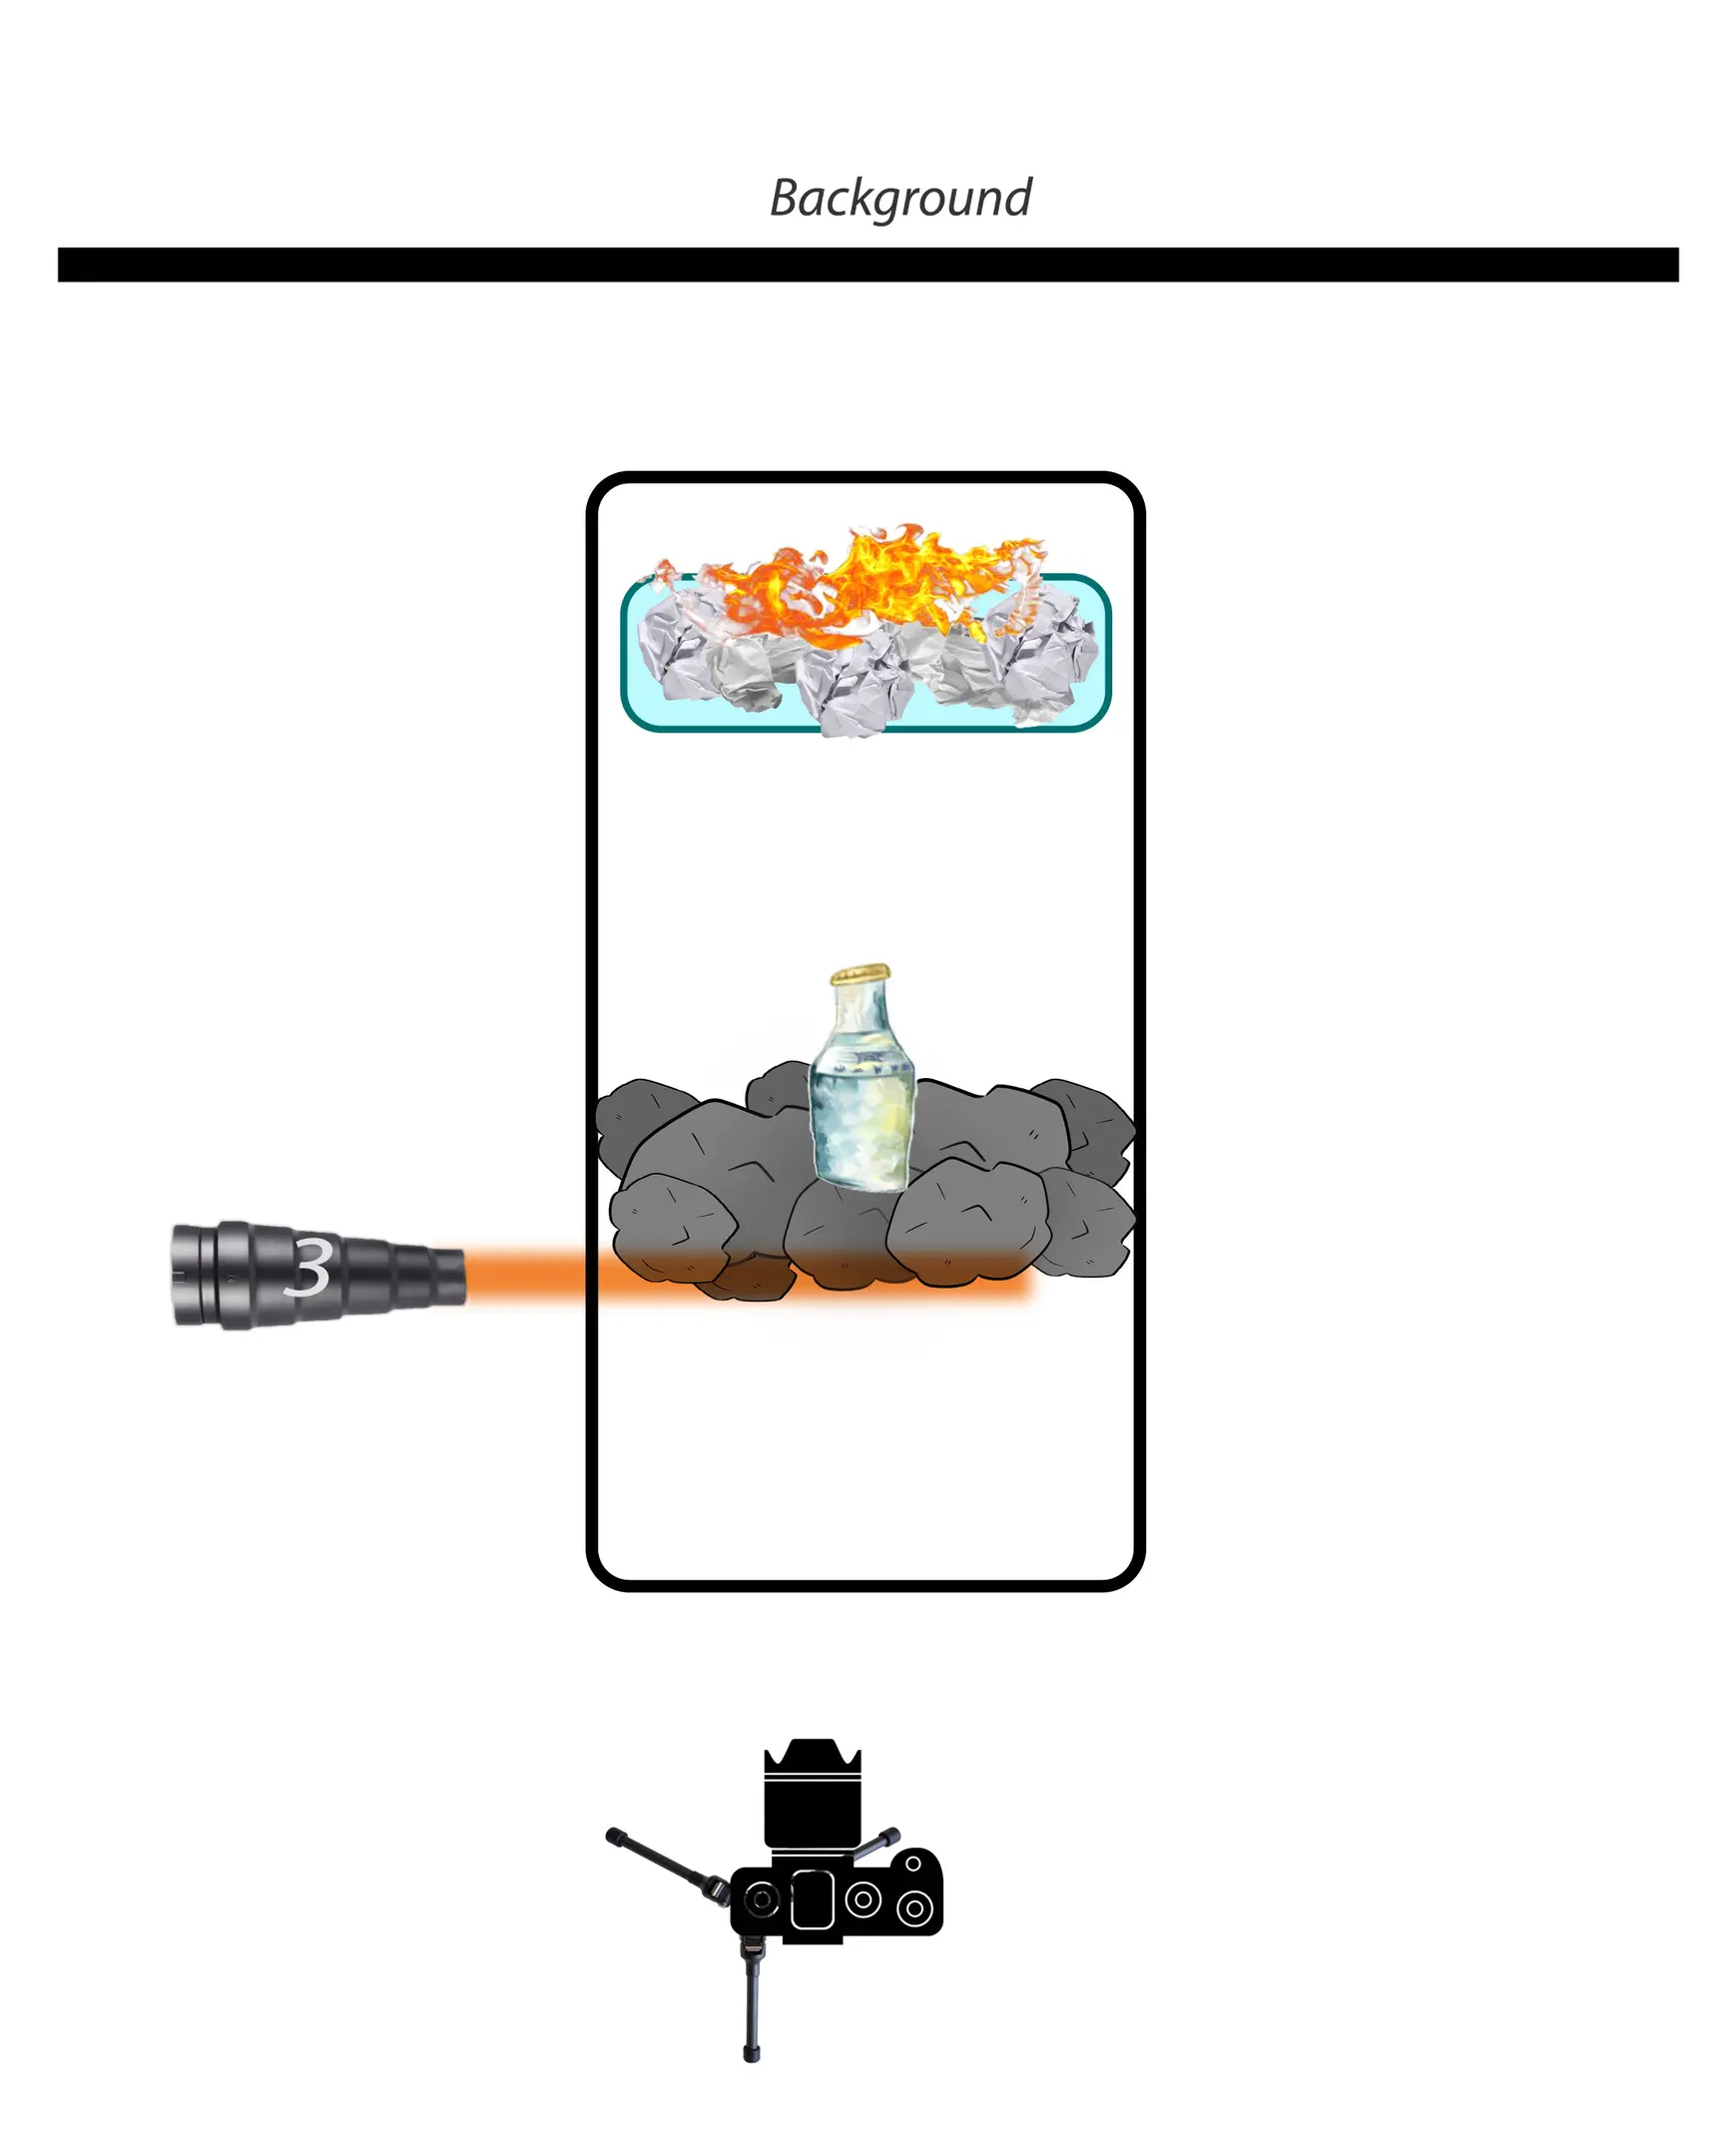
When I conceptualized the Chilli Hills Rakia shoot, I started from the playful wordplay: “Lyuta Rakia” – why fierce? Because it is crafted with hot peppers. Additionally, brandy is a strong drink, high in “degree,” and with added pepper and spices, everything will undoubtedly burn. Therefore, I decided to convey to the viewer the idea that this alcohol is so “hot” that placing it on coals will heat them to a fiery red and cause a flame, creating a powerful and memorable concept.
Mastering the Lighting Setup for Fiery Product Photography
Then I began to consider how many light sources would be needed for this complex setup, especially for capturing realistic fire effects.
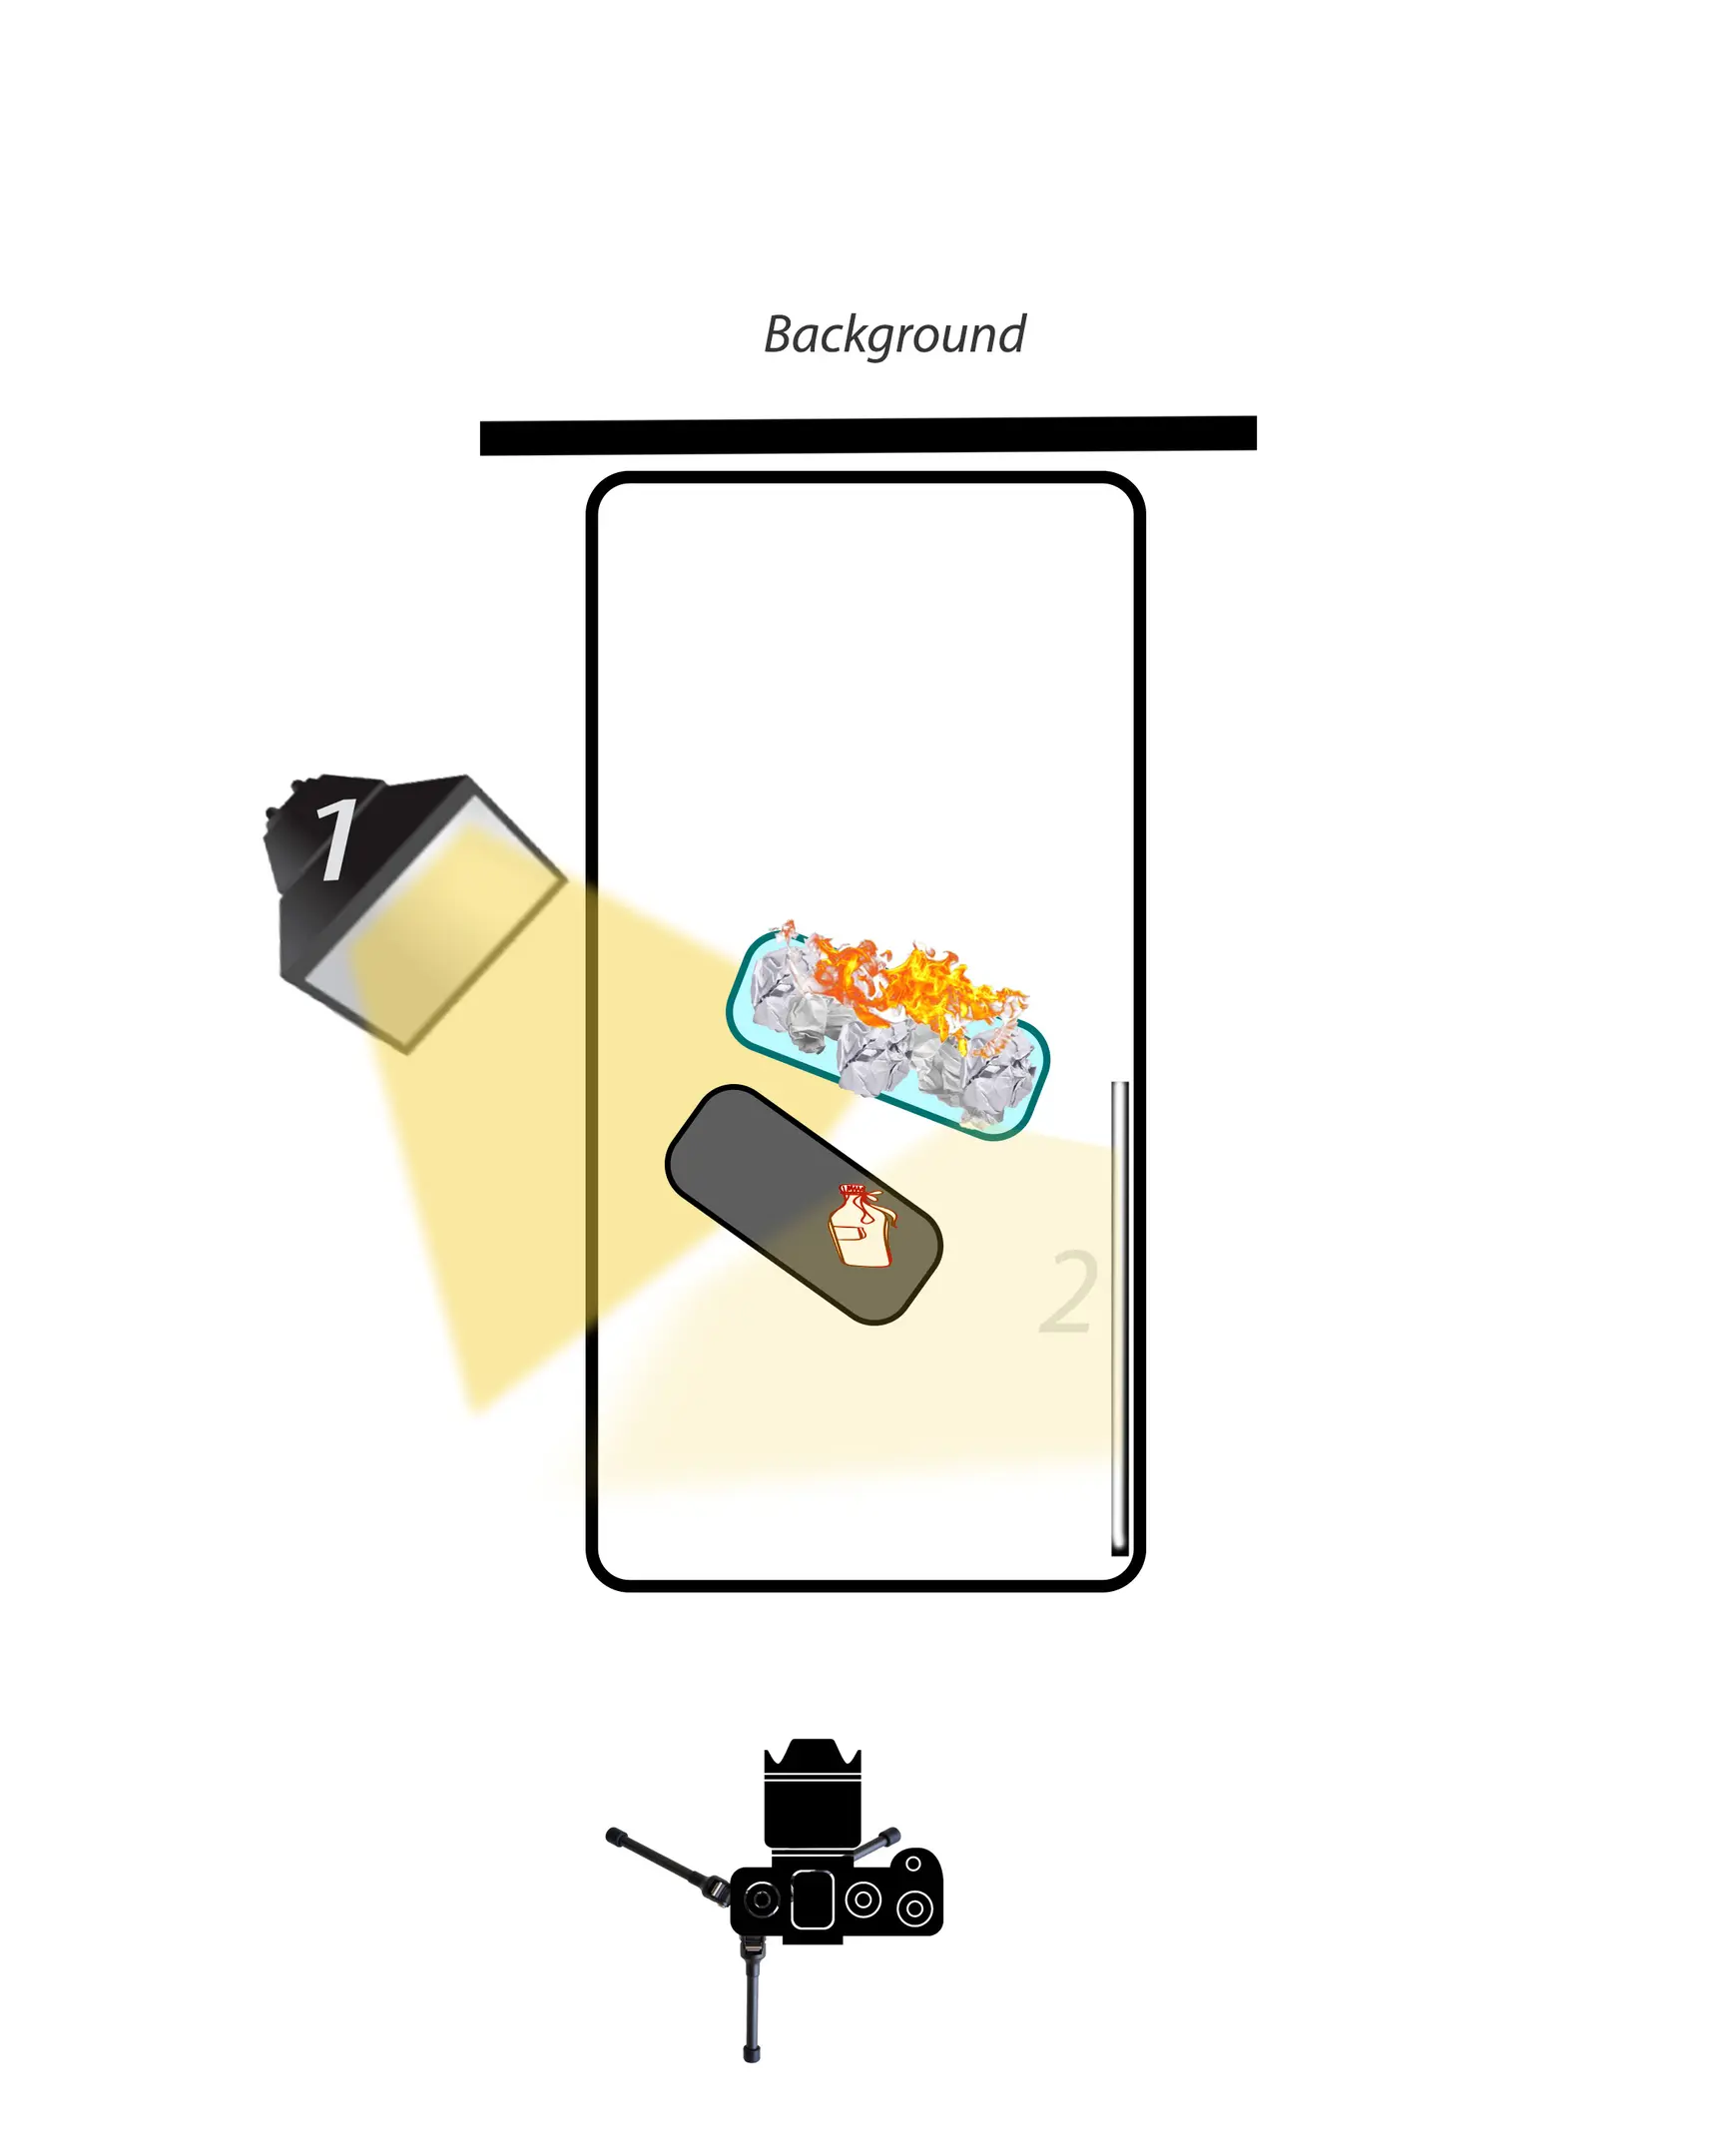
Light Source #1: The Dynamic Flame Background
The first light source creates a flame in the background. You cannot simply put paper on the table and set it on fire. Safety is paramount, and stringent fire safety measures must not be overlooked. Therefore, I took the paper, placed it in a heat-resistant dish suitable for an oven, and set it all together on a thick wooden board. This board protects the countertop even if things get hot. This meticulous approach ensures a controlled and safe flame effect for the background of your images.
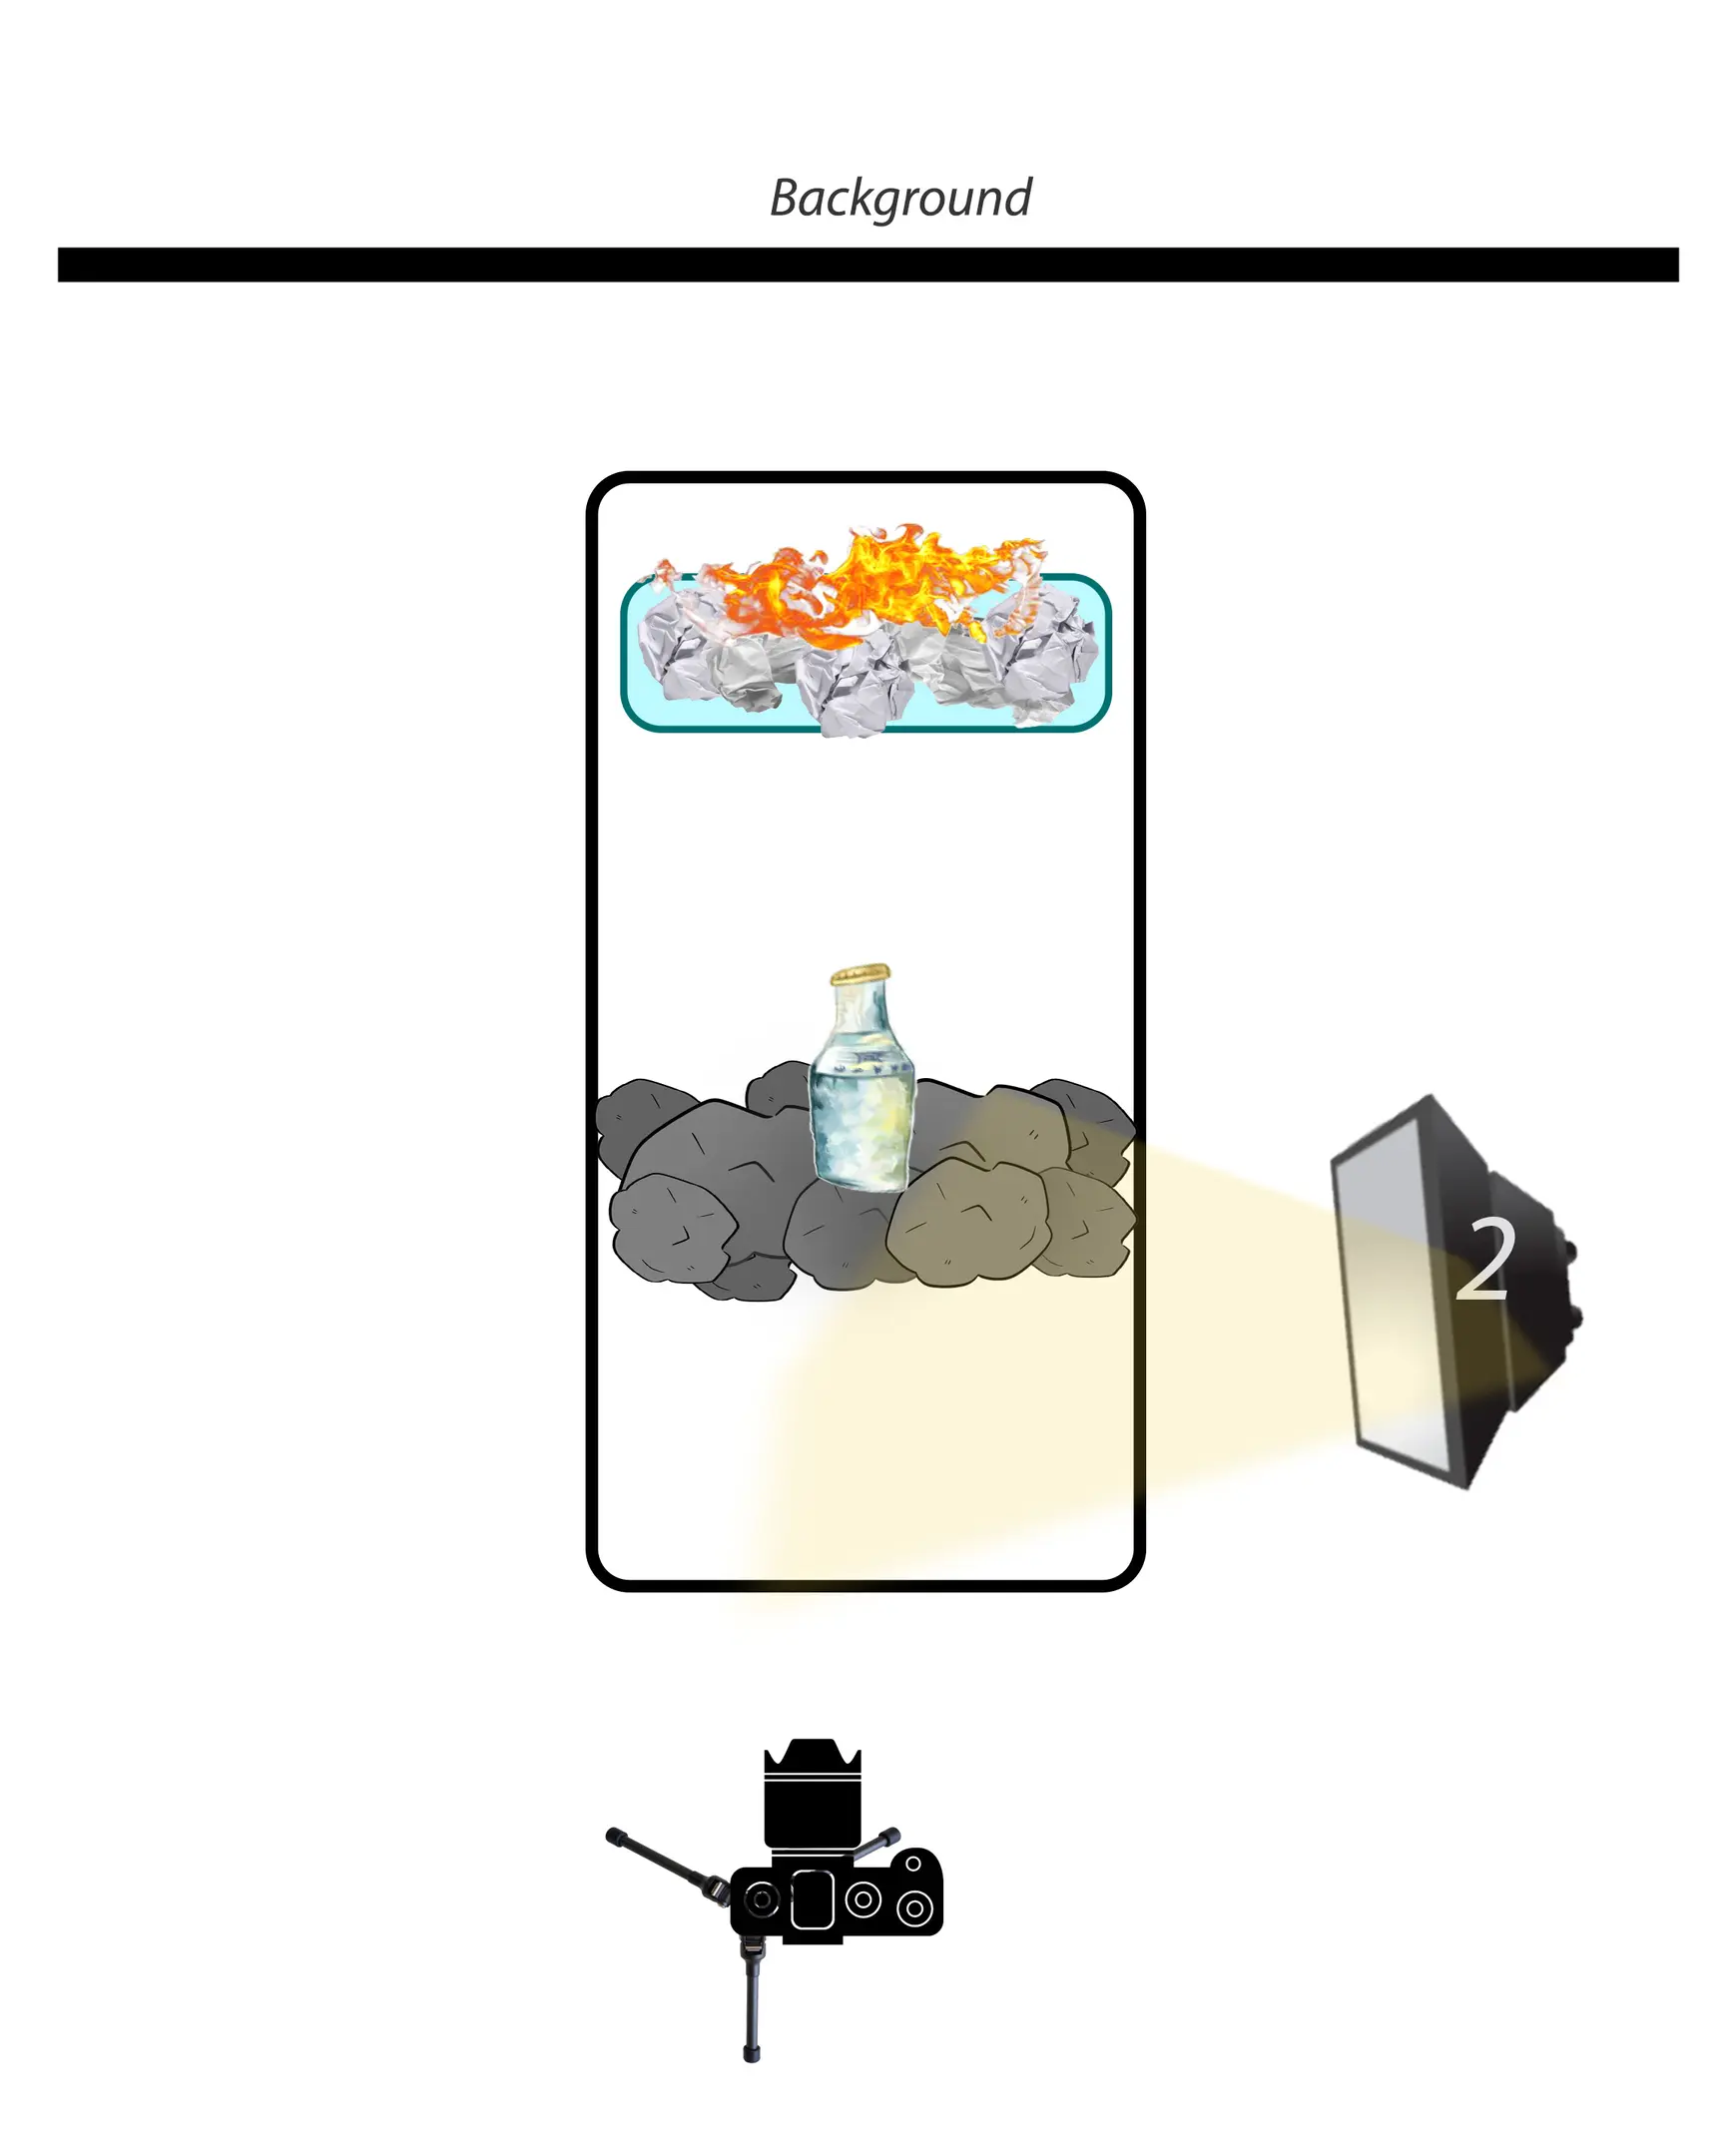
Light Source #2: Highlighting Product Transparency and Contents
The second light source addresses the Rakia itself: it’s a transparent drink, and it contains pepper, which is a crucial detail for the client. It is vital to show the customer that there is pepper inside the bottle. So, you need a light source that will effectively solve the problem of highlighting the contents, emphasizing both the transparency of the product and its unique ingredients.
Light Source #3: Simulating Glowing Coals
The third light source simulates burning coals. Shooting with real hot coals is probably possible but definitely not safe. This challenge can be effectively solved by another flash directed precisely at the coals, often enhanced with a red gel filter to simulate the realistic glow without any inherent danger.
Light Source #4: Illuminating the Product Label for Brand Clarity
The fourth light source is essential for brand recognition. No one will agree to accept the final result if it’s impossible to understand what kind of product it is. Therefore, the label must be clearly shown. We have to add one more flash specifically for label illumination, ensuring prominent brand visibility in the final photo.
When shooting the master class, we utilized 4 distinct studio lighting sources. Spoiler: you could achieve this with just one, but you would have to move around the object and perform more extensive compositing—but more on that later.
Essential Camera Gear and Settings for Fire Photography
Perhaps one of the most important conditions for a successful session is that you must have a stable tripod for your camera. The camera absolutely must not move! Shooting is done at a slow shutter speed—specifically to capture the dynamic fire. For this critical reason, you need exceptional stability to meticulously avoid any blurring in the frame. In addition, we will combine multiple frames in Photoshop, so be absolutely sure to secure the camera firmly.
The Four Key Lighting Sources in Detail
Light Source #1: The Primary “Drawing” Light
This is the “drawing” light. For everyday photography and our master classes, I used a GODOX AD200 Pro flash and a softbox (although a stripbox could also be used effectively).
This source had the maximum power of all and served to shine directly through the bottle. In this particular case, it was absolutely essential to showcase the transparency of the drink. It also significantly helped separate the bottle from the background and illuminate the left side of the bottle, clearly defining its form.
Light Source #2: The “Filling” Light for Even Illumination
This is the “filling” light. I also used a GODOX AD200 Pro flash and a softbox diffuser (or stripbox). The power of the fill light source must be less than that of the main light source. Otherwise, you will inevitably have double shadows in the frame, which would compromise the professional look.
This light source primarily illuminates the product label. Every client wants, in addition to impressive special effects, the crucial details of the product to be clearly visible and legible. This fill light can often be replaced by a reflector (e.g., a white foam board). However, if you opt for a reflective surface instead of a flash, it must be positioned at such an angle that the light from source #1, when reflected from the cardboard, effectively highlights the label.
Light Source #3: Simulating the Heat of Coals
For simulating the heat of coals, I used a GODOX AD300 Pro flash with a snoot head and a red gel filter. It was aimed only at the coals to realistically simulate combustion, significantly enhancing the overall effect. As you understand, this light source could also be completely removed if such a specific effect isn’t required for your concept.
Light Source #4: Capturing Real Fire with Shutter Speed
For the camera to effectively “see” and capture the fire, it is not enough to simply ignite it in the frame. Fire itself is a powerful light source, and the camera perceives any light provided it is of sufficient power and duration. This is super important to understand for successful fire photography. A flash is a powerful, instantaneous light source; therefore, it “draws” the frame in a mere fraction of a second (1/200 is usually sufficient when working with a flash). However, when the photographer works with continuous light sources such as flames or sparklers, a slow shutter speed becomes the invaluable solution. A slow shutter speed dictates how long the light emanating from the flame will fall onto the camera’s sensor. Therefore, I advise you to set the shutter speed on the camera from 0.5 to 1 second, meticulously adjusting the rest of the parameters specifically for your task.
Preparing for the Shot: Eliminating Ambient Light
After you have meticulously set up the lighting scheme, configured the appropriate parameters on the camera, and isolated all other ambient light sources that could potentially alter the light and shade pattern in the frame (by turning off ceiling lamps, closing windows with black-out curtains), you need to turn off the synchronizer on the camera and take a test shot without any flashes. You should achieve a completely black frame, confirming your absolute ambient light control.

If your test frame appears absolutely black, then you are executing everything correctly. No other extraneous light sources—except for your flashes—are affecting the light pattern in the frame, which means they will not “dirty” your pristine shot.
If you can distinguish even the faint outlines of an object on your test frame, then extraneous light is interfering. In the future, this will most likely complicate your retouching work.
Recommended Camera Settings for Fiery Product Shots
Photographers are always interested in specific camera settings—foundational numbers from which you can confidently start shooting. I typically begin with the following parameters:
- Exposure is approximately 0.5-1 second.
- Aperture from f/8 to f/12-15.
- ISO 100.
Preferred Camera Equipment for Master Class Shots
My favorite lenses for detailed work are the Canon 85mm f/1.8 USM and the Sigma 105 mm f/2.8 EX DG OS HSM Macro lens. My camera of choice is a Canon EOS 5D Mark IV. For flash triggering, I rely on a Godox X Pro-C 2.4G TTL Transmitter for Canon. And, crucially, a solid tripod. I use Manfrotto (ensure your tripod is genuinely stable to eliminate any chance of blurring).

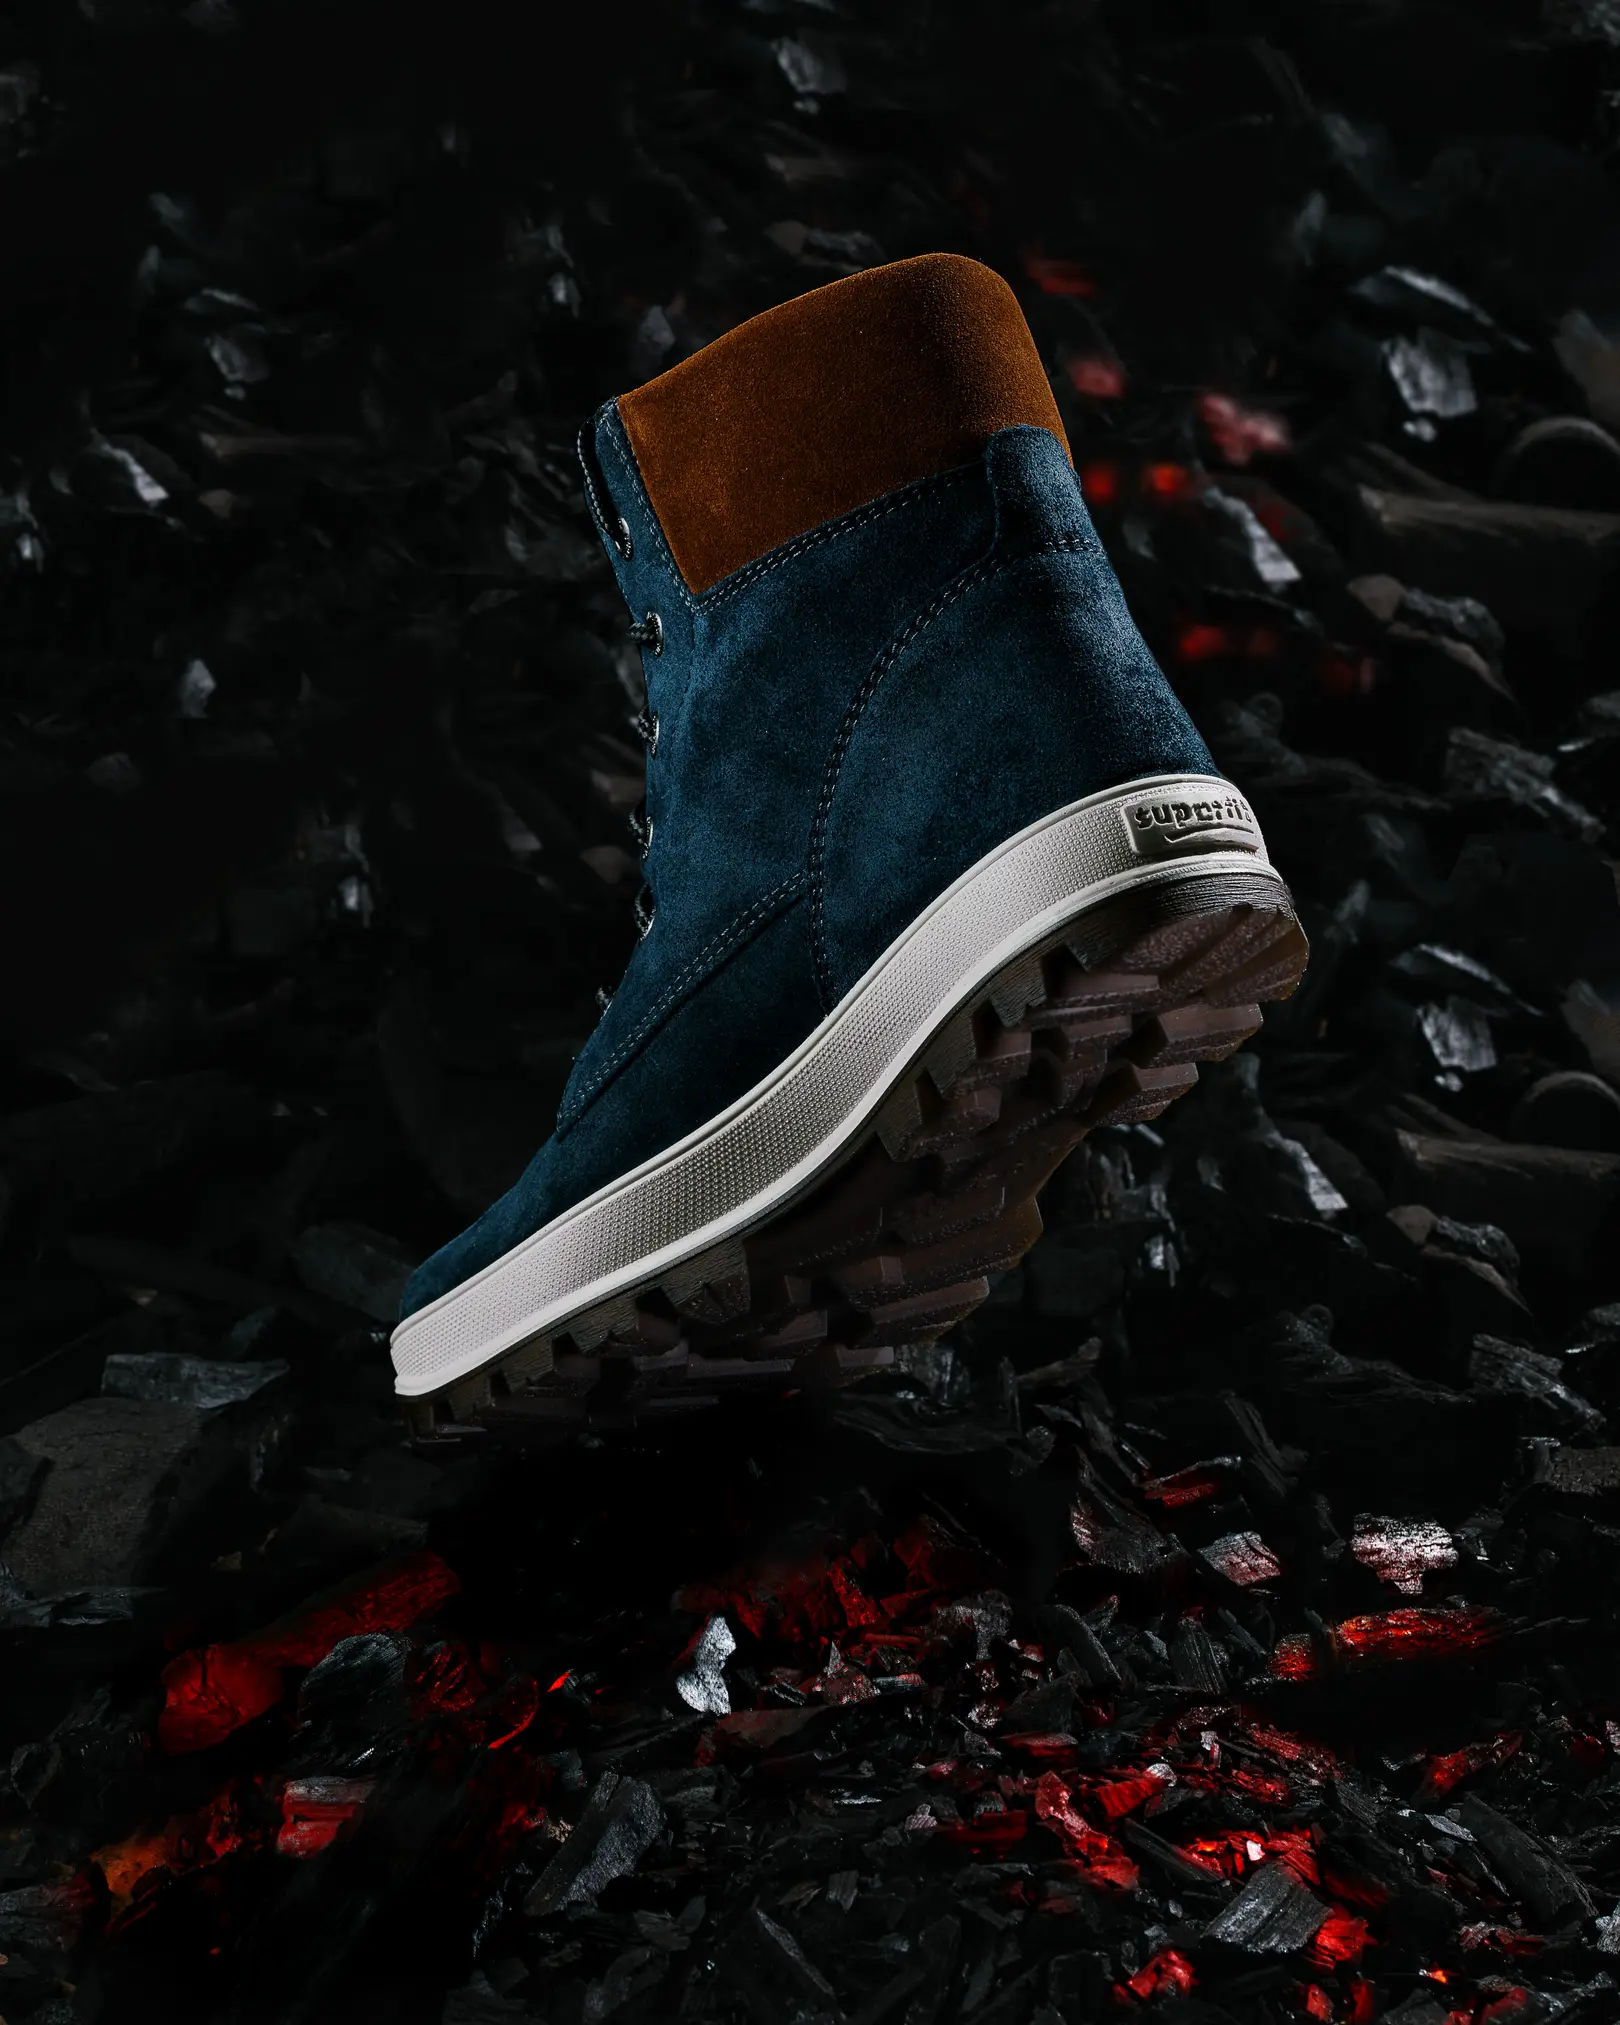
Achieving Professional Results with Limited Lighting (One Light Source Method)
If you don’t possess 3 lights, or even 2 lights and a reflector, you can still absolutely achieve this dynamic shot. To do this, first and foremost, you need to position your camera on an extremely stable tripod and, preferably, control it remotely (via an application) in order to eliminate all chances of the camera moving relative to the scene. If you only have one light source, then you should capture 3 or 4 distinct frames. The number of frames will equal the number of lights that cannot be combined simultaneously. For example, if in the second frame, you can also incorporate the fire, then you might only need 3 frames.
Take your single light source and place it in position 1. Let’s capture the first frame for our composite.
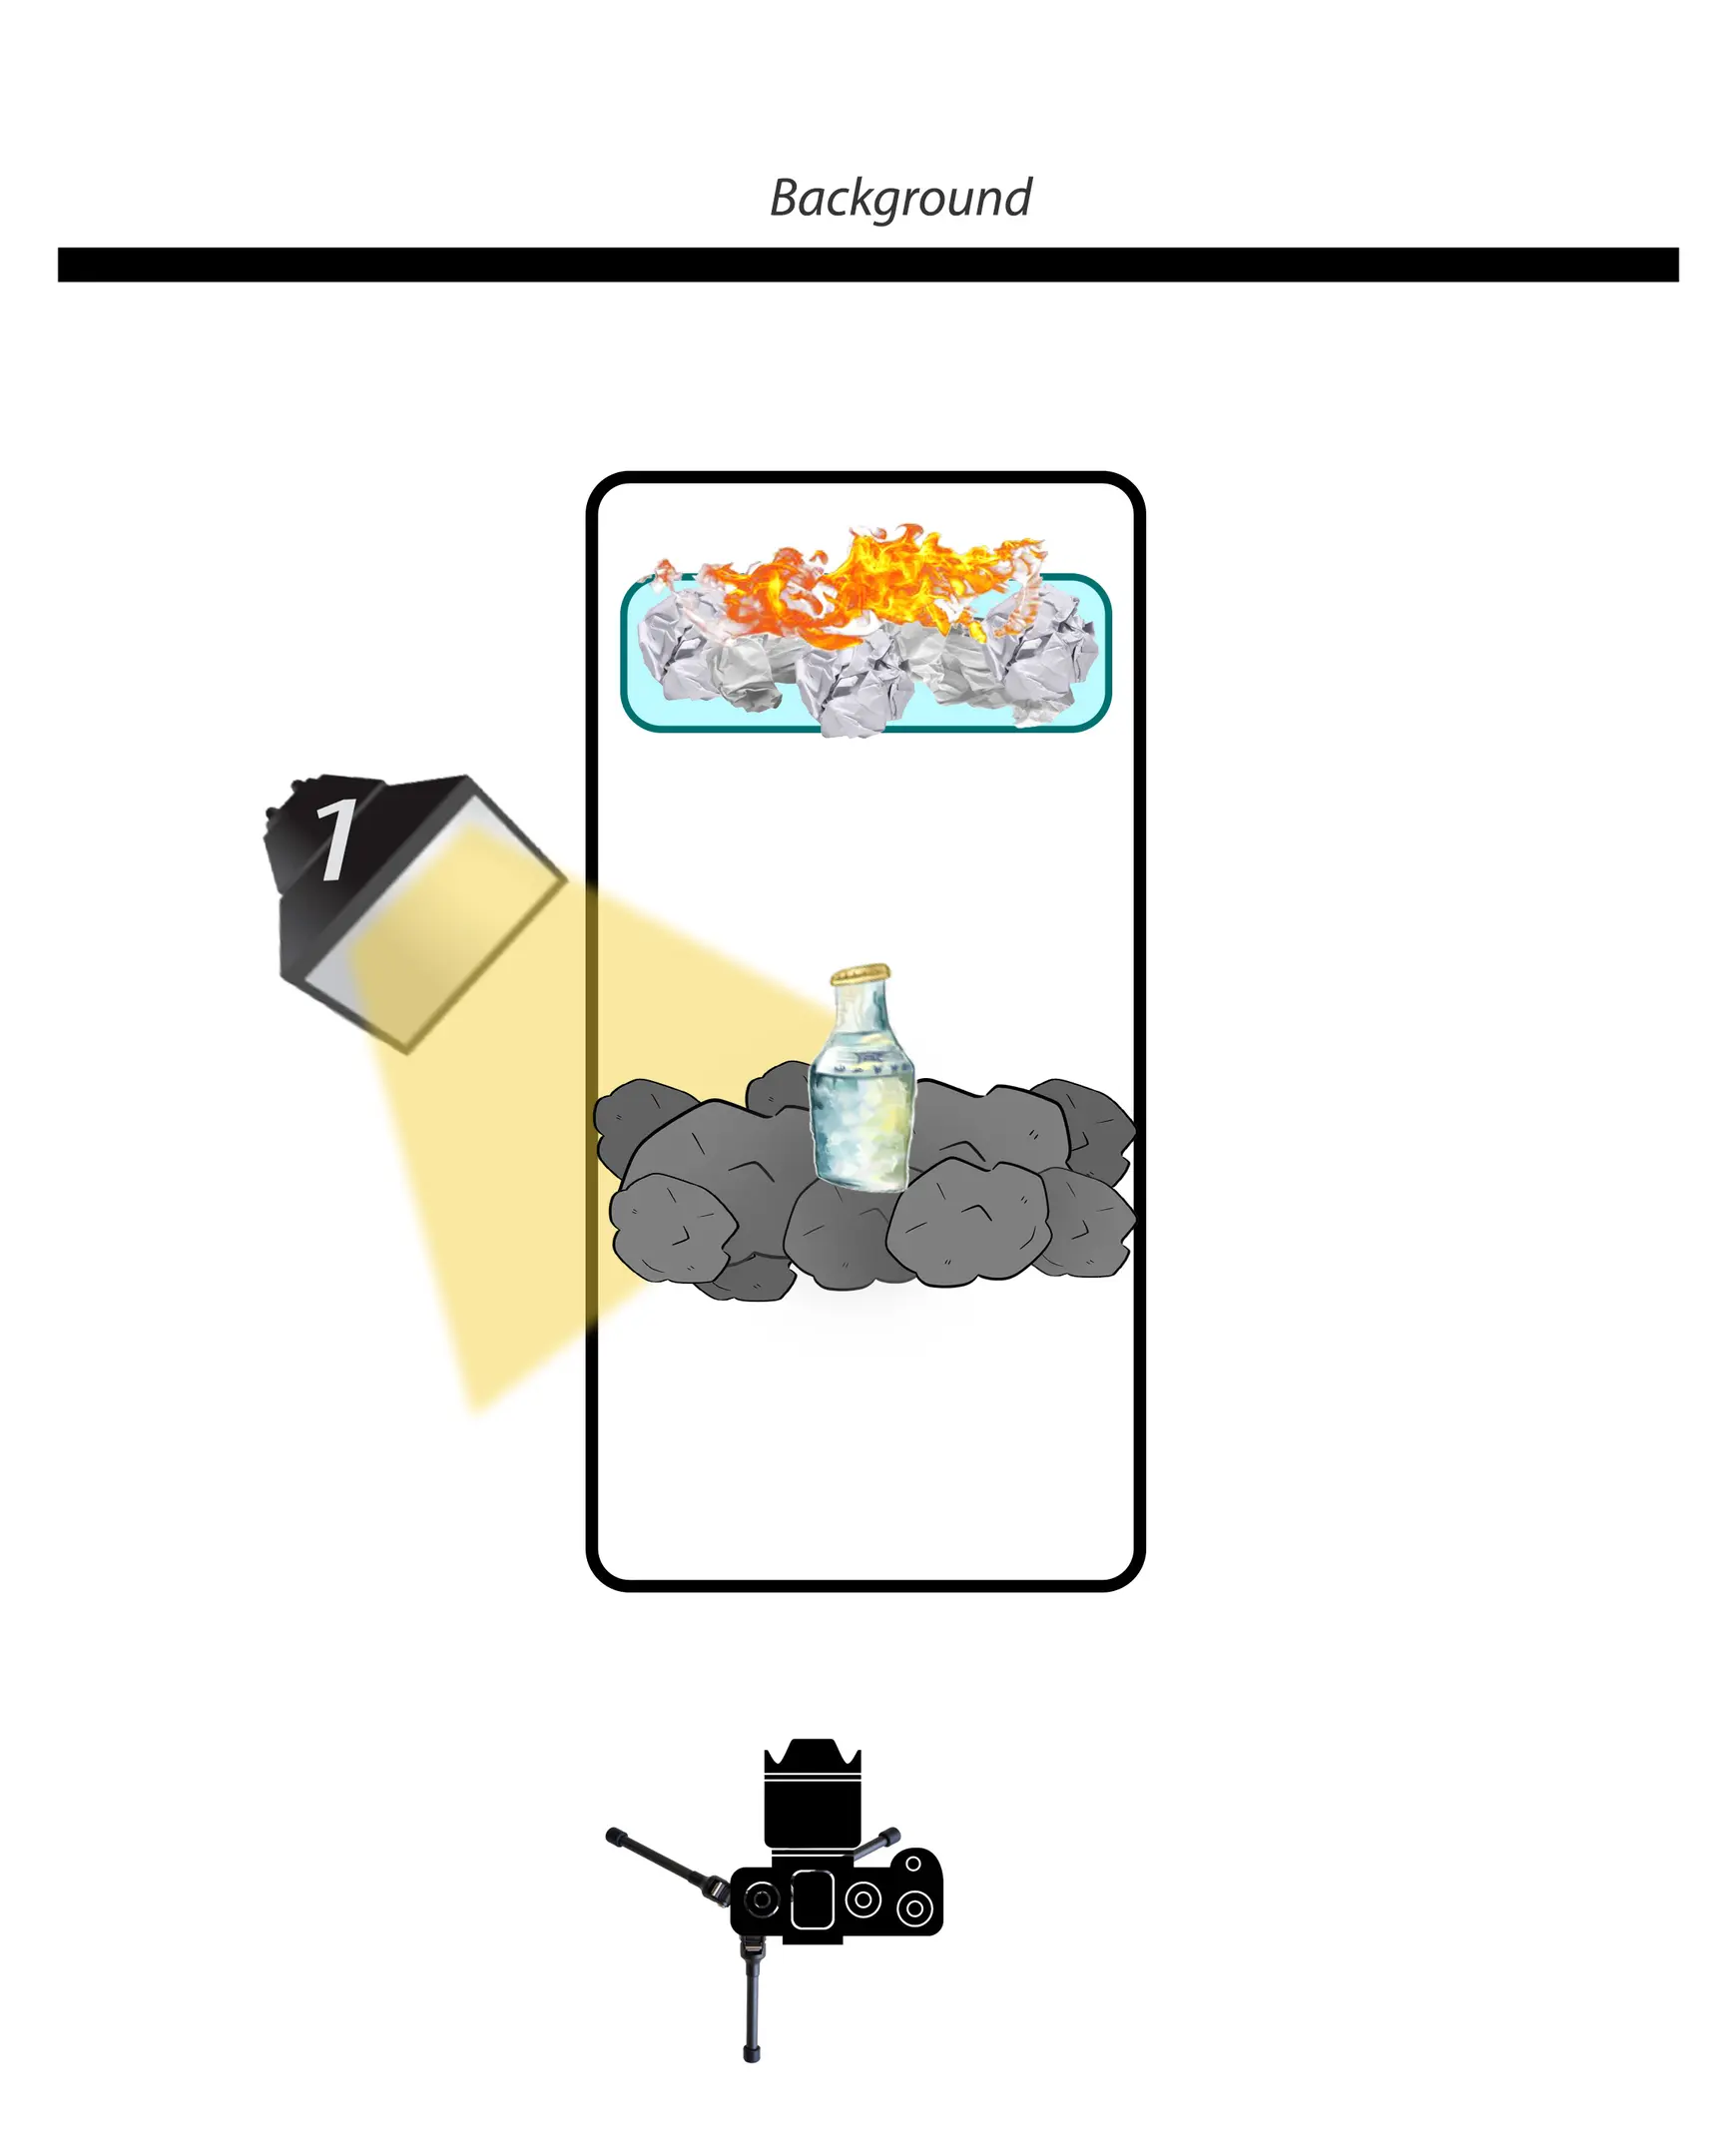

In this foundational shot, we are lighting the object from behind, effectively creating separation from the background.
Then we move the same light source to position 2. Reduce the power of the source by about ⅓ and capture a new picture. Do not move the camera! This second frame is specifically needed to highlight the crucial label.
If you are working with just one light source, I suggest that in this particular shot where you are illuminating the label, you also ignite a fire behind the bottle. Alternatively, you can capture a separate frame with the fire—the specific order isn’t as critical. The only important thing is that you must understand that different light elements can be expertly combined in post-processing.


Next, we attach a snoot with a gel filter to our single light source and move it to position 3. We capture the third frame, specifically focusing on enhancing the flaming coals effect.

All 3 frames you will then need to open in Photoshop and expertly combine for a stunning final composite image!
In my case, I can afford to activate all 3 light sources at once, so I will demonstrate in my photos how I increase the amount of fire. To overlay (summation) in Photoshop the light on the label, the sides of the bottle, and the coals—the fundamental principle of image compositing will remain precisely the same.
Post-Processing in Photoshop: Blending Multiple Exposures for Dynamic Effects
Step-by-Step Photoshop Workflow for Combining Fire and Product Shots
-
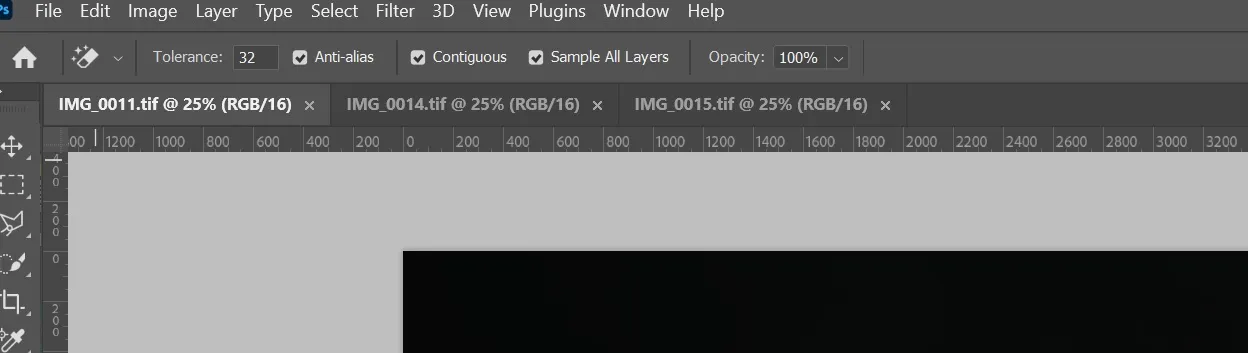
For example, you decide that the best and most “clean” base frame is IMG_0011. This will serve as the foundation layer on which we will “glue” the additional light that is missing from it.
-
Navigate to the IMG_0014 tab. Press Ctrl+A to select all, then Ctrl+C to copy, and paste the IMG_0014 frame onto IMG_0011 using the keyboard shortcut CTRL+V (you can use any method you are accustomed to).
-
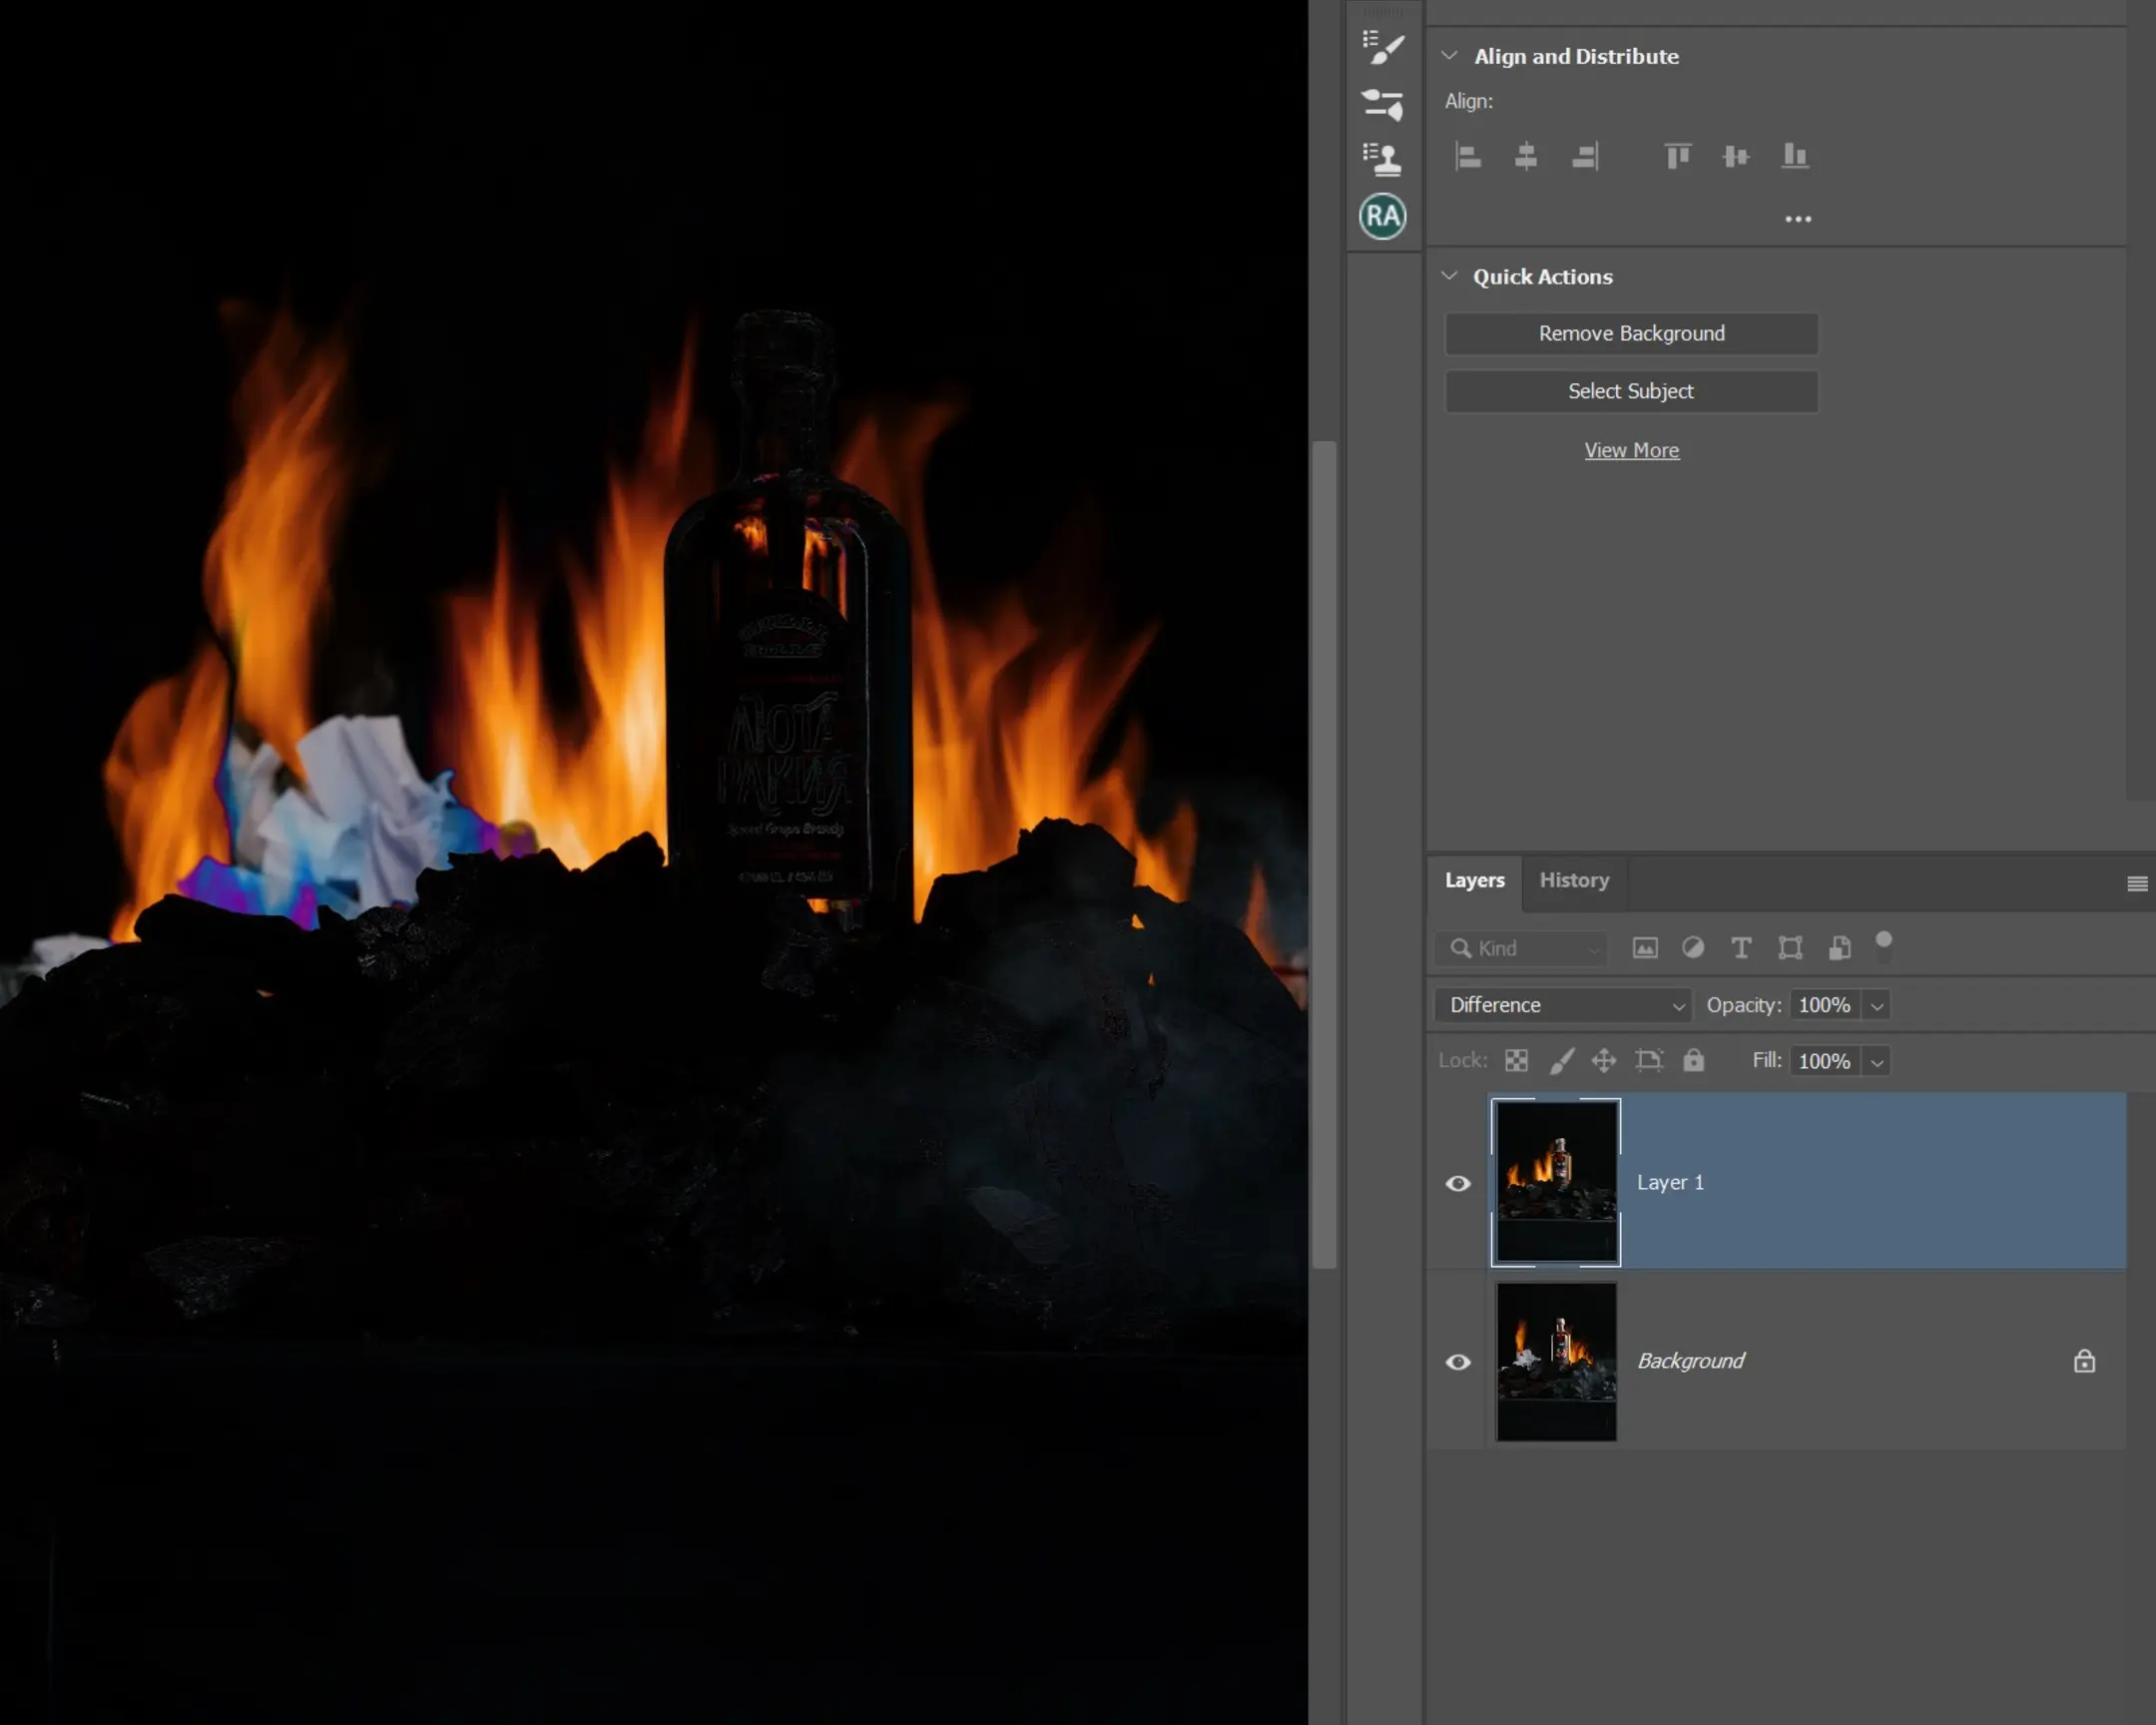
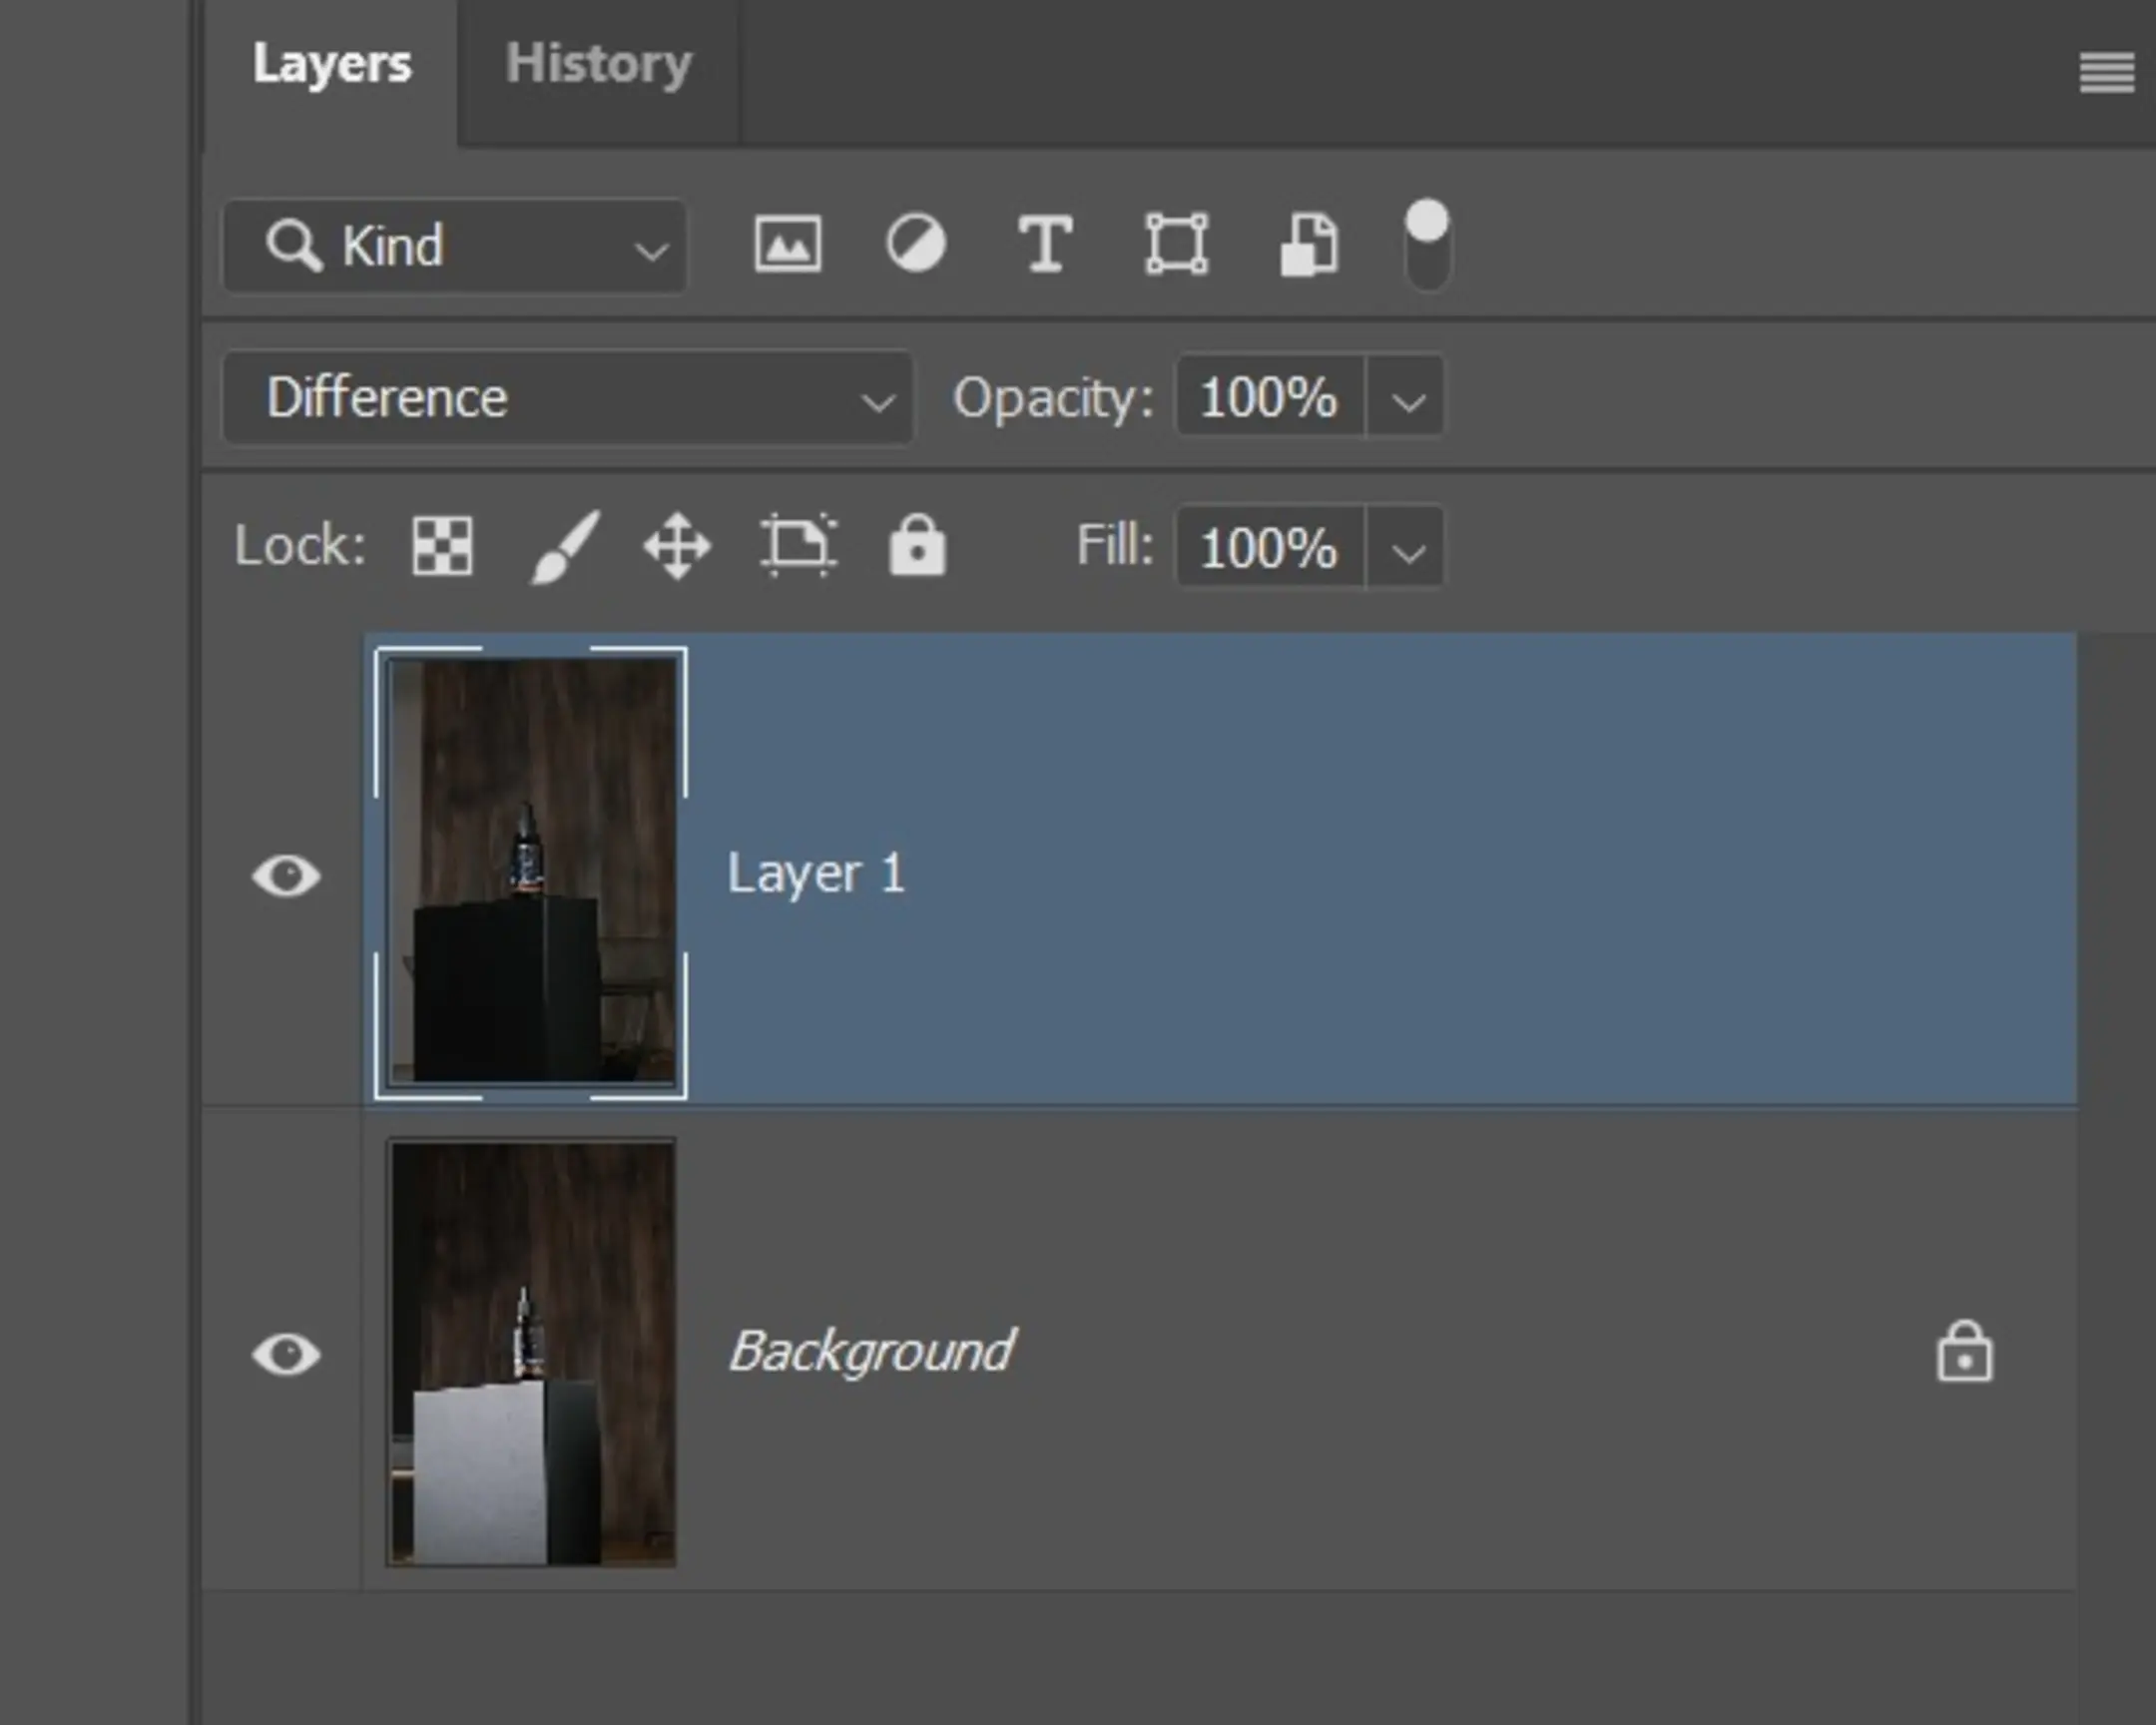
We then change the blend mode of the IMG_0014 layer (in the layers panel, it’s typically named LAYER1) to the Difference blend mode. This is crucial for precisely aligning the images, as it highlights the differences between the base layer and the layer superimposed on top. The differences will appear as white stripes in the frame—you can observe this clearly in text or distinct edges.

- Using CTRL+T (Free Transform) and the arrow keys on the keyboard (or the Move Tool from the Photoshop toolbar), we carefully combine and align the frames so that the contours of the main objects coincide absolutely perfectly. This precise image alignment for your composite will be achieved when the outlines of the subject become completely black.
The result should closely resemble the one in the next photo.
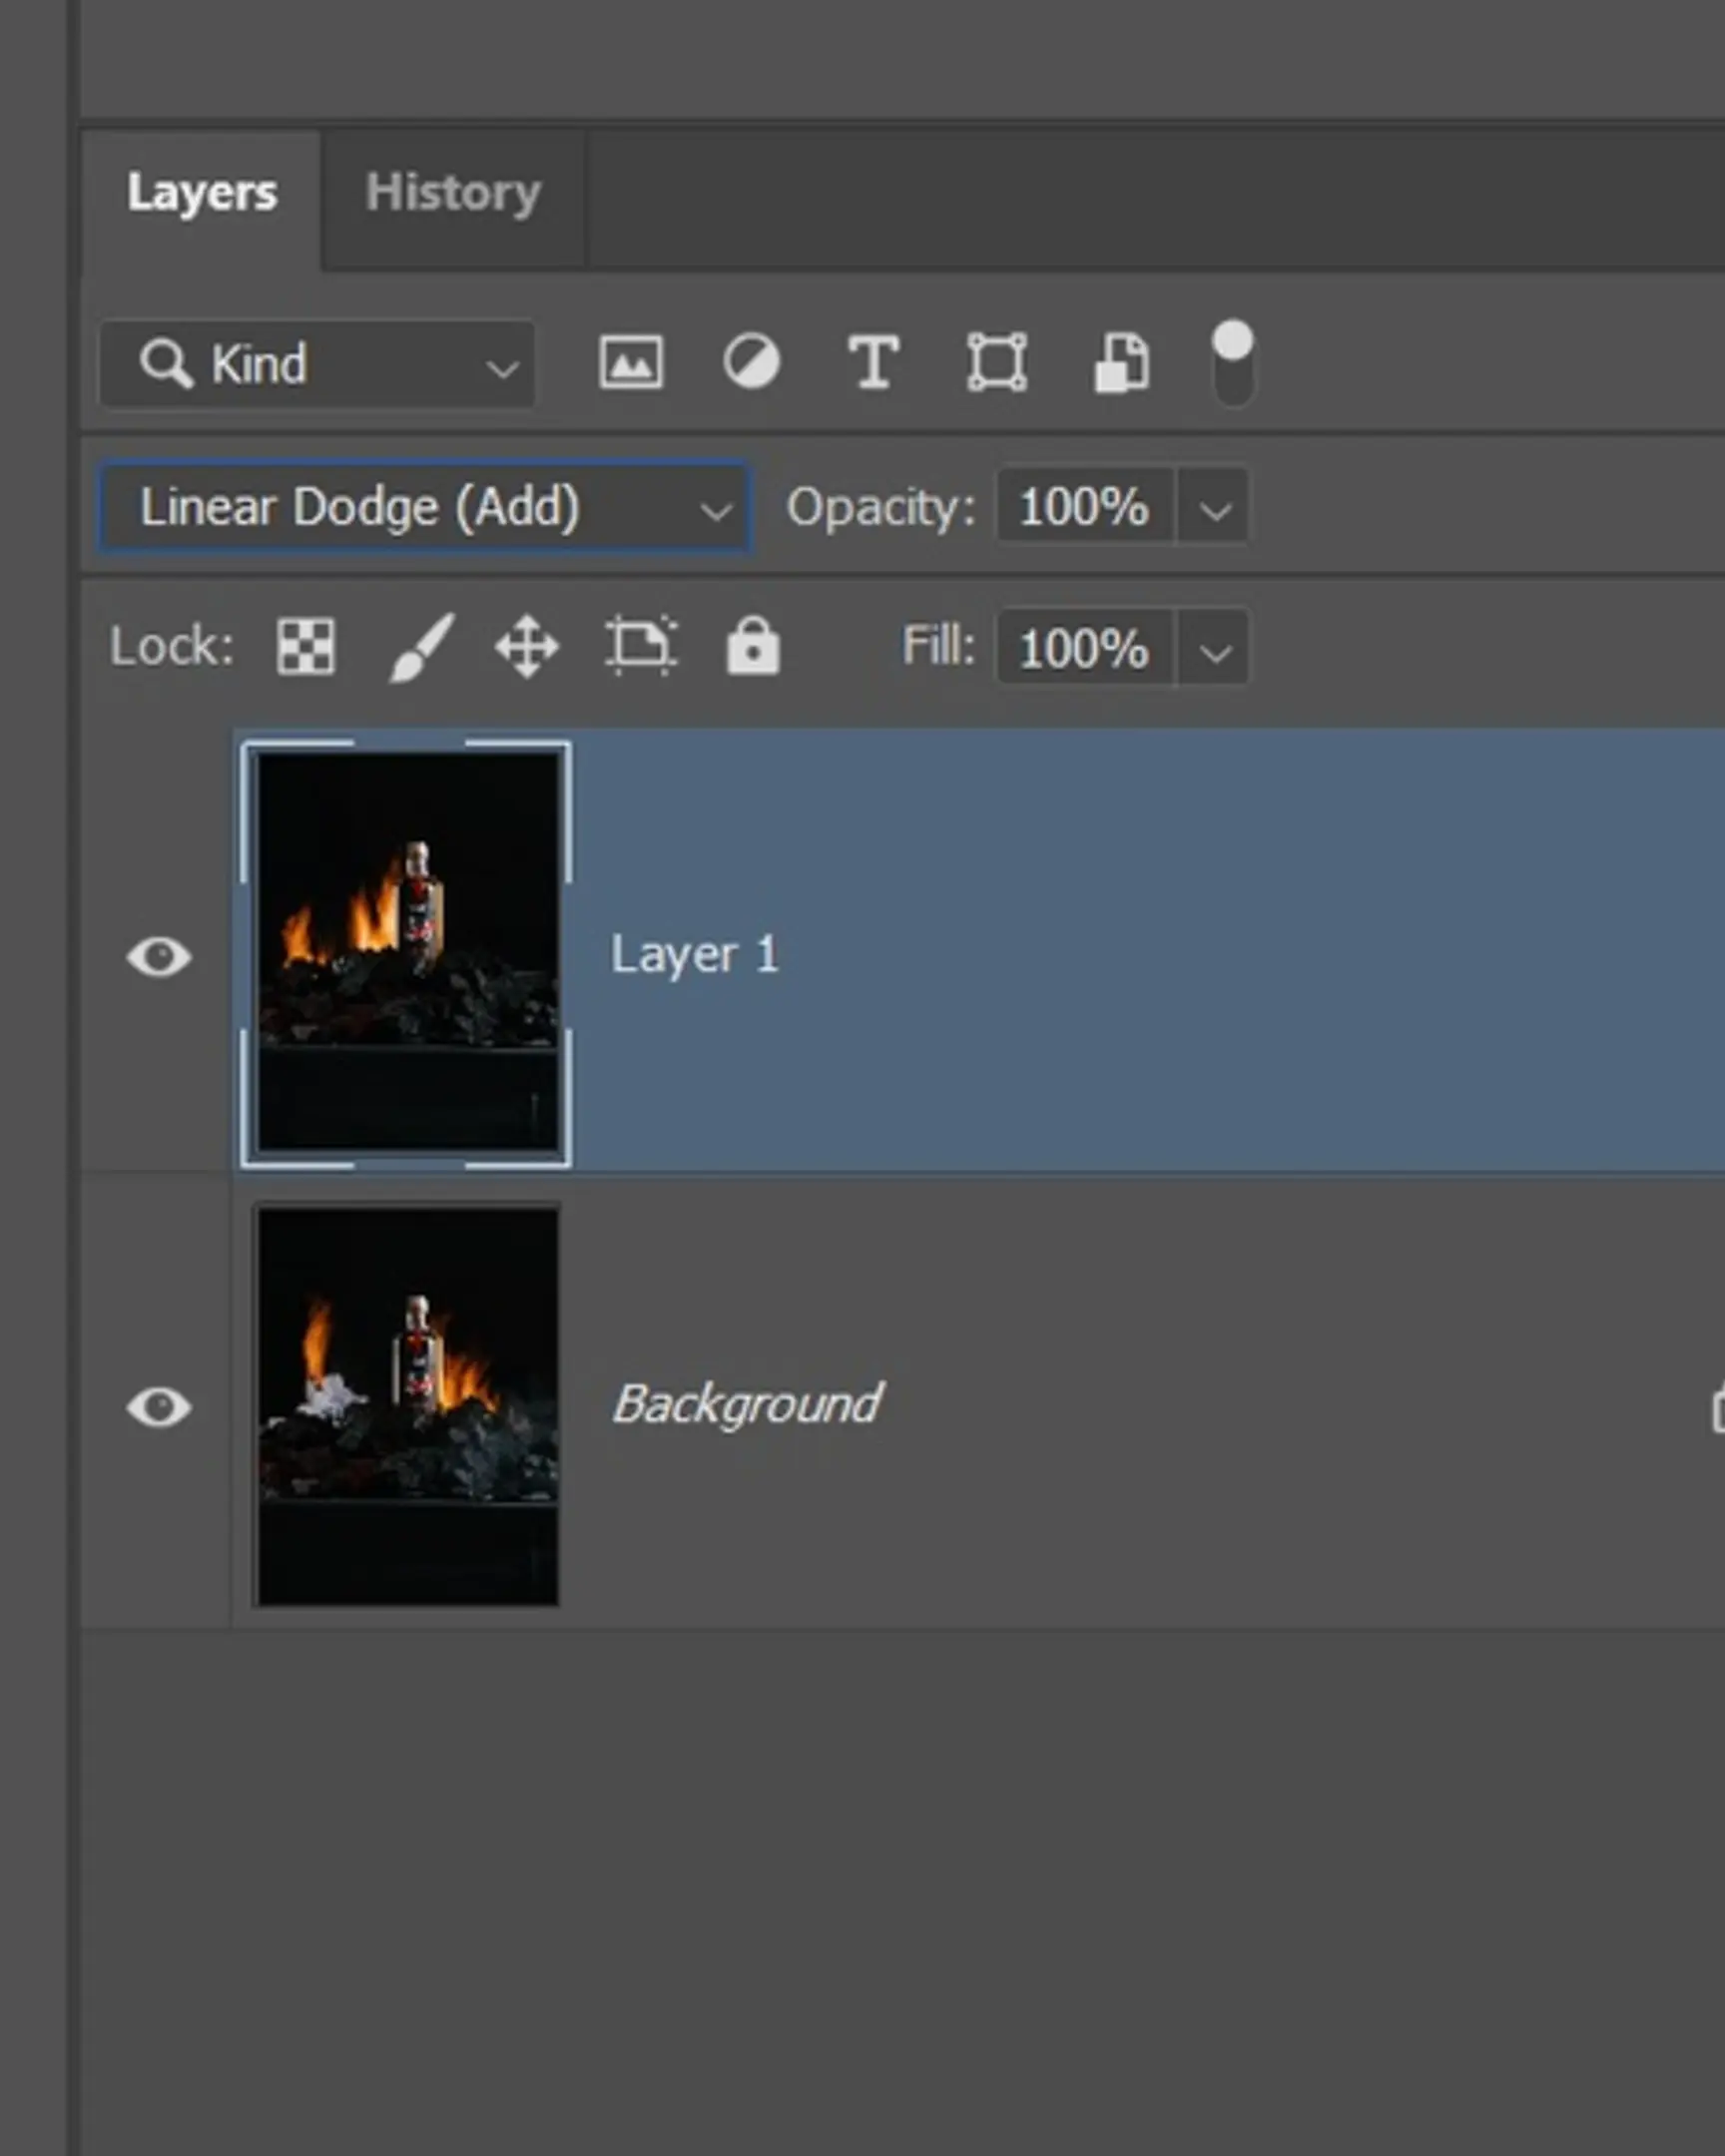
- And now for the core trick of directly “gluing” the light—we transfer the LAYER1 (i.e., our IMG_0014 frame) to the blend mode Linear Dodge (Add) for effectively adding light, or Lighten Color, to seamlessly integrate the lighting from different exposures into a cohesive image.
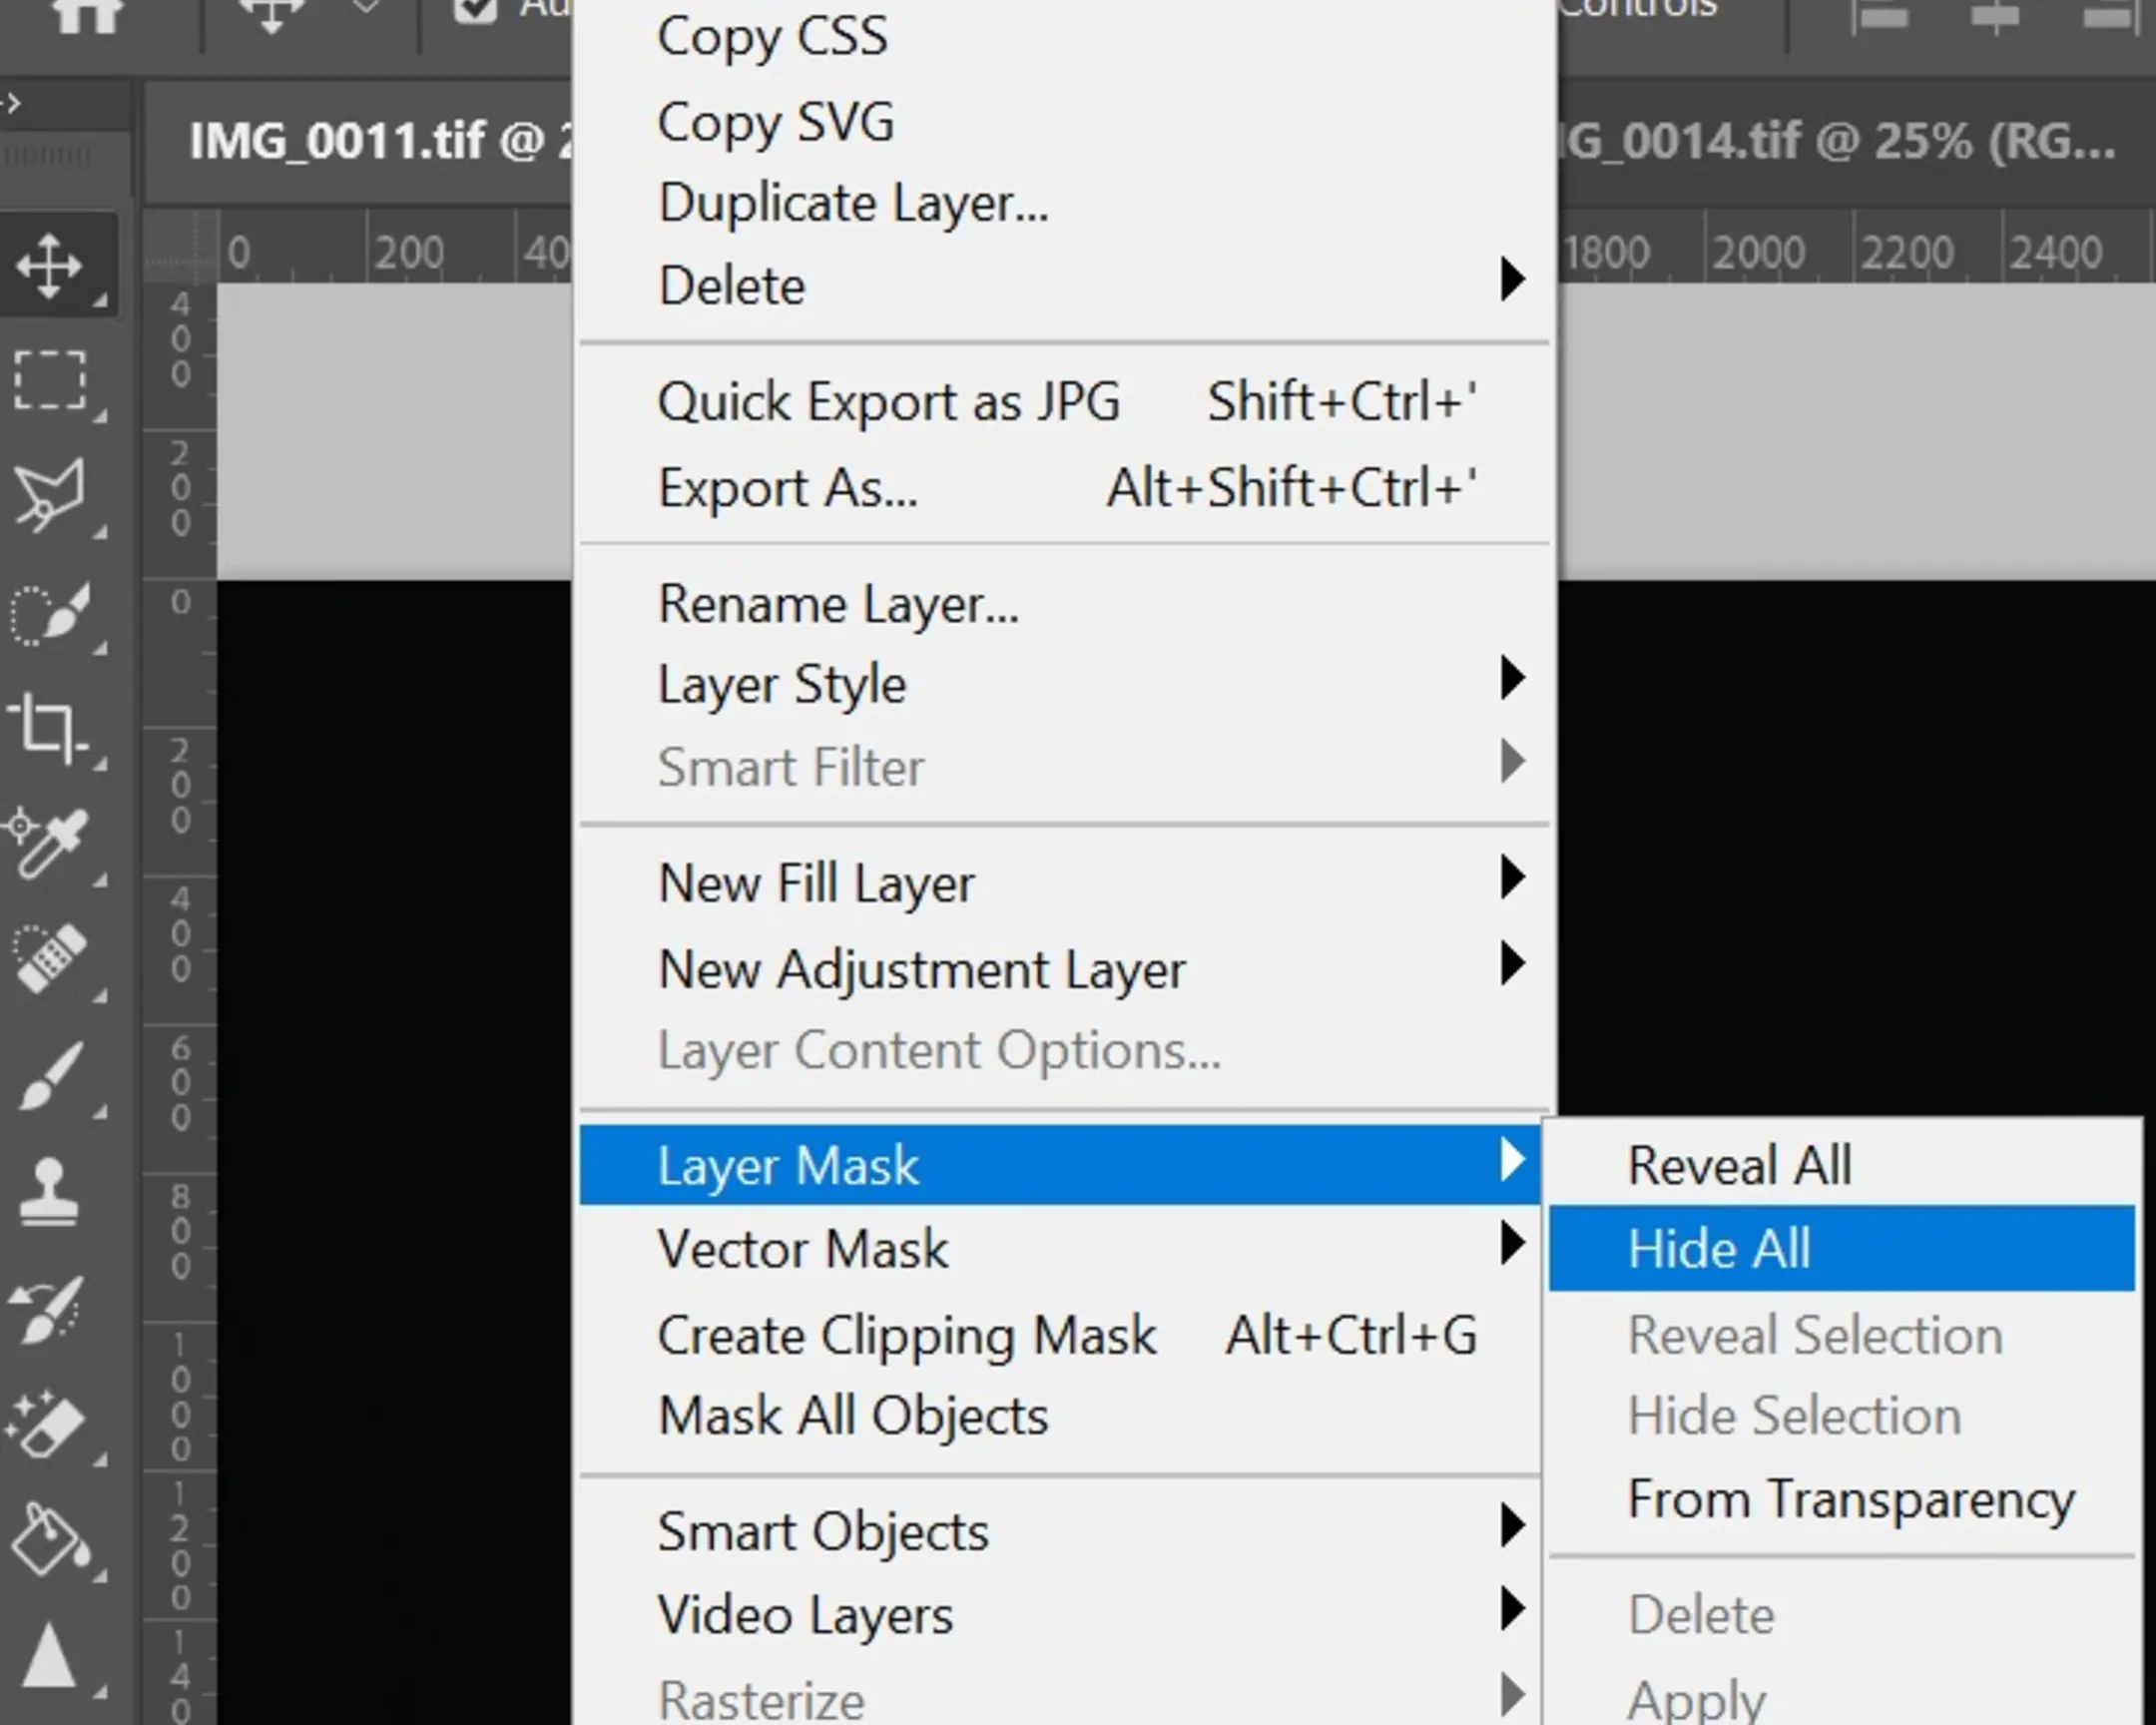
- There is a chance that the picture might become overexposed in certain areas. While on the LAYER1 layer, hold down the ALT button and add a layer mask.
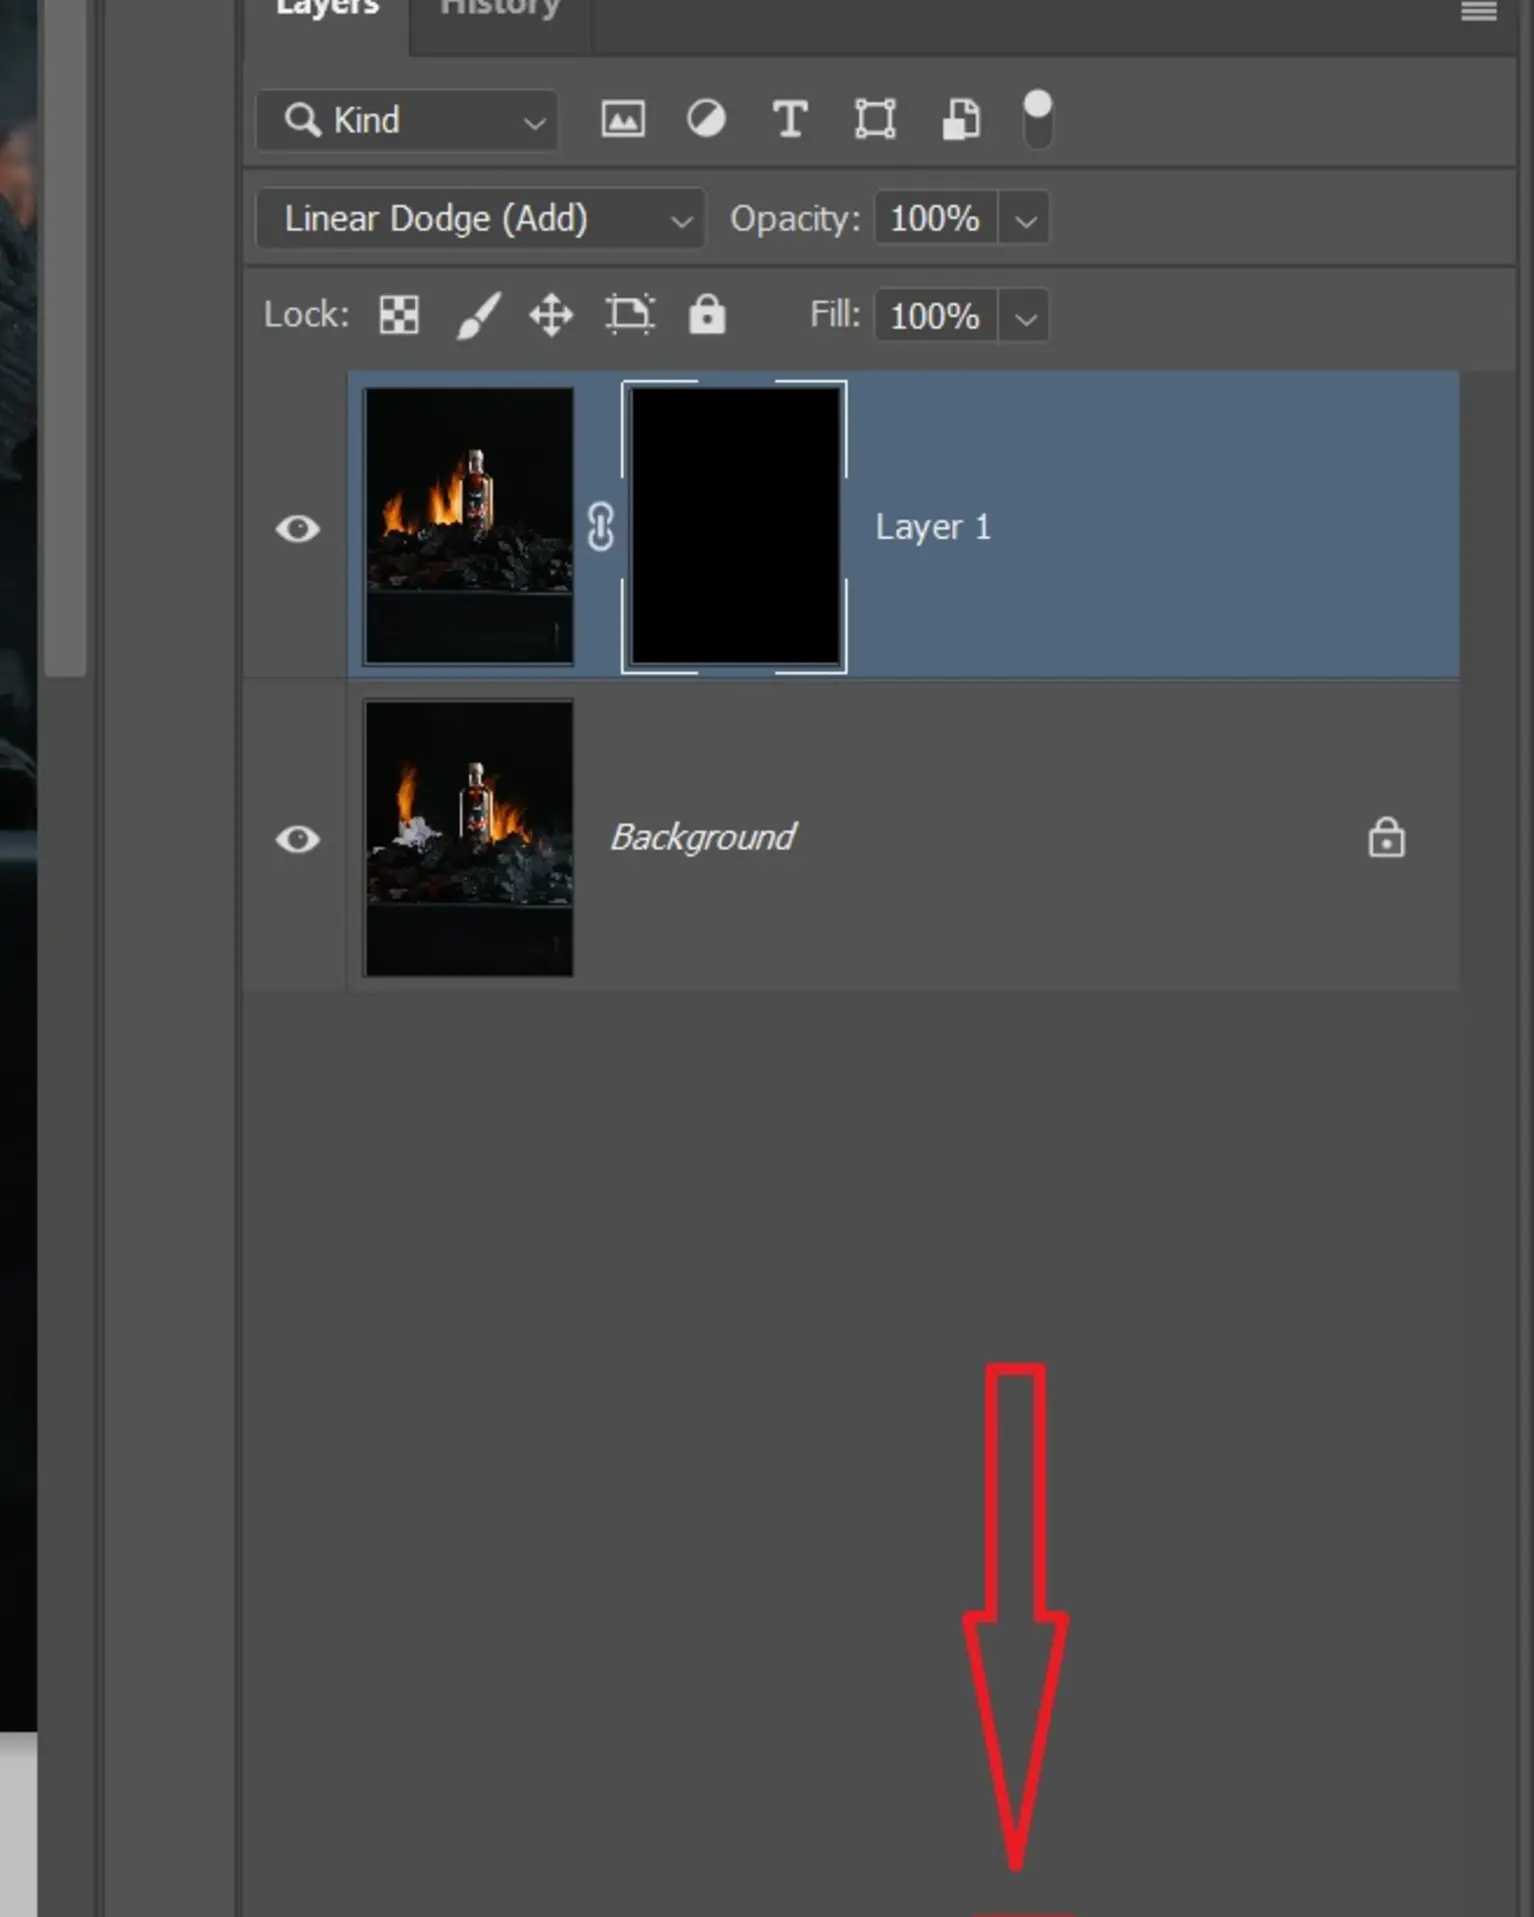
This can also be done via the menu: Layer -> Layer Mask -> Hide All.
- Select a brush on the toolbar with the following settings: Hardness - 0%, Color - White.
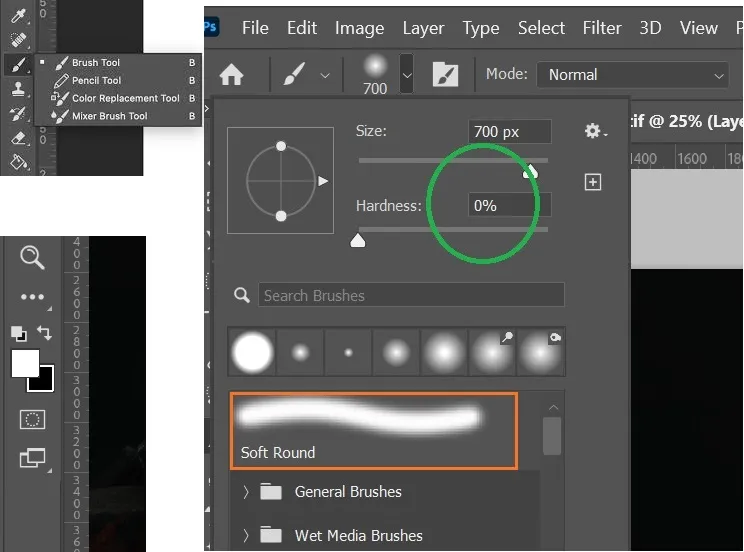
With the layer mask we just created, we meticulously begin to reveal the light precisely where we need it: by painting over the black mask with a white brush. This technique is absolutely fundamental for non-destructive editing in professional photography, allowing for precise control over light and effects.
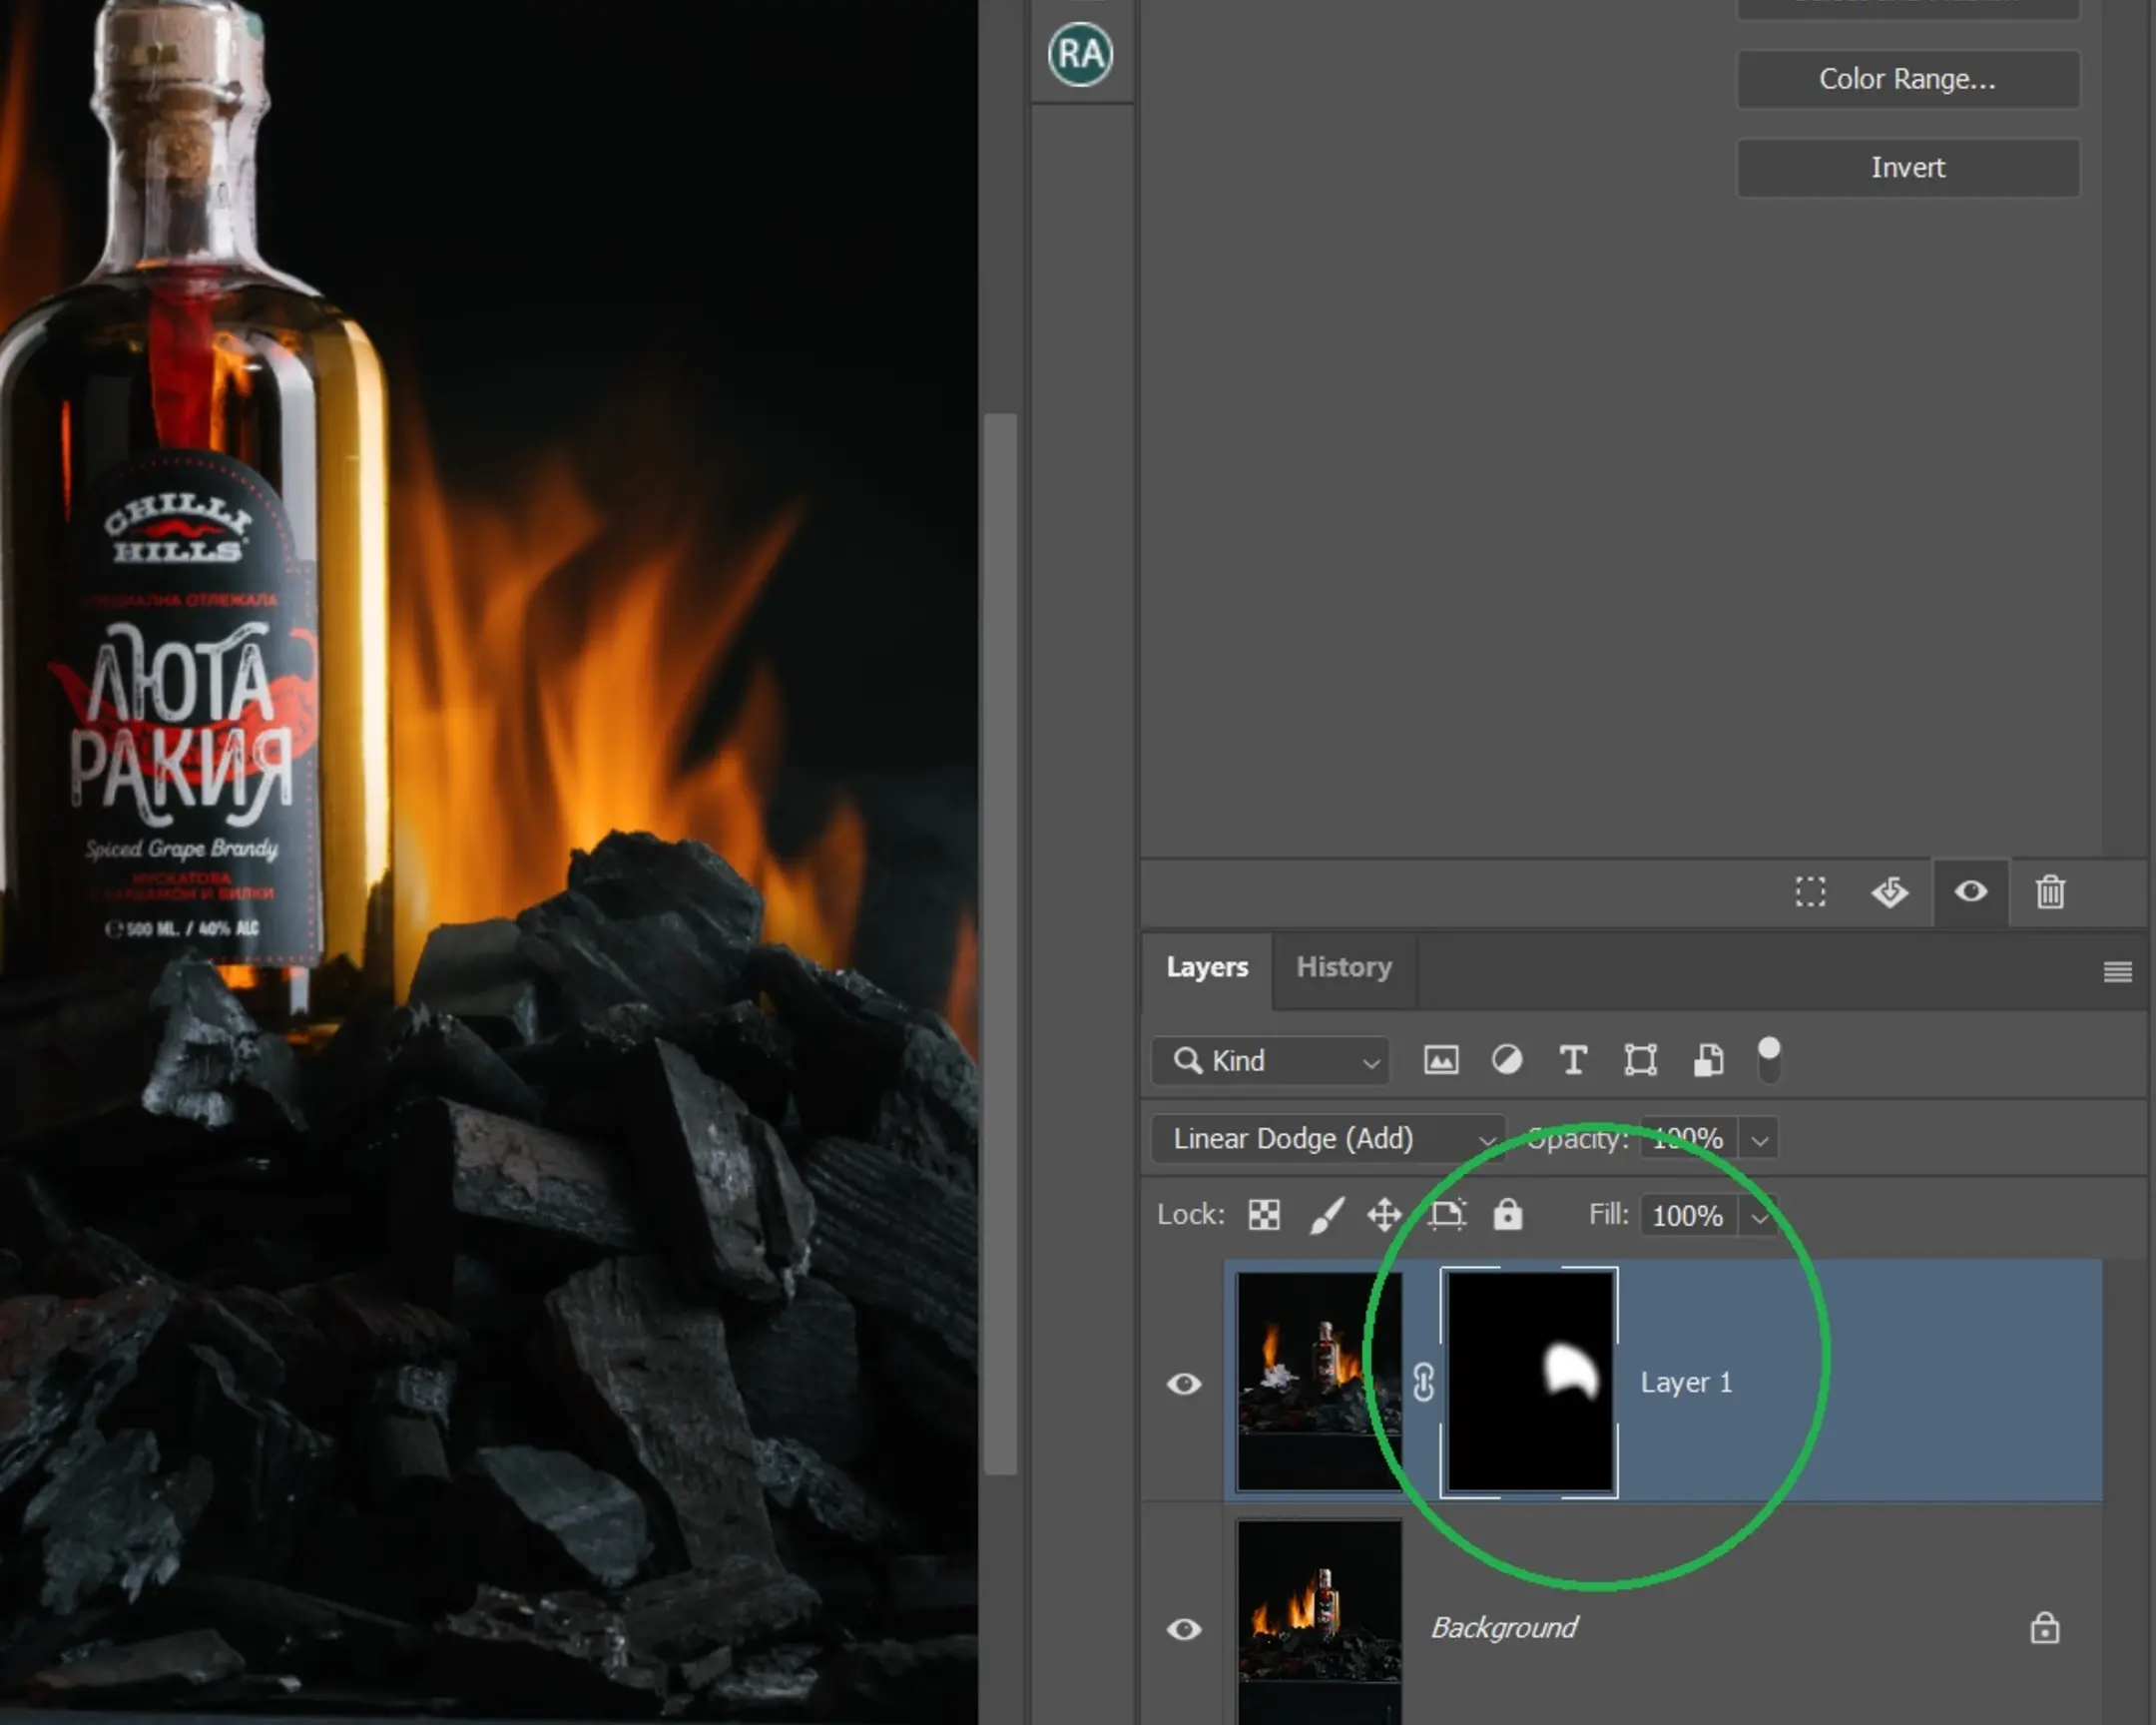
To see the before and after of the work you’ve done, you can simply click on the eye icon next to the selected layer. If suddenly something is not being drawn, most likely you are not painting directly on the mask. Ensure that you are precisely on the mask of the layer you intend to modify. The active layer or mask will be highlighted with a white frame. In the photo, within the green circle, you can observe that it is the Layer 1 layer mask that has been selected, and the fire is being painted onto it to the right of the bottle.
If you accidentally “showed” an excess amount of light, you can simply change the color of your brush to black. And—still working on the layer mask—paint over the area you do not need in black, effectively hiding them even under a black mask.
Many people find masks confusing at first. But if you practice a little bit, you will quickly understand that masks in Photoshop are an incredibly unique and powerful tool—without which it is virtually impossible to live for advanced image editing!
- Looks beautiful, doesn’t it? Let’s then add the last frame where our embers were glowing intensely!
We perform steps 2-7 with frame number 3 (which is IMG_0015 in my example). We thus integrate this frame to enhance our captivating fiery shot.

Final Touches: Refining Your Fiery Product Image
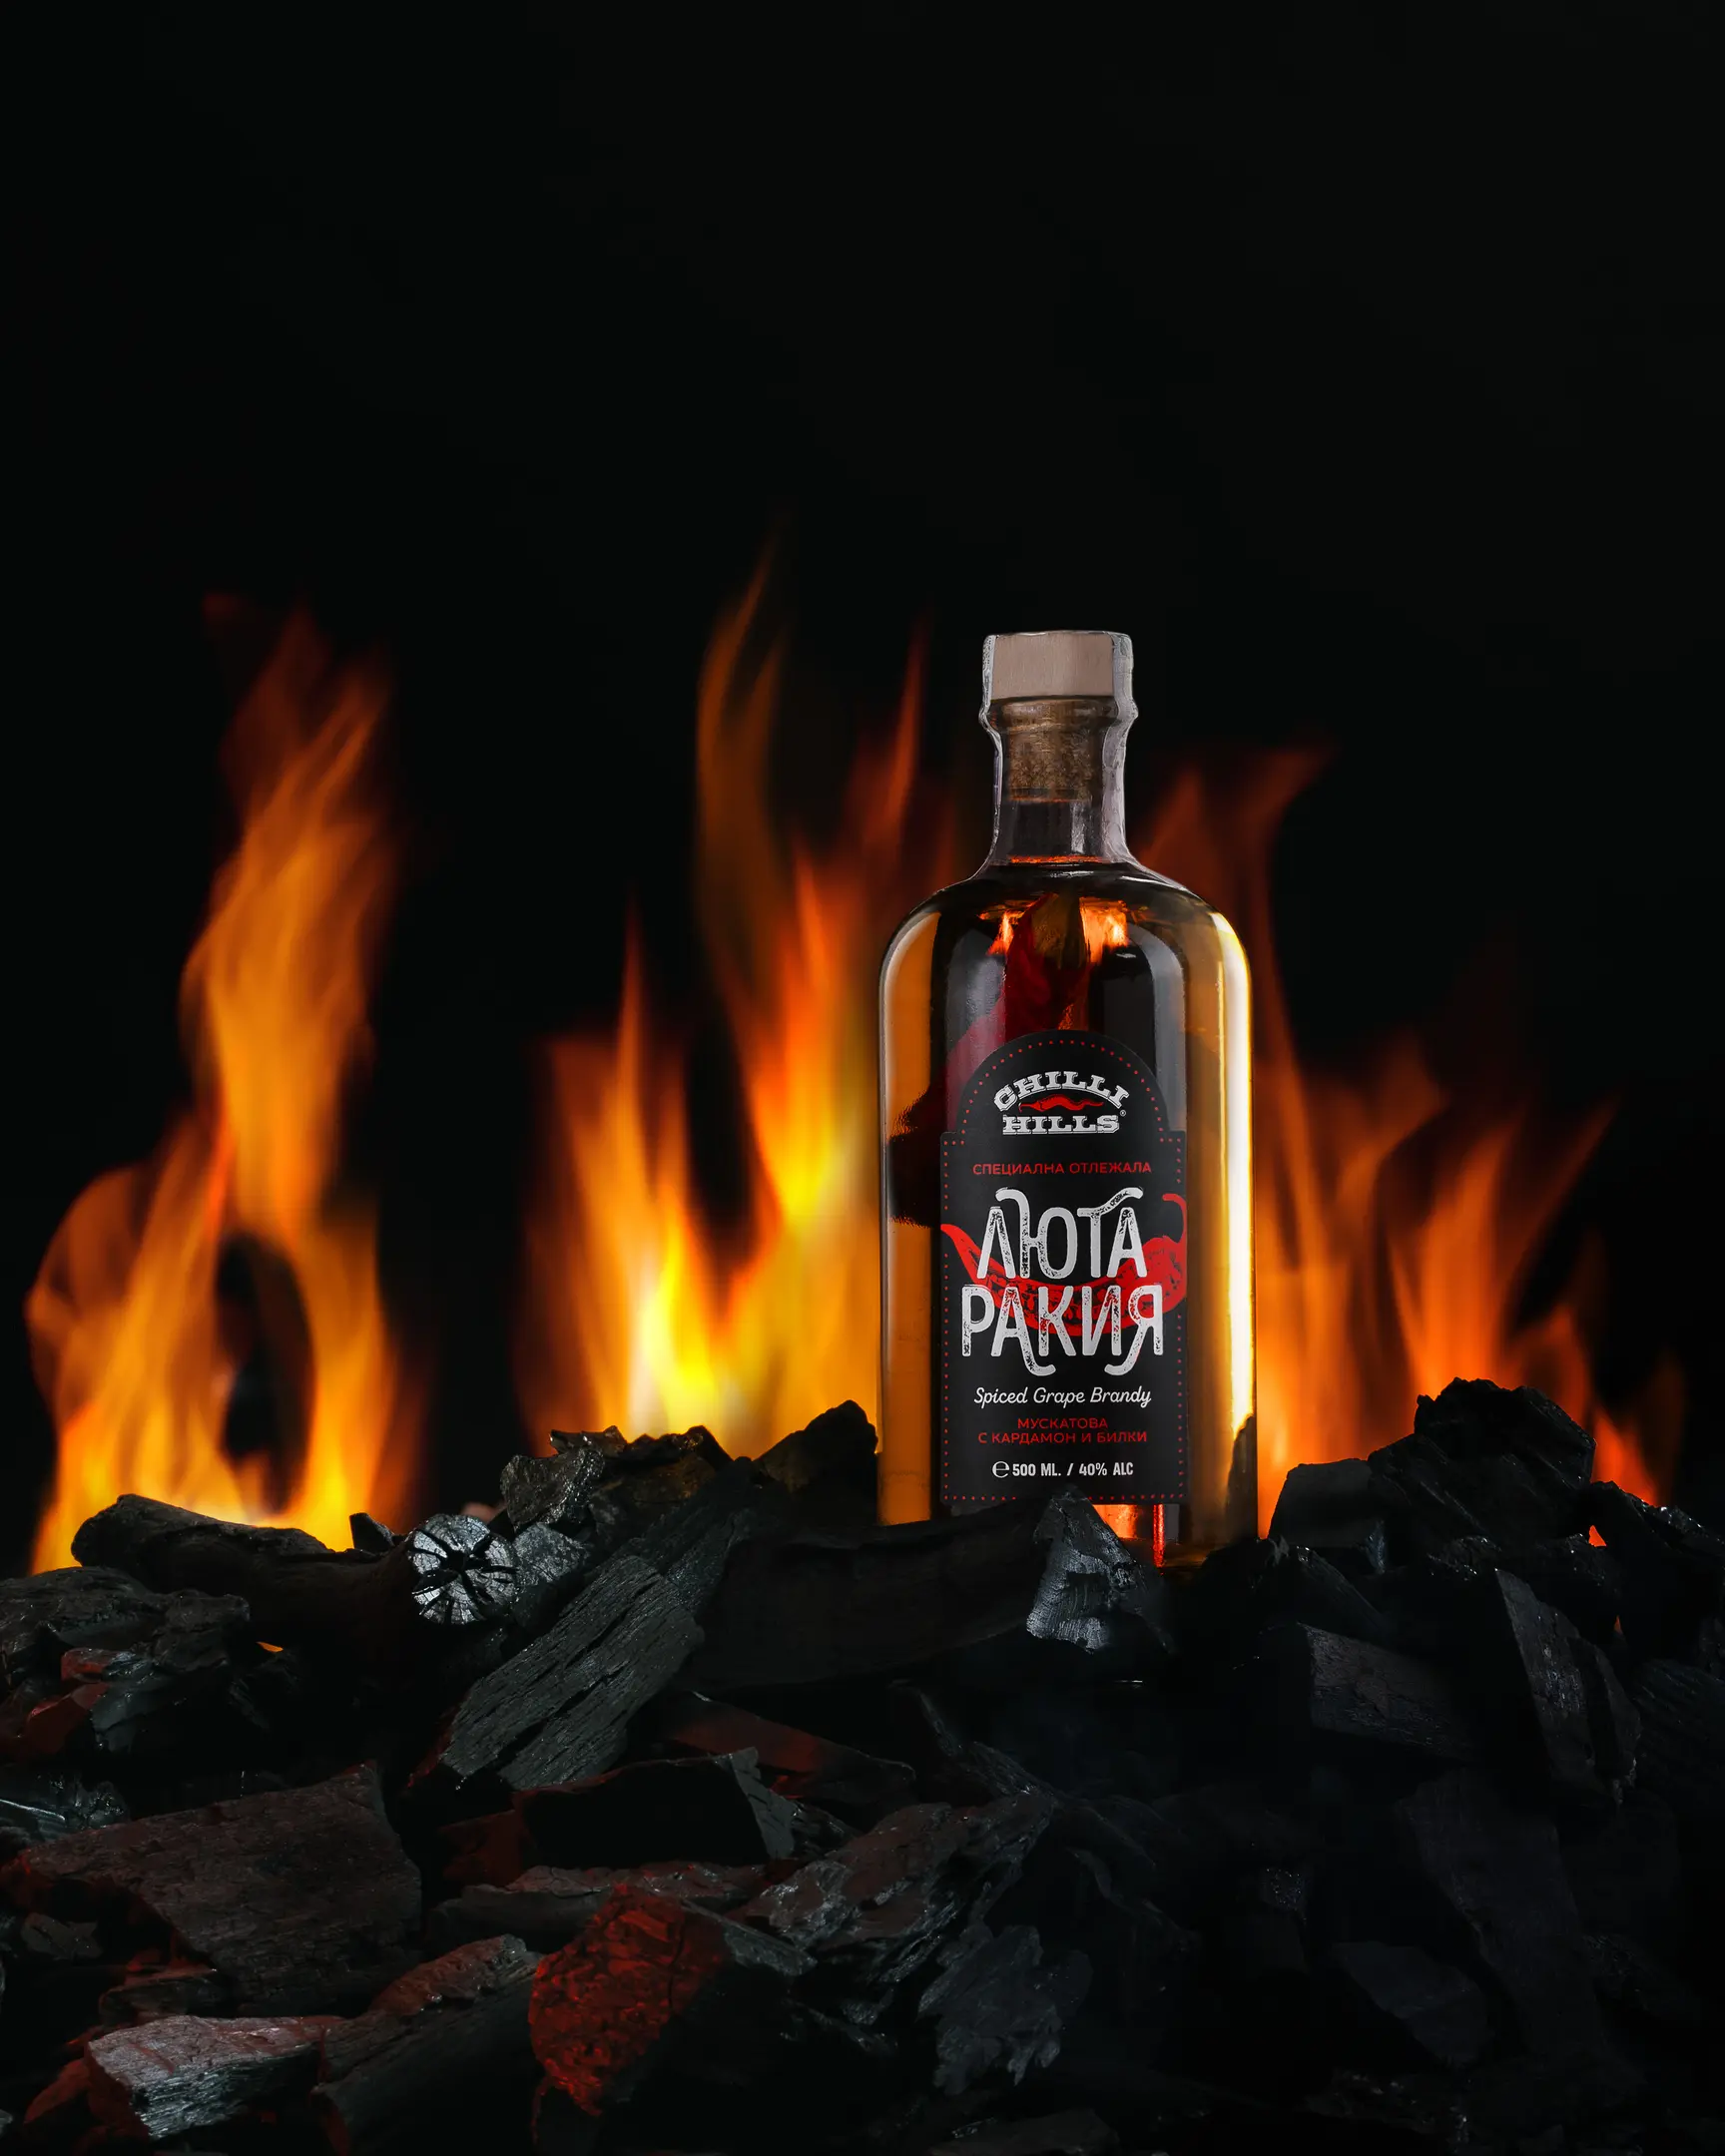
We bring the picture to the state you like best (removing dust particles, cropping, adjusting brightness, adding sharpness—in general, we process it exactly the way you prefer). This completes our detailed workflow, resulting in a polished and impactful final image.
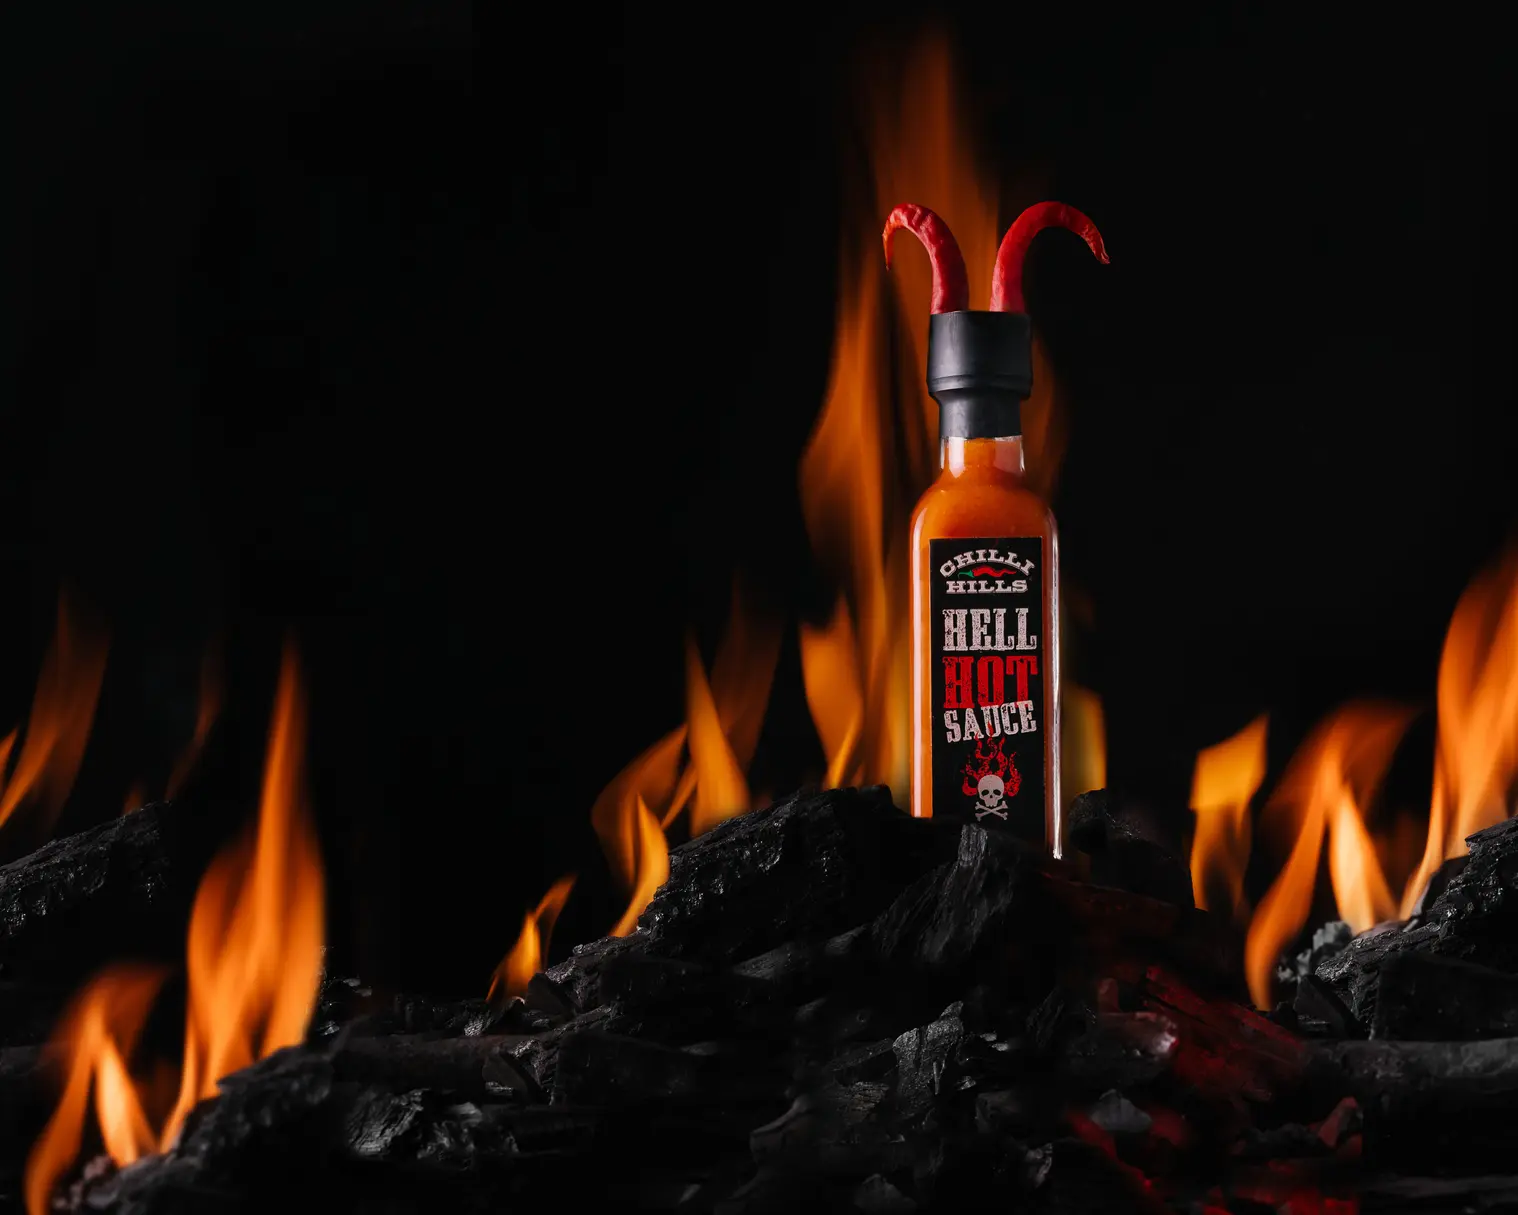
Single Light Source Challenge: Another Product Photography Example
To prove that you can achieve a similar professional frame with just one light source, I conducted another small session. To further assist your learning and practical application, I am providing the source files from this single light source shooting, which you can assemble yourself in Adobe Photoshop.
So, I’ll start again from the beginning with the precise lighting scheme for this setup.
And again—the first crucial step for effective composite photography is to place the camera firmly on an absolutely stable tripod! The camera must not move an inch! You are shooting at a slow shutter speed—specifically to capture the dynamic fire! In addition, you will need to meticulously combine the frames in Photoshop, so be absolutely sure to secure the camera.
Three Key Elements of the Single Light Setup
Light Source #1: The Main Drawing Light for Single Flash Photography
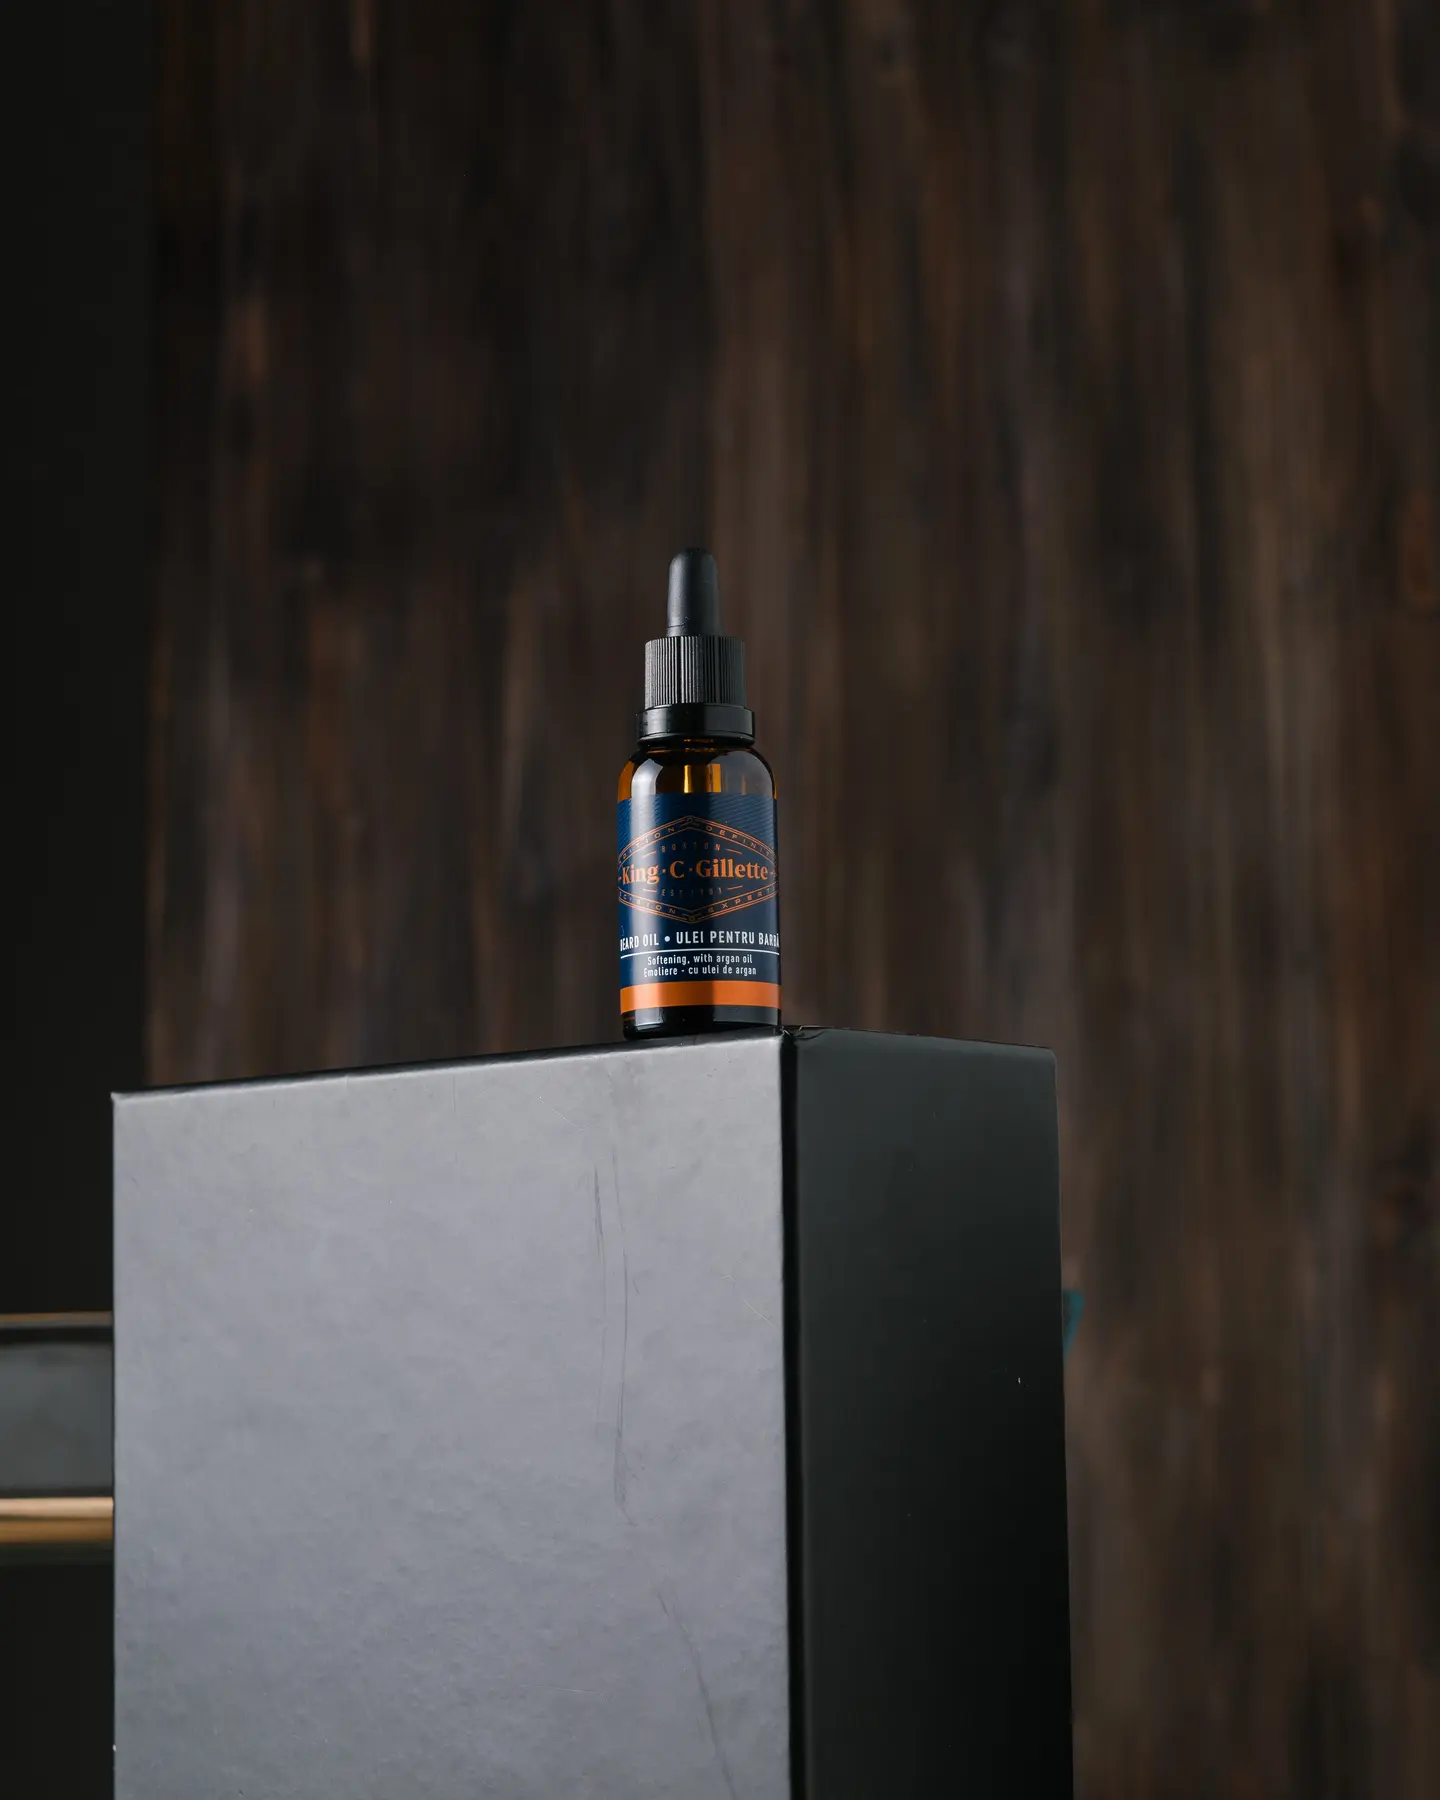
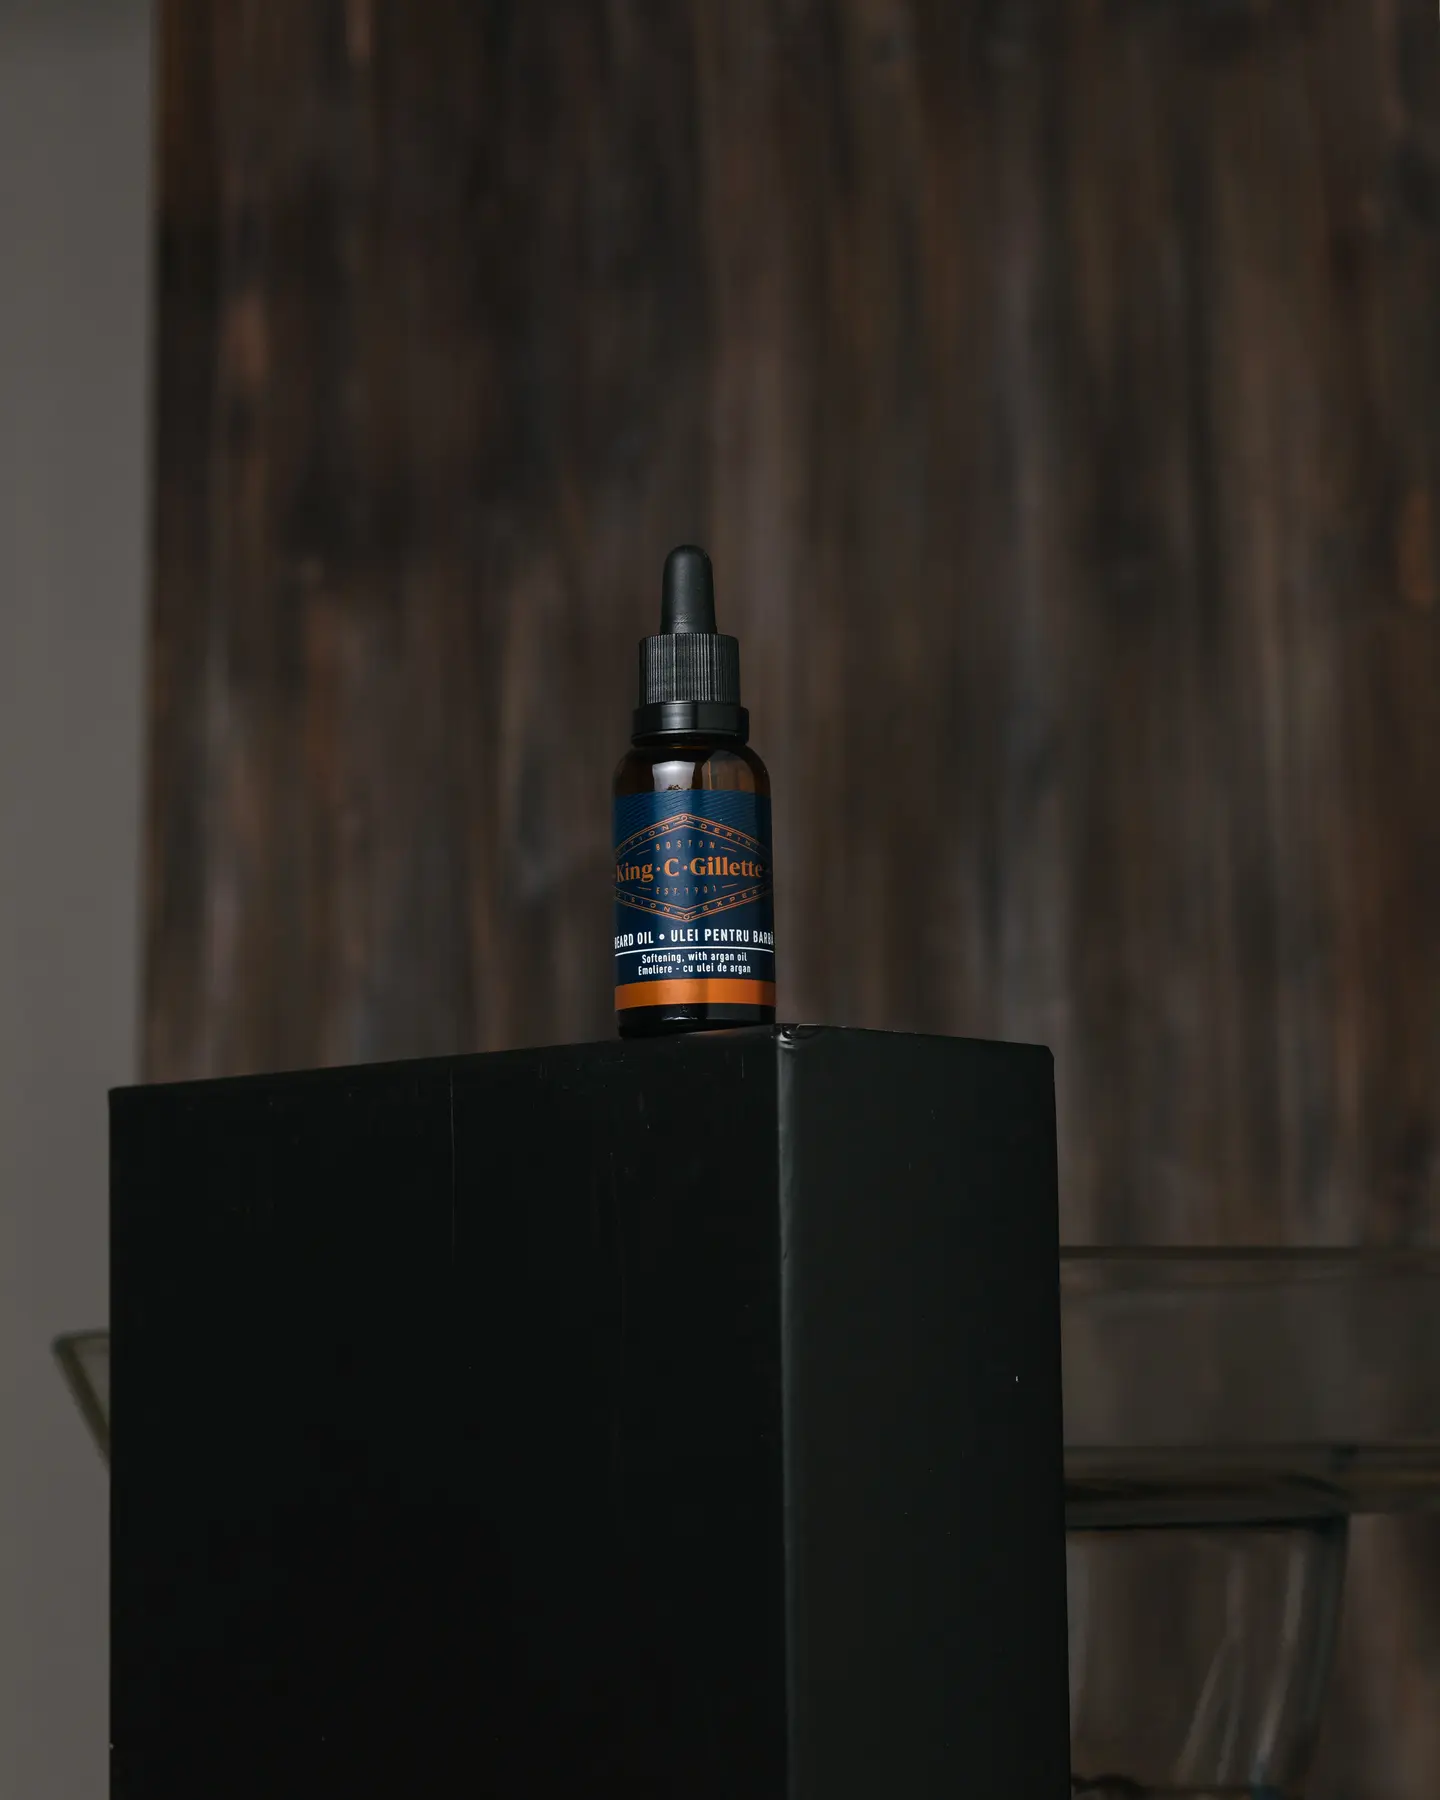
This is the “drawing” light. Here, I used a GODOX AD200 Pro flash with a softbox measuring 60x90 cm. The light illuminates the object from the rear left—effectively separating the bottle from the background, highlighting the pedestal on which the object is standing, and illuminating the left side of the object. This strategic placement is crucial for a well-defined shot even with a single flash.
Light Source #2: The “Filling” Reflector for Label and Product Details
This is the “filling” element. The power of the fill source should typically be ⅓ less than the power of the “drawing” source, or, as in my example, you can effectively use white foam board. You can purchase it at an art supply store, or you can use any other readily available reflective white surface. Source #2 (the reflector) helps illuminate the label and the right side of the object, ensuring all critical details are clearly visible and legible. The reflector should be positioned so that the light from source #1, reflected from its surface, effectively illuminates the label. However, in order to have more versatile options for processing or retouching, I always capture an extra frame specifically for the label by moving light 1 (the softbox) to a front-side position.
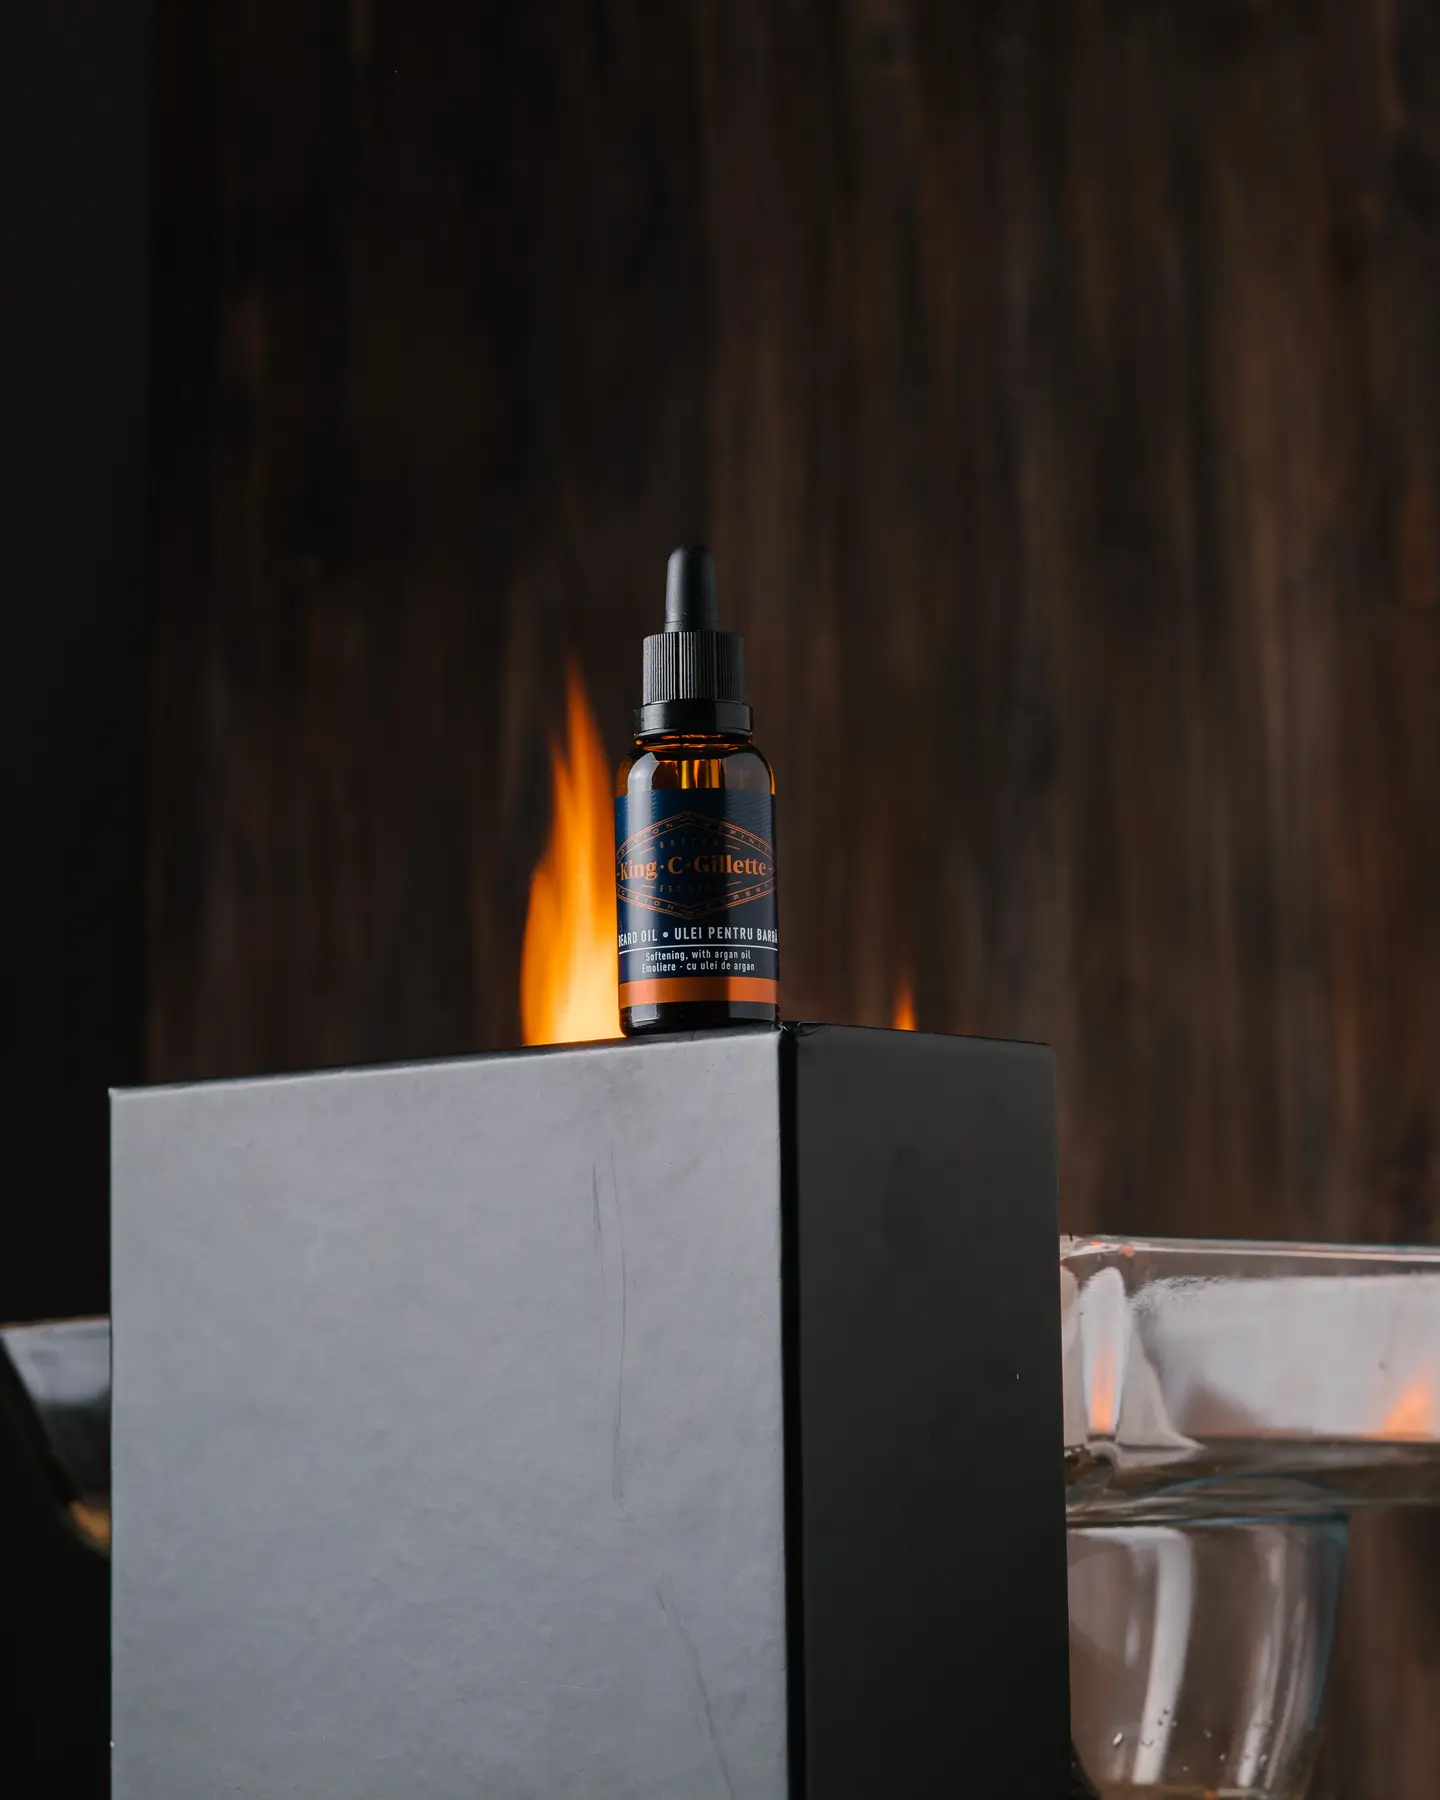
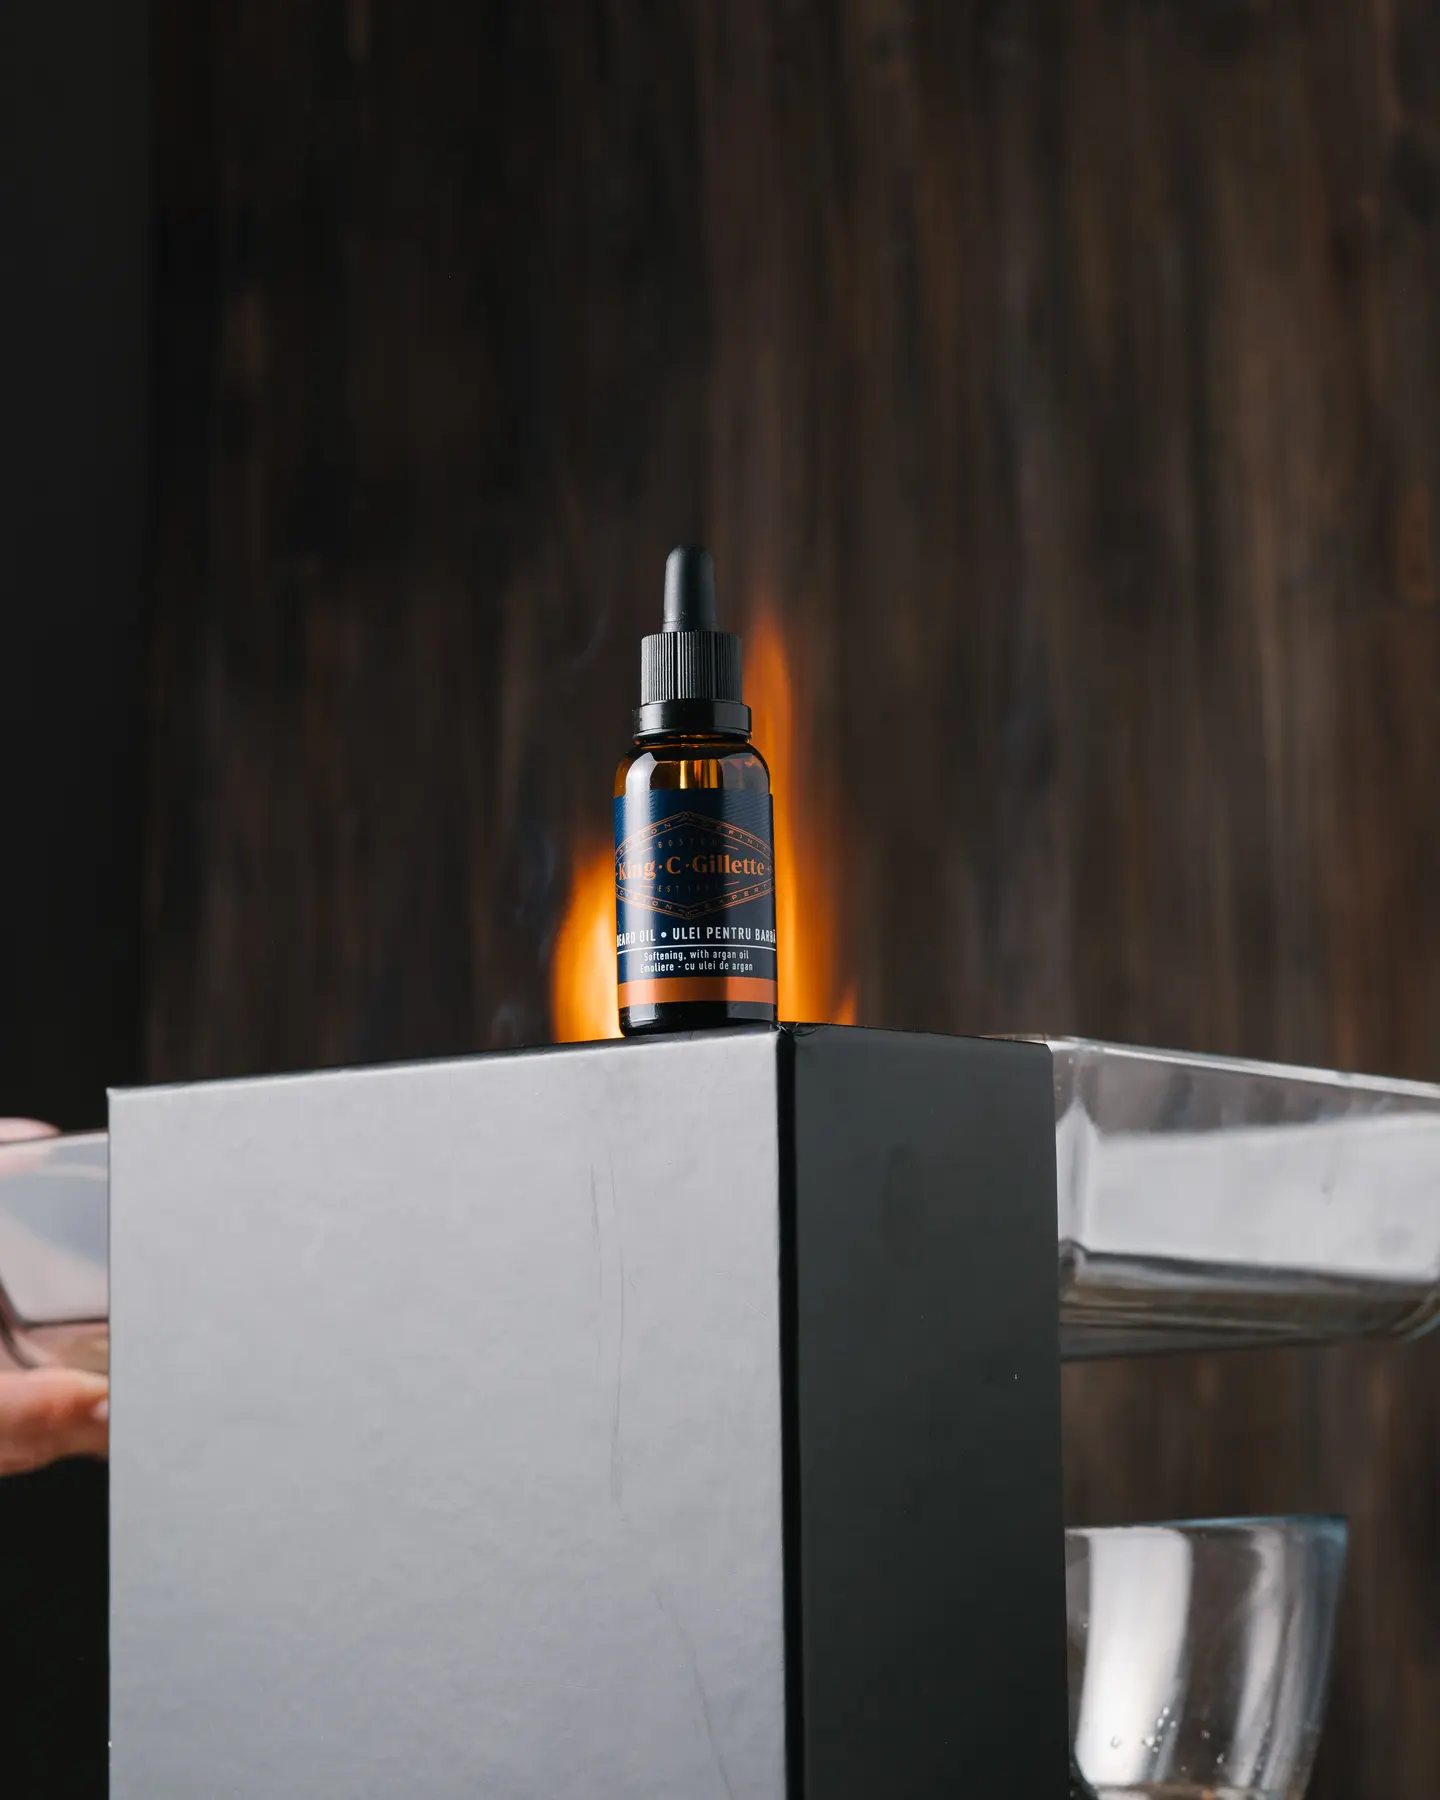
Light Source #3: Capturing Fire Elements Safely
This element focuses on fire. After you have meticulously set the light, configured the precise settings on the camera, closed all curtains, and turned off all lights in the room so that it plunges into complete darkness, you need to turn off the synchronizer on the camera and, with the set camera settings, take a picture without any flashes. This should result in a completely black frame. This ensures that, except for your flashes, no other extraneous light sources will alter the light-shadow pattern in the frame, guaranteeing clean and controlled fire capture.
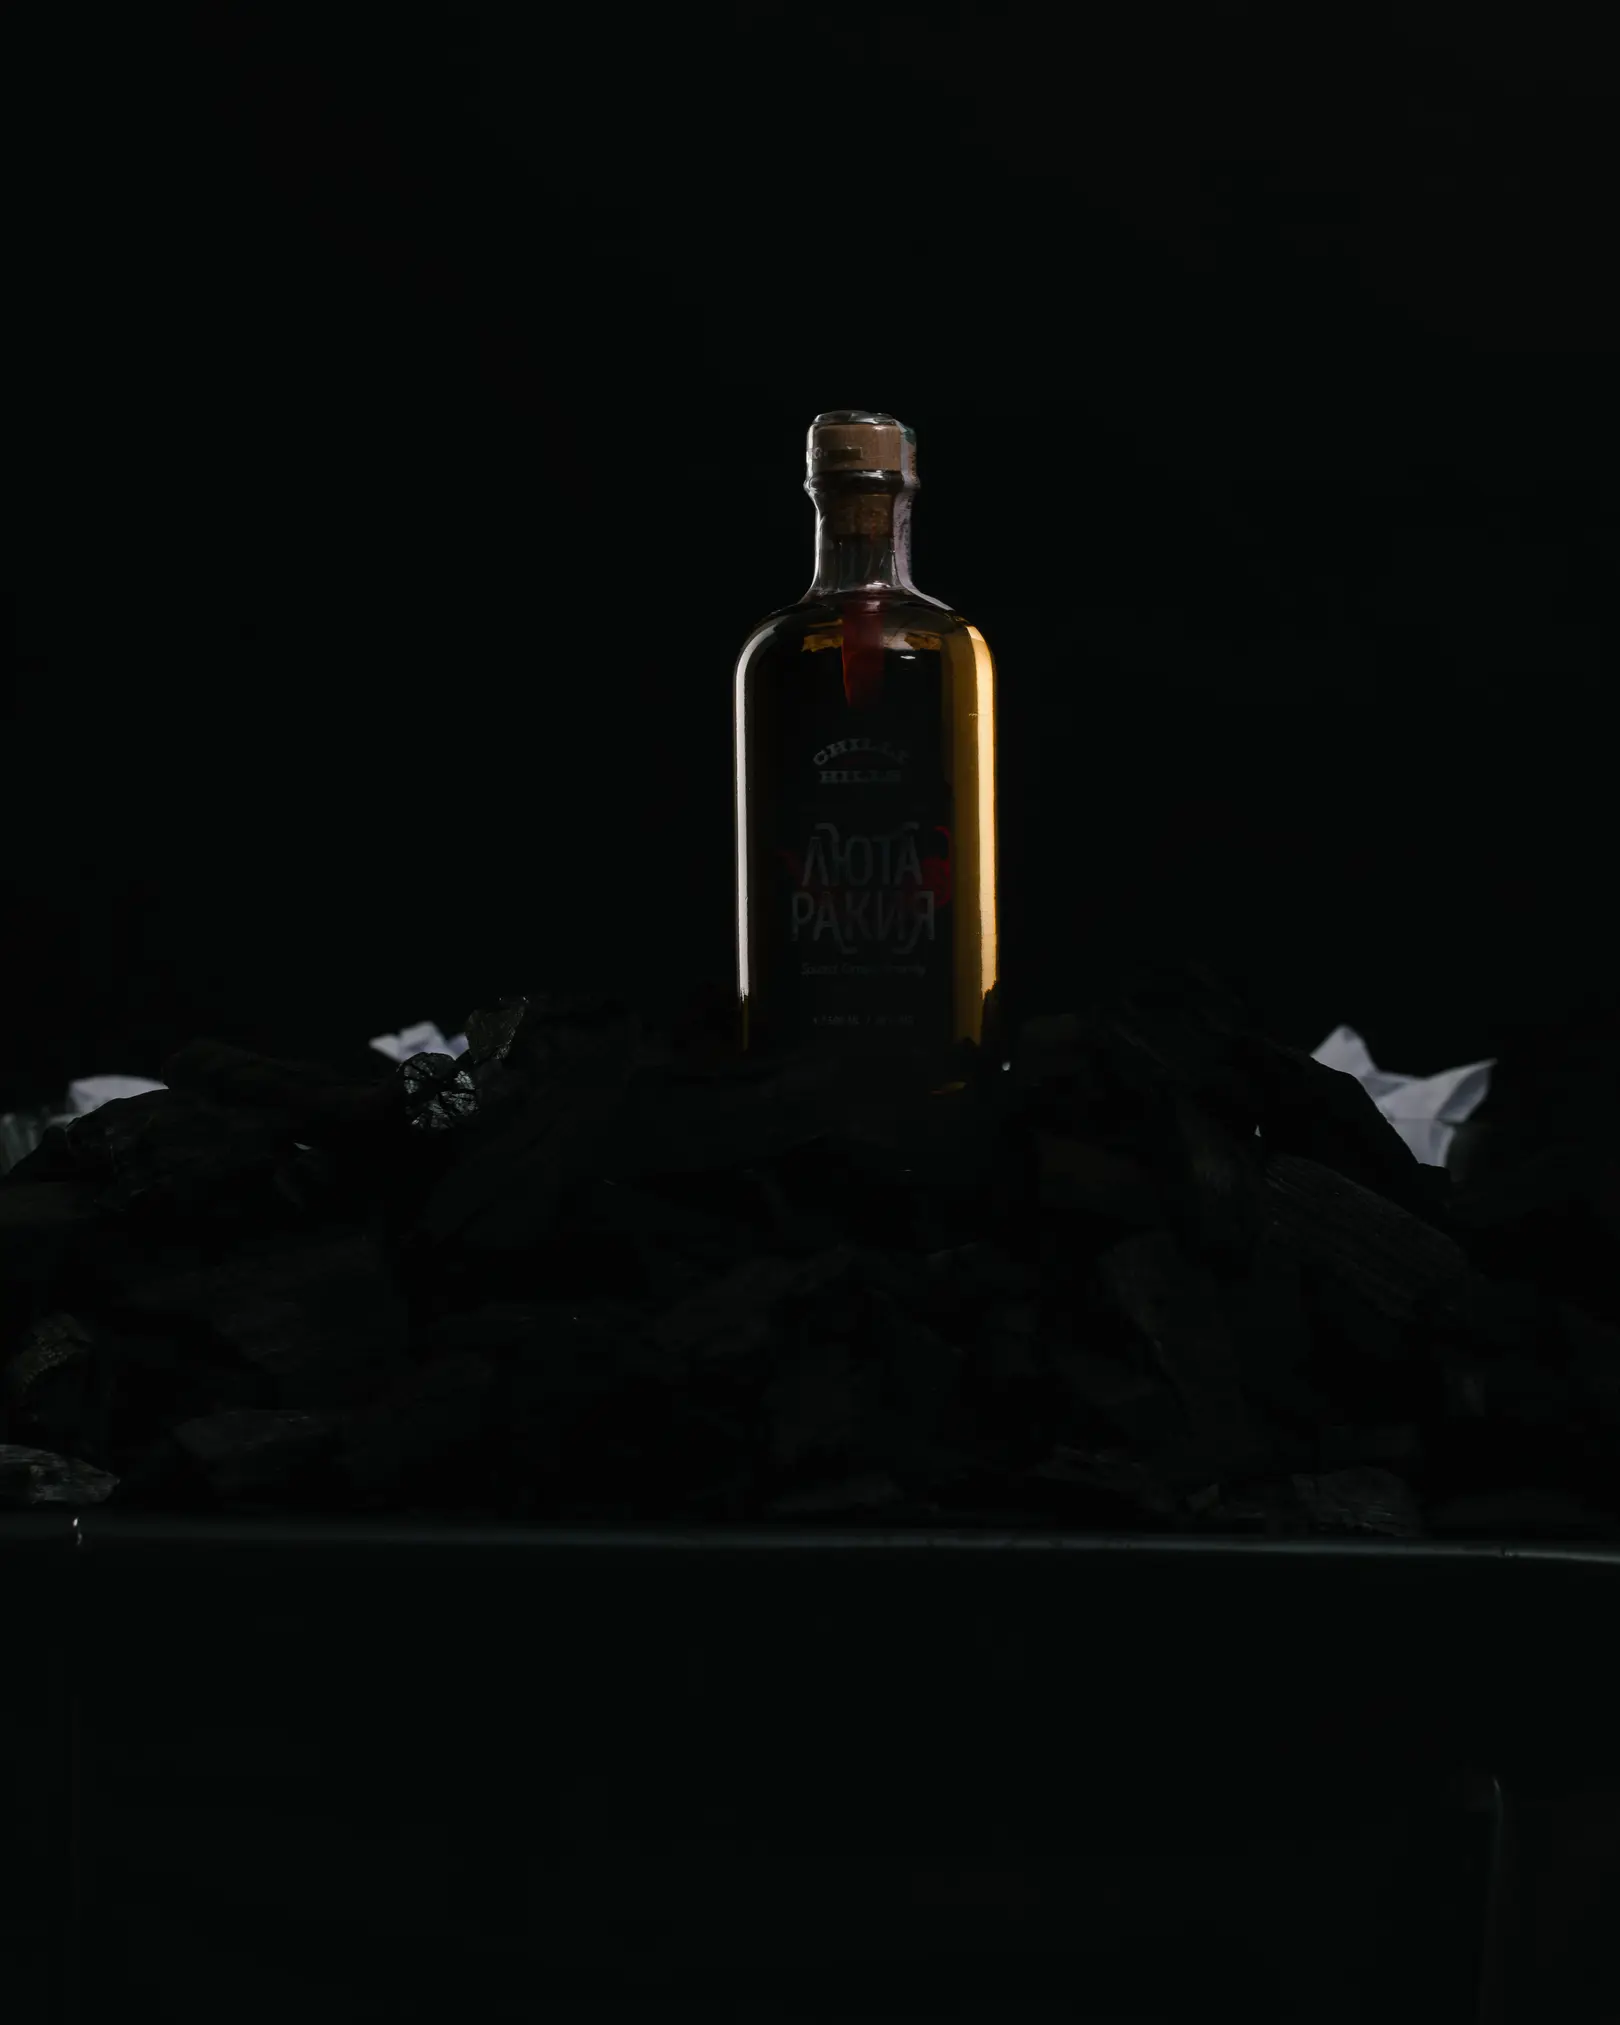
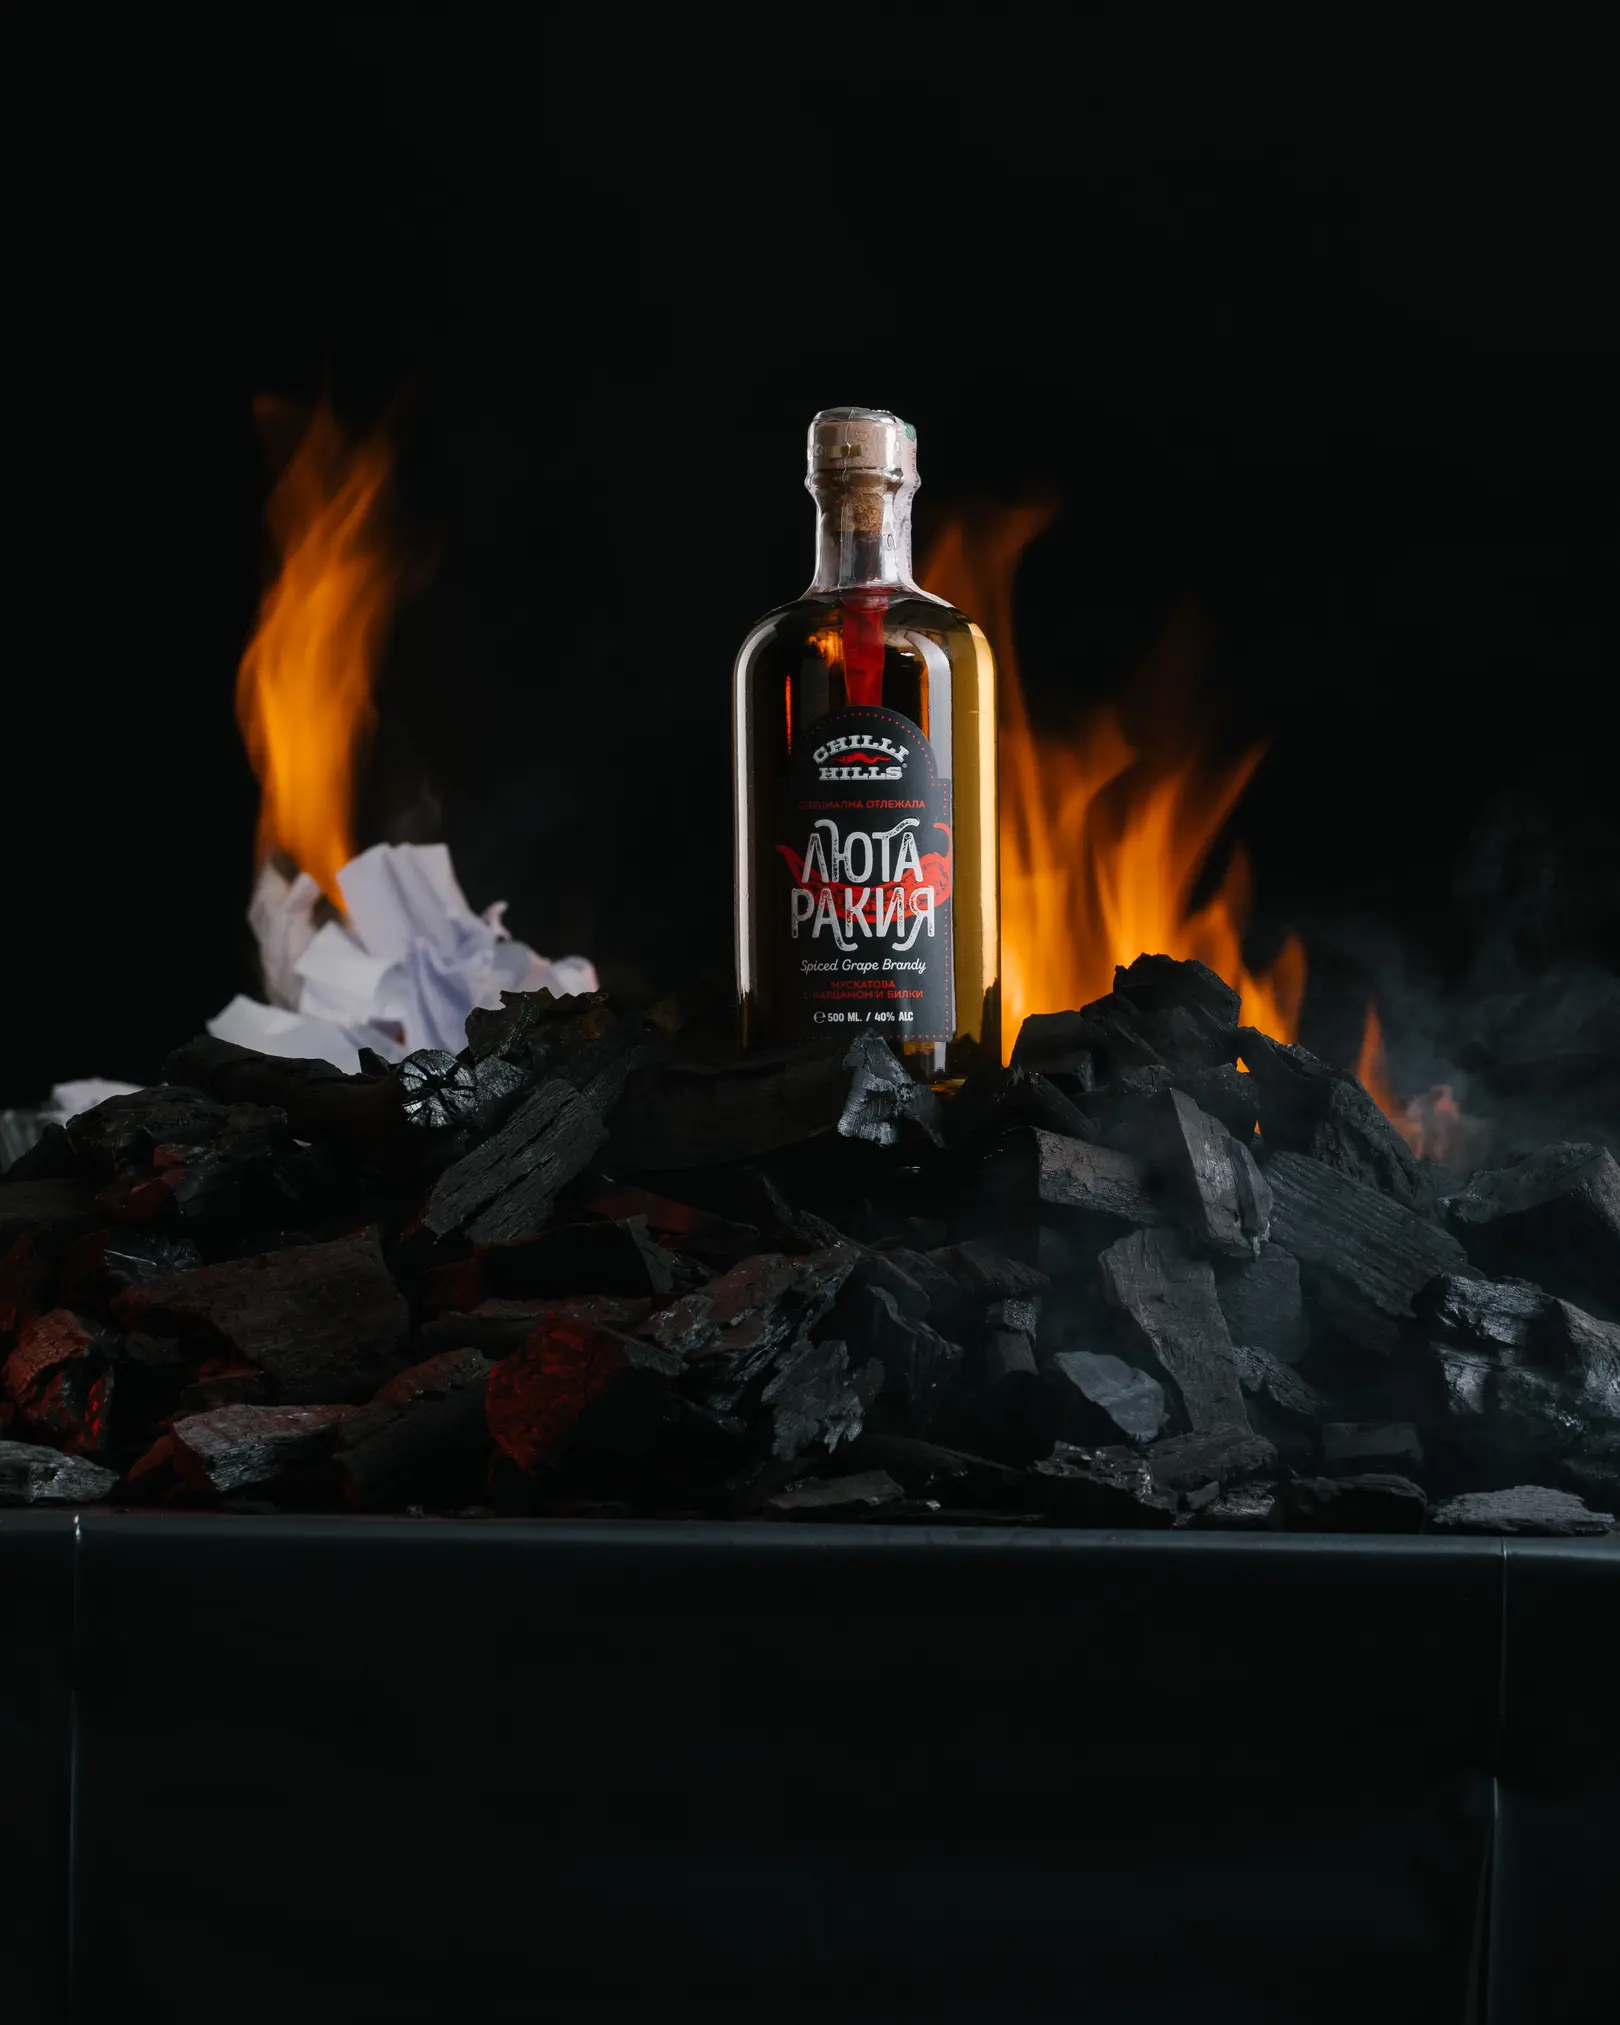
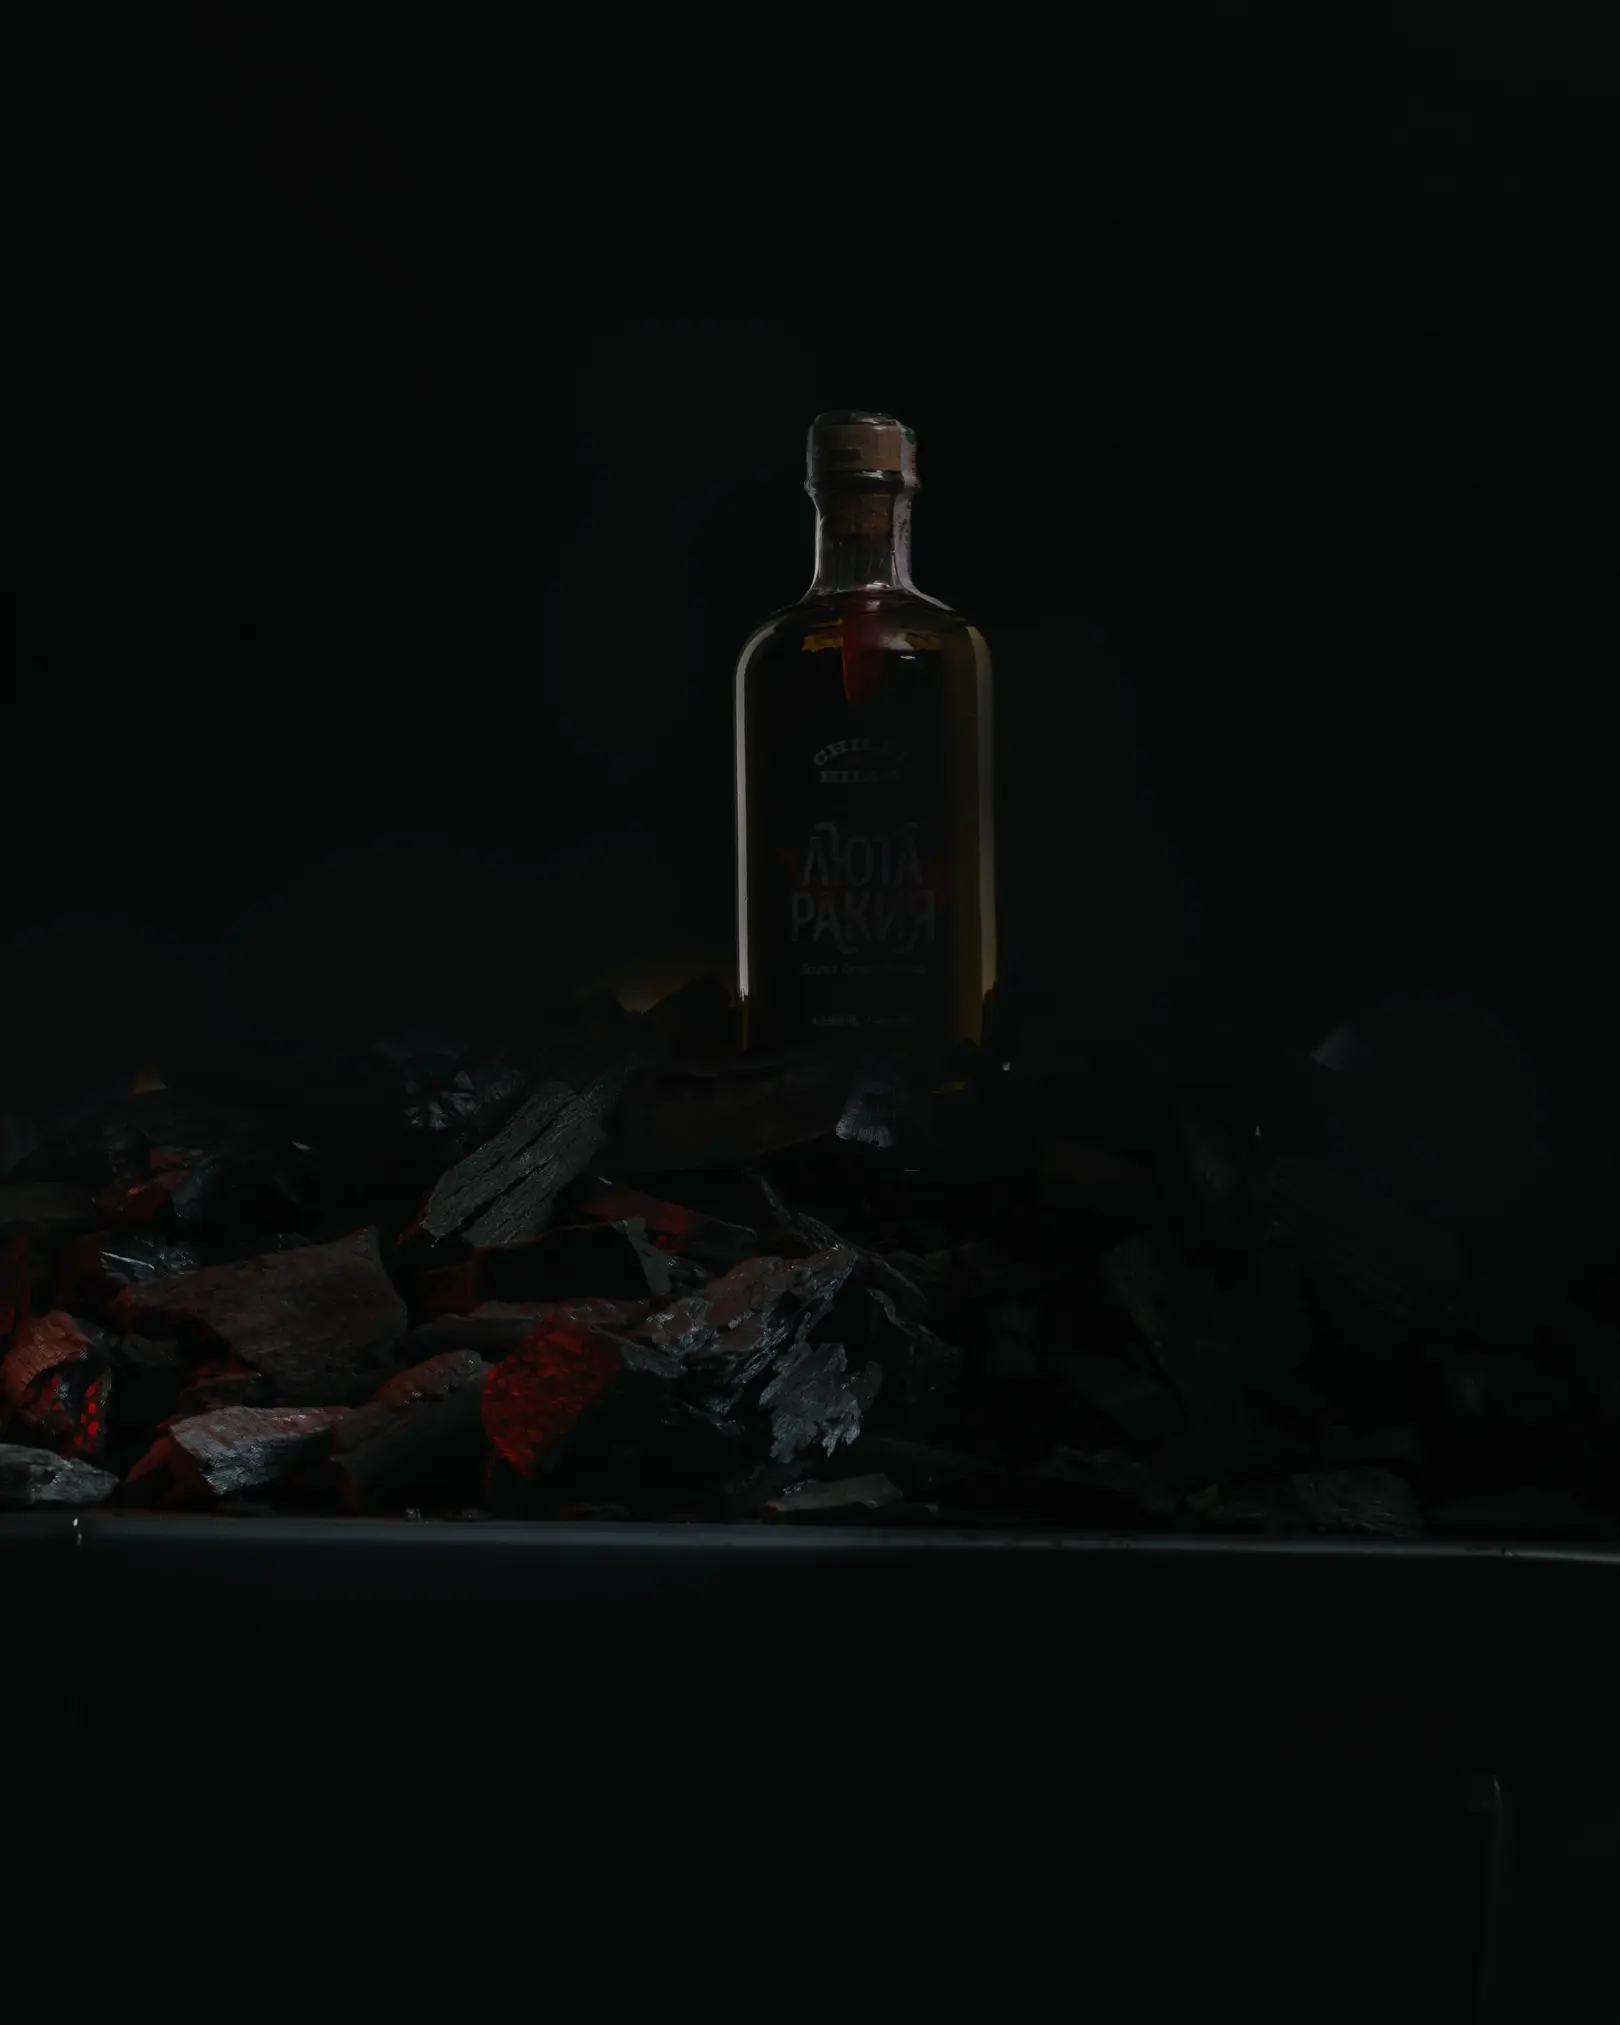
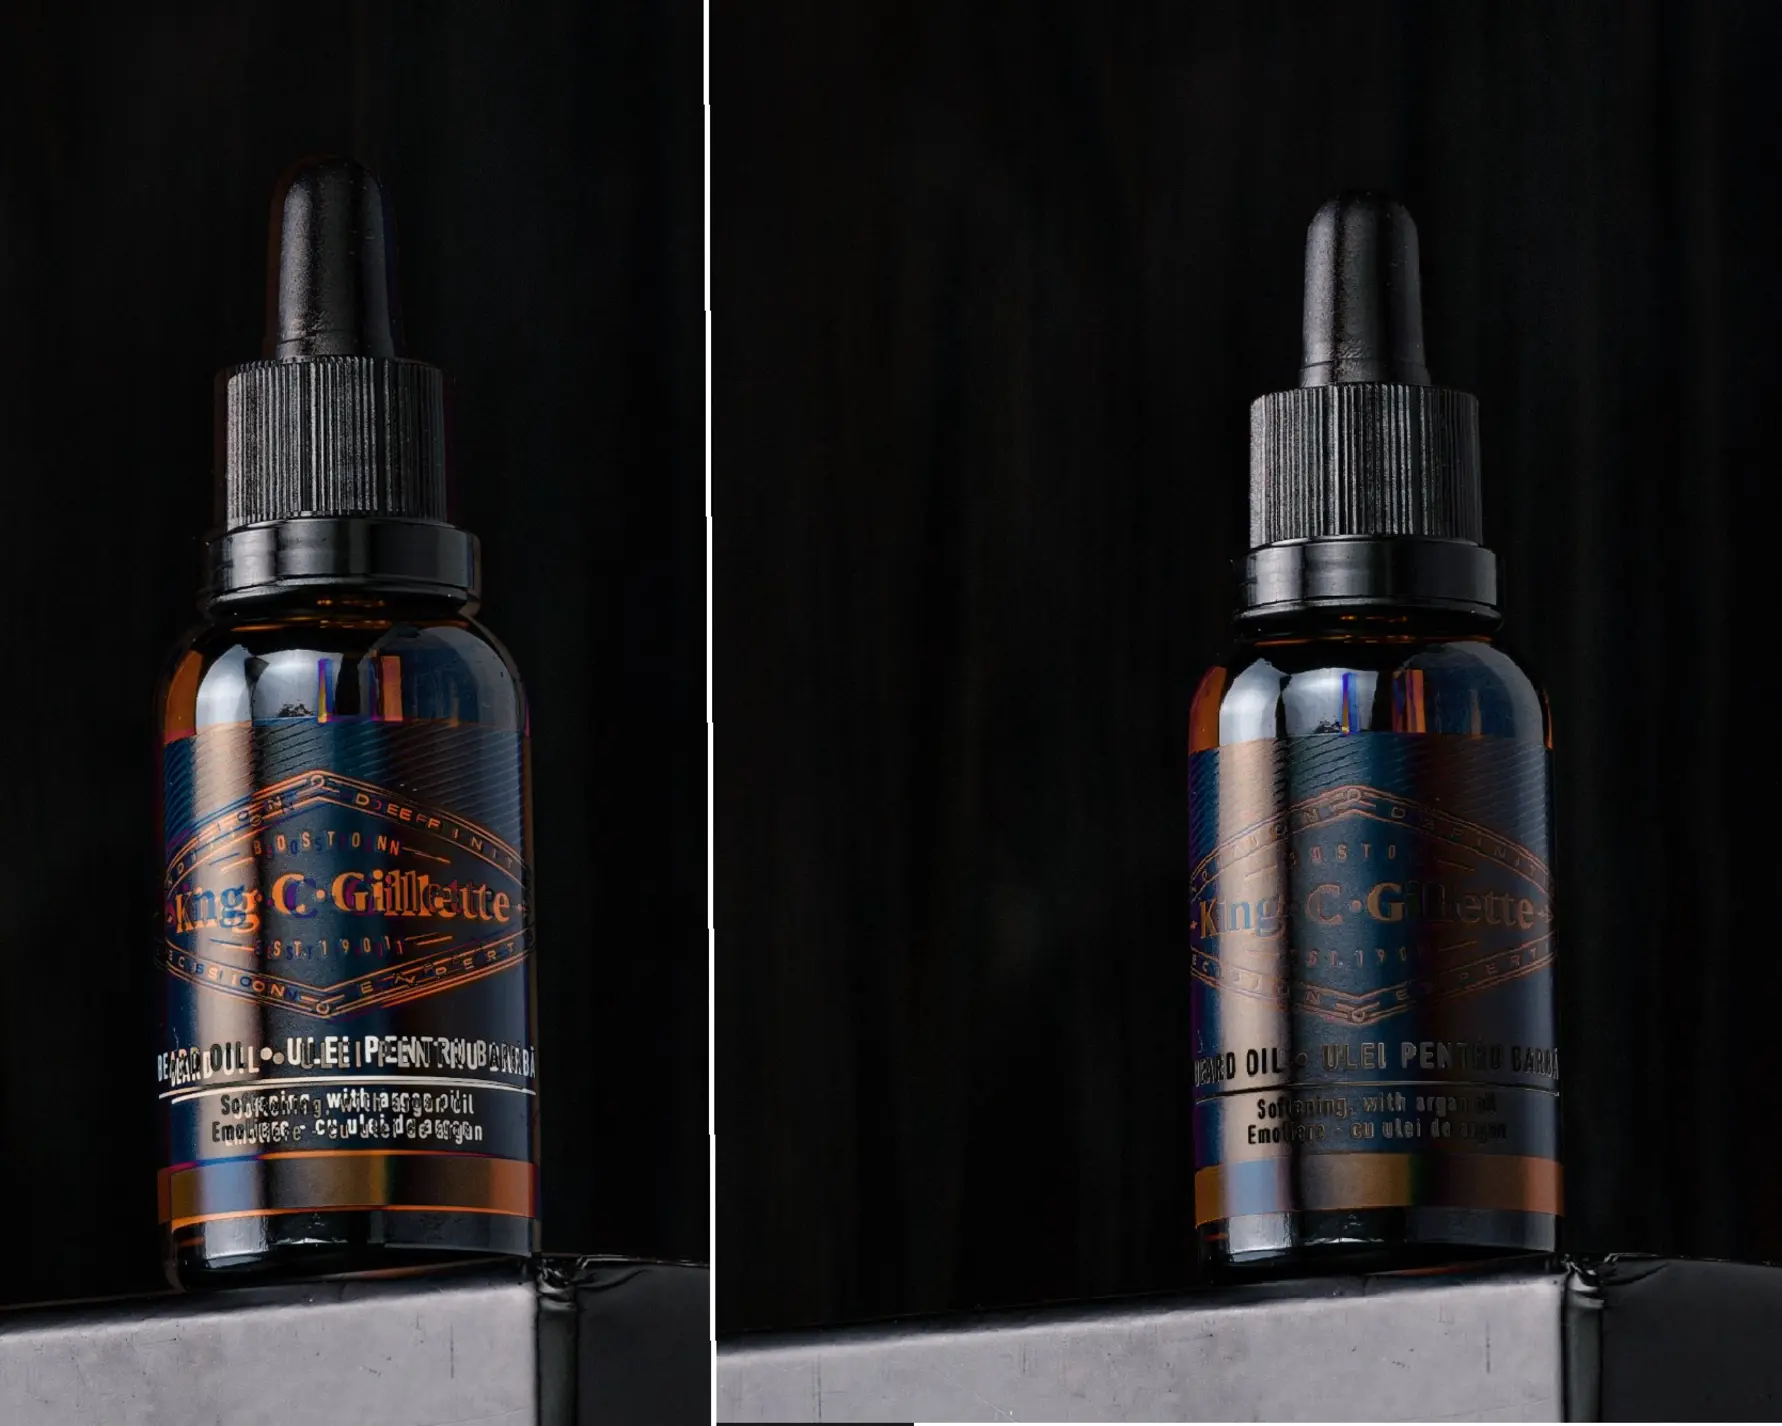
You must be prepared for the possibility that the first attempt at capturing the frame with fire may not be perfect. Here is an example of a frame with a shutter speed of 1 second (left) and 0.5 seconds (right), clearly demonstrating how different fire intensity can be captured.
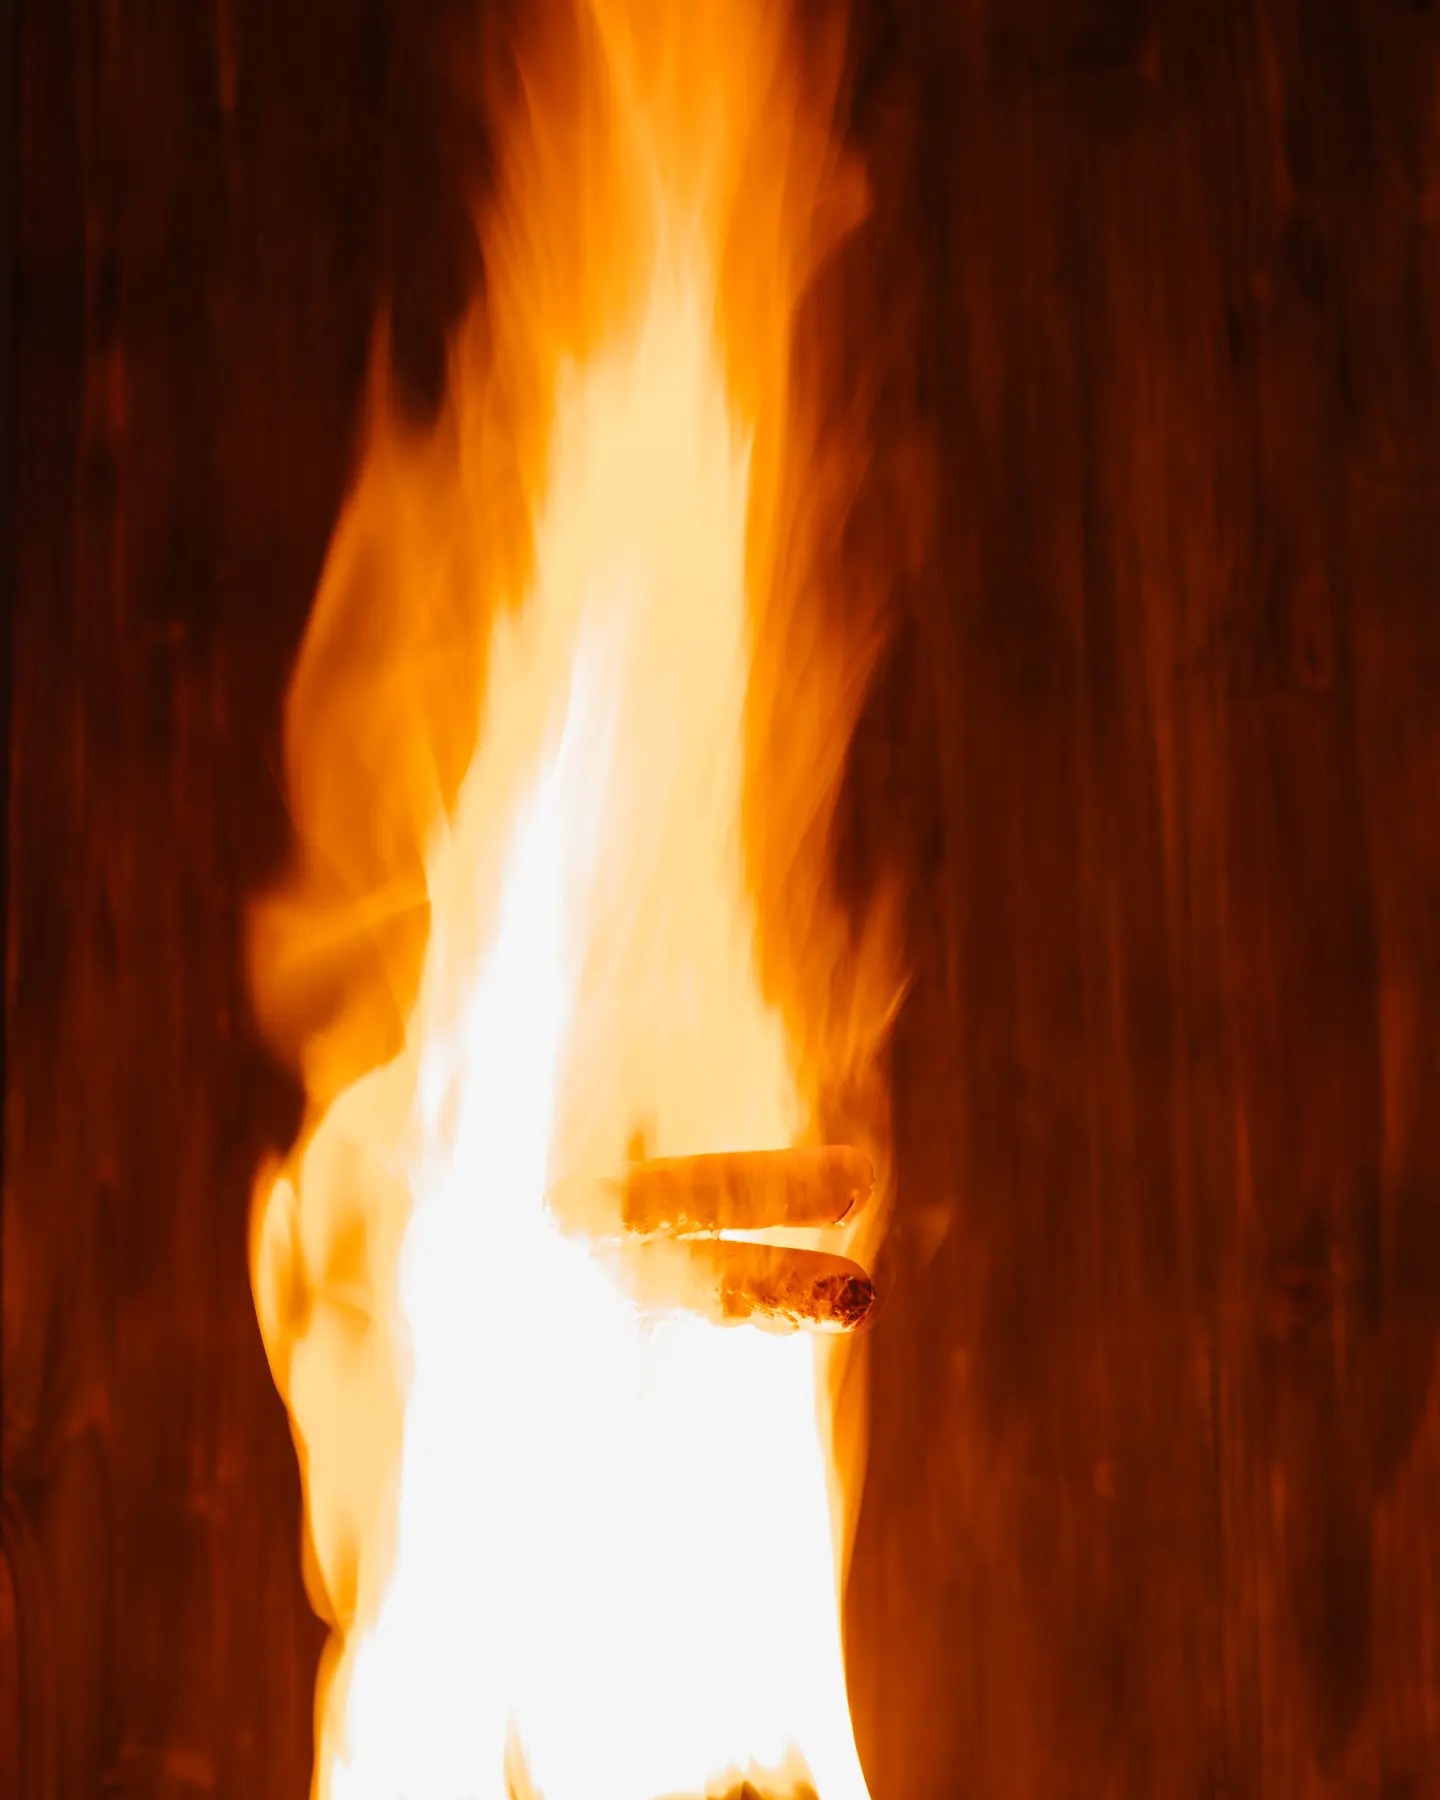
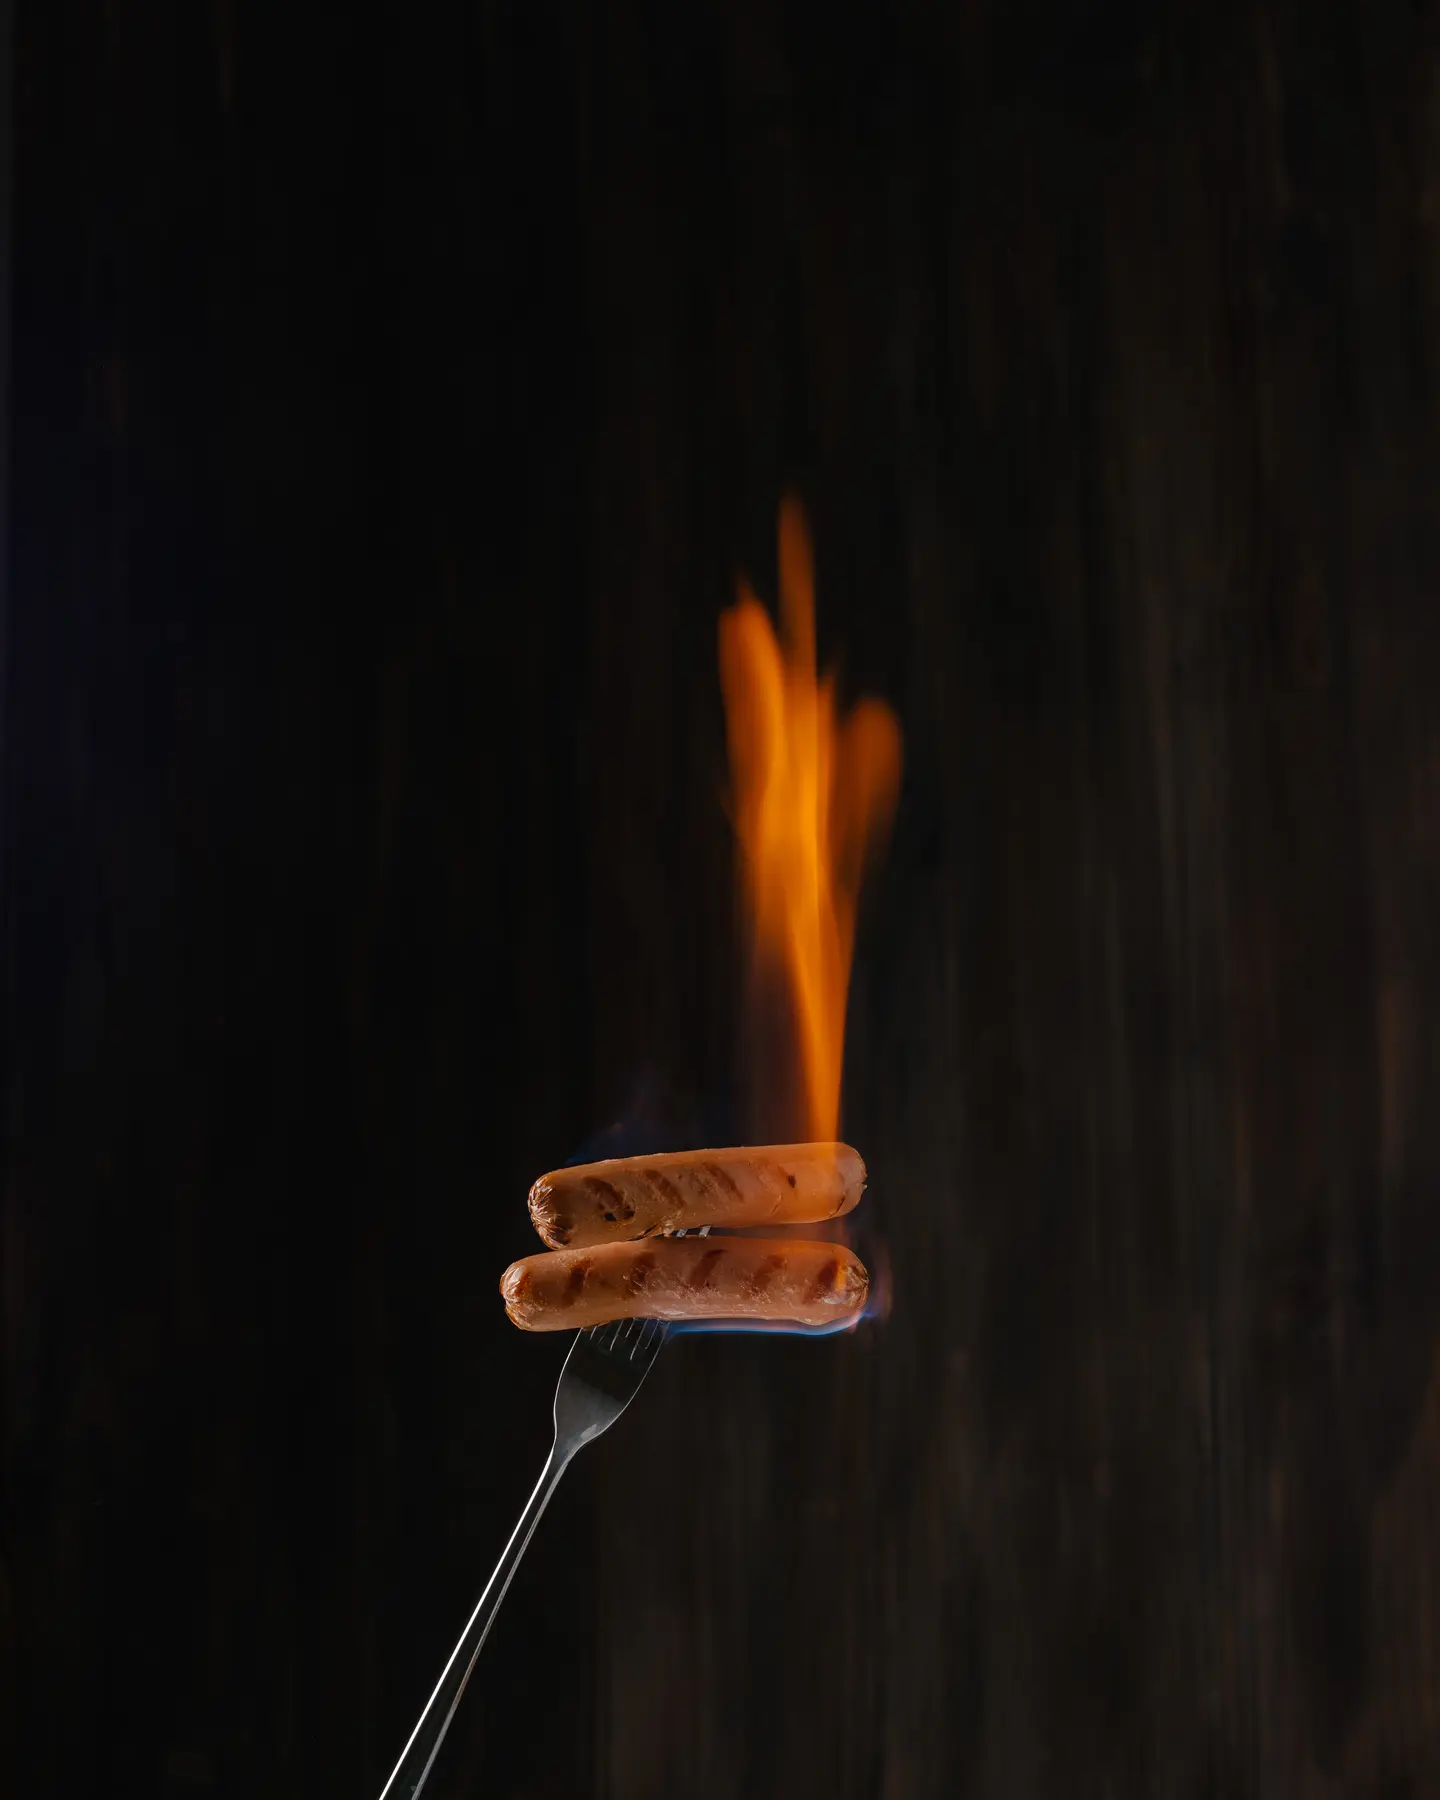
As you understand, fire is still an element that is inherently difficult to control! Therefore, be absolutely sure to prepare enough water and clear the room of any flammables before you begin shooting (a wet towel, heat-resistant dishes, and ideally, a fire extinguisher). This is absolutely crucial for maintaining rigorous safety. And also—prepare yourself mentally for the fact that it will likely take several attempts to achieve a flame effect that you truly like!
Revised Camera Settings for the Single Light Source Experiment
What specific camera settings did I use for this single light source shoot?
You may require slightly different settings, but they will likely be very close to the following:
- Exposure is approximately 0.5-1 second.
- Aperture from f/8 to f/12-15.
- ISO 100.
I used one GODOX AD200 Pro flash, a Canon EOS 5D Mark IV camera, and one of my favorite lenses—the Canon 85mm f/1.8.
Building the Final Image: Single Light Source Compositing
As a result of this meticulous process, I captured 5 distinct frames and expertly assembled them into the final picture in Photoshop using advanced compositing techniques. Frames 1 and 2 were essential for drawing the background and illuminating the label, providing distinct and controlled lighting.
Frames 3, 4, and 5 became our valuable flame donors, captured separately for later seamless integration.

Photoshop Workflow: Assembling the King C. Gillette Beard Oil Shot
-
I decided that the best and most “clean” starting point is the BASE frame. This will be the foundational photo on which I will meticulously overlay other layers to construct the final picture.
-
In Photoshop, you need to open all 5 images. Go to the Label tab. Press Ctrl+A to select all, Ctrl+C to copy, and then insert the Label frame onto the Base frame using the CTRL+V key combination (you can use any method you are familiar with).
-
Set the Label layer to Difference blend mode and carefully try to shift the image so that the letters on the label match absolutely perfectly for precise image alignment.
-
Using CTRL+T (Free Transform) and the arrow keys on the keyboard (or the Move Tool on the Photoshop toolbar), move the label layer relative to the background and combine the frames so that the contours of the main objects coincide perfectly. This will be visibly confirmed when the lines of the subject become completely black.
In the example on the left, you can observe a slight bifurcation (splitting) of the letters on the label. On the right, the letters have already completely coincided and turned black, clearly confirming successful layer alignment.
-
It’s now time to apply the layer masks and selectively reveal the light. While on the Label layer, hold down the Alt key and click on the mask icon at the bottom right of the Layers panel, or go to Layer -> Layer Mask -> Hide All. Select a white soft brush (keyboard shortcut B) and then draw the light onto the mask on the Label layer.
-
I then set the LABEL layer to Linear Dodge (Add) blend mode for adding light. And…

…I realized that for the label, such an intense amount of illumination was already redundant. This can be easily fixed by changing the blend mode back to NORMAL (which essentially means overlapping one layer with another) or by simply changing the layer’s transparency (which I opted to do), effectively demonstrating flexibility in editing.

-
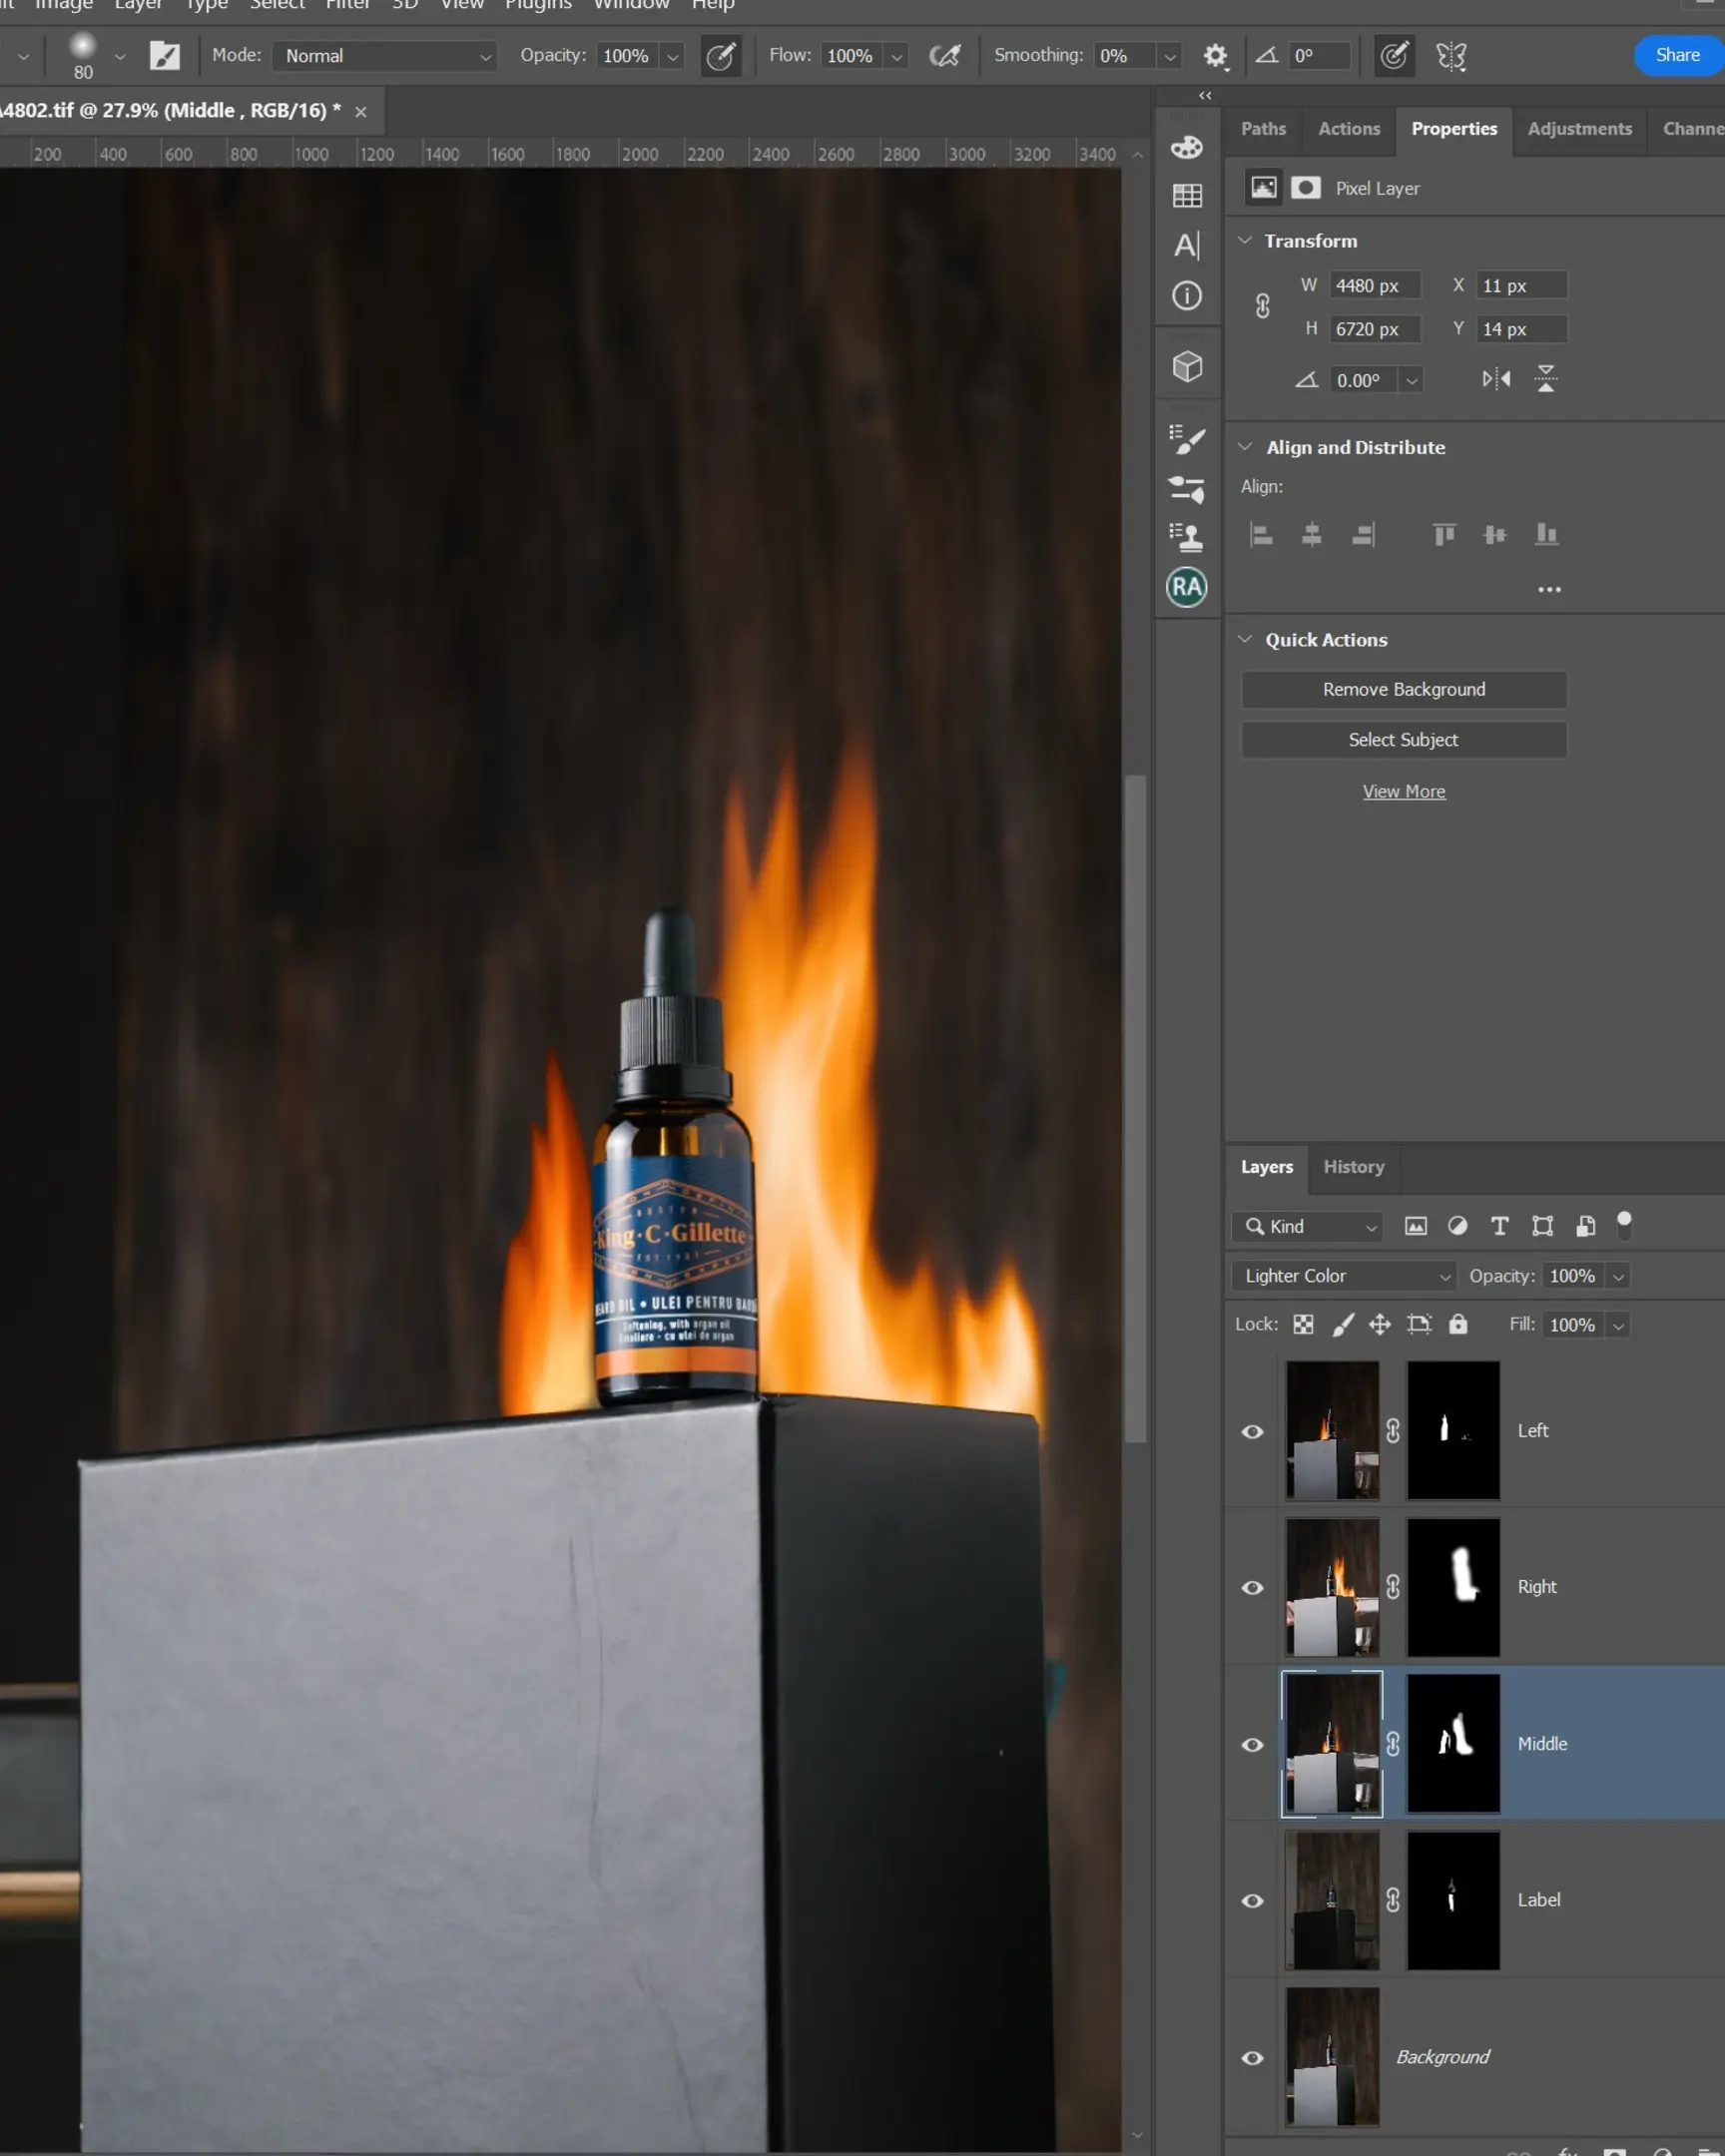
Now, it’s time to add the fire elements. This means performing all steps 2-6 for the remaining fire frames and using the mask to reveal a certain amount of fire on each of those layers. Let me remind you that the ideal blending mode here is either Linear Dodge (Add) for adding light, or Lighten Color, for seamless integration.
-
In this particular case, I found that using the Lighter Color layer blend mode worked best for integrating the fire elements seamlessly.
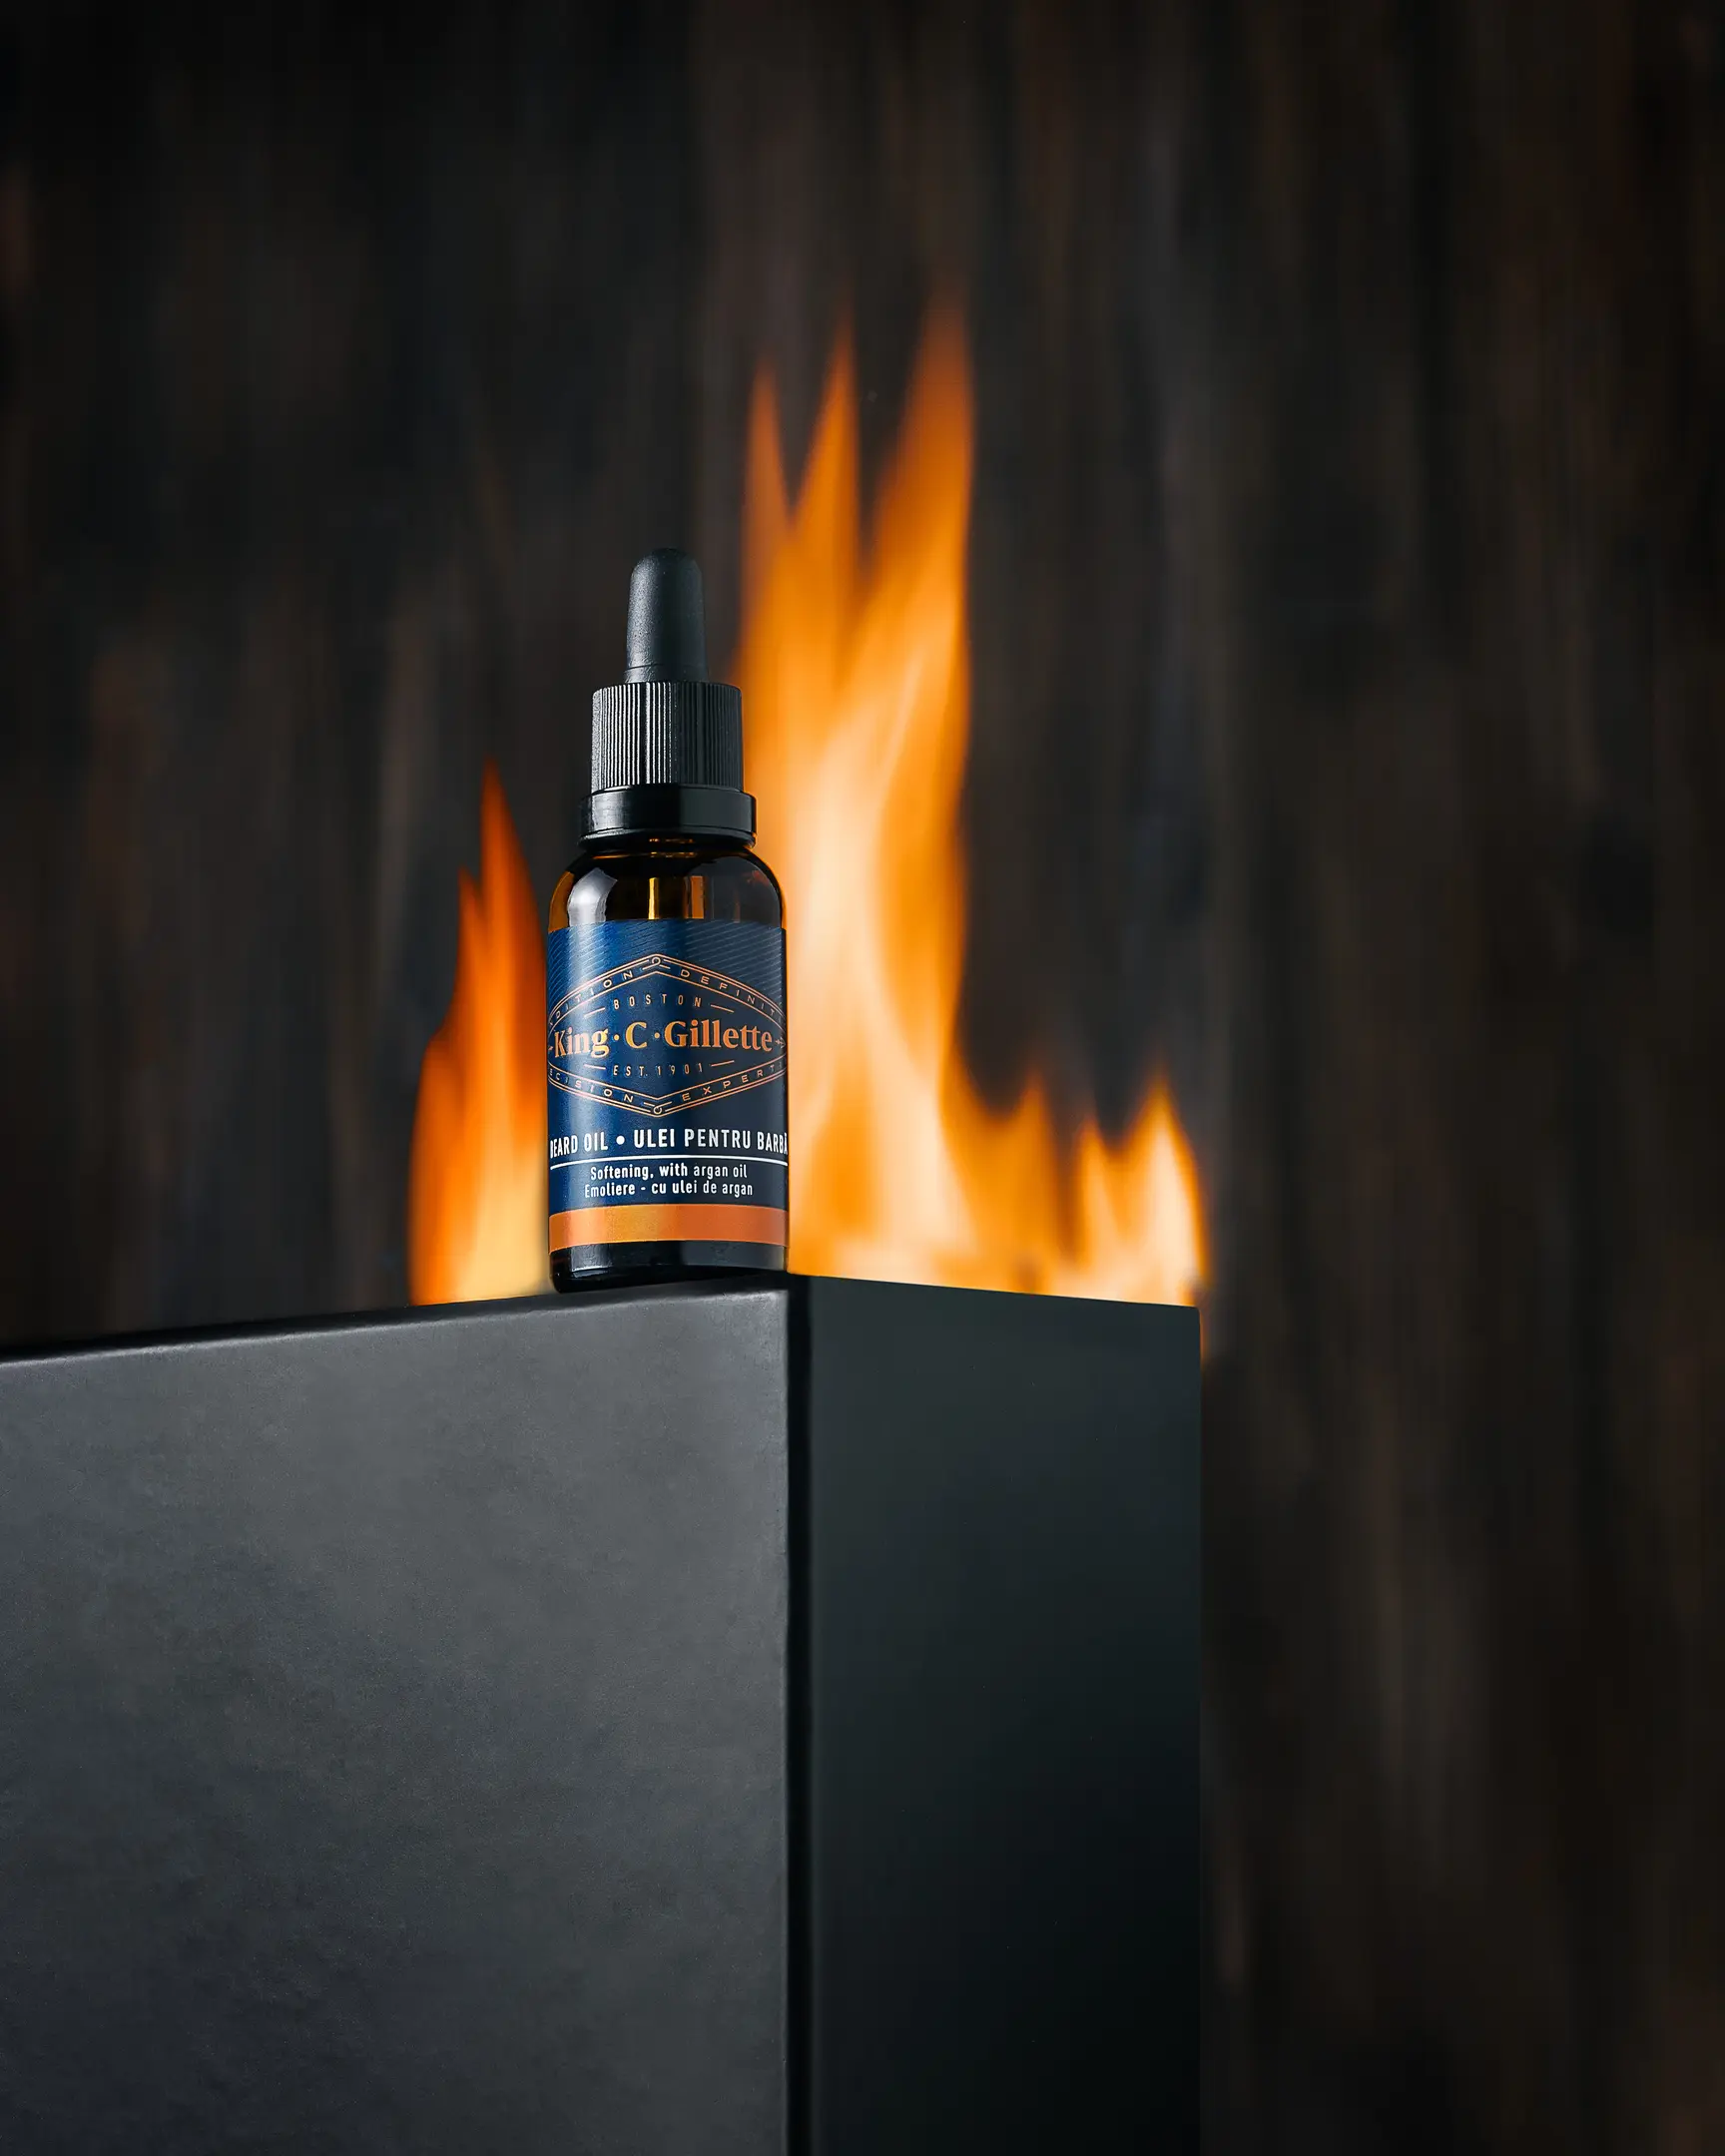
- The only thing left to do is meticulously clean up the final frame. I removed any distortion in the frame, cropped it, cleaned up any visible scratches, and performed a little color correction. However, this final stage is purely a matter of your personal taste and color perception.
If you have any questions about product photography, would like to receive any clarifications, or perhaps share your amazing results or experience – just shoot me a message at Olga.Babitskaya@praleska.eu or connect with me on Facebook and Instagram.