How to make any object fly up in a photo - even if you're not a wizard
Mastering Product Photography: Creating Floating and Suspended Effects with Glass
I absolutely love using glass in product photography, and I can’t wait to share this technique with you. The more you experiment with this style, the more inspiration you’ll find. Why do I lean on glass so much for my shoots? Simply put, it is an incredibly flexible tool for building stunning visual effects.
Once you understand how light behaves in these setups and how to handle the glass effectively, the possibilities are endless. Honestly, realizing how much control you have over “levitation” photography can feel almost like a superpower.
Why Use Glass in Your Product Photography?
Glass opens the door to a variety of creative shots for your portfolio.
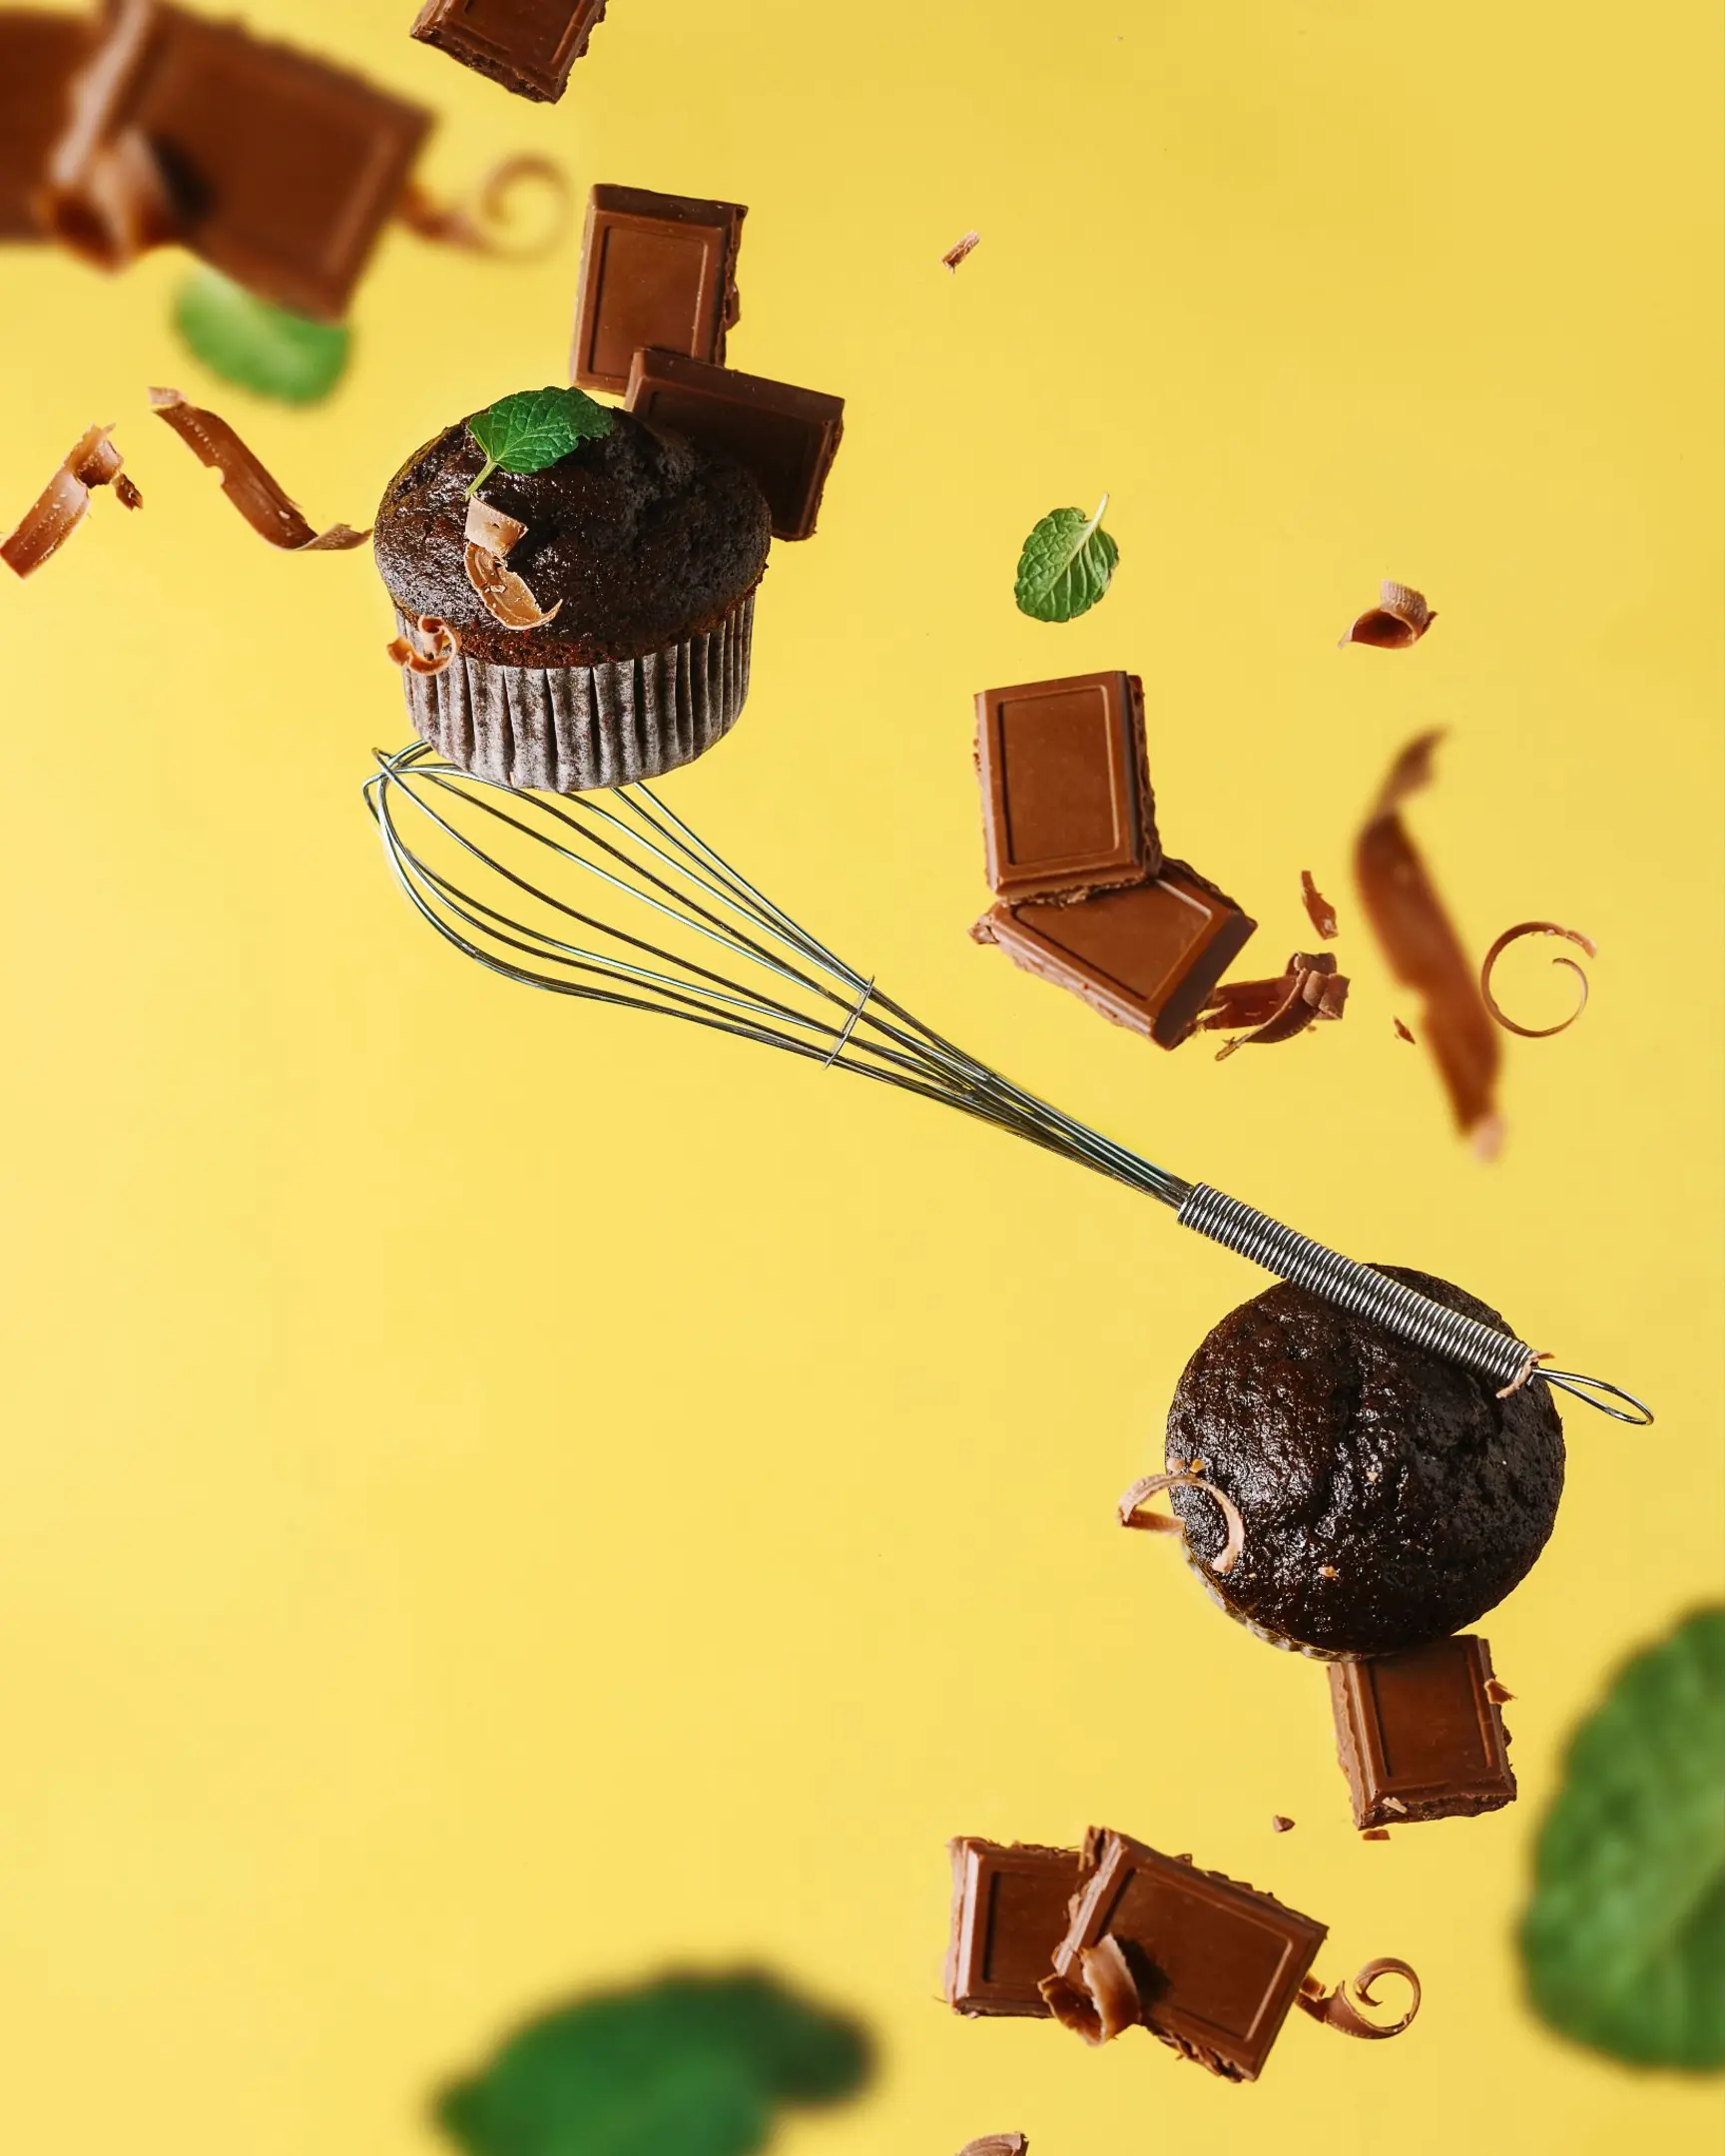
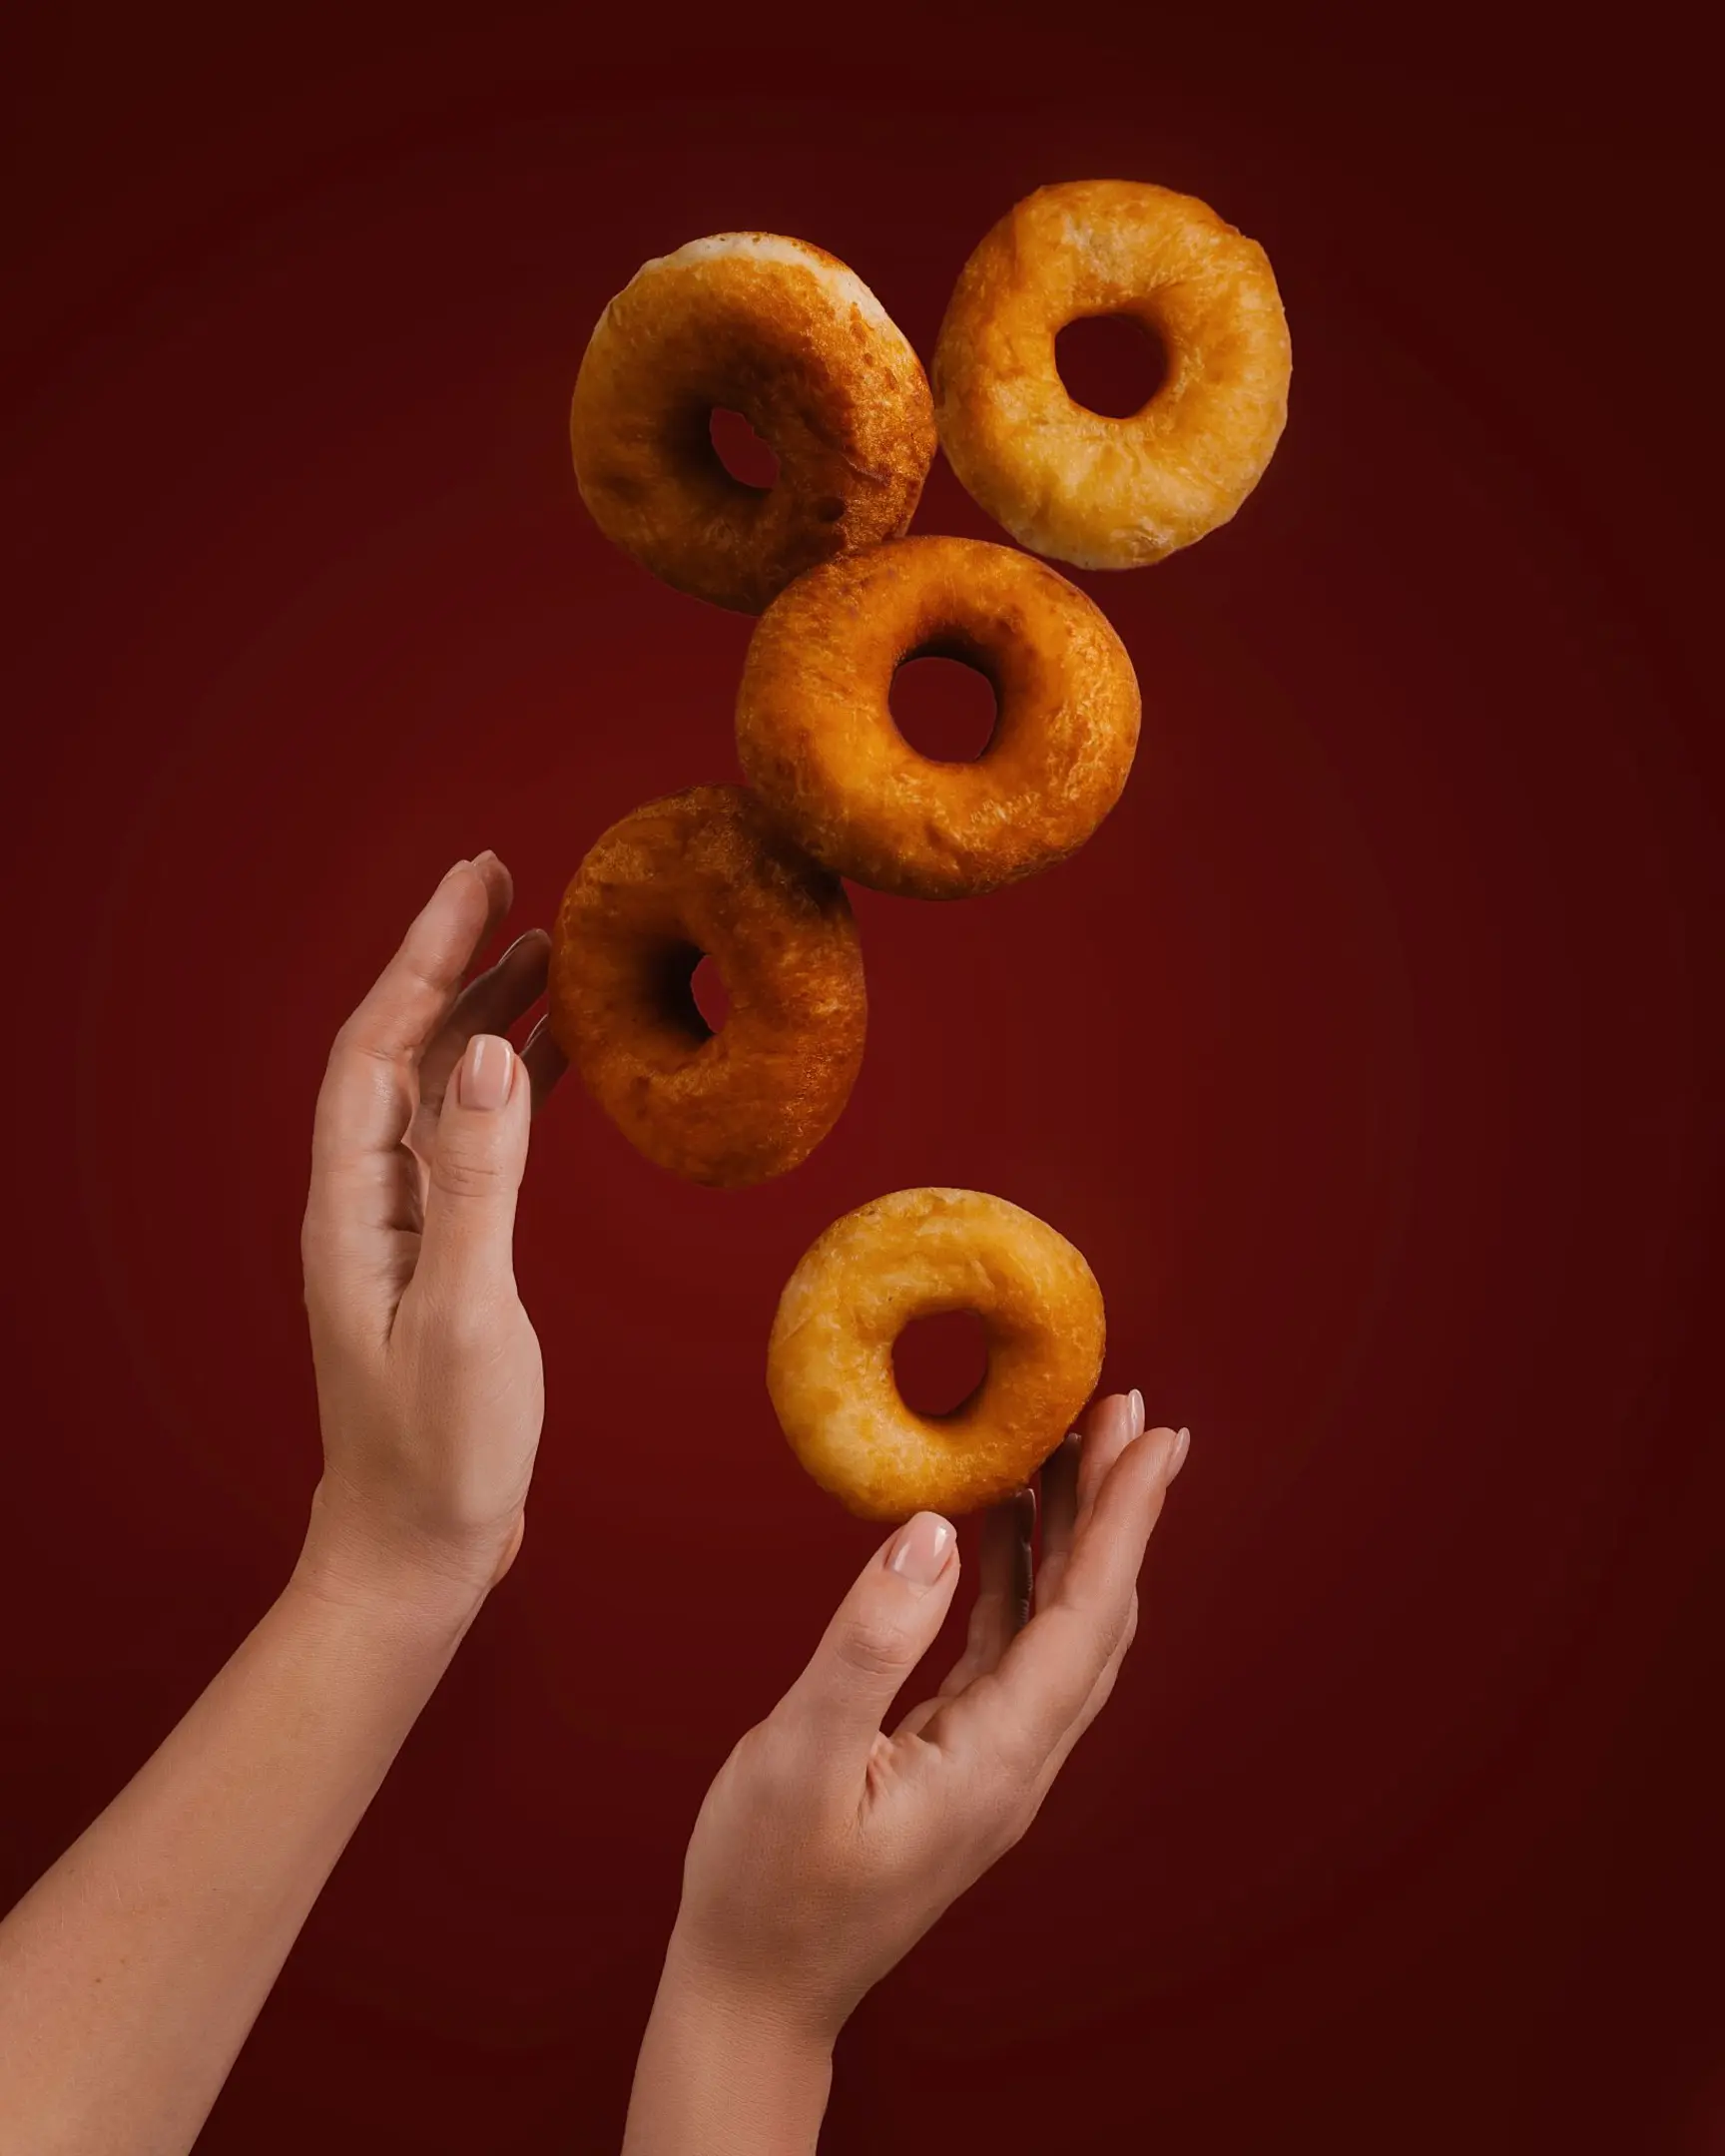
Maybe you are aiming for a gravity-defying balancing act or a clean, floating product visual.

If you want to create the illusion that objects are floating in your product shots, glass is essential.
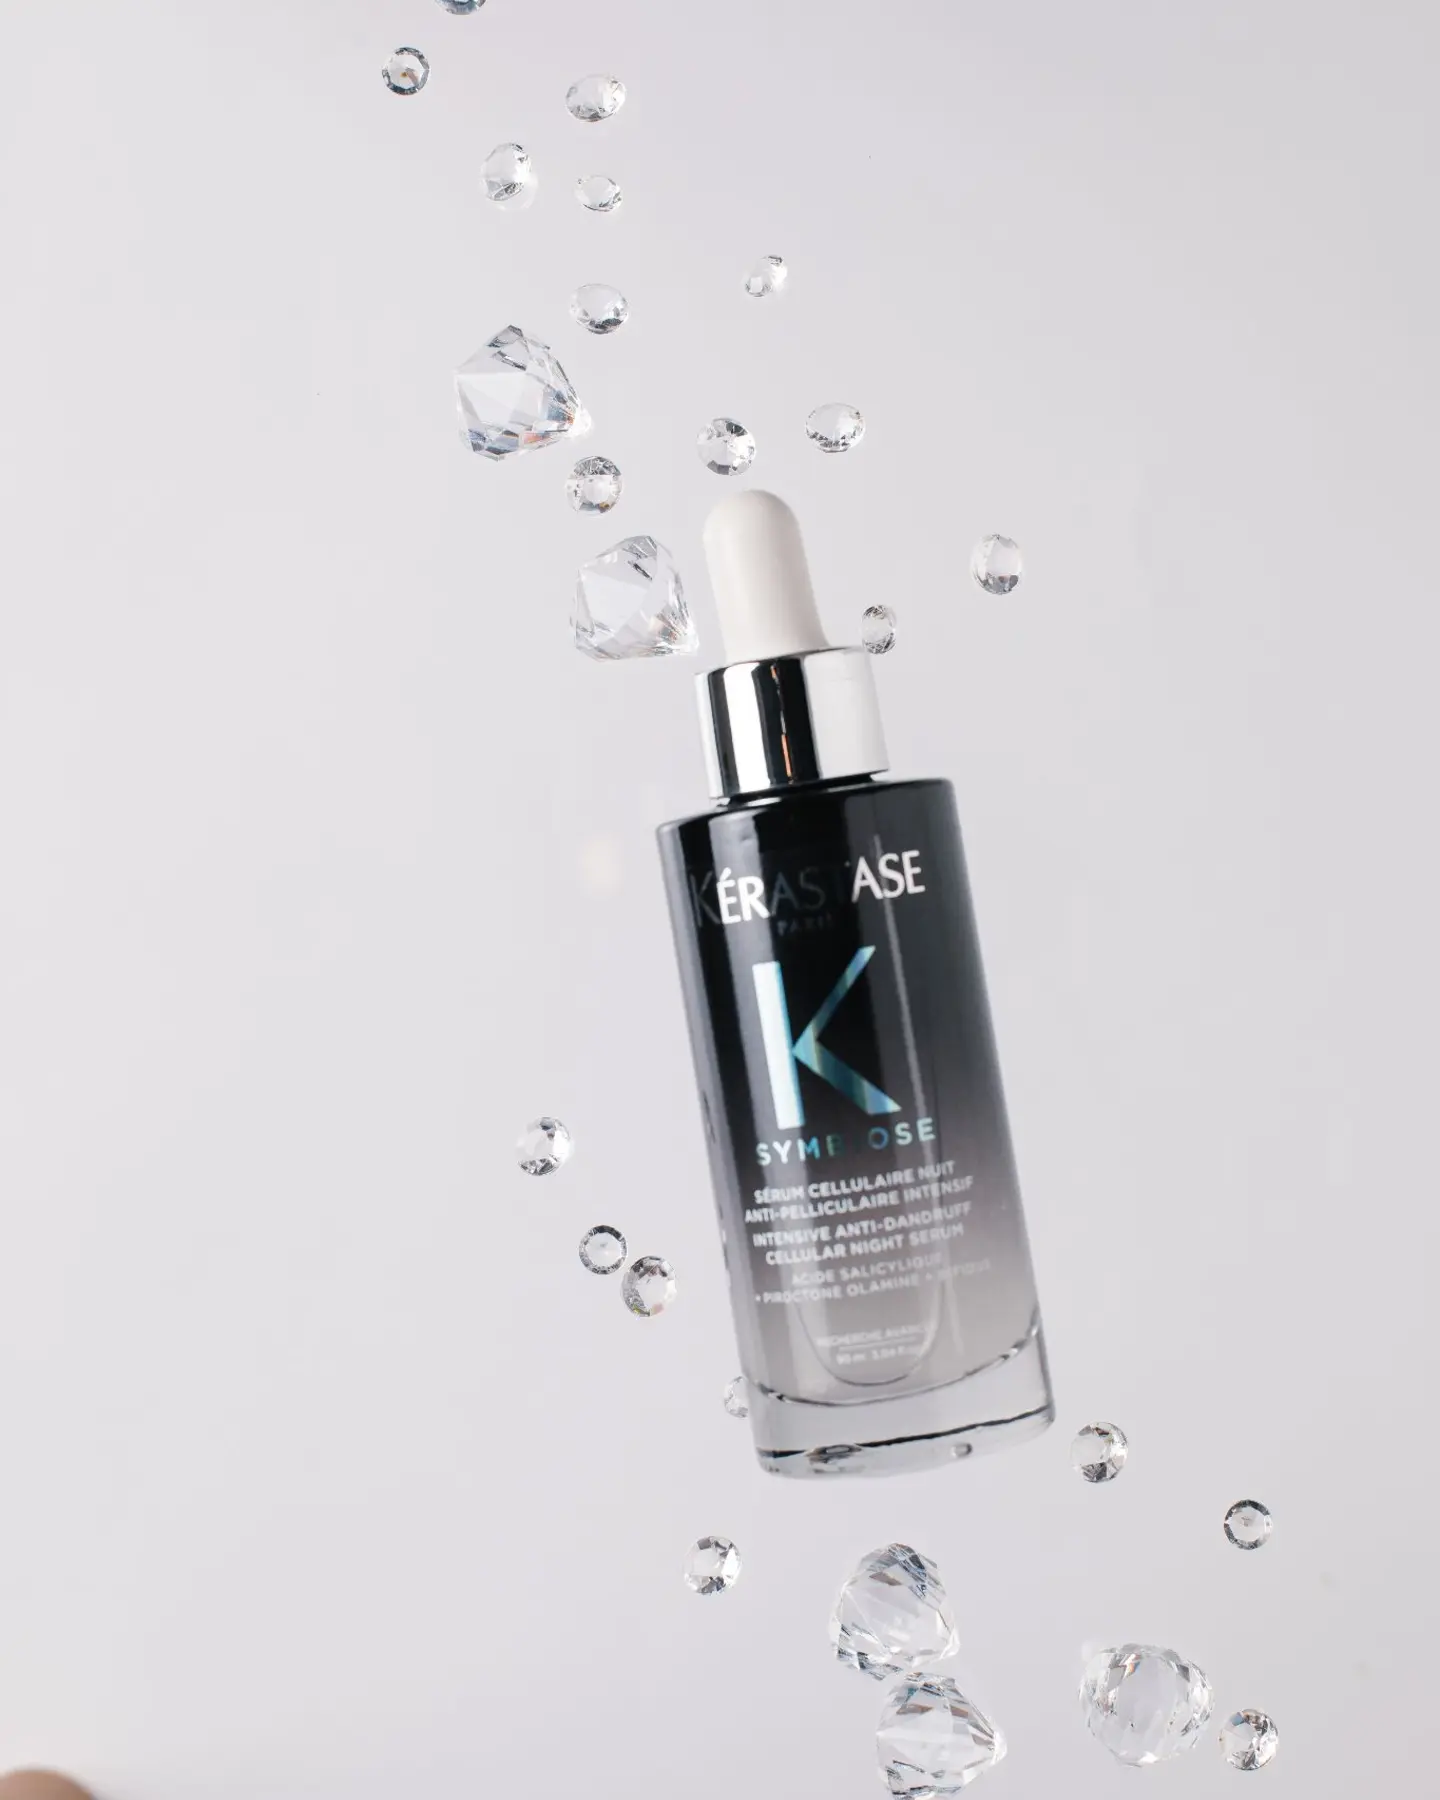
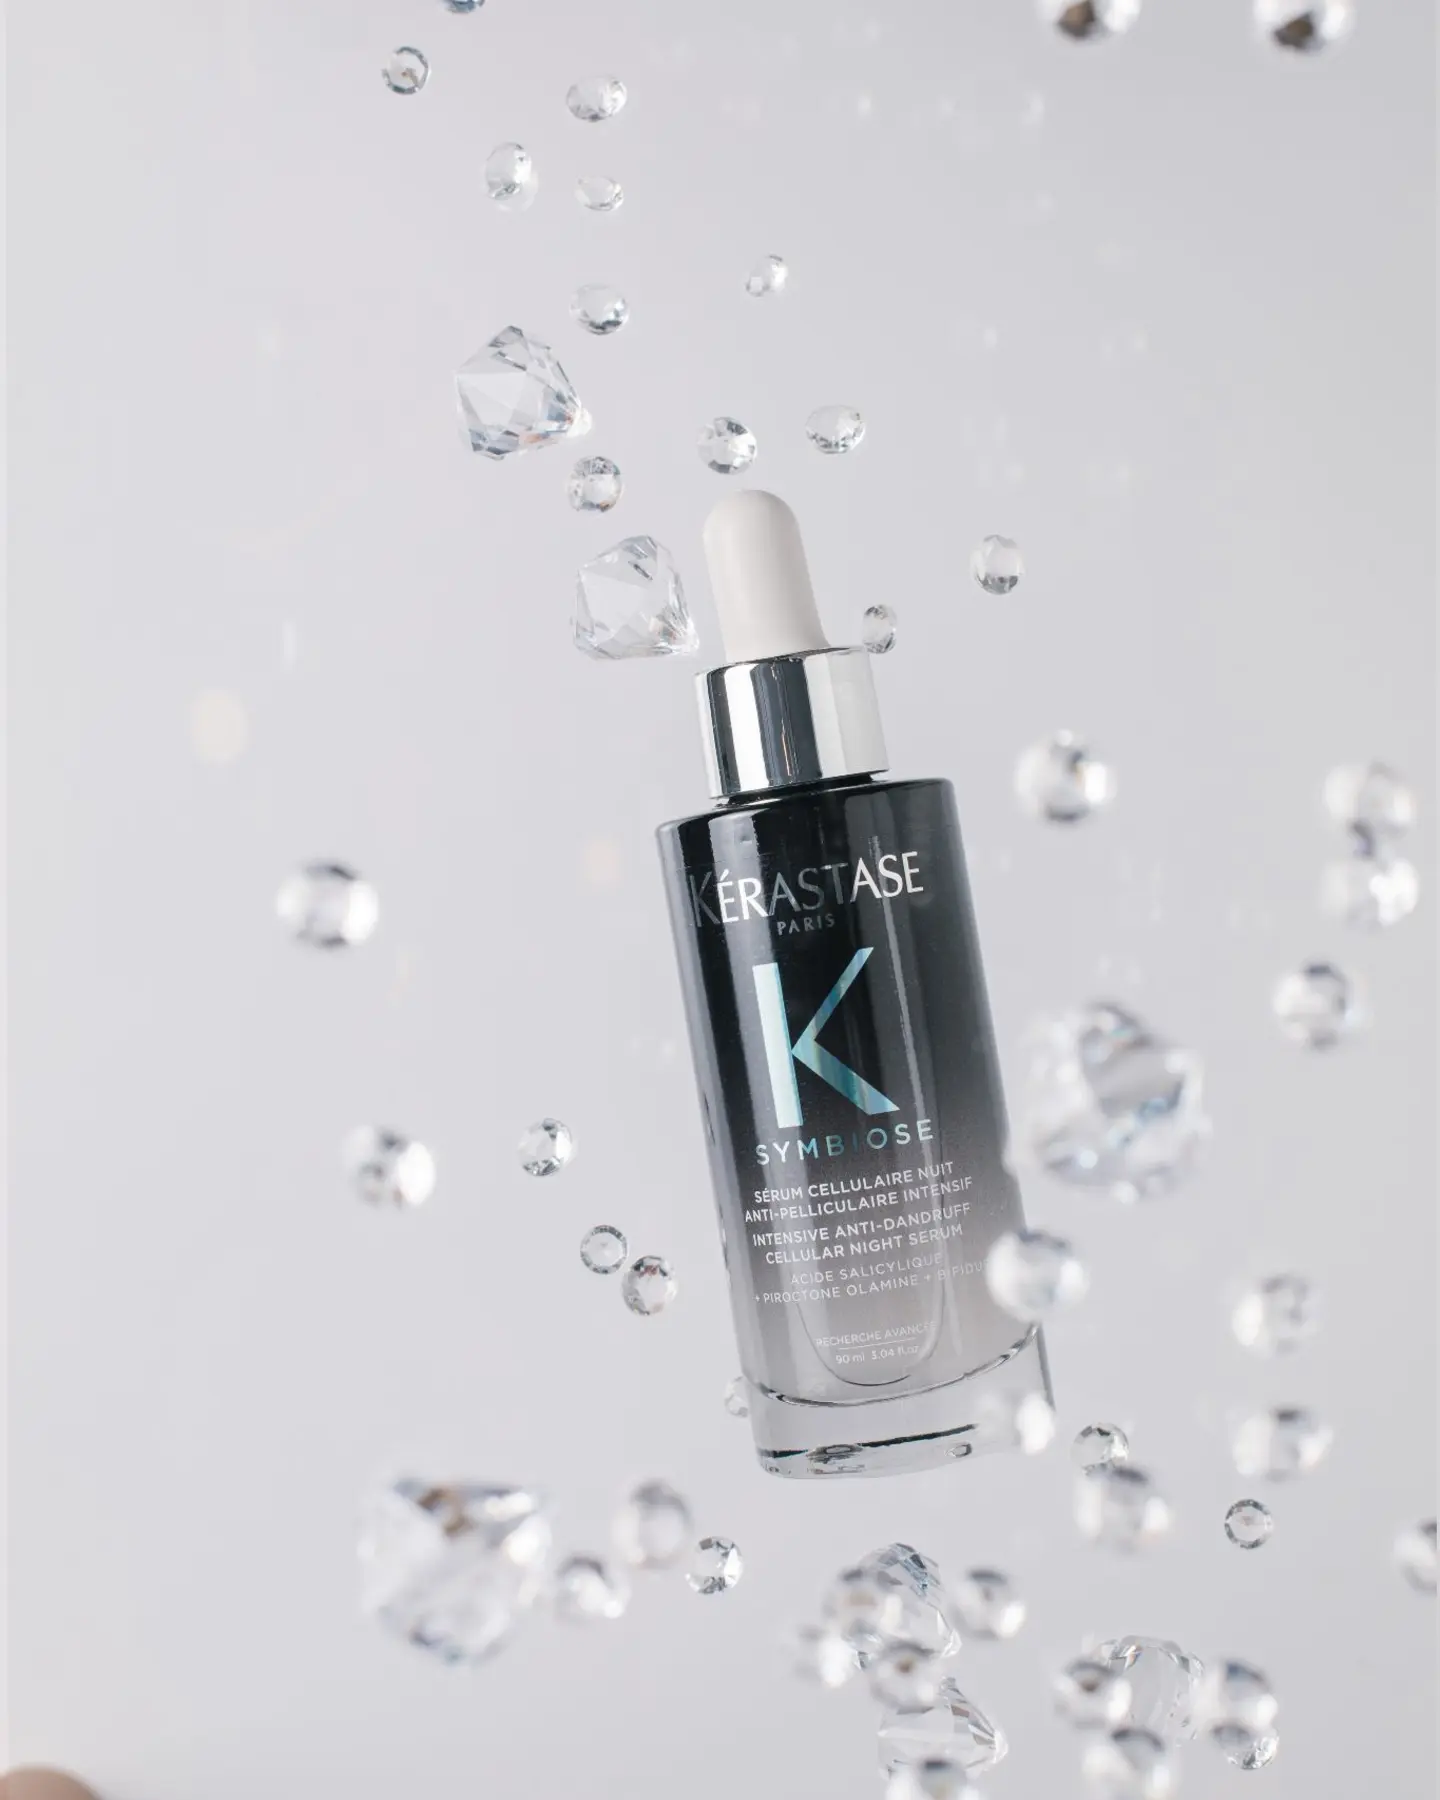
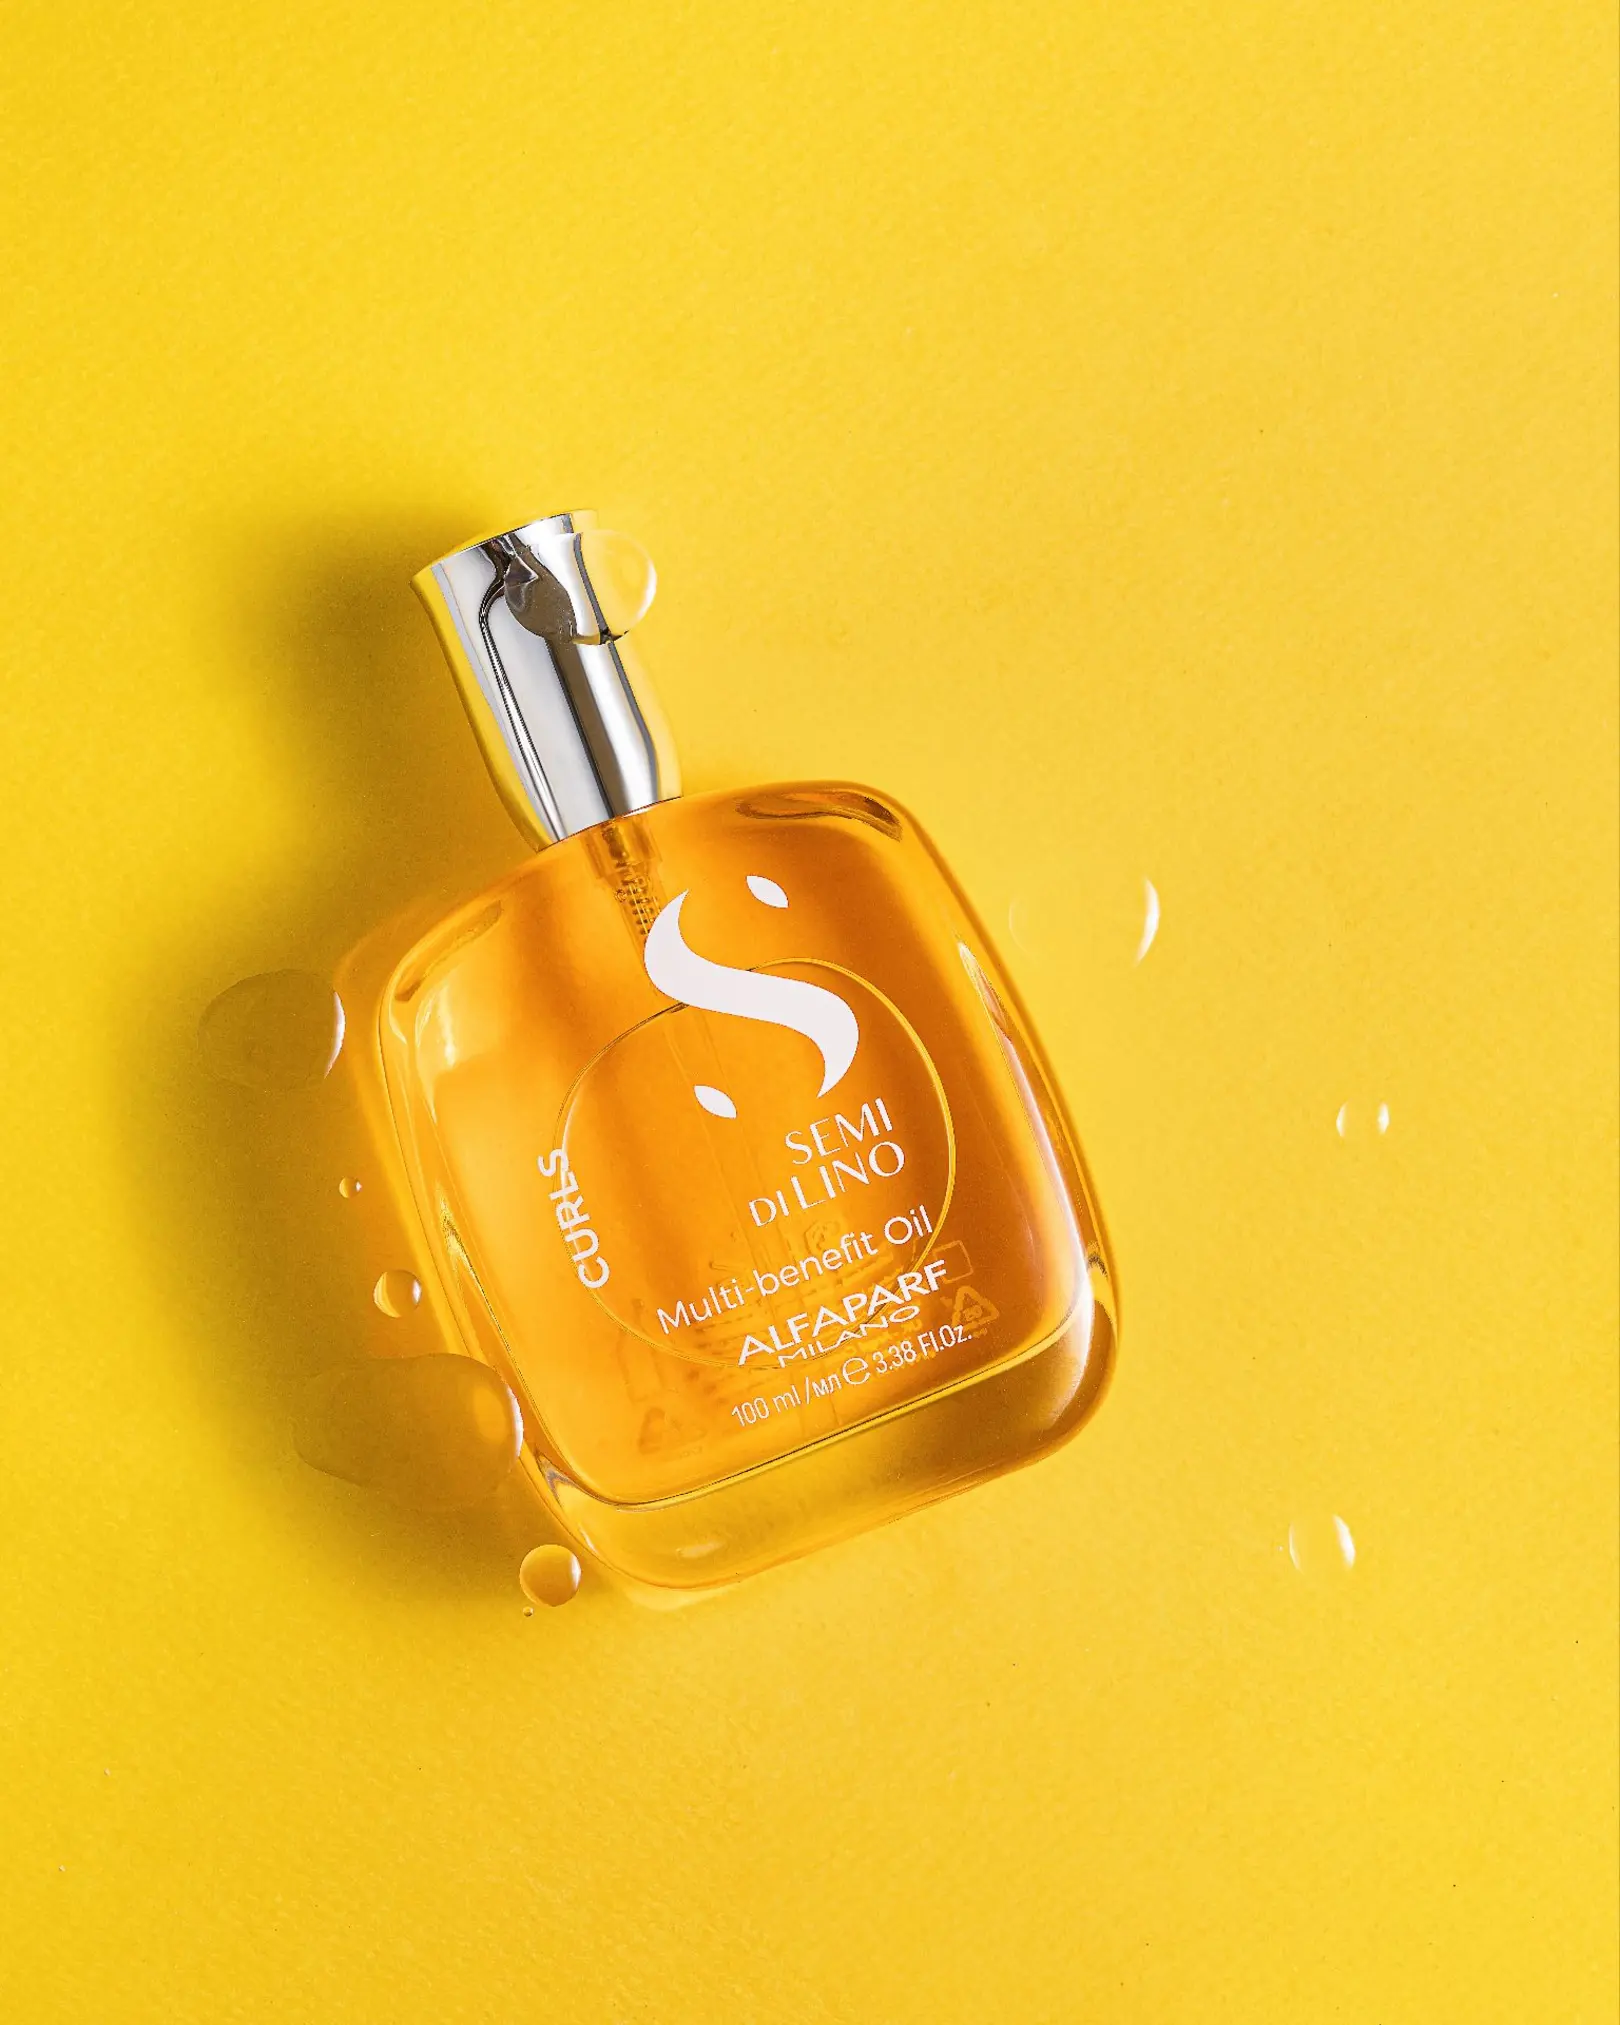
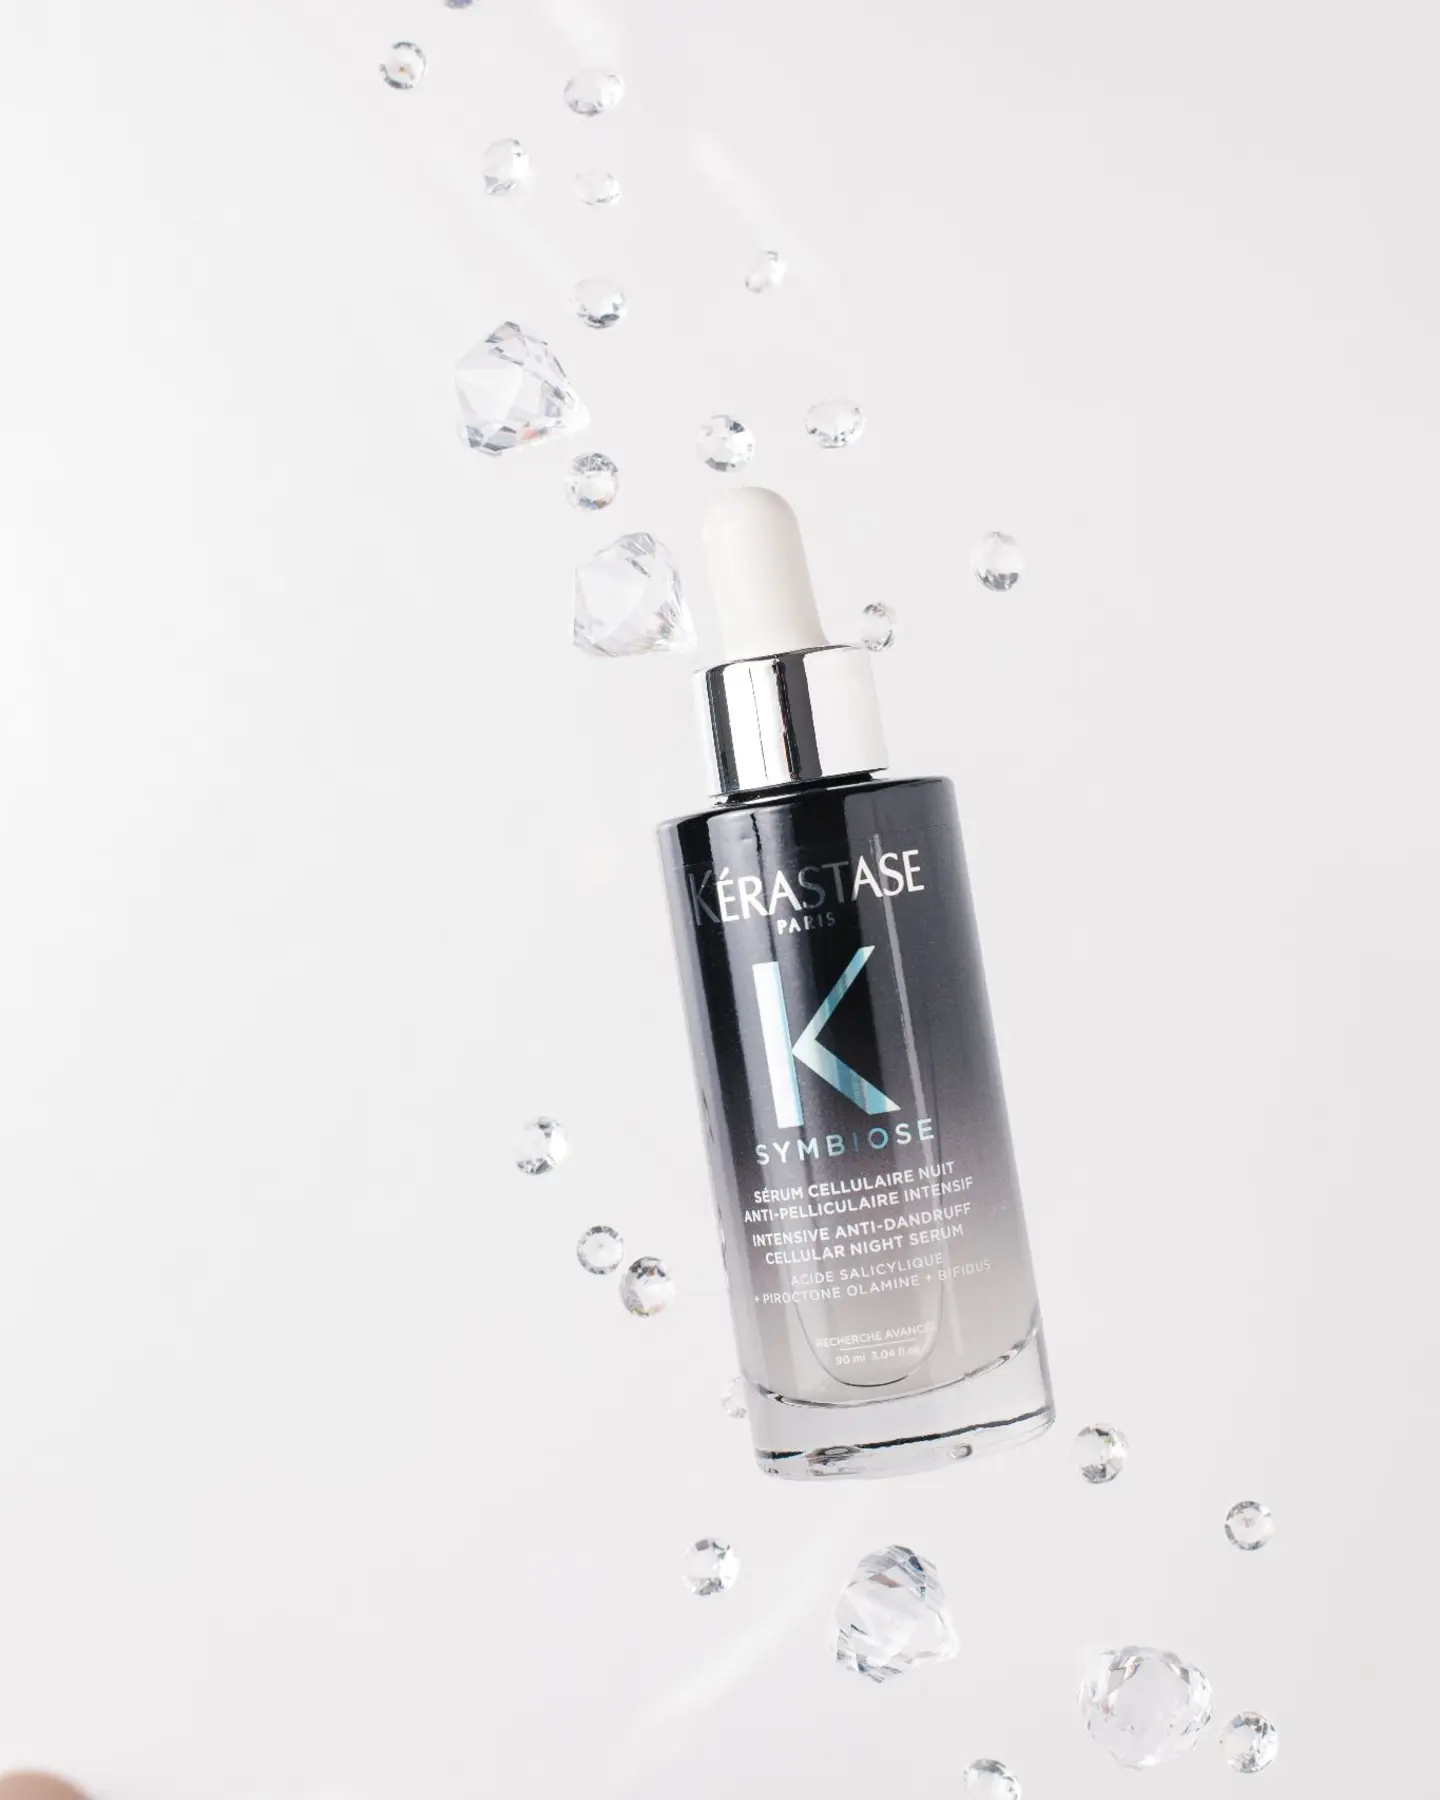
Do you love that impressive look of suspended droplets often seen in skincare advertisements?
Or perhaps you have a fragile product that can’t be tossed in the air repeatedly, but you still need that dynamic “wow effect” for the campaign.
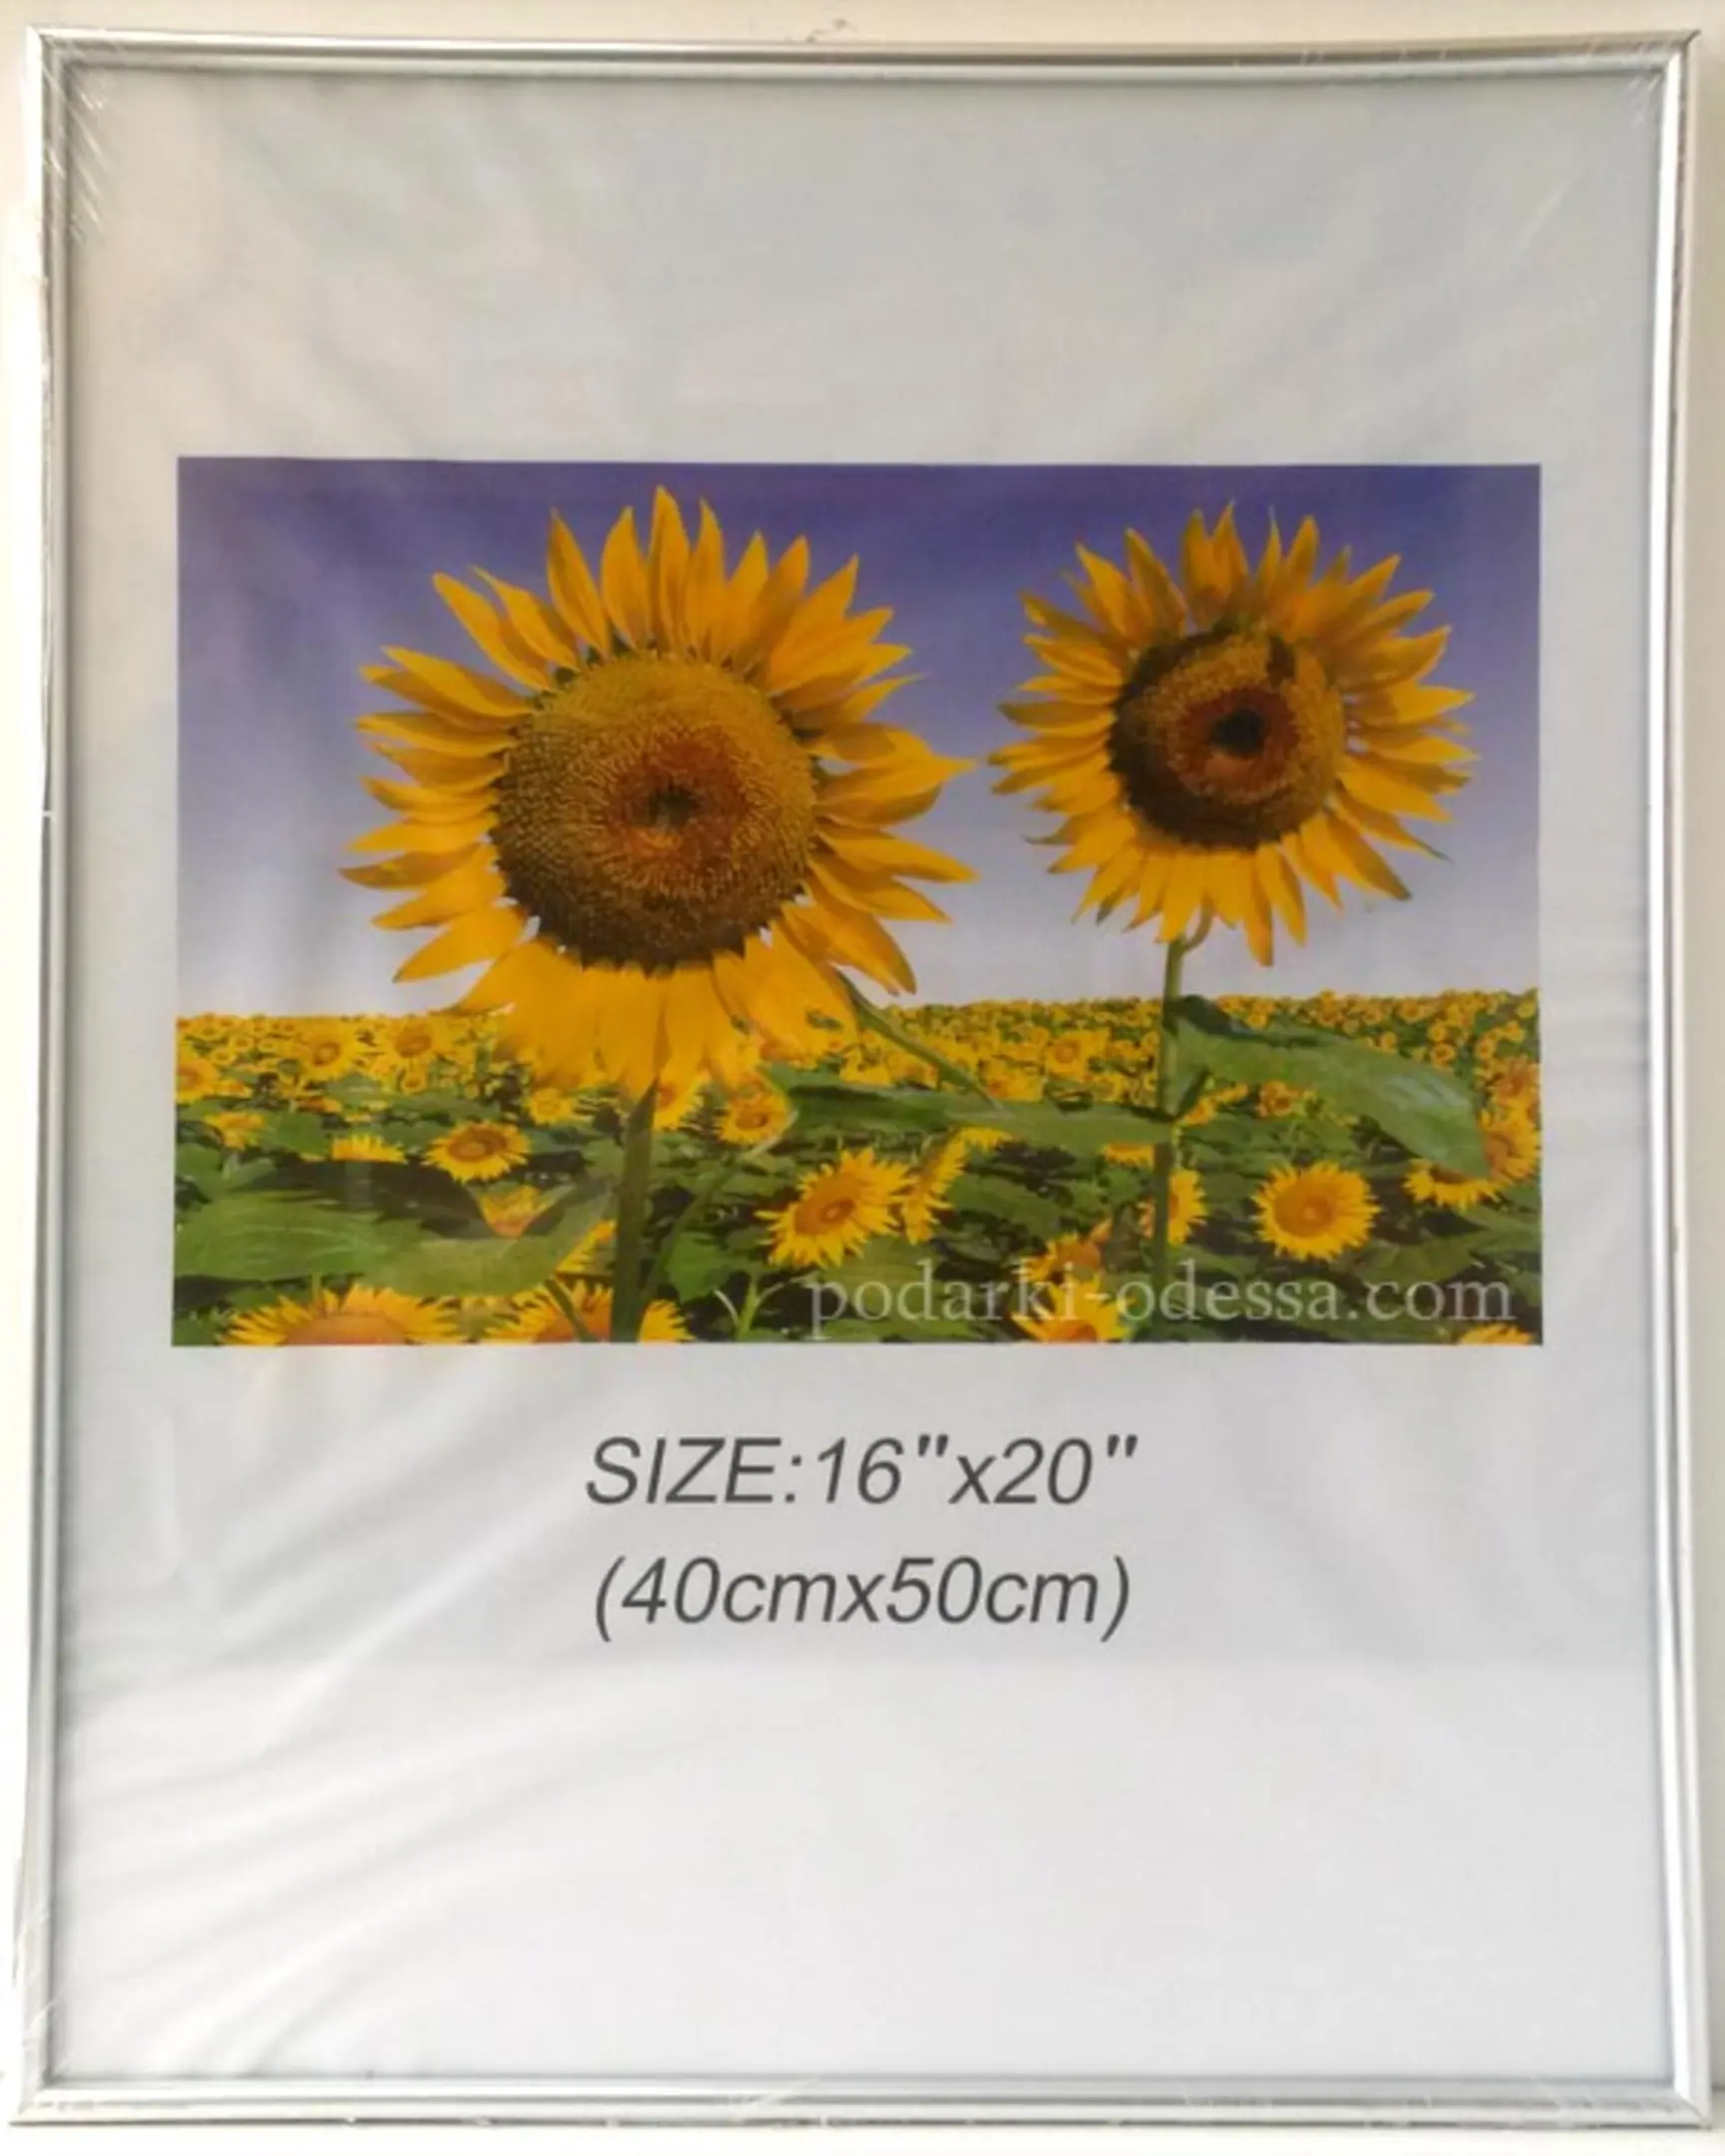
If so, it’s time to head to a store, grab some photo frames with glass, and start your journey into creative glass photography.
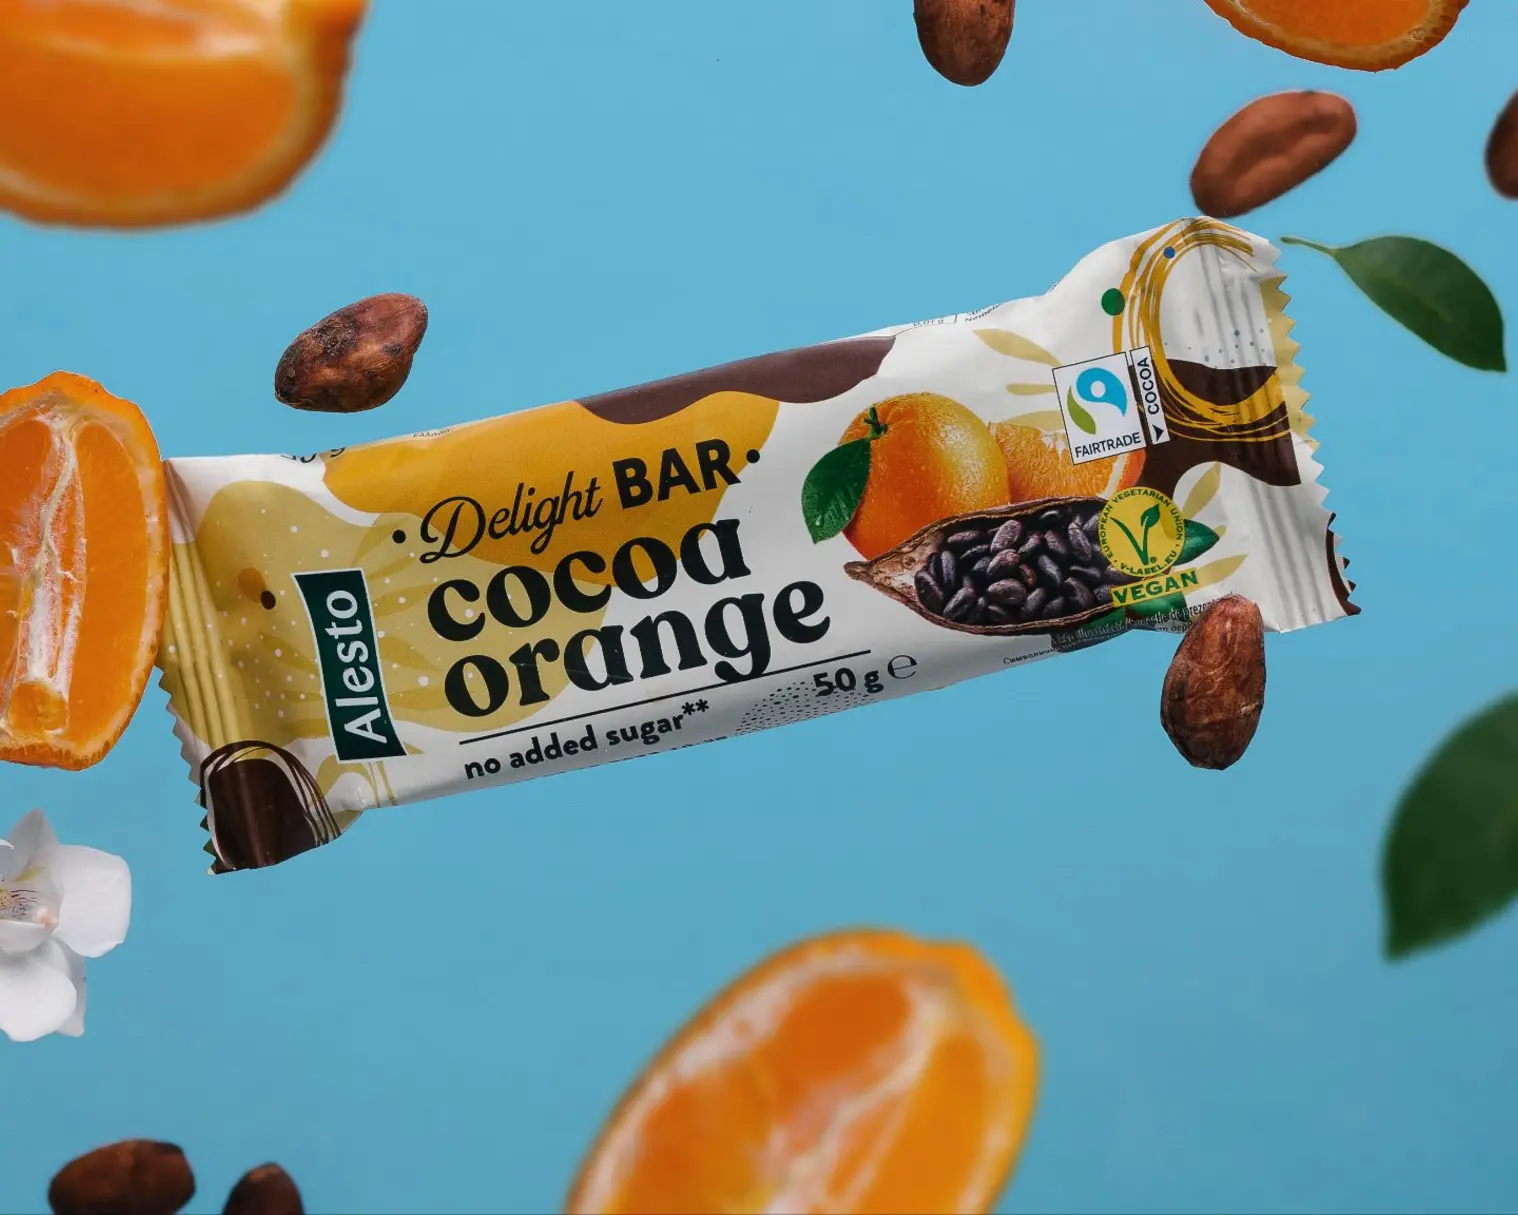
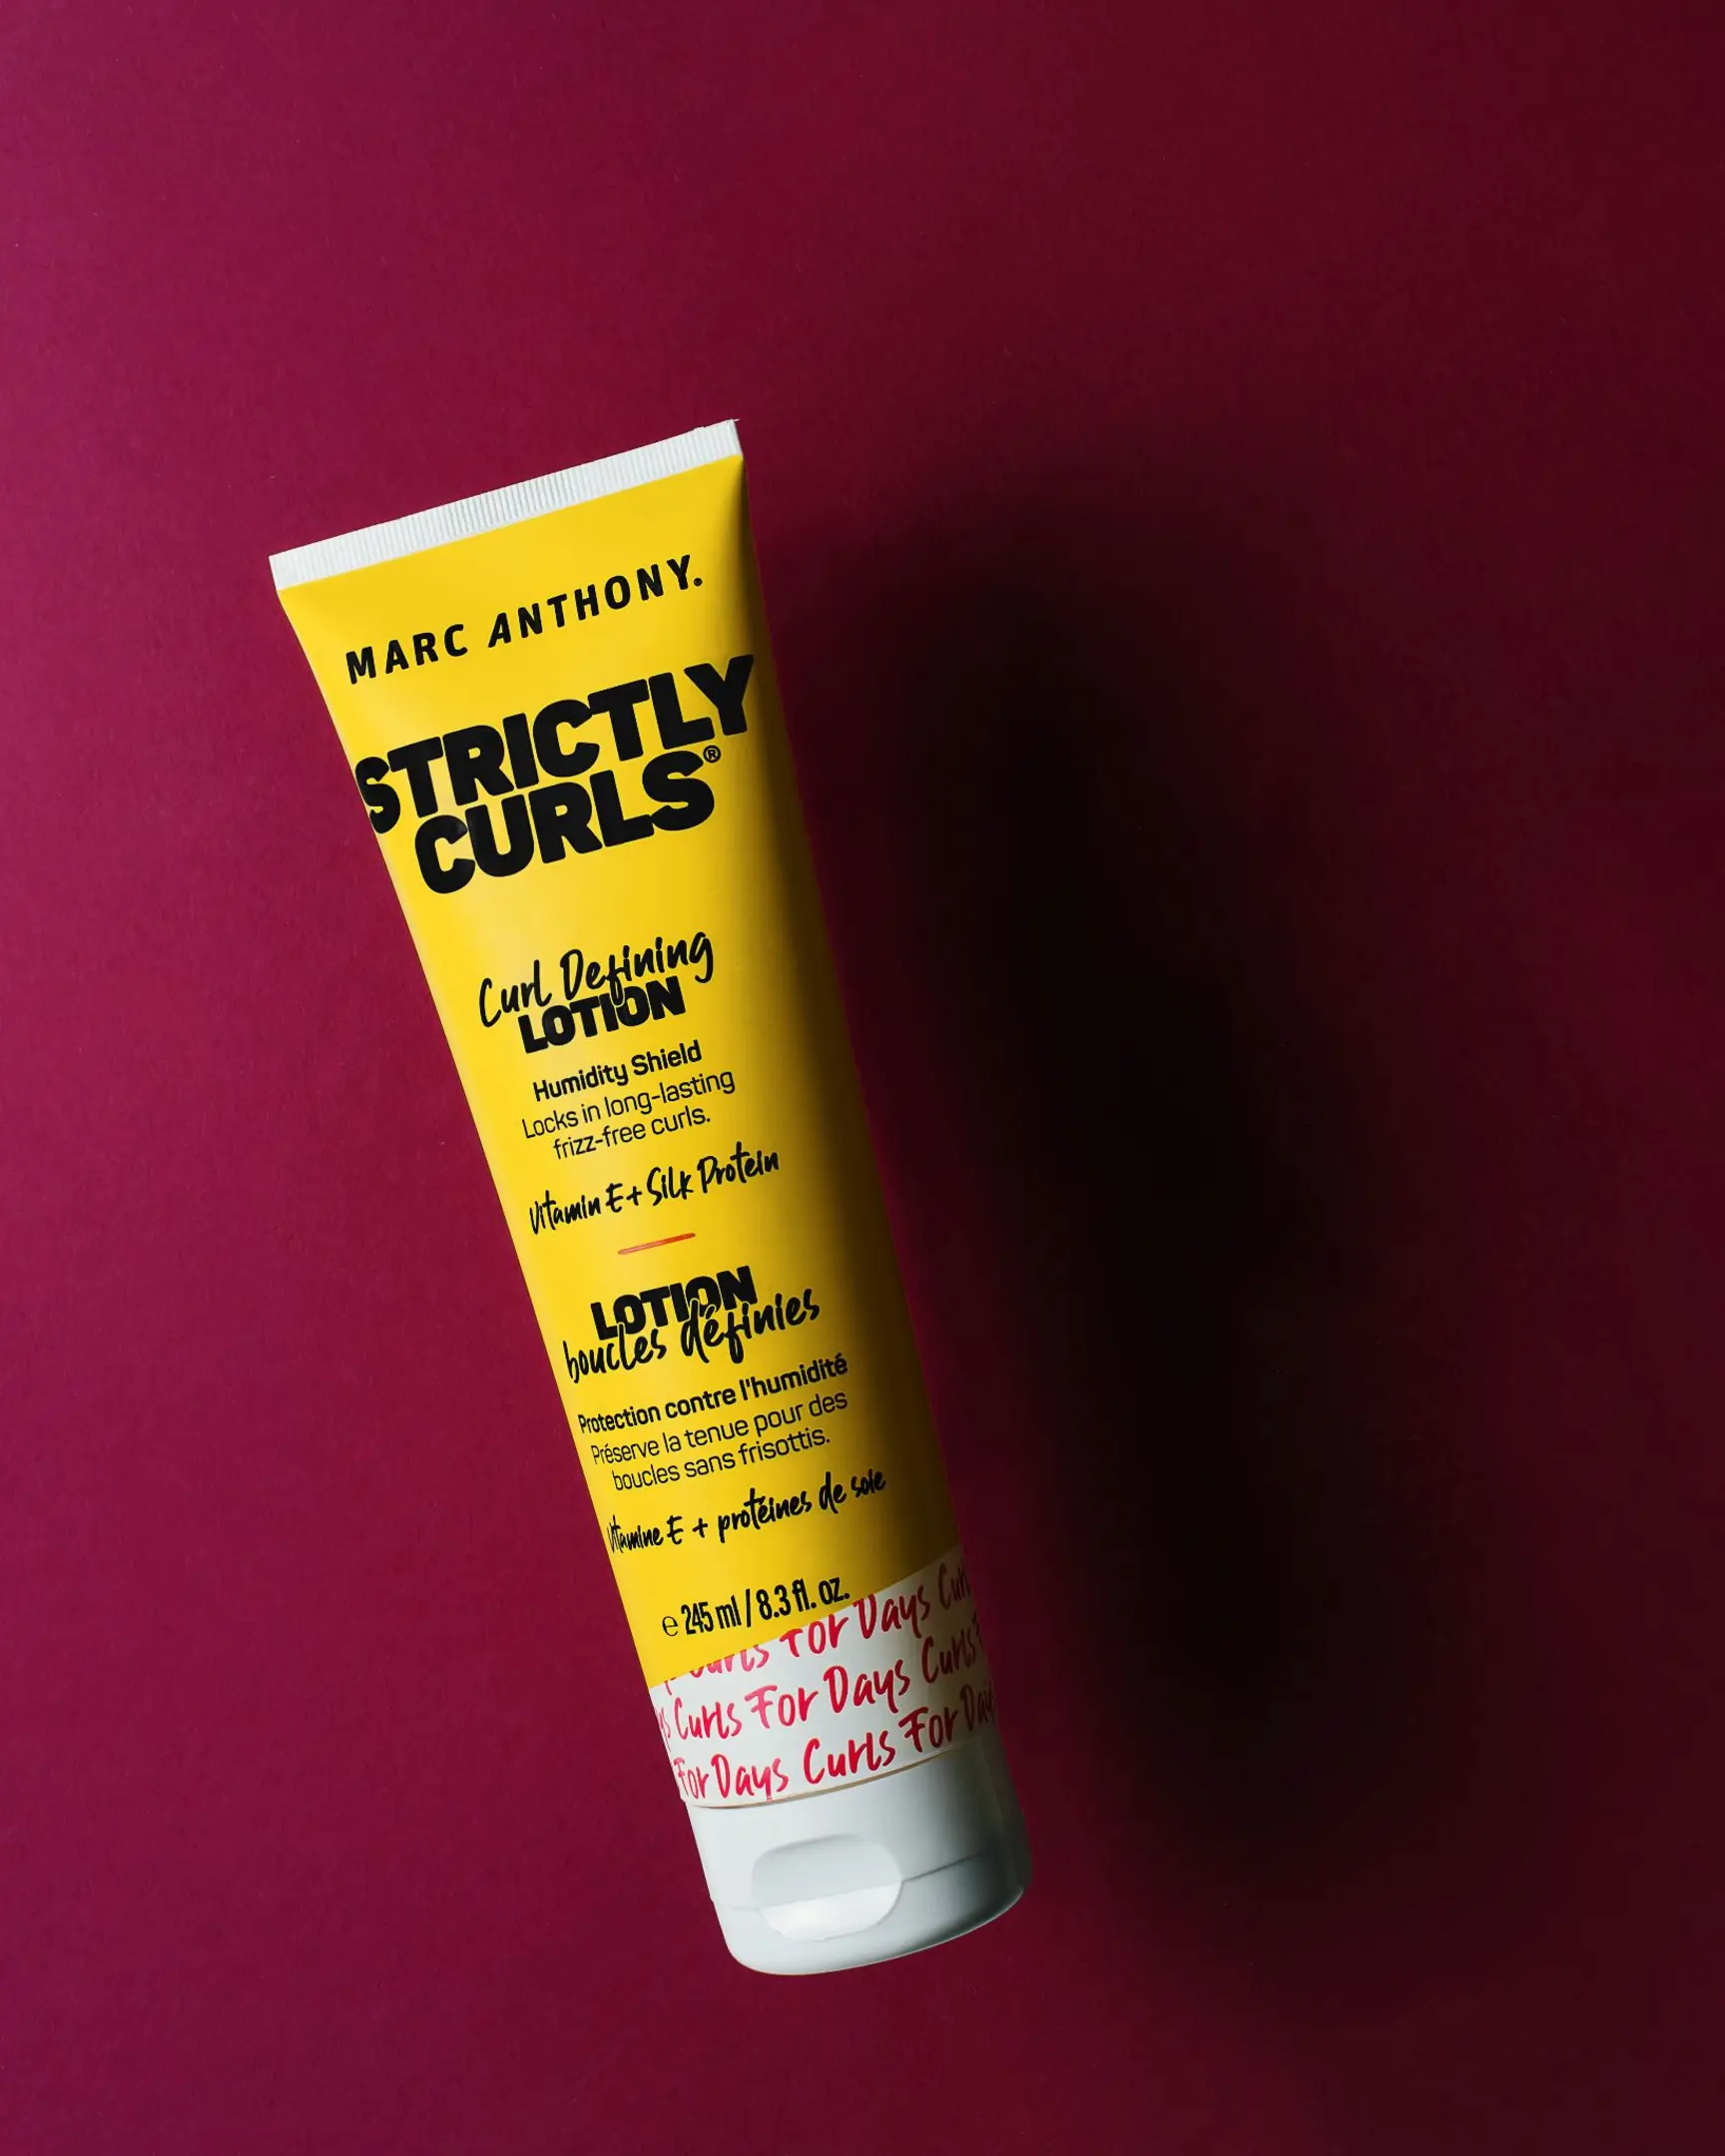
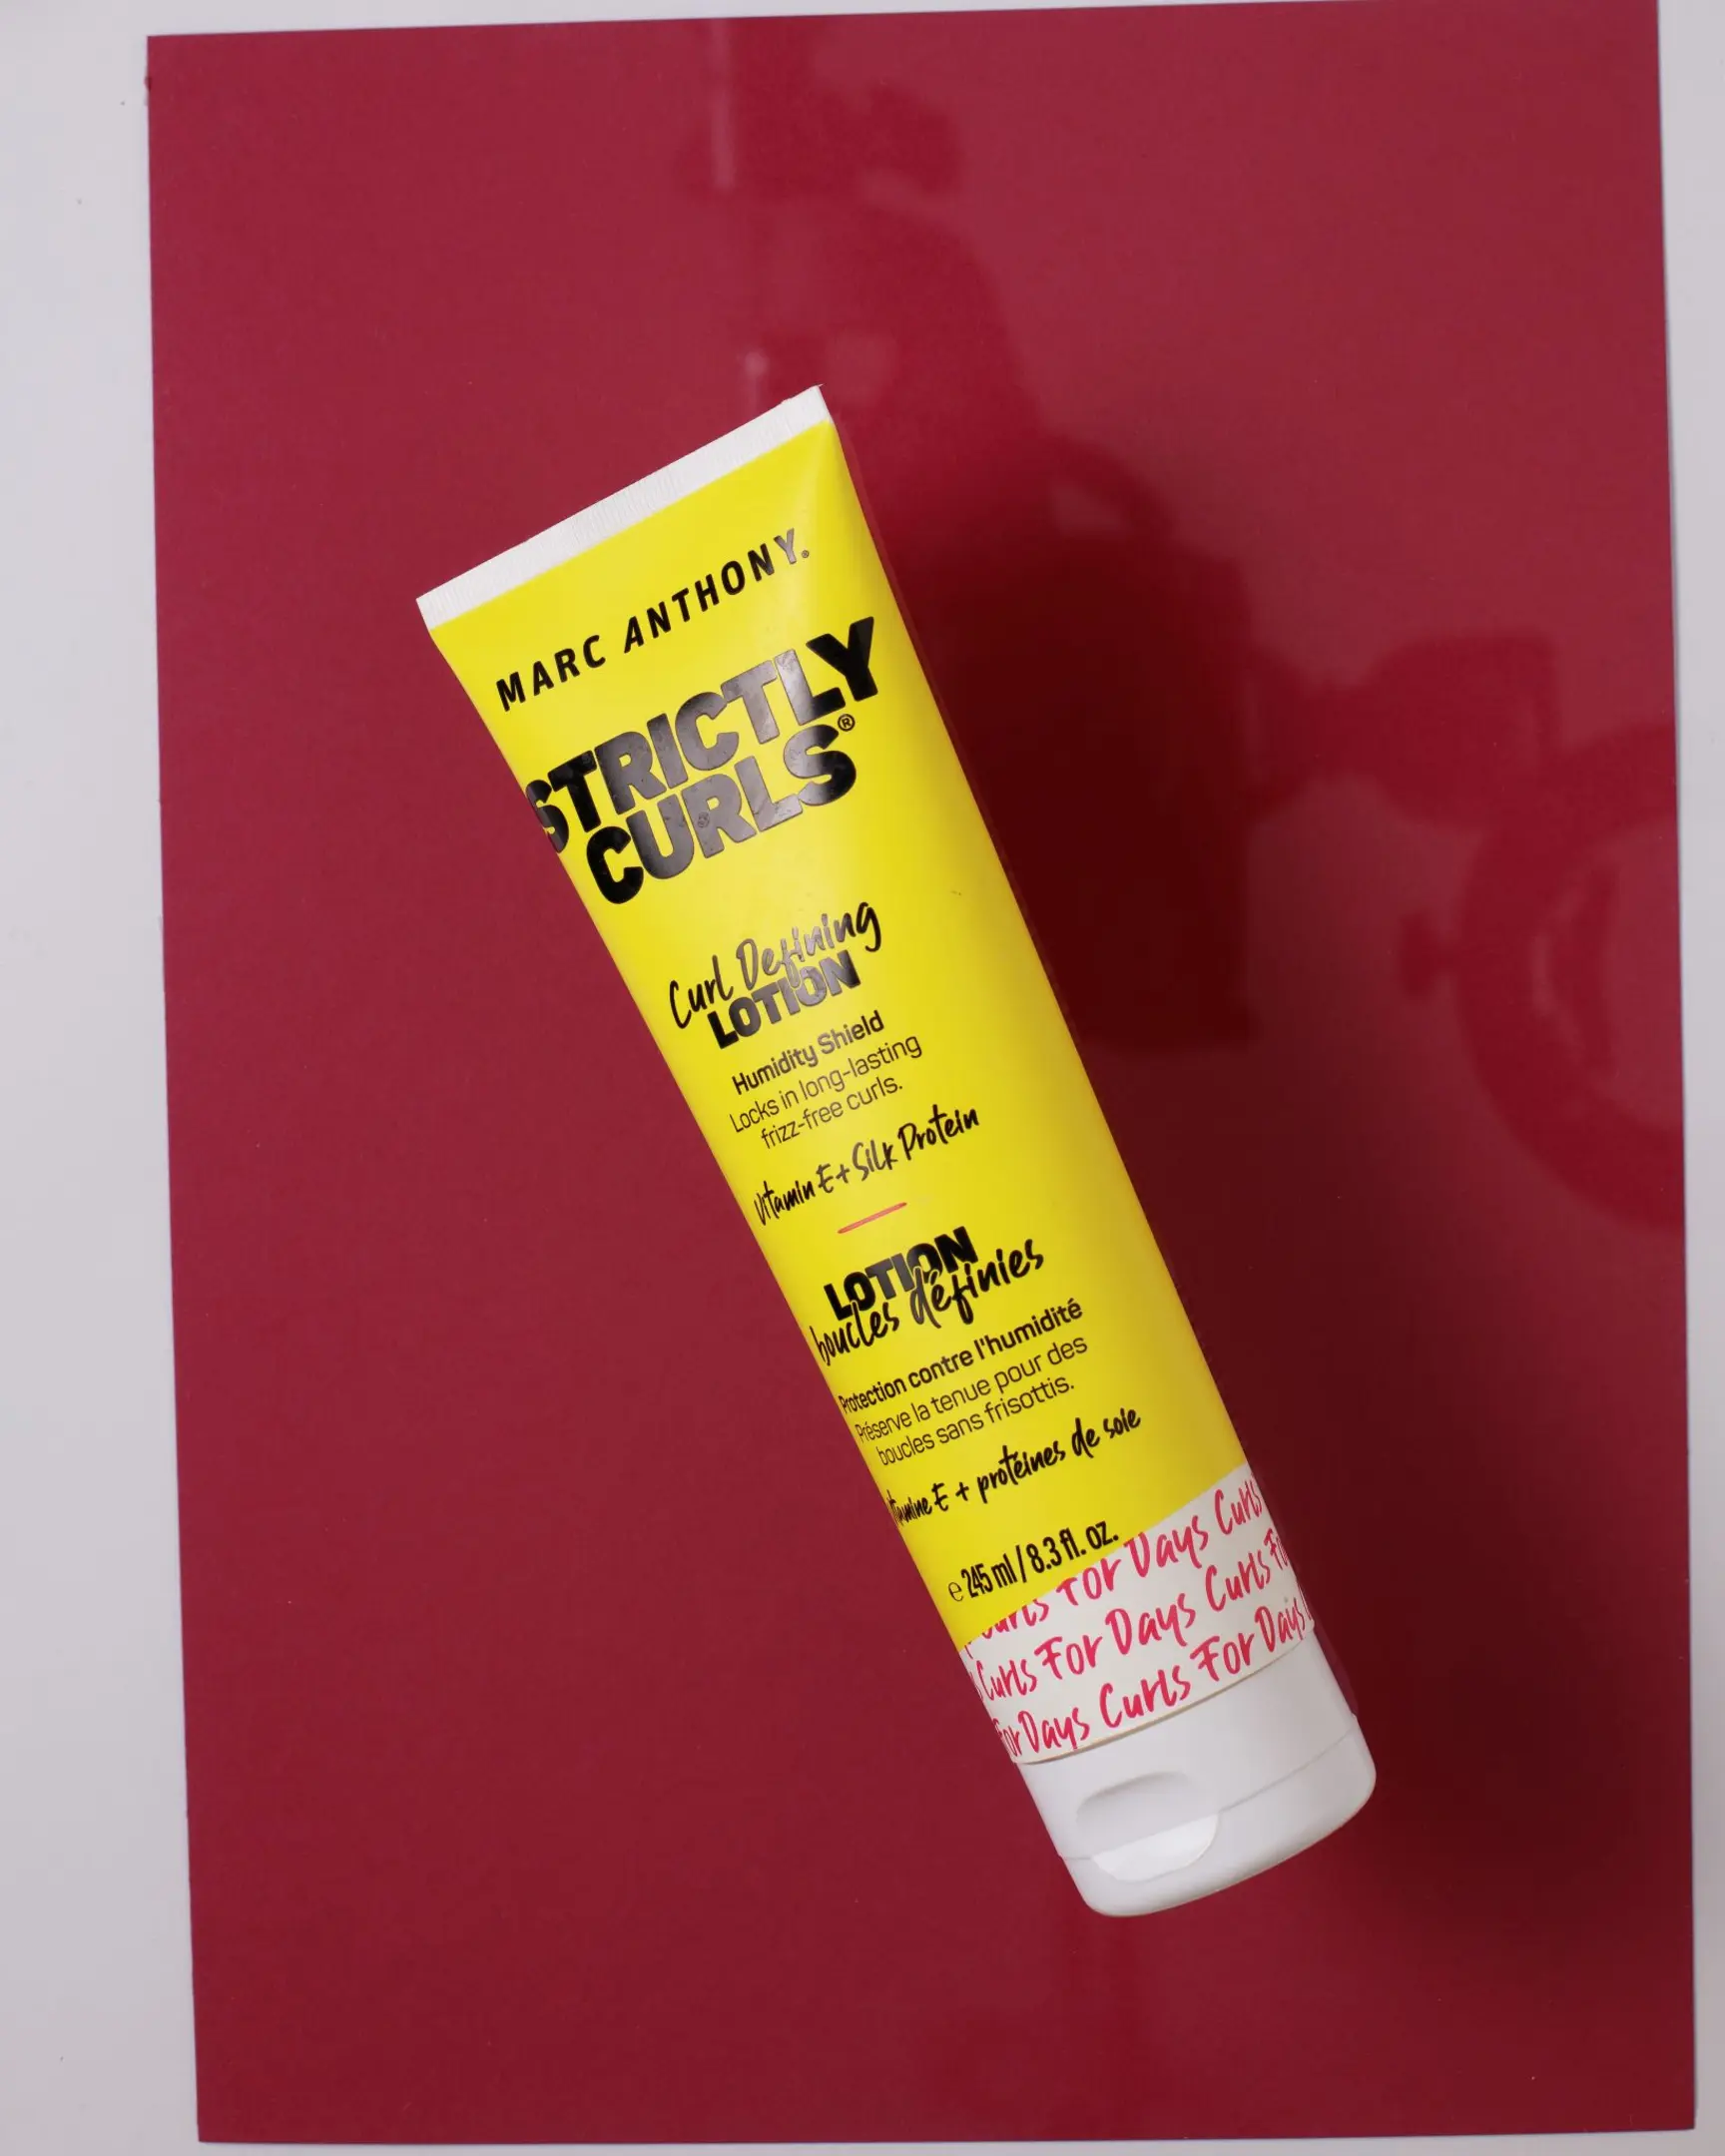
I personally use three glass photo frames sized 40x50 cm. This size is perfect for framing smaller items—like chocolate bars, facial cleansers, or hair serums—along with accompanying props for levitation shots.
You will want to start by planning your composition. Let’s assume you already have a concept in mind.
I’ll give you a heads-up right now: you won’t be able to stack 15 layers of glass to create complex depth. It isn’t just about stability; the issue is that even two layers of glass can create a nightmare of reflections, which is the most common headache in this type of photography.
My advice? Start small. Begin with a single layer of glass and arrange your objects on it. Practice editing those shots and gradually add complexity as you master the technique.
Here is a simple starting point: if you place the glass a short distance from your background, the objects will cast a shadow on the wall behind them, instantly adding depth to the image.
Common Challenges in Glass Product Photography and How to Solve Them
Uneven Background Lighting
One issue you might face in your setup is uneven lighting across the background. Sometimes this is an artistic choice, but if you need a clean, uniform look, you need to consider the inverse square law.
In simple terms: if two objects are 1 meter apart but positioned very close to the light source, the second object will receive about 75% less light than the first. However, if those same objects are still 1 meter apart but you move the light source 5 meters away, the difference in illumination drops to only 1%.
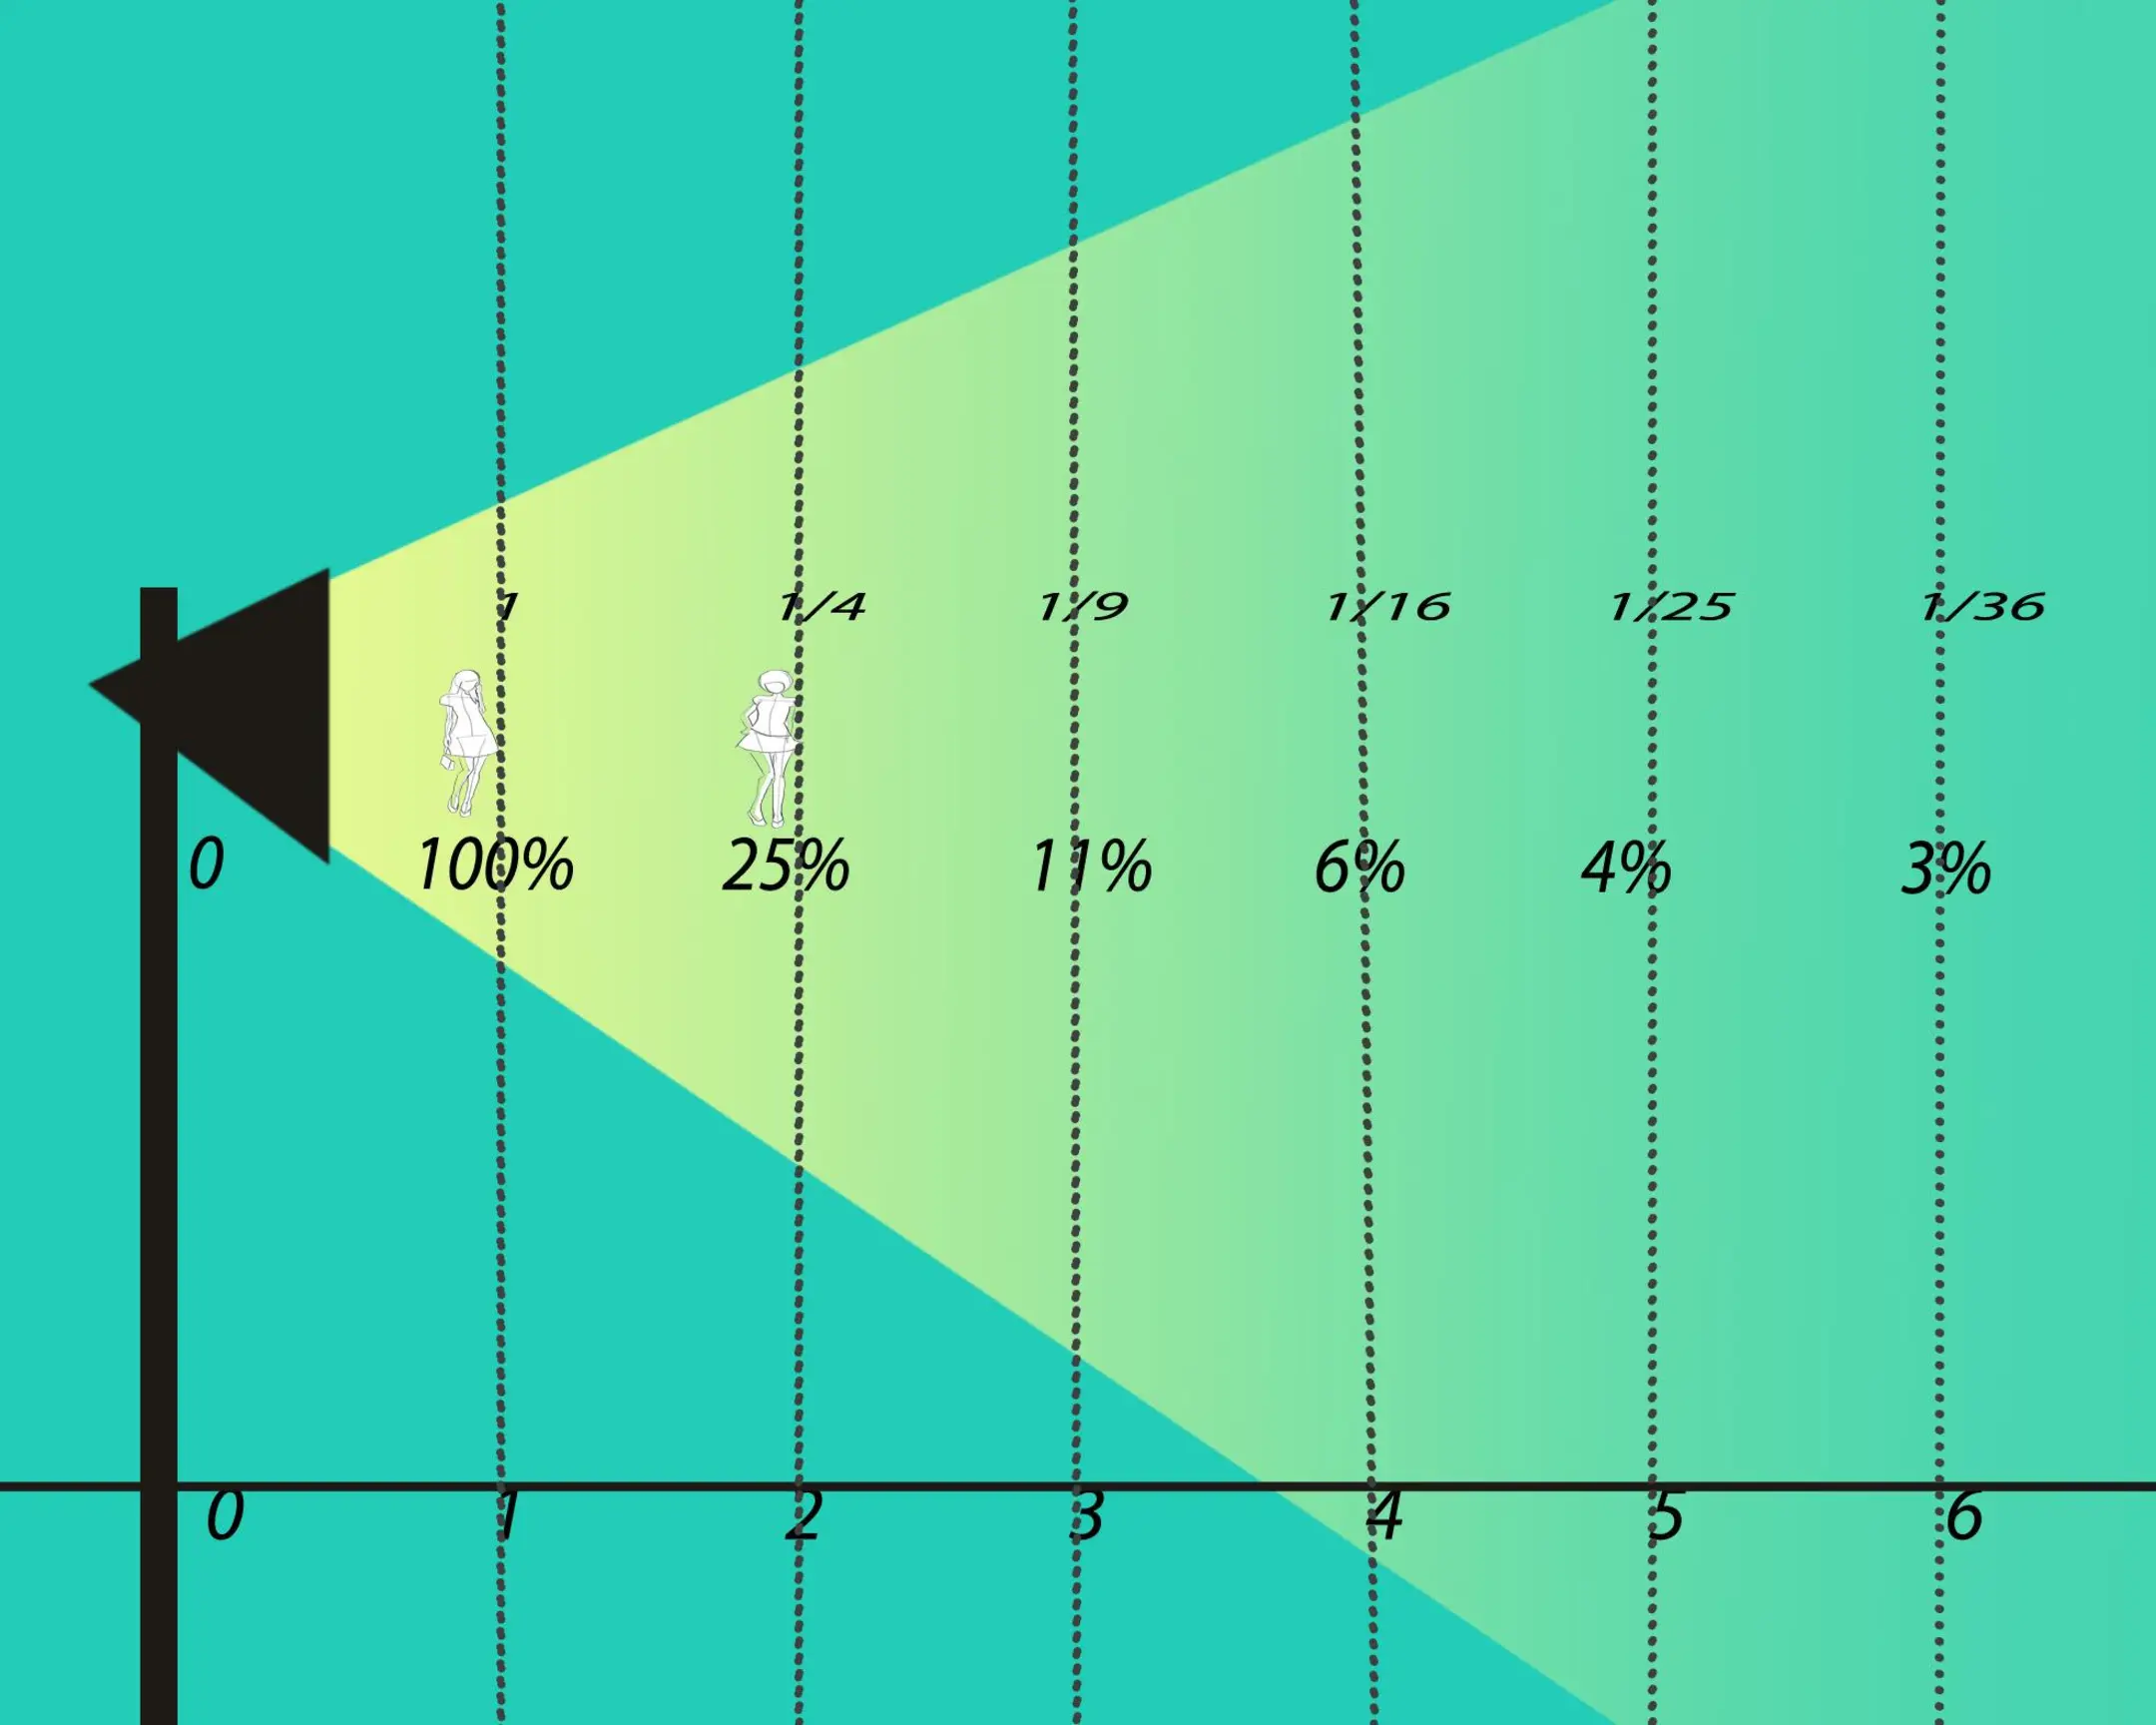
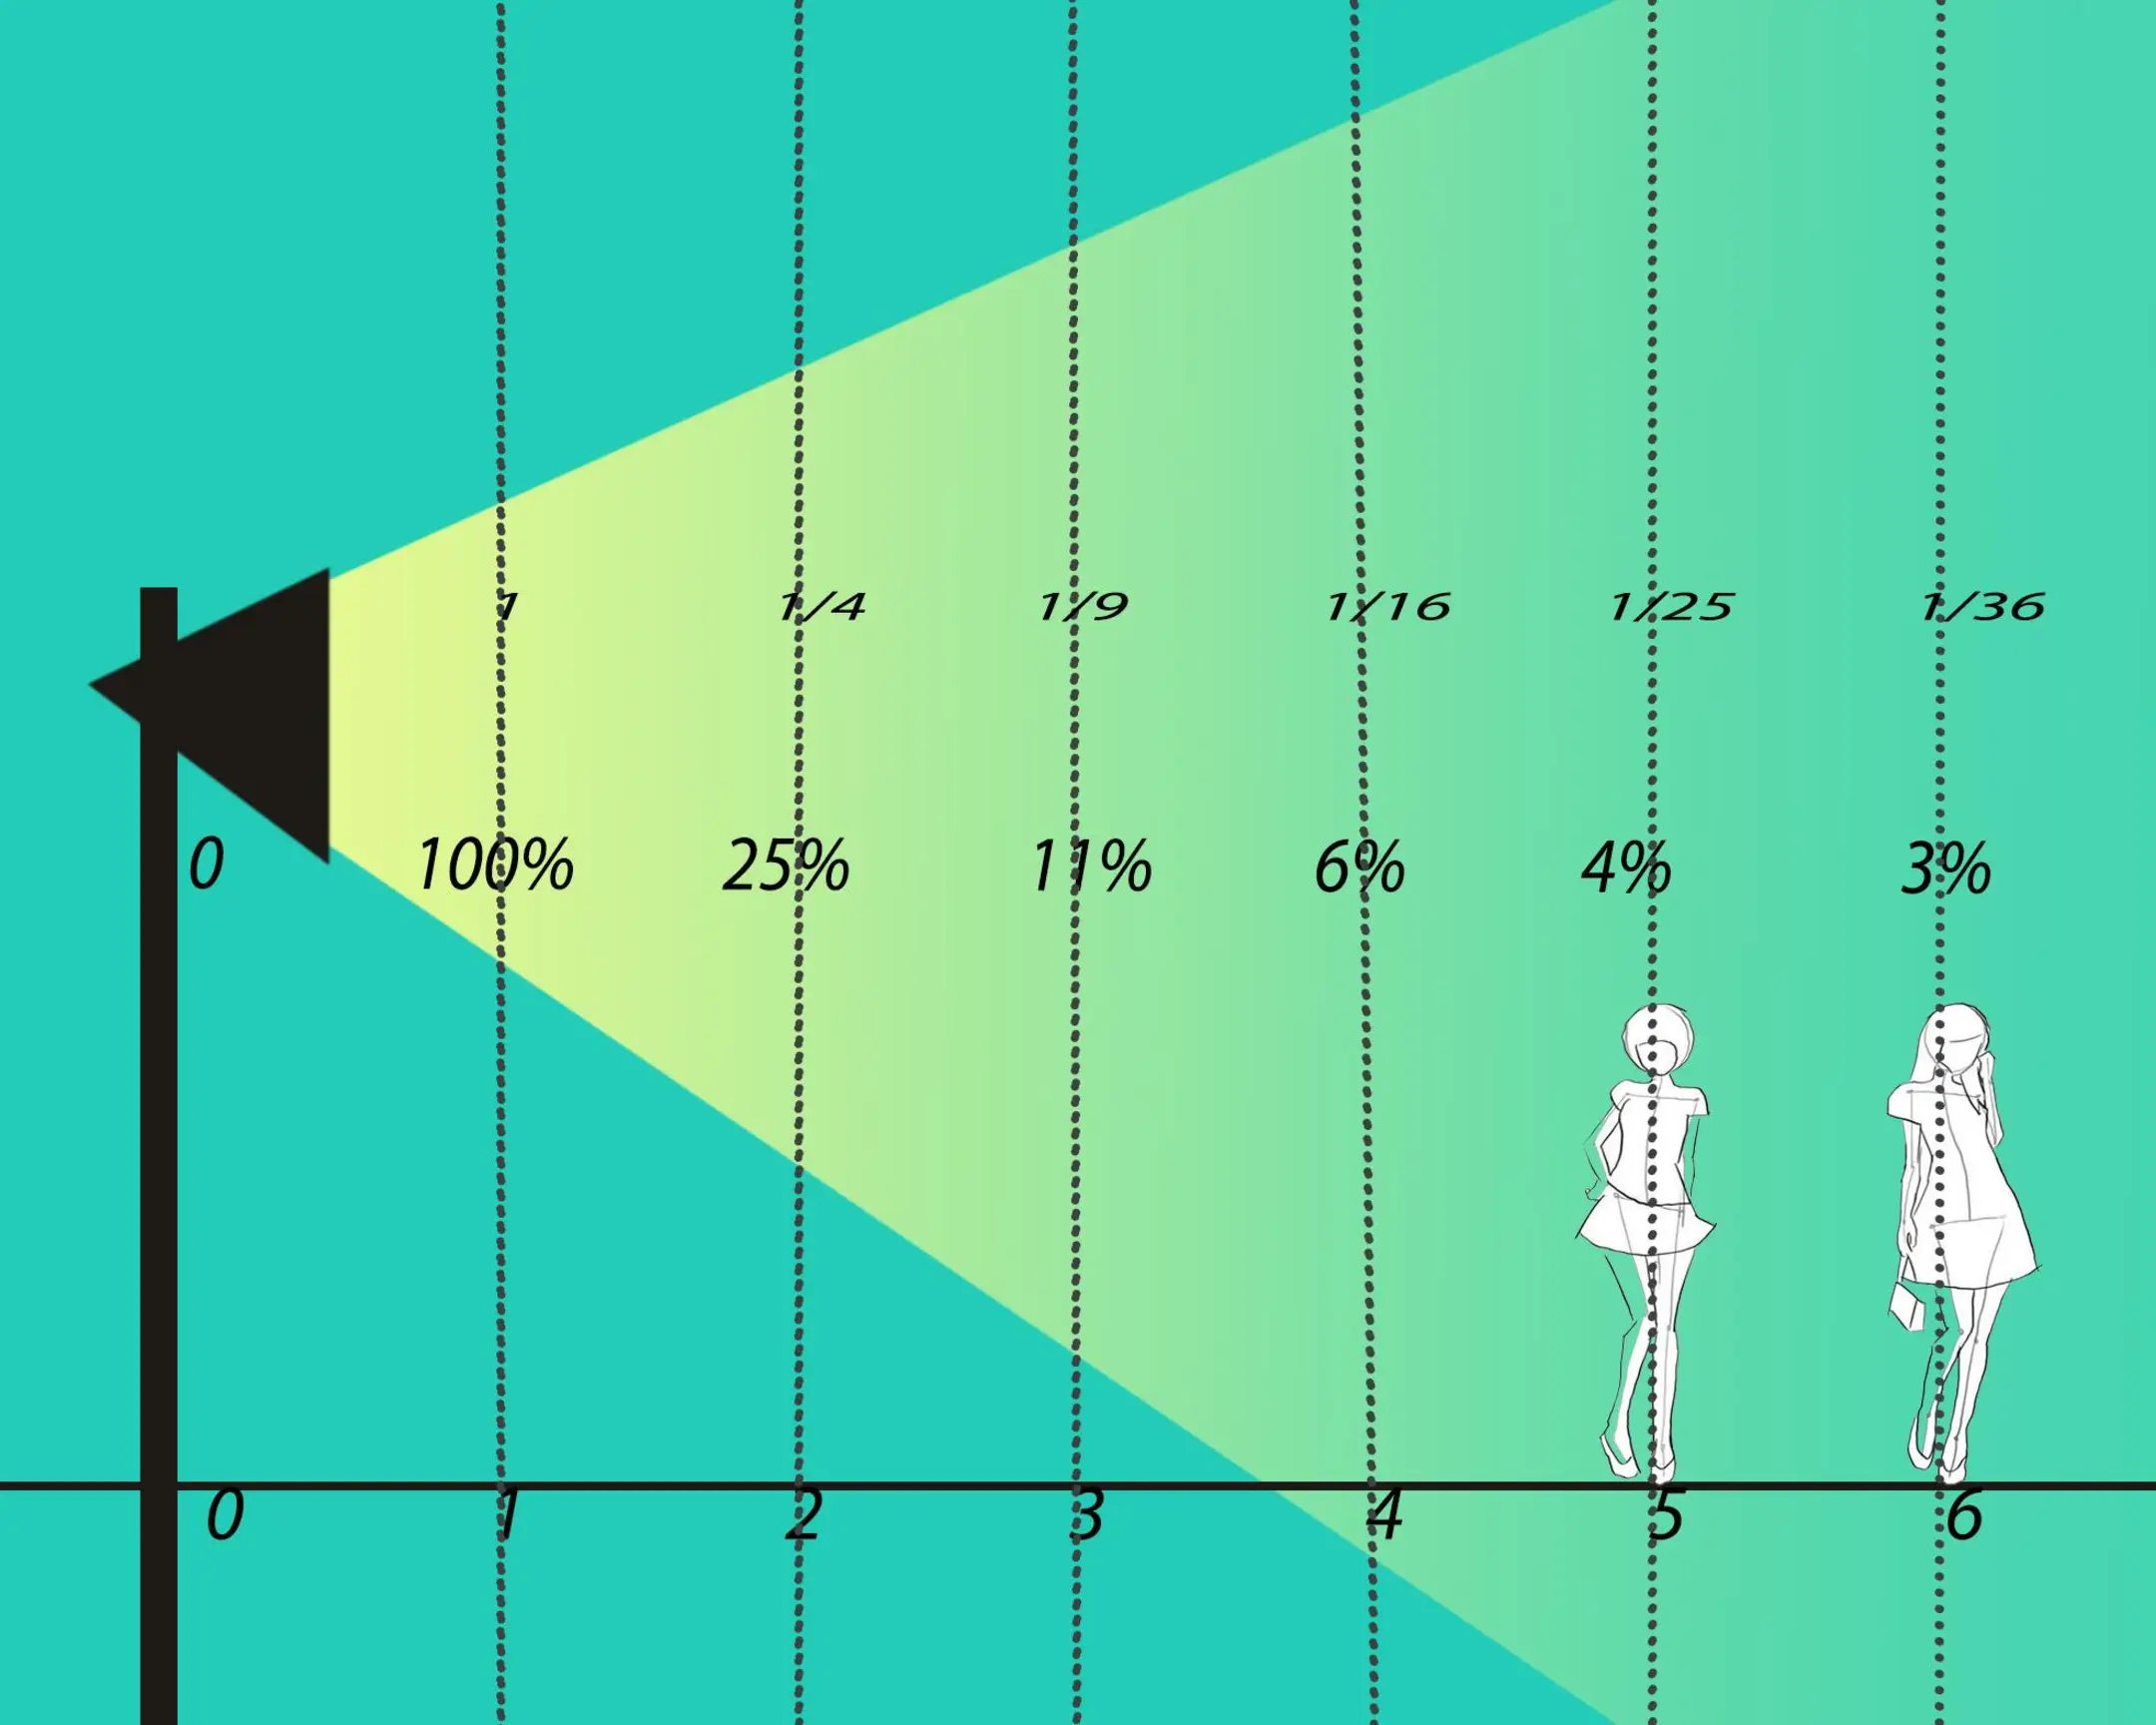
Basically, the further away your light source is, the more even the light will be across your scene. Moving your light back minimizes the variation between different points on the surface.
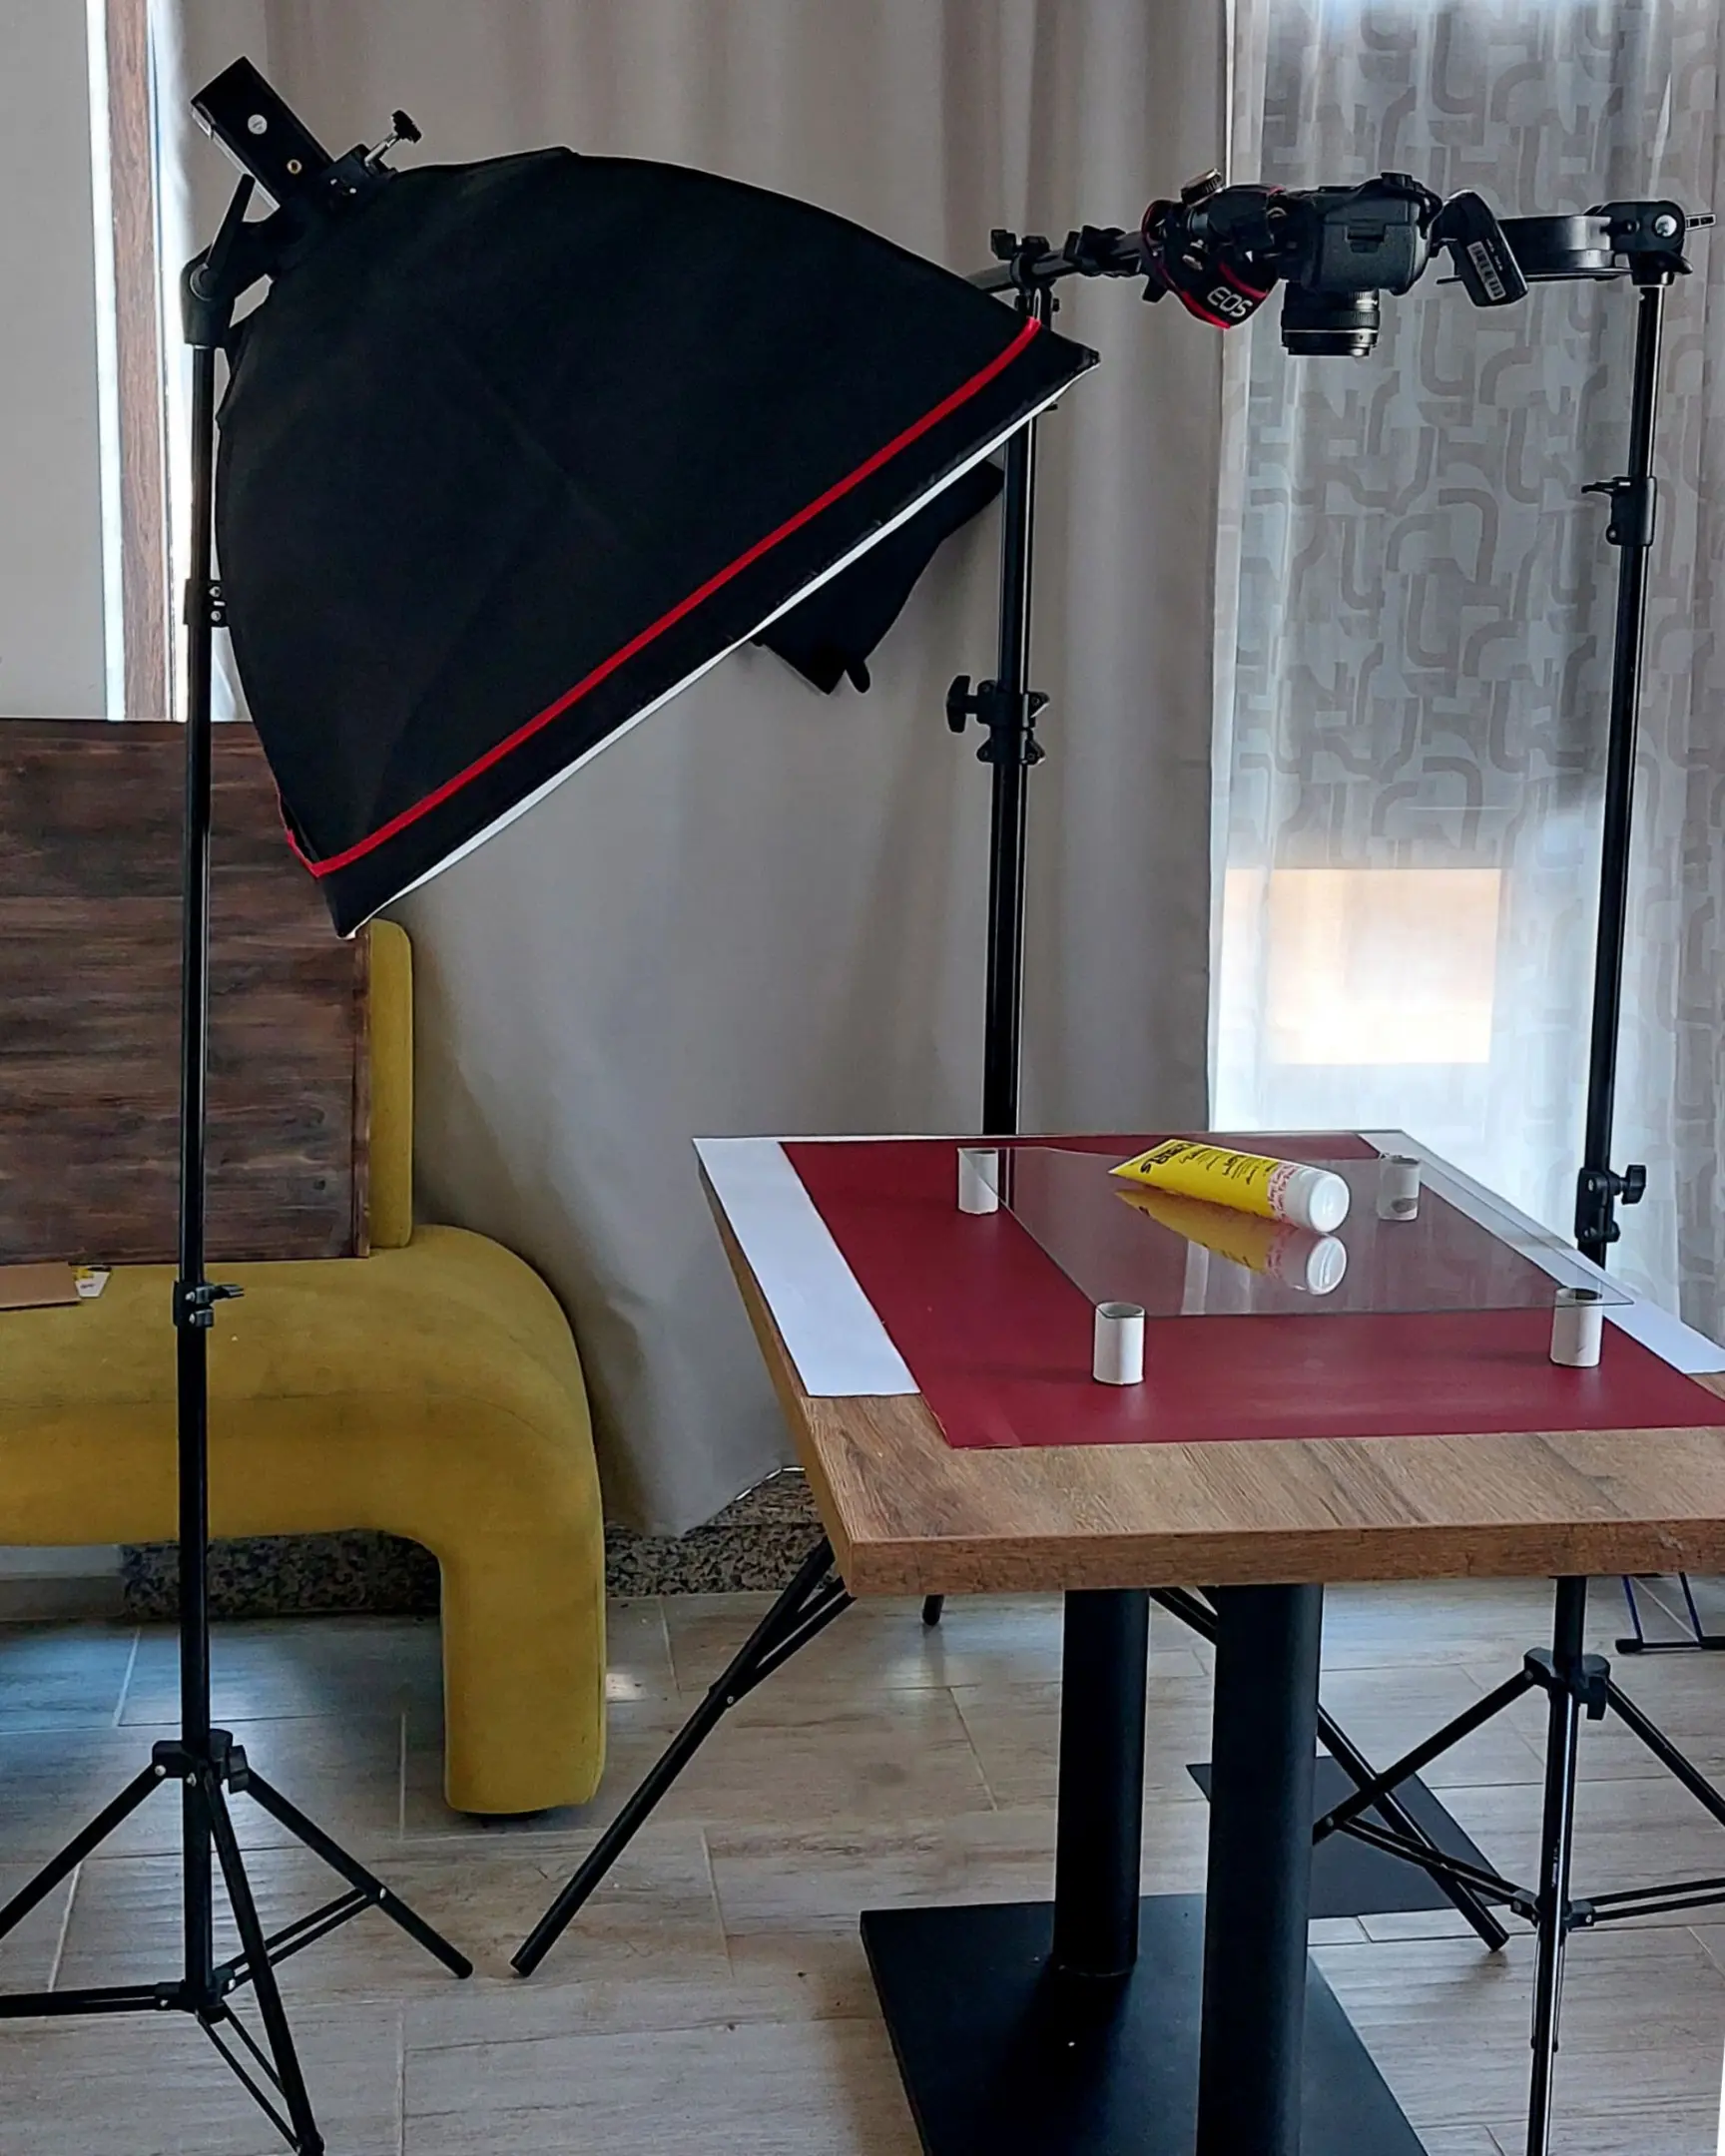
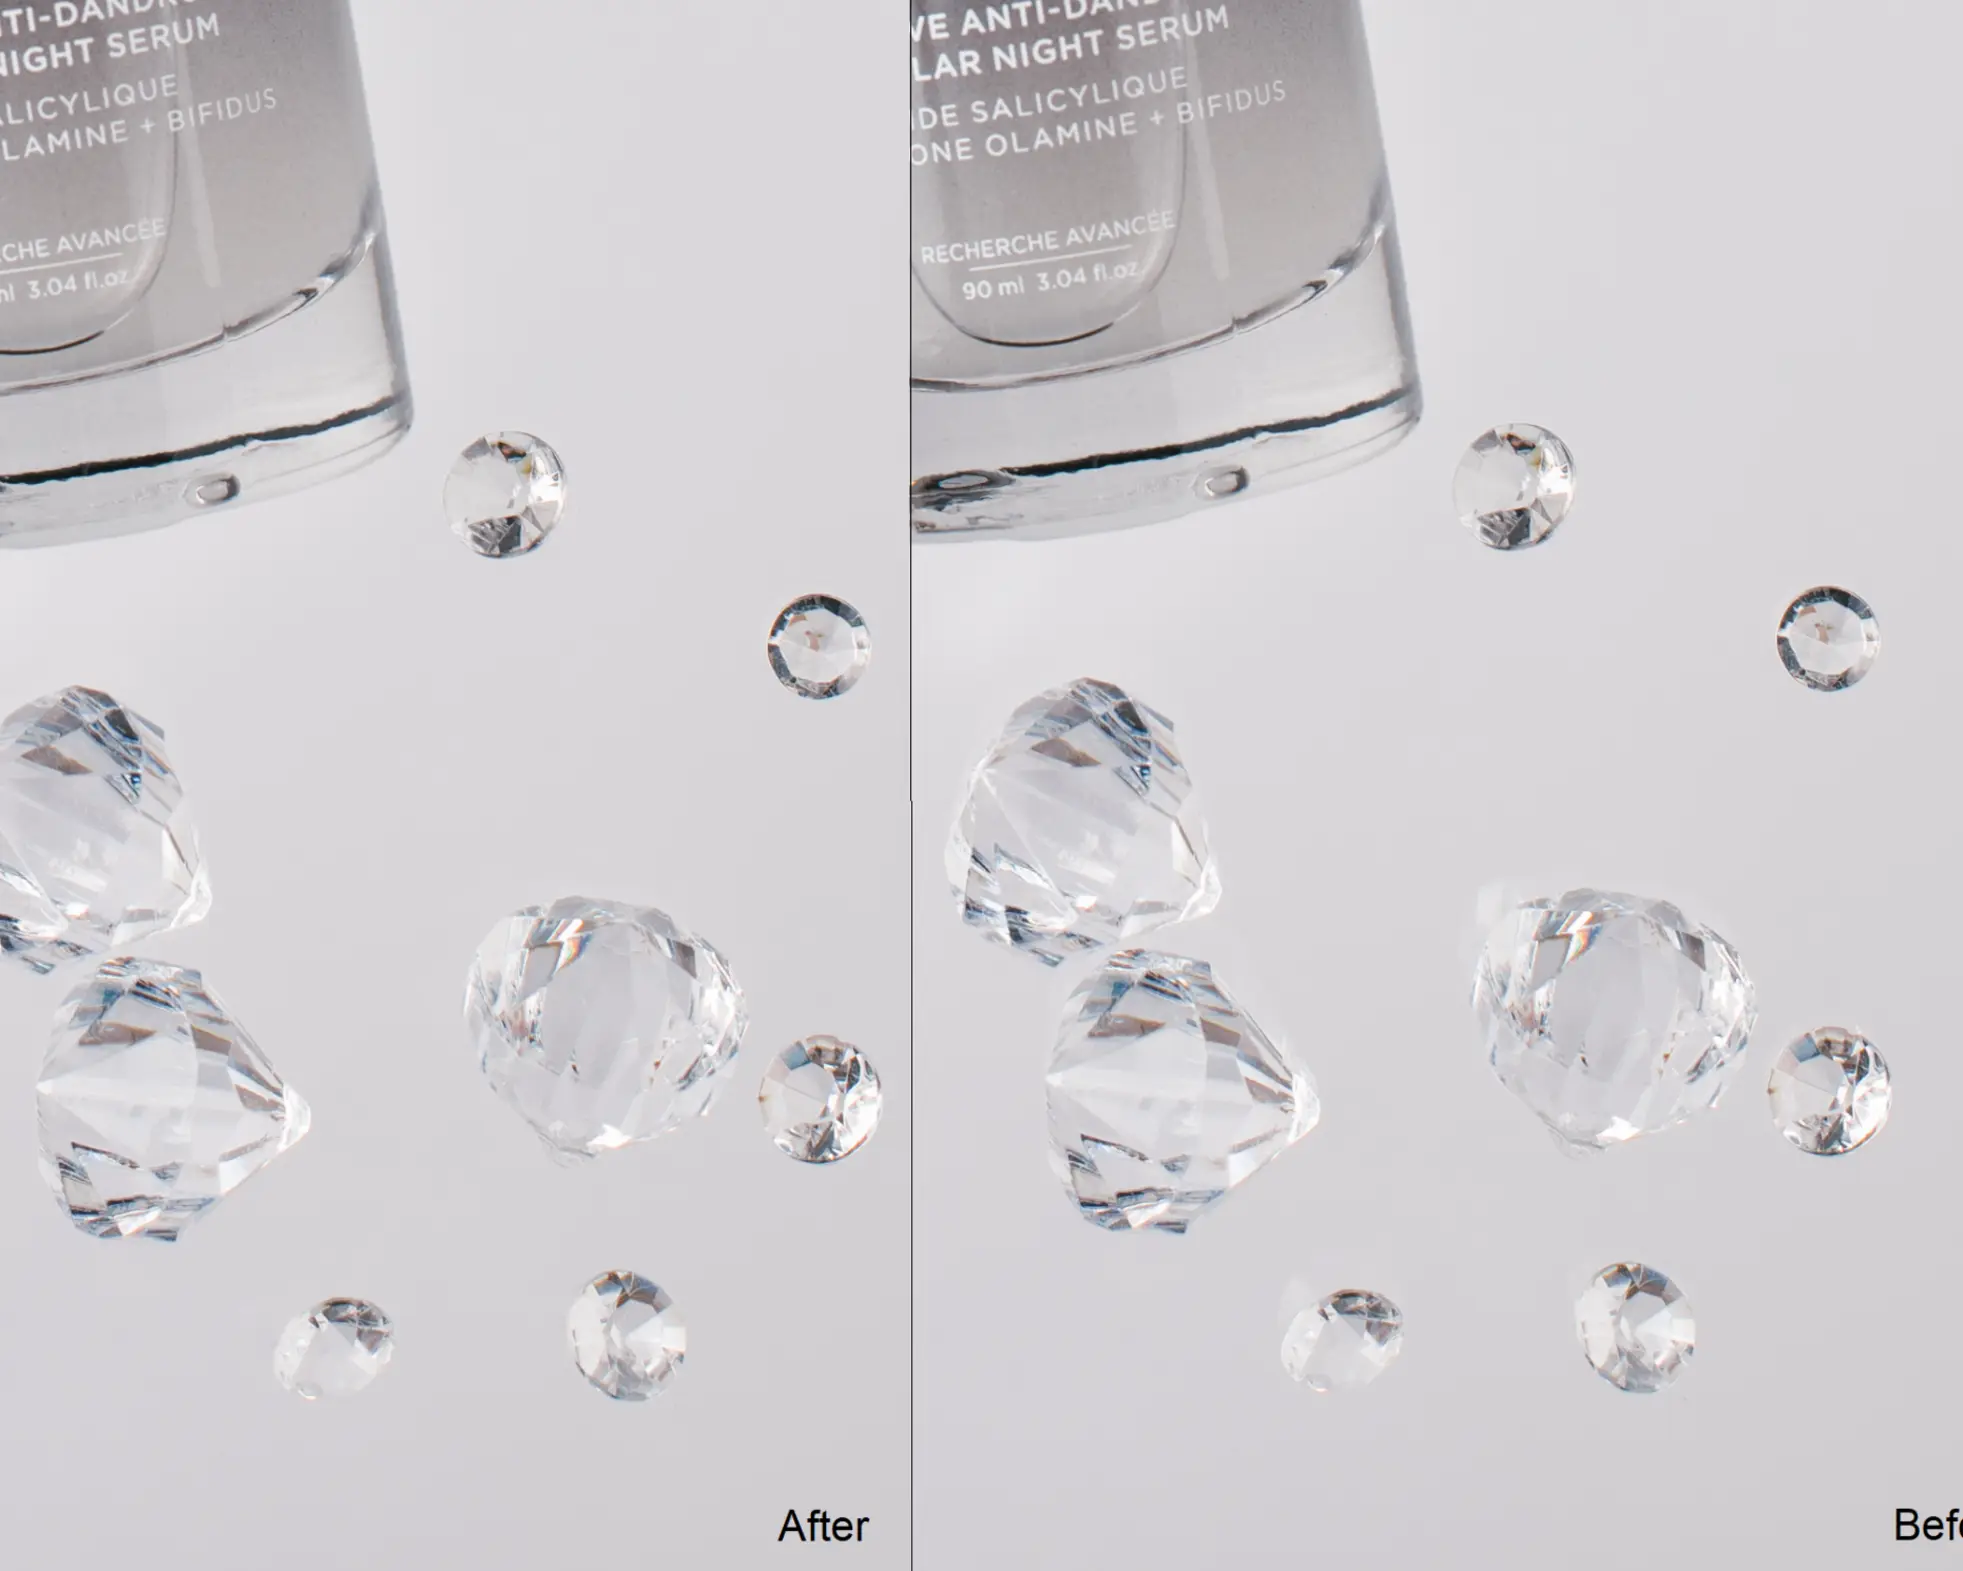
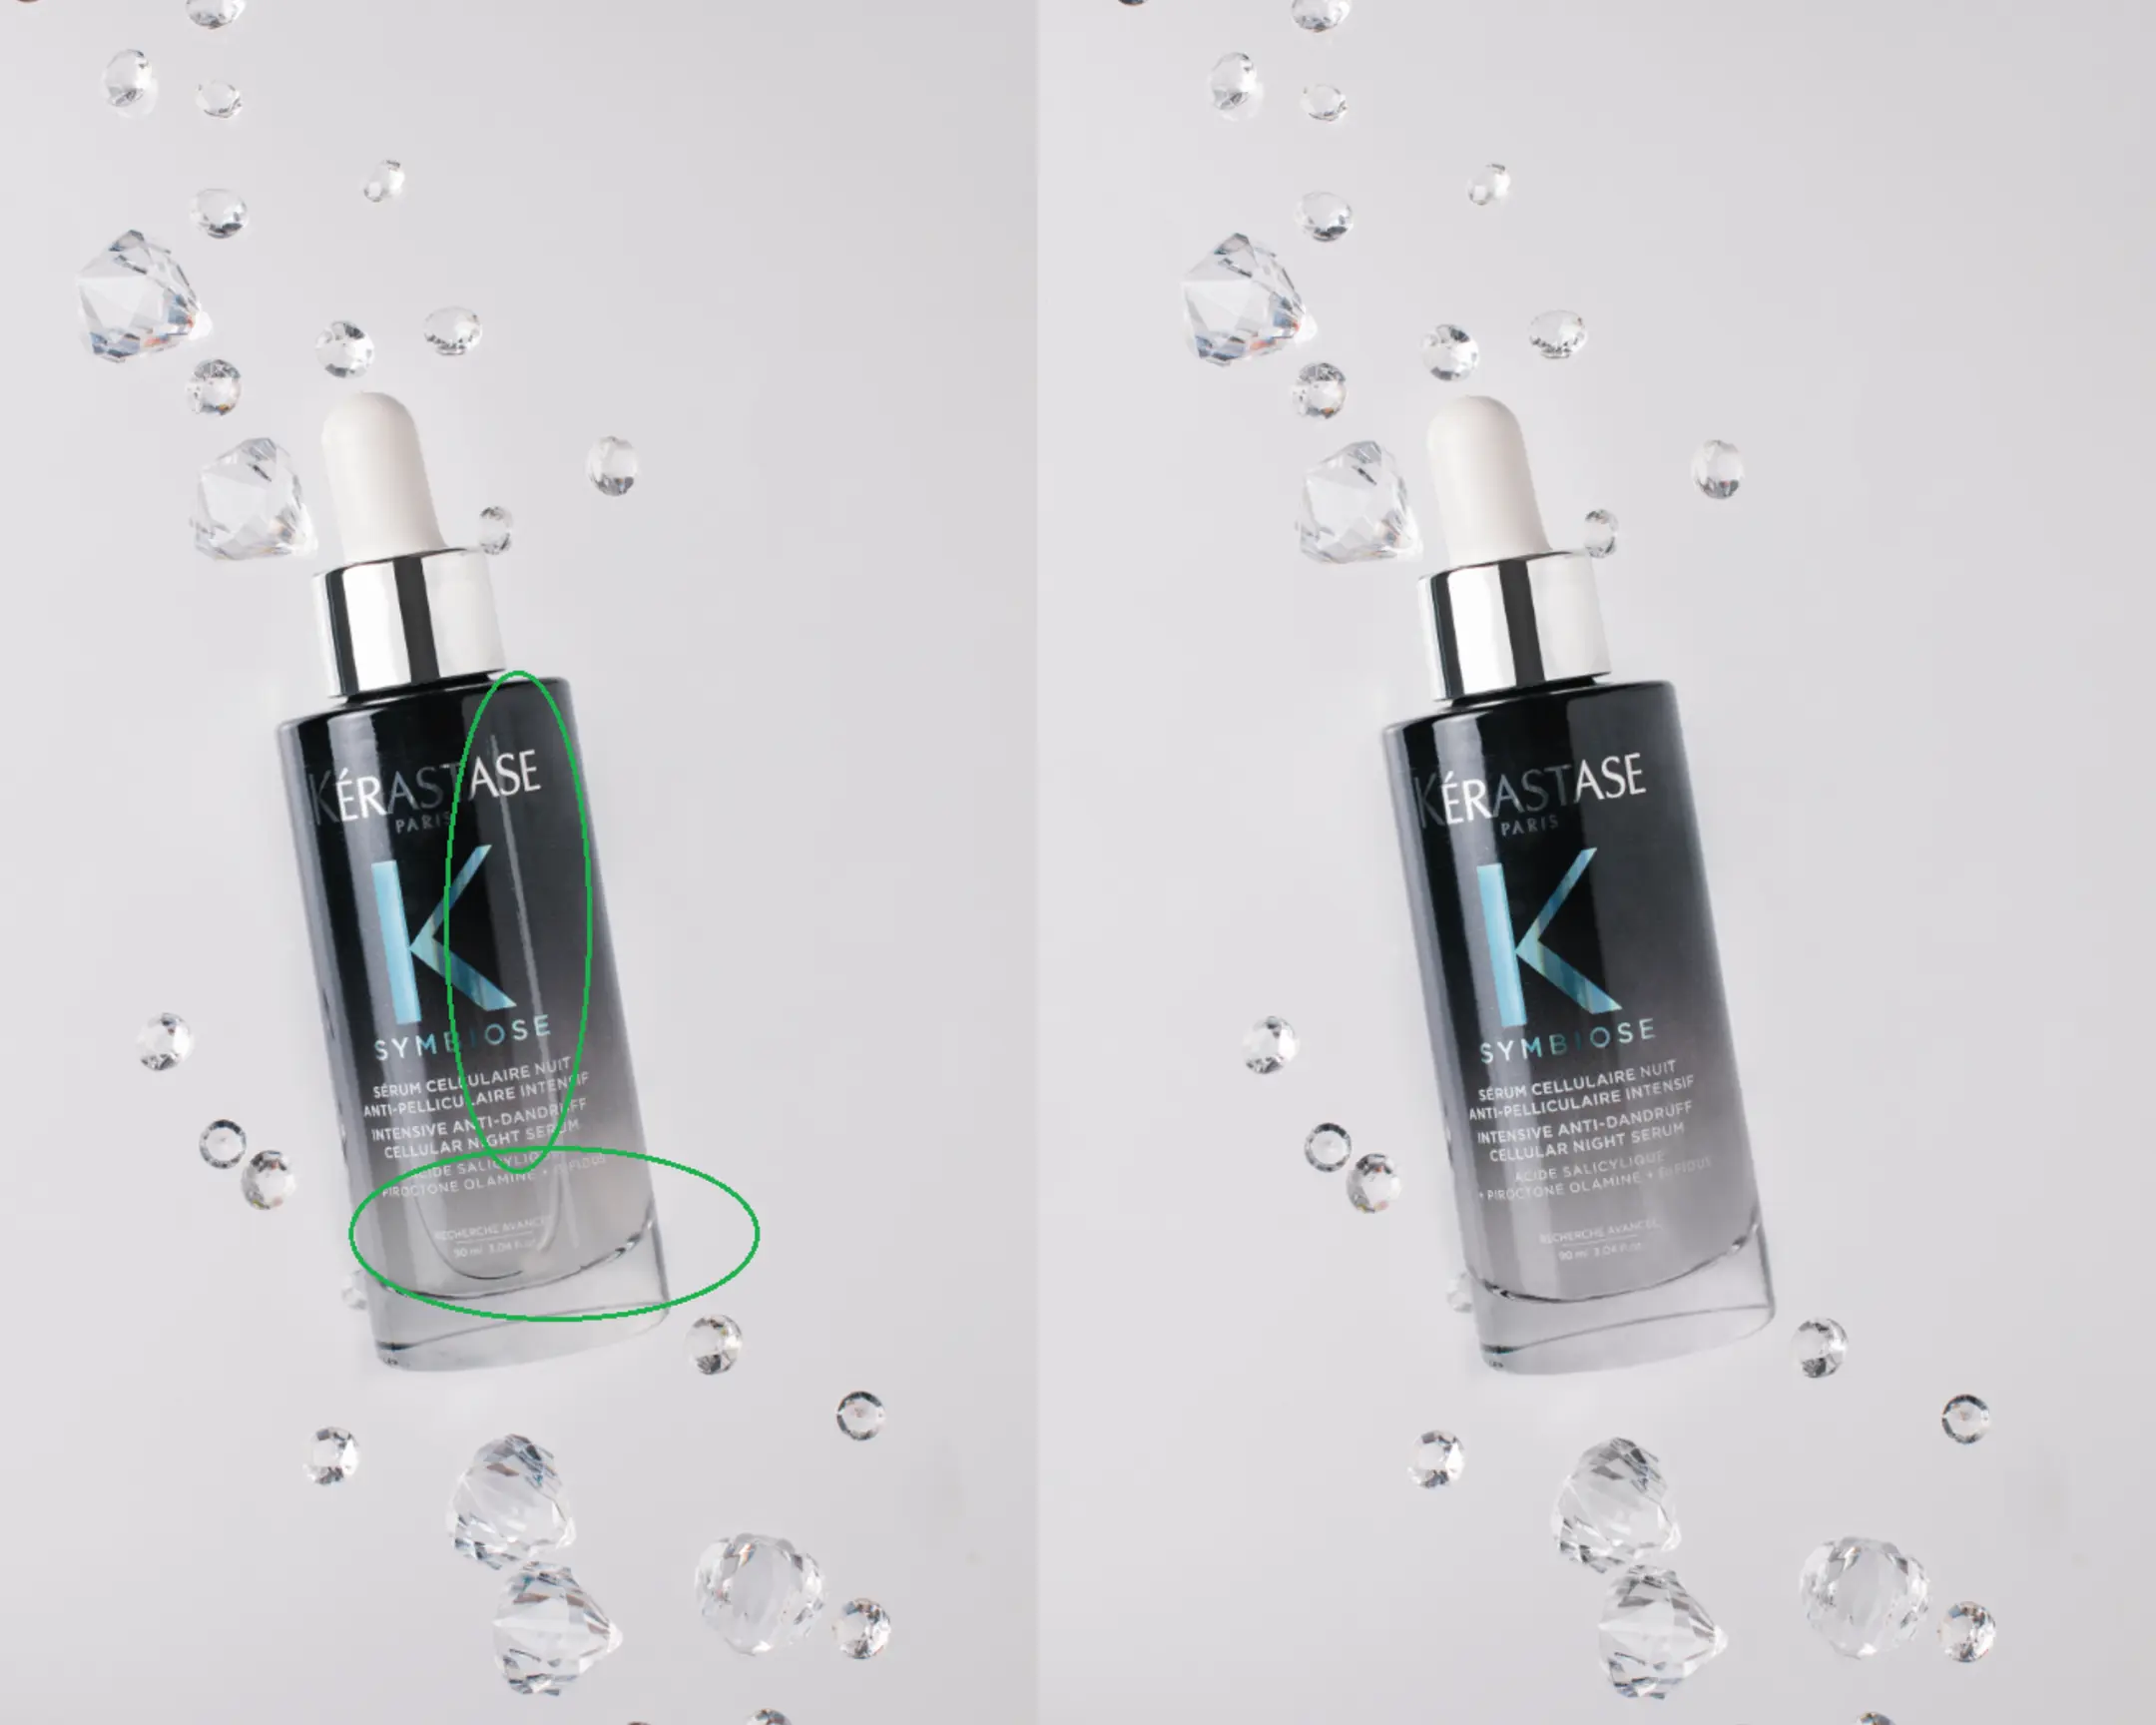
In the photo with the lotion above, the flash was positioned quite close. You can see the background is significantly brighter on the left than on the right. You can mitigate this by placing a white reflector (like a foam board) opposite the flash to bounce light back into the shadows.
Now, take a look at the result. The background is illuminated much more evenly, but fixing one problem often reveals another.
Unwanted Reflections in Glass Photography
You might start seeing things in the glass you don’t want there—like your own hands or the camera lens.
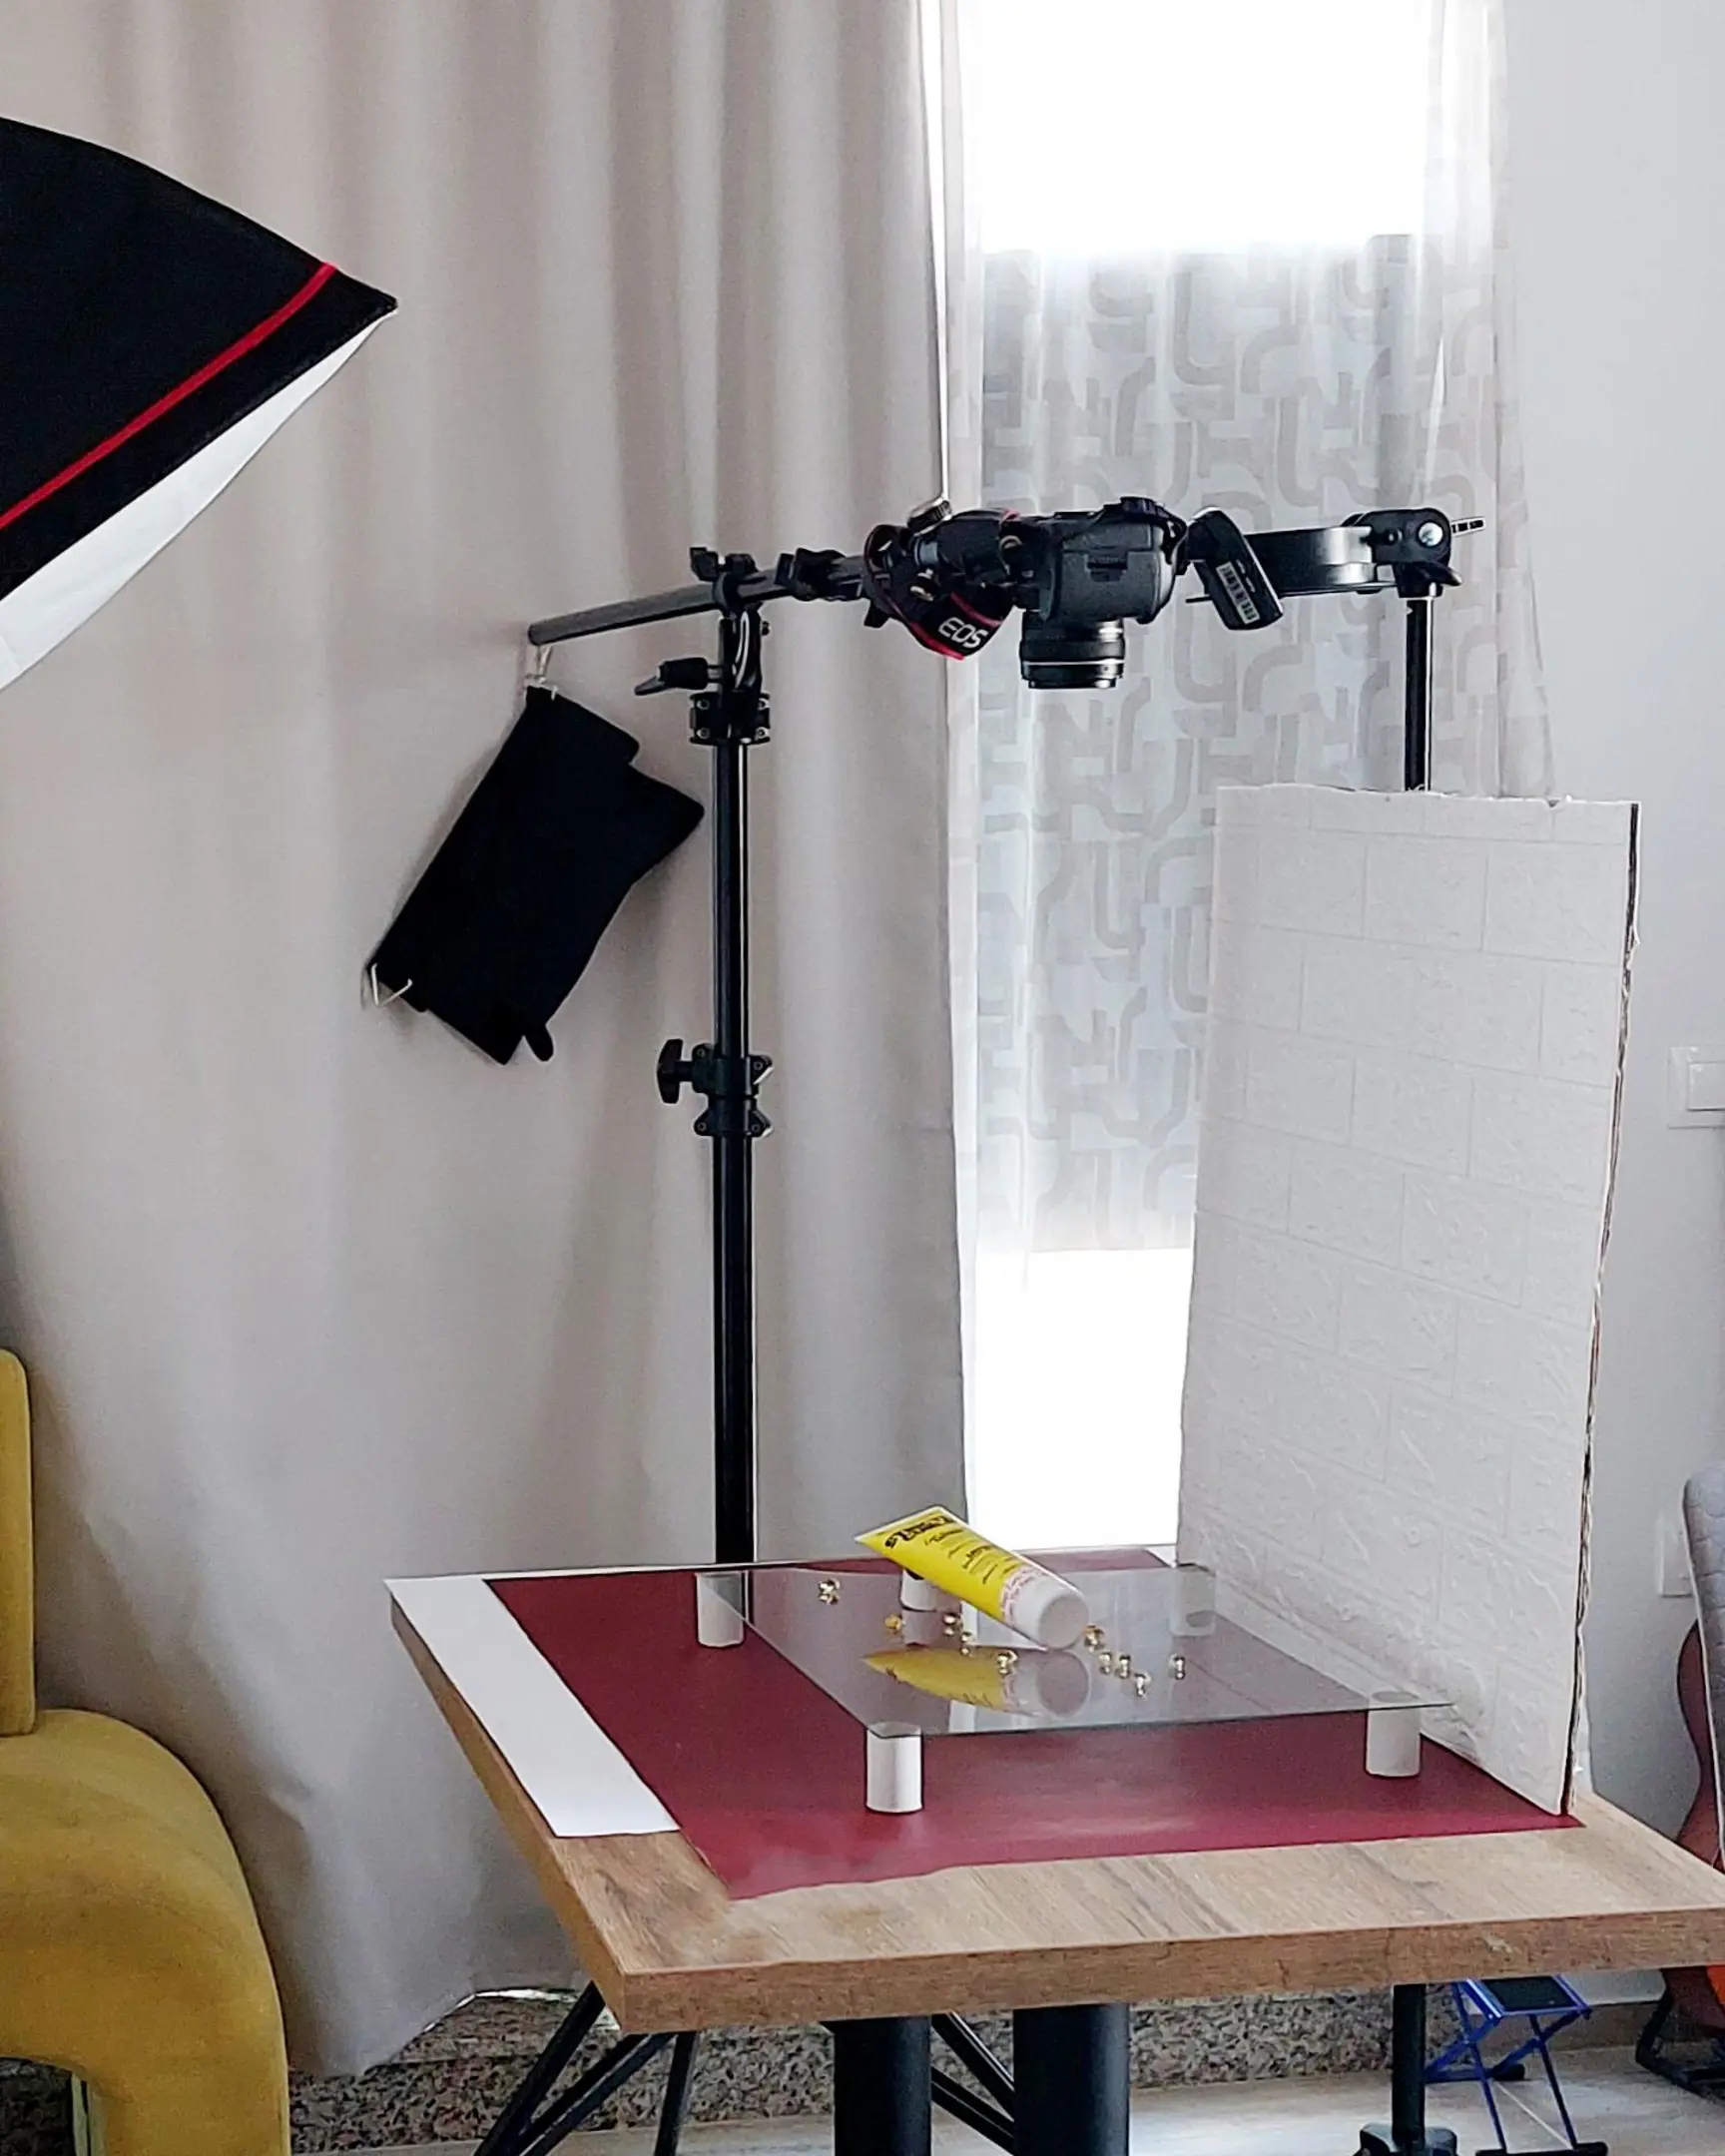
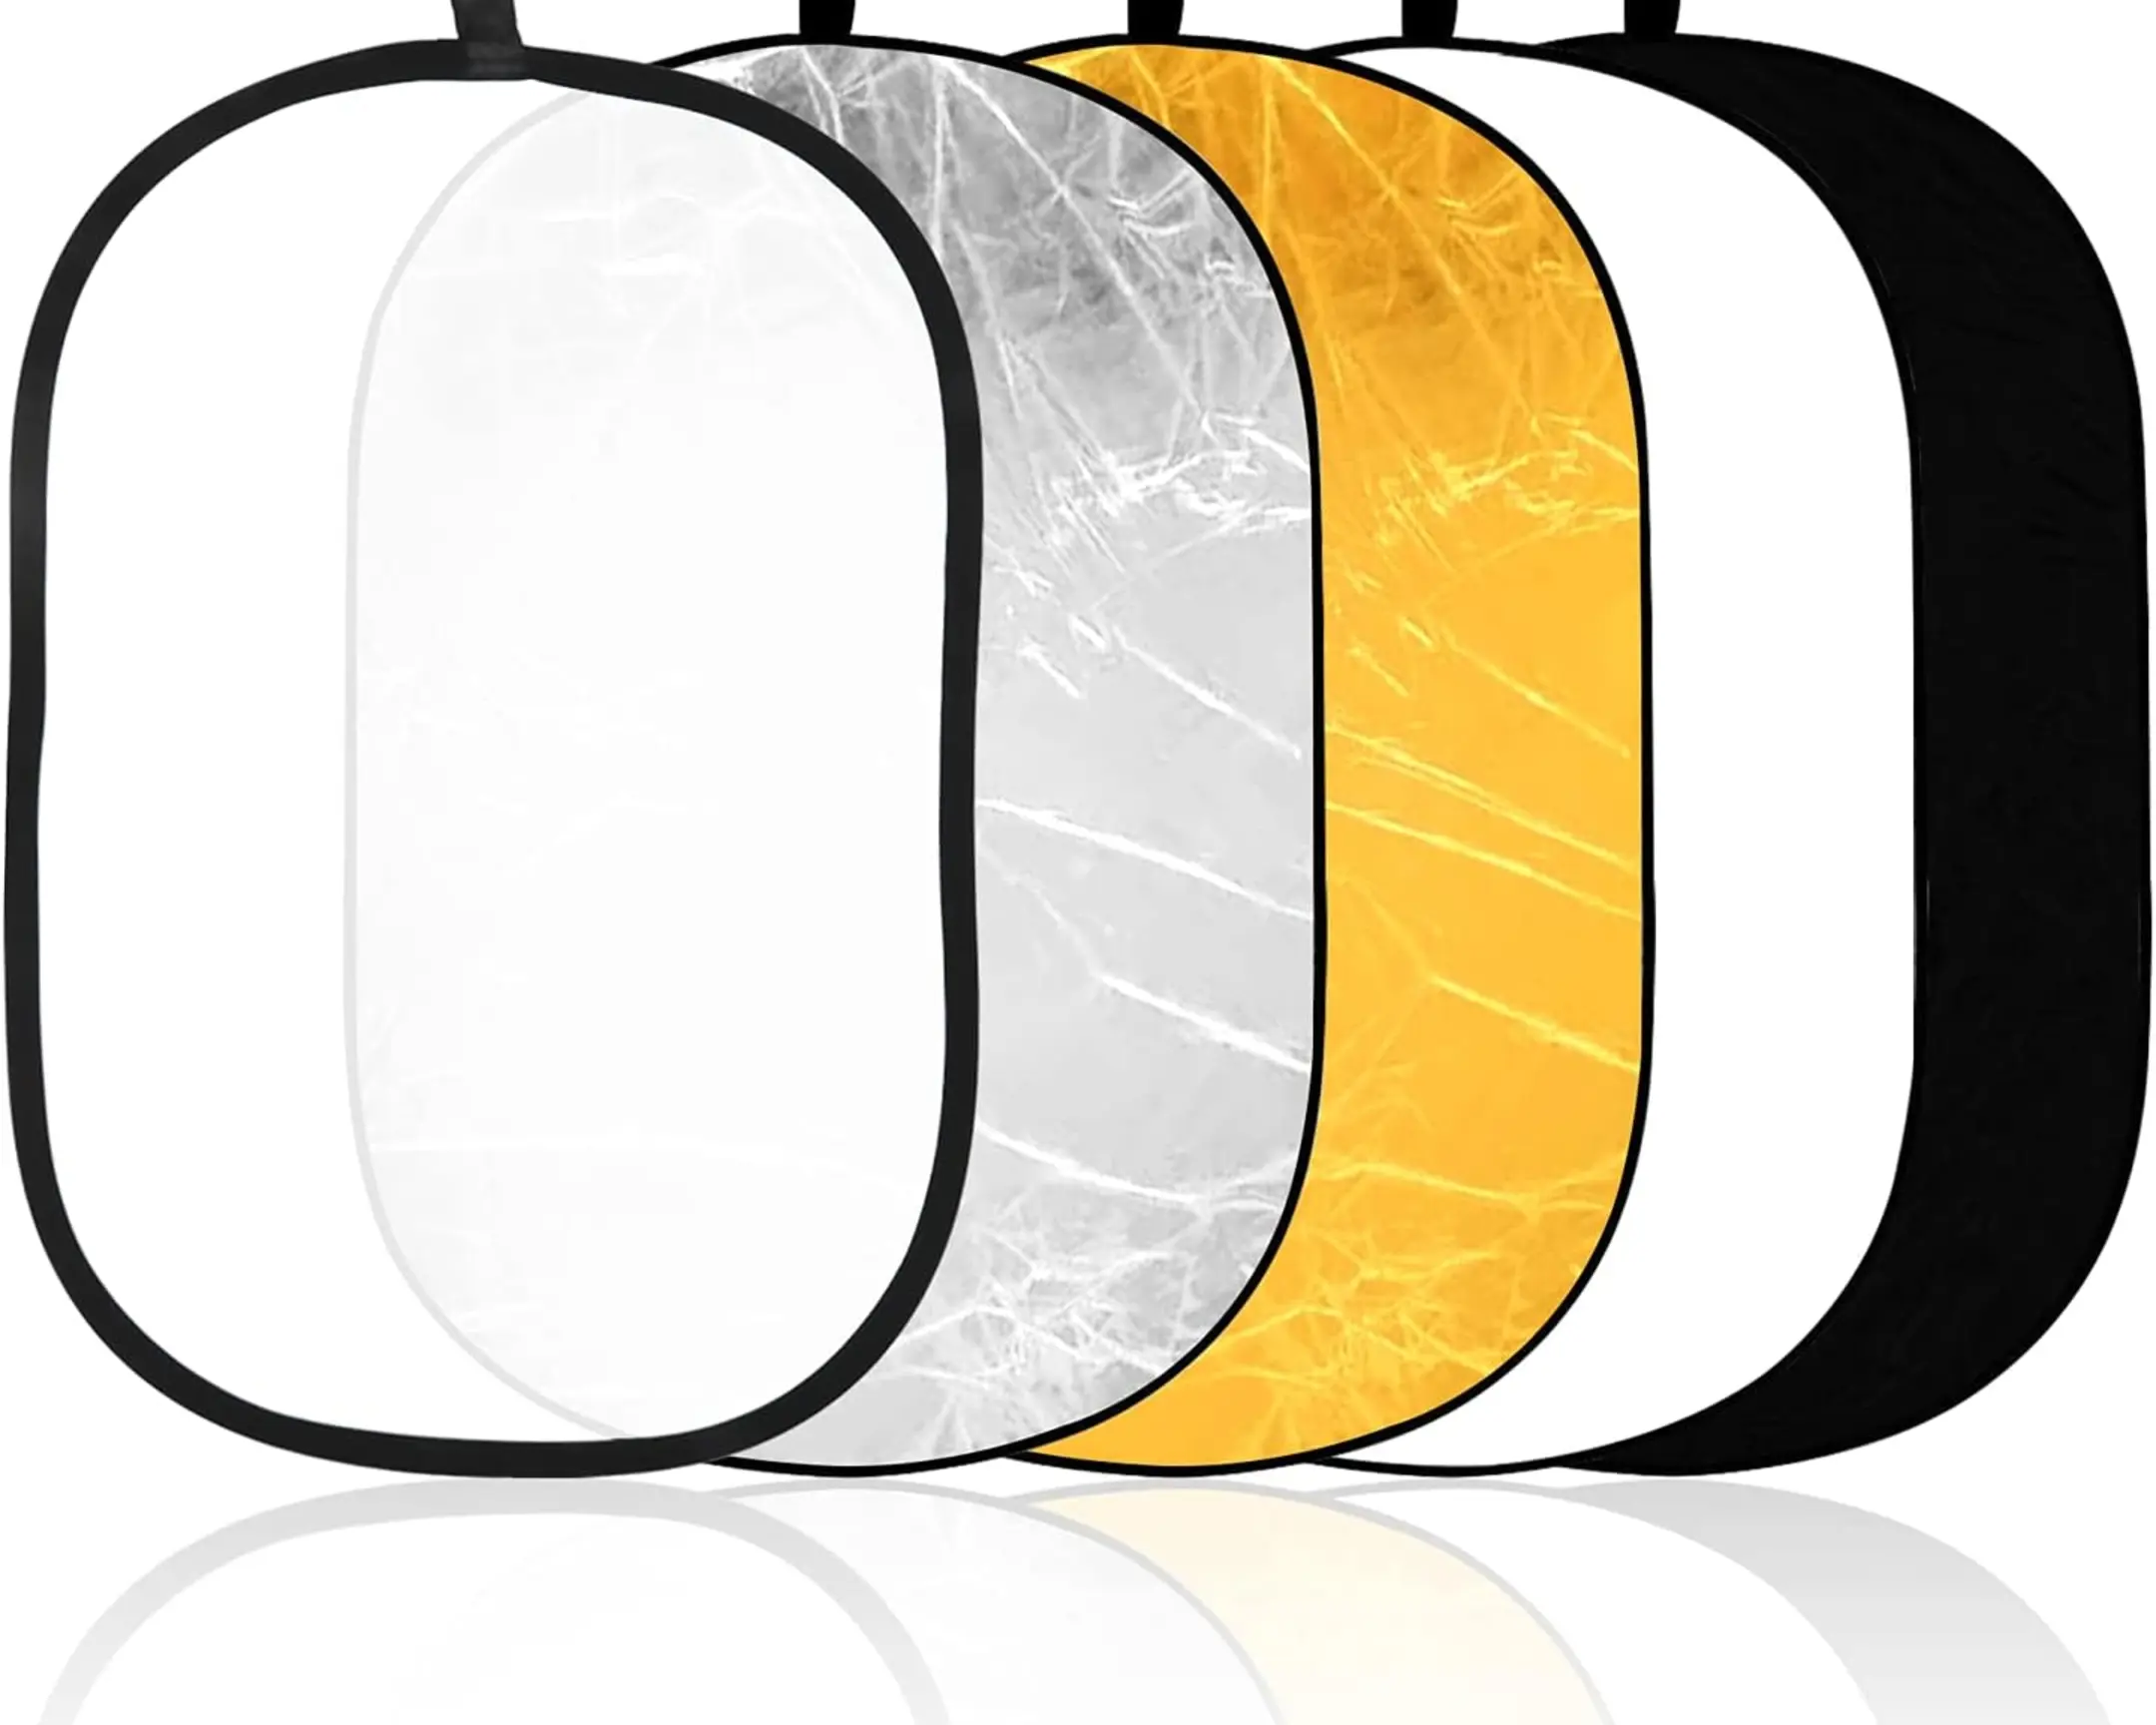
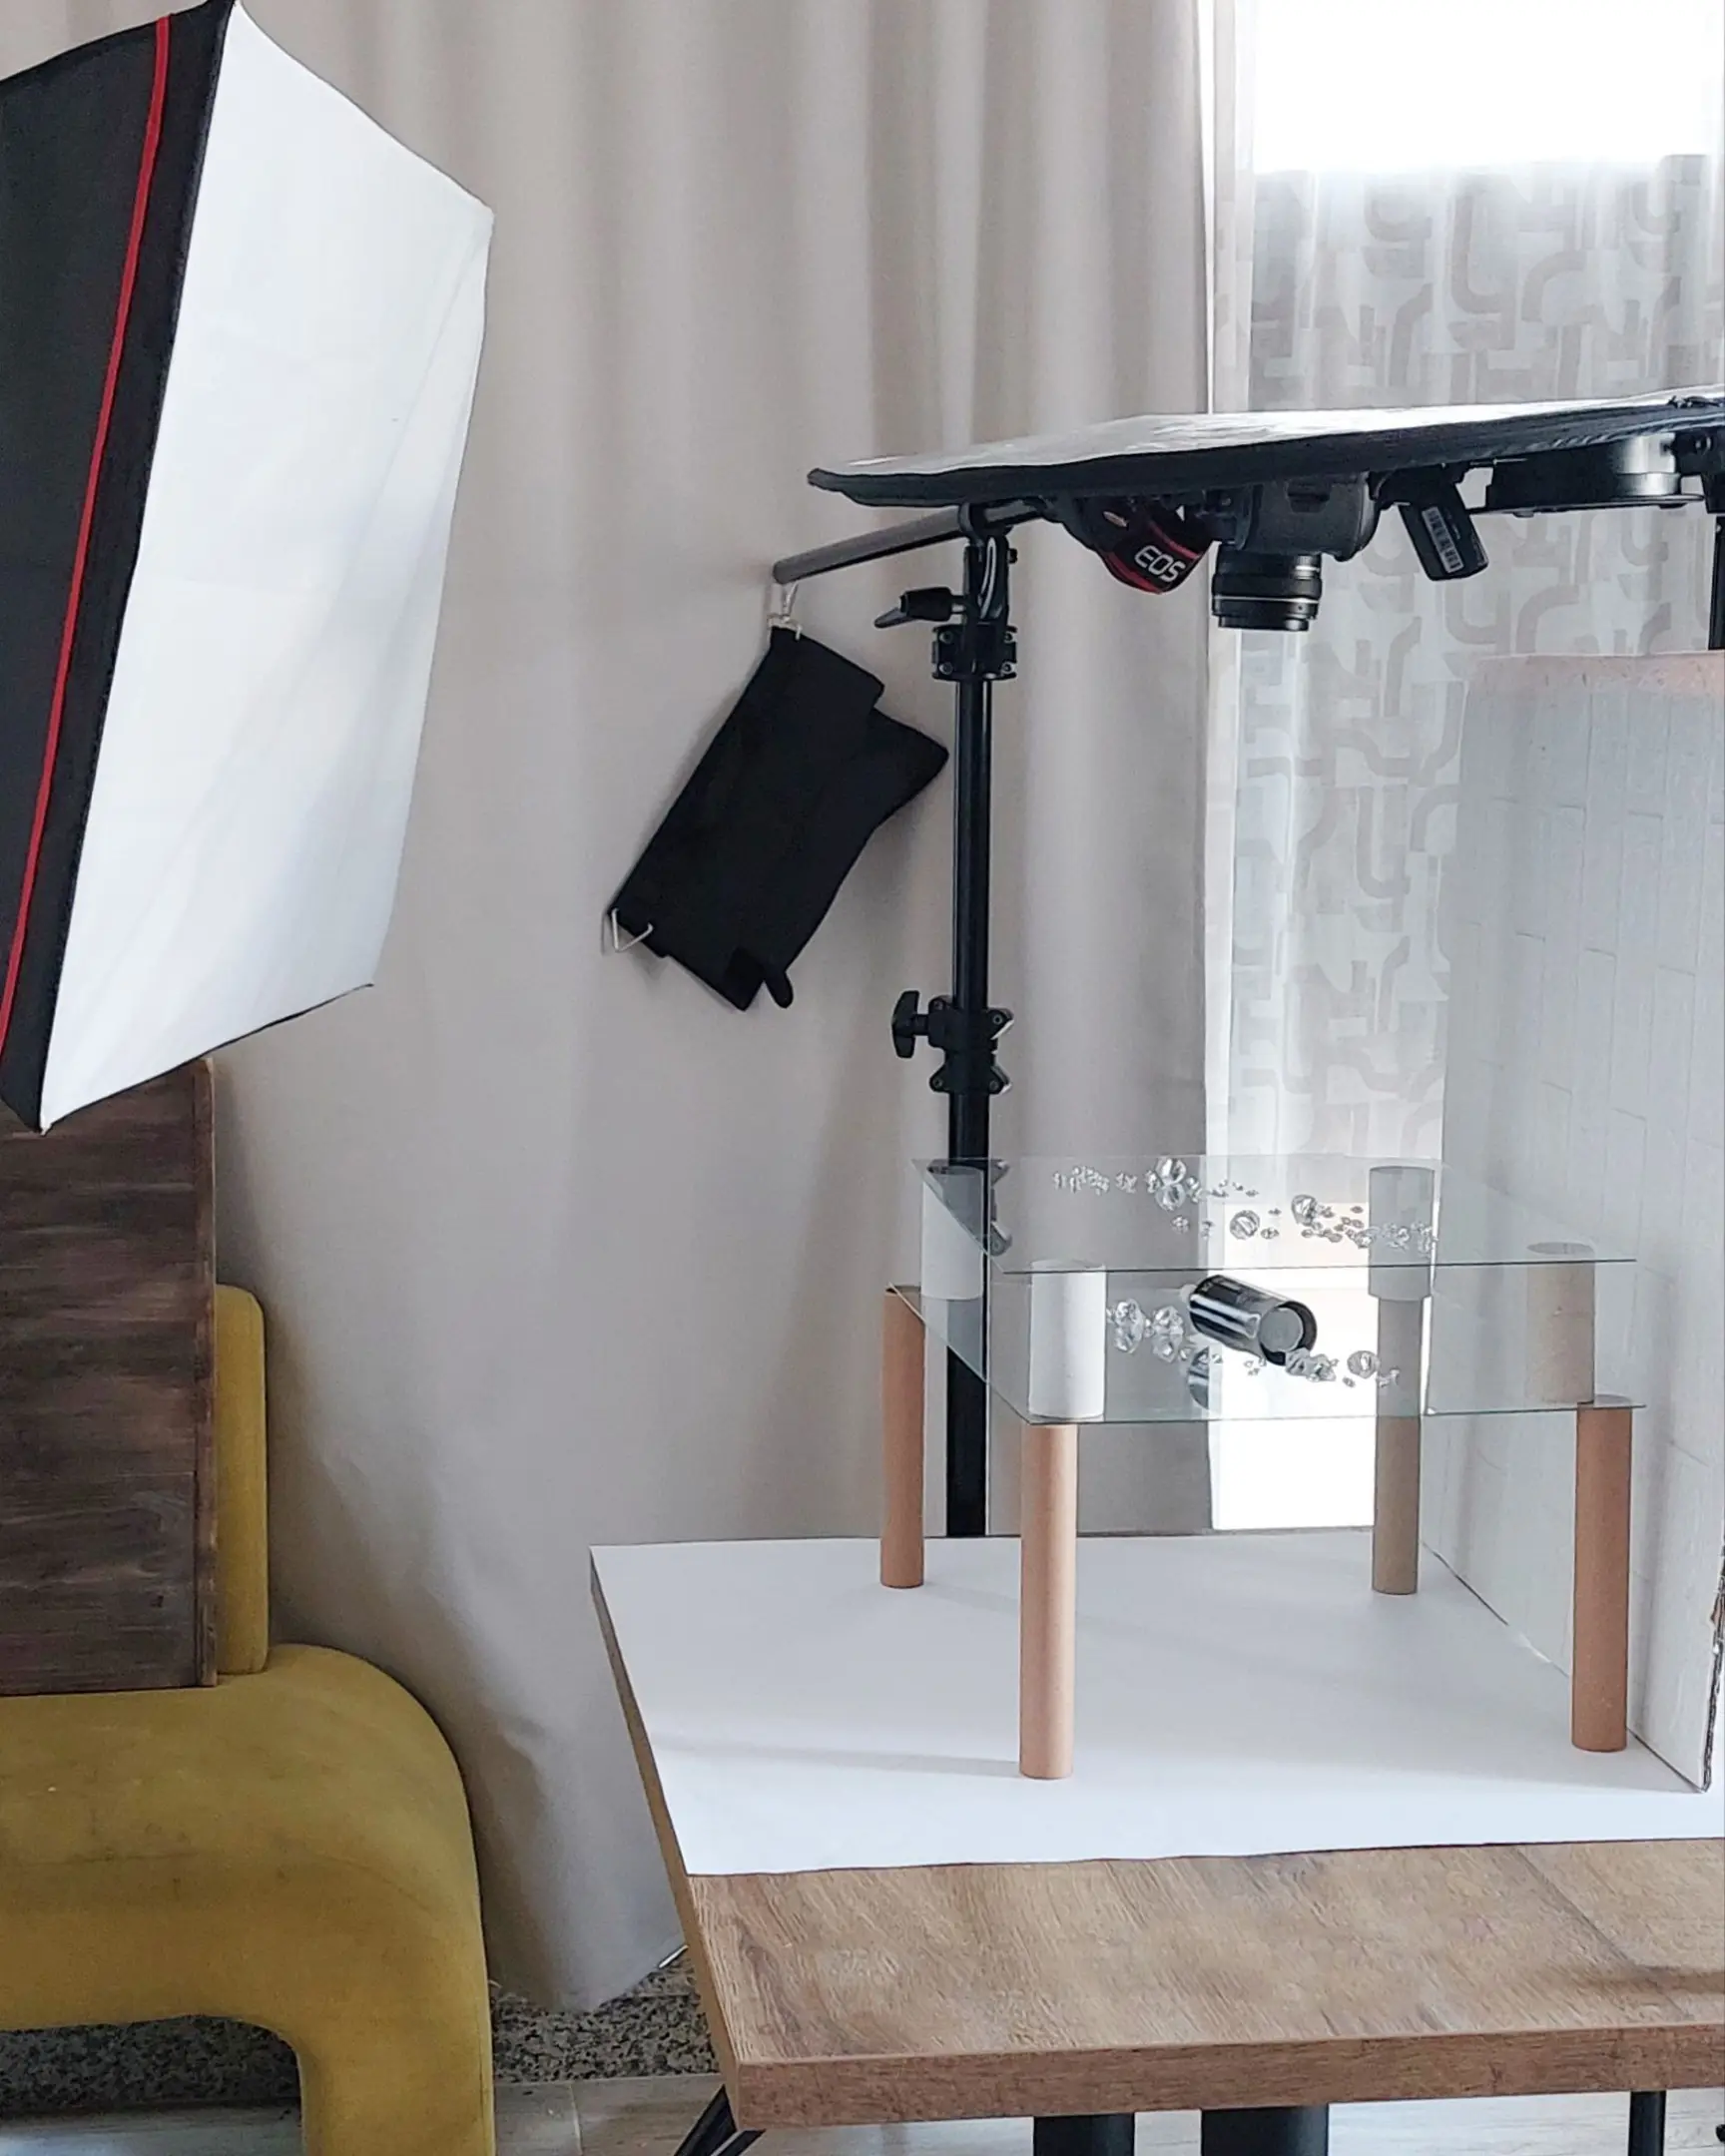
Fortunately, you can remove these reflections partially, or sometimes completely, by controlling your environment. You need to “flag” the reflection source (usually the ceiling or the open room) using black material. This could be a sheet of black paper, foam board, or the black side of a 5-in-1 reflector.
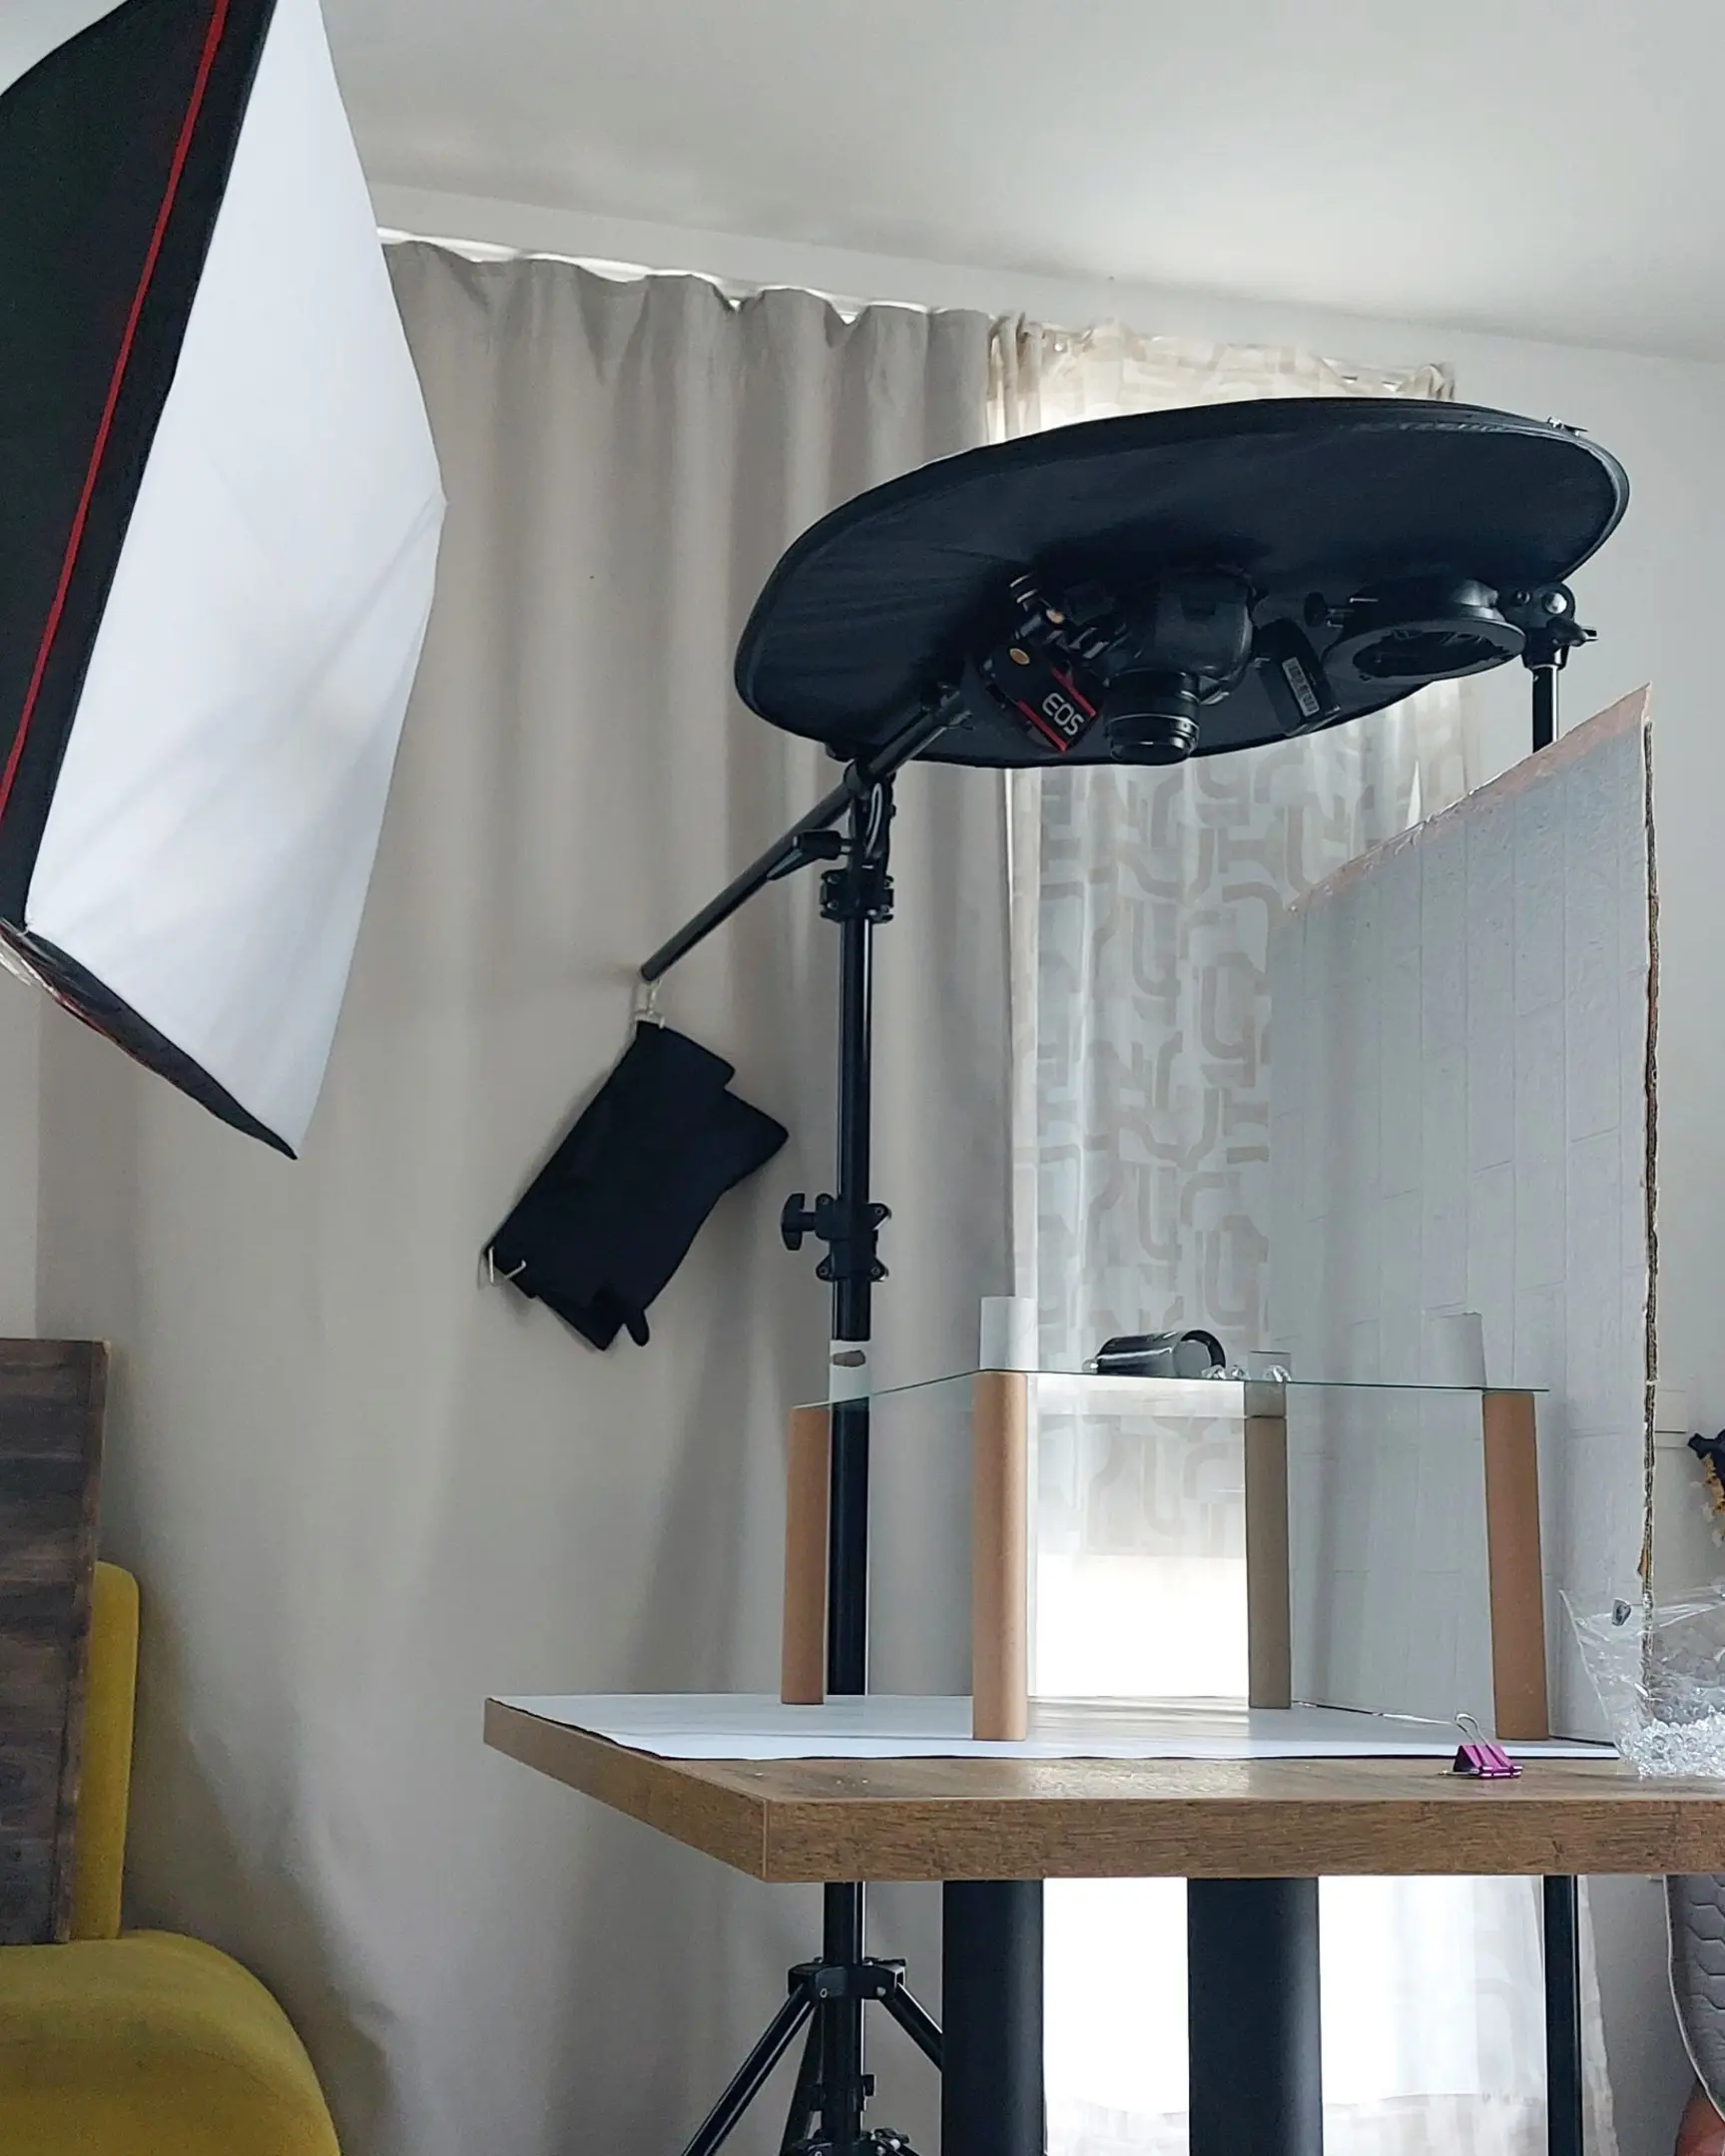
(In the image below, you can see the reflector lying on top of the camera, with the black side facing the glass).
The bad news is that you can’t always eliminate every single reflection physically. Some are just part of the physics of shooting glass.
The good news?
- With a proper lighting setup, most reflections will disappear.
- Shooting on a light or bright background makes reflections much less visible.
- If you use a single sheet of glass and place a black flag above the camera, you will eliminate almost all unwanted glare.
- There are simple Photoshop tricks to clean up the rest during post-processing.
- I have a method for shooting with two sheets of glass that minimizes retouching time.
I’ve covered the physical setup (points 1-3) above. You can also see this in action in the Dynaphos video, where I adjust the softbox specifically to manage reflections.
Now, let’s look at points 4 and 5—the editing workflow.
Master Class: Simulating Product Levitation Using Glass
Let’s dive into the practical side of simulating levitation.
For this example, I chose a serum bottle. I placed it on tall stands to avoid casting shadows on the background and to allow me to position the flash further away, ensuring that even lighting we discussed earlier.
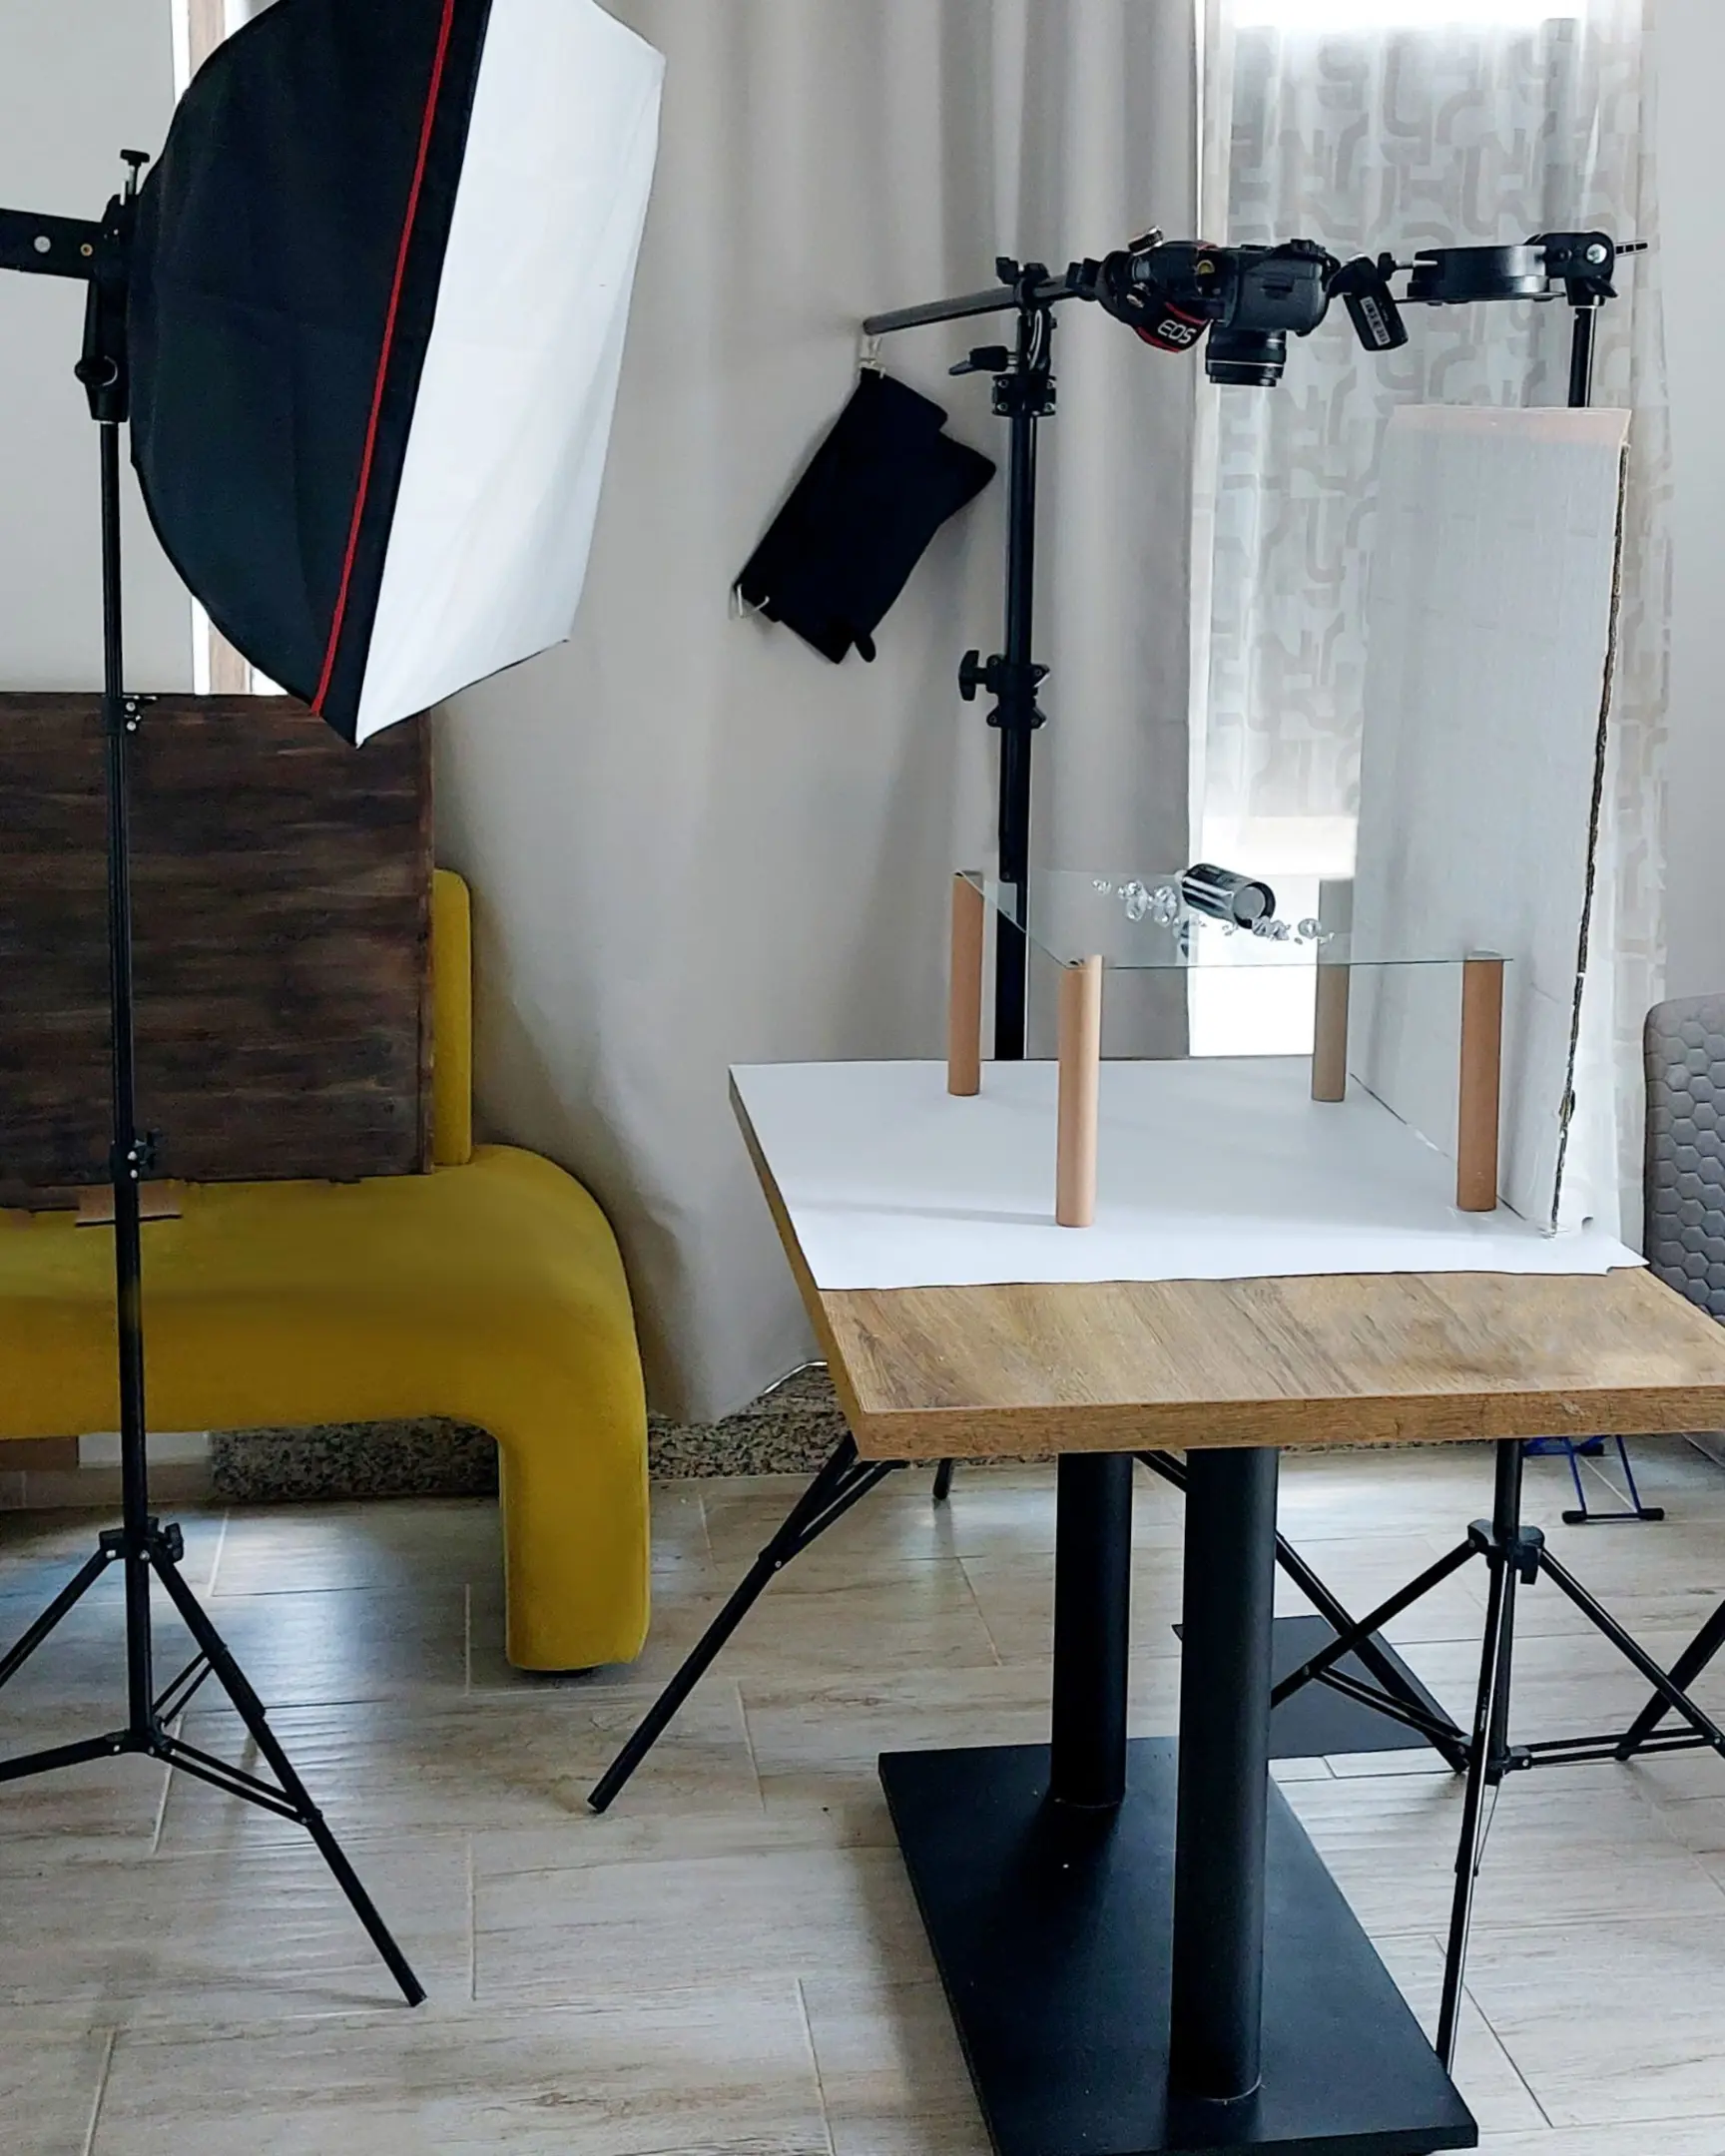
On the right, I used white cardboard as a reflector to fill in the shadows on the bottle. I then surrounded the object with crystals.
When I initially tried adding a second layer of glass to create depth, I ended up with a chaotic mess of reflections.
Here is what that looked like:
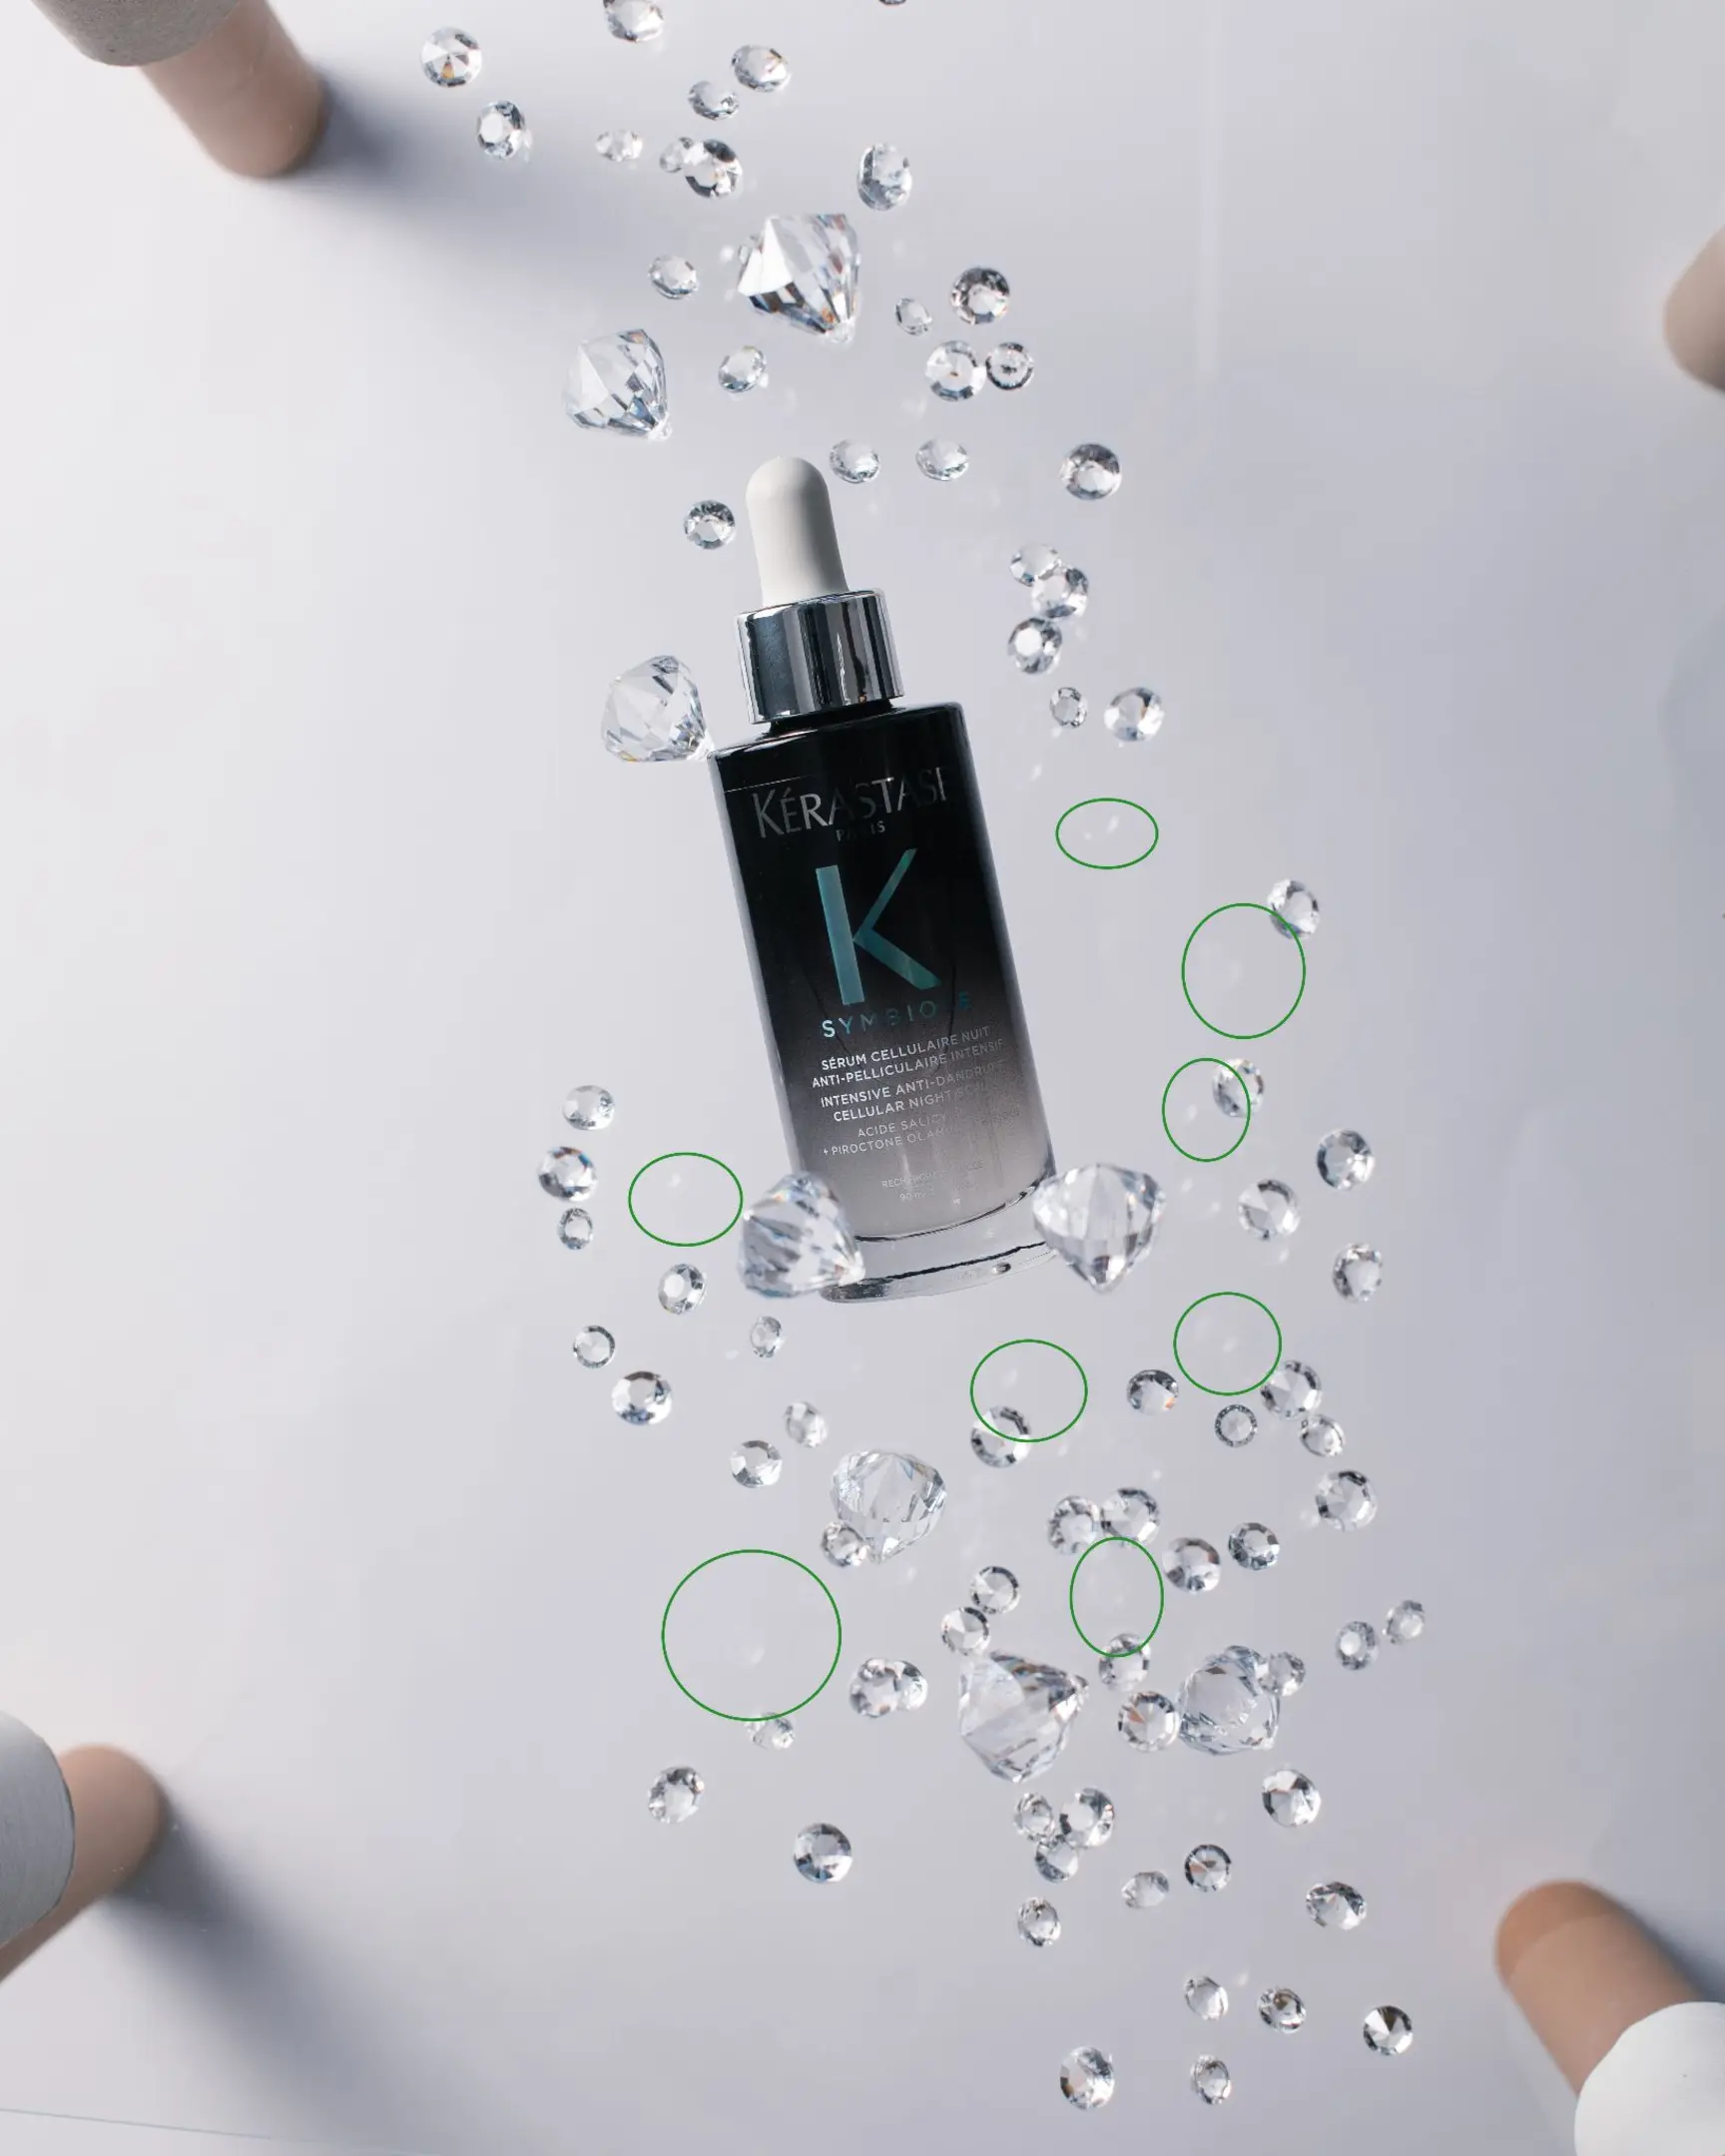
Could you spend 2 hours in Photoshop fixing that? Sure. But it is much smarter to shoot for the edit.
Multi-Shot Compositing for Floating Product Effects
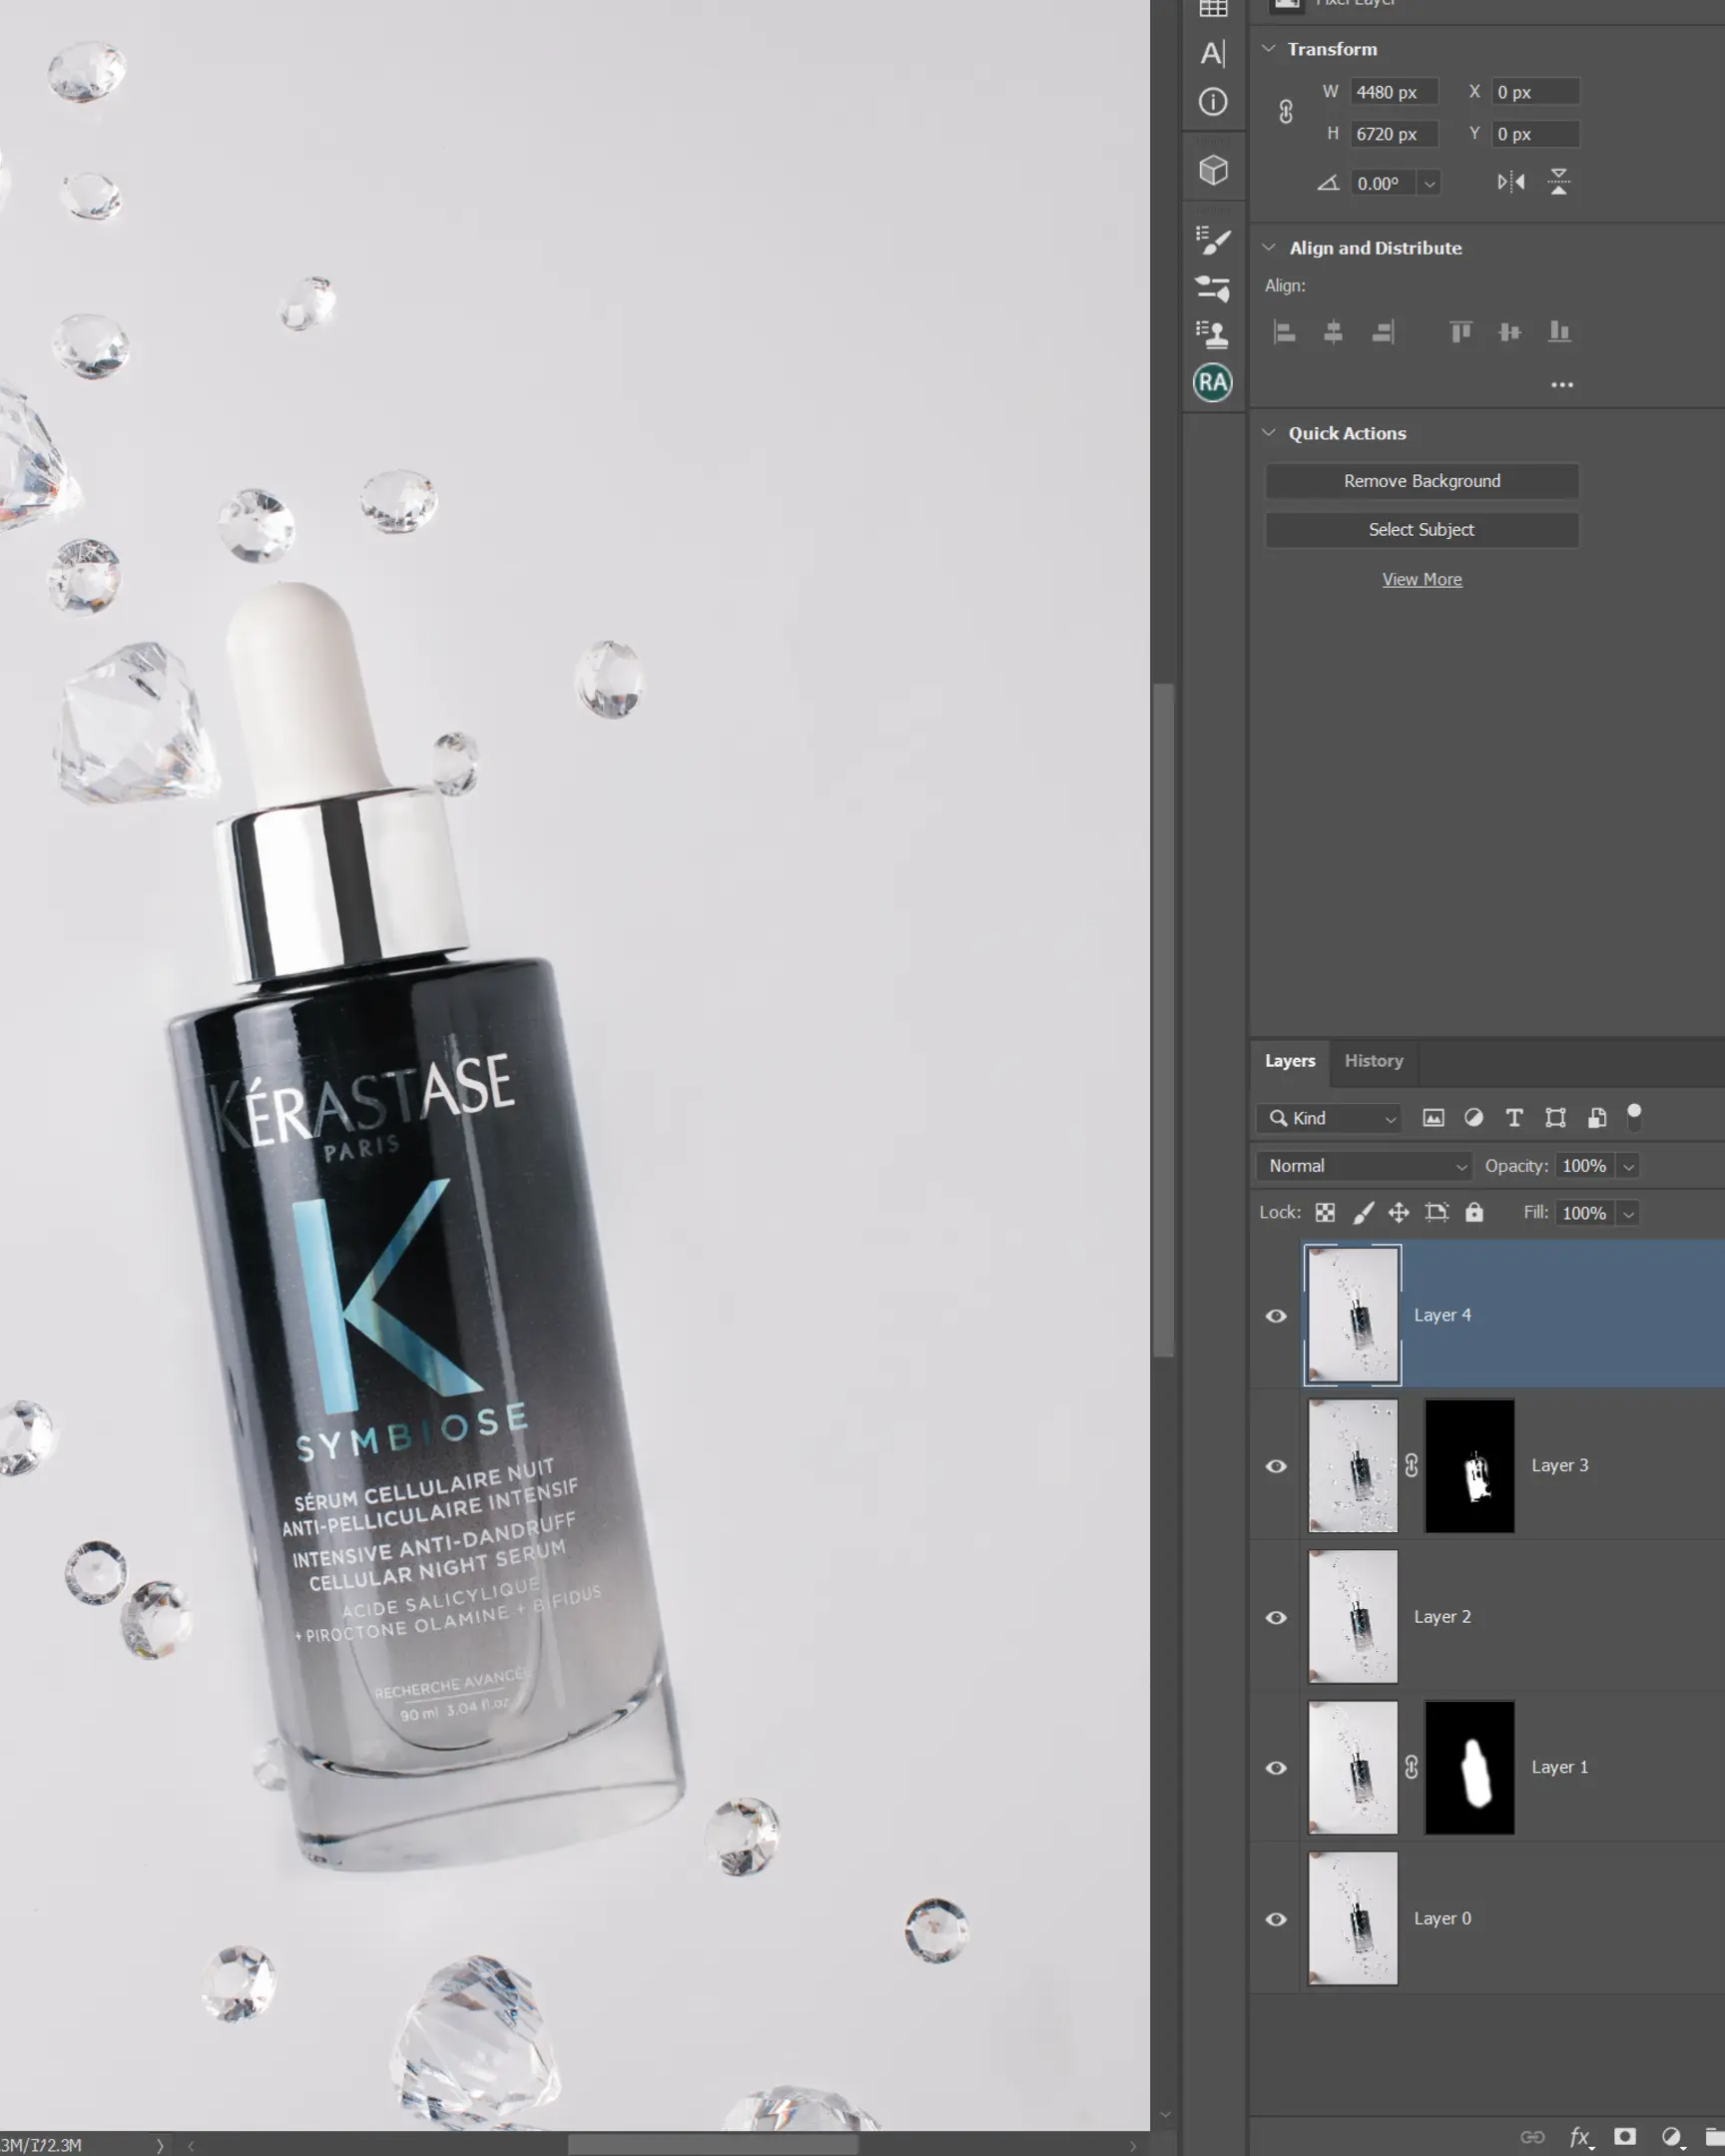
I decided to go back to a single sheet of glass and take multiple “donor” shots to minimize post-processing time.
Donor Shot 1: Sharp Crystals
The first file, “Kristal,” is my base. In this shot, the product label is slightly out of focus, but the crystals are perfectly sharp. This will be the foundation for the suspended elements.

Donor Shot 2: Blurred Label and Crystals
Frame number 2, “Label and blur,” gives me the blurred foreground crystals and a sharp upper label. For this shot, I held a second sheet of glass closer to the lens. It created tons of reflections, but we can ignore those because we will only mask in the specific parts we need.

Donor Shot 3: Pipette Details
Frame number 3, “Pipette,” captures the lower half of the bottle and the pipette detail. The glass reflections are messy here too, but the pipette itself looks clean, which is all that matters for the composite.
Photoshop Compositing Steps
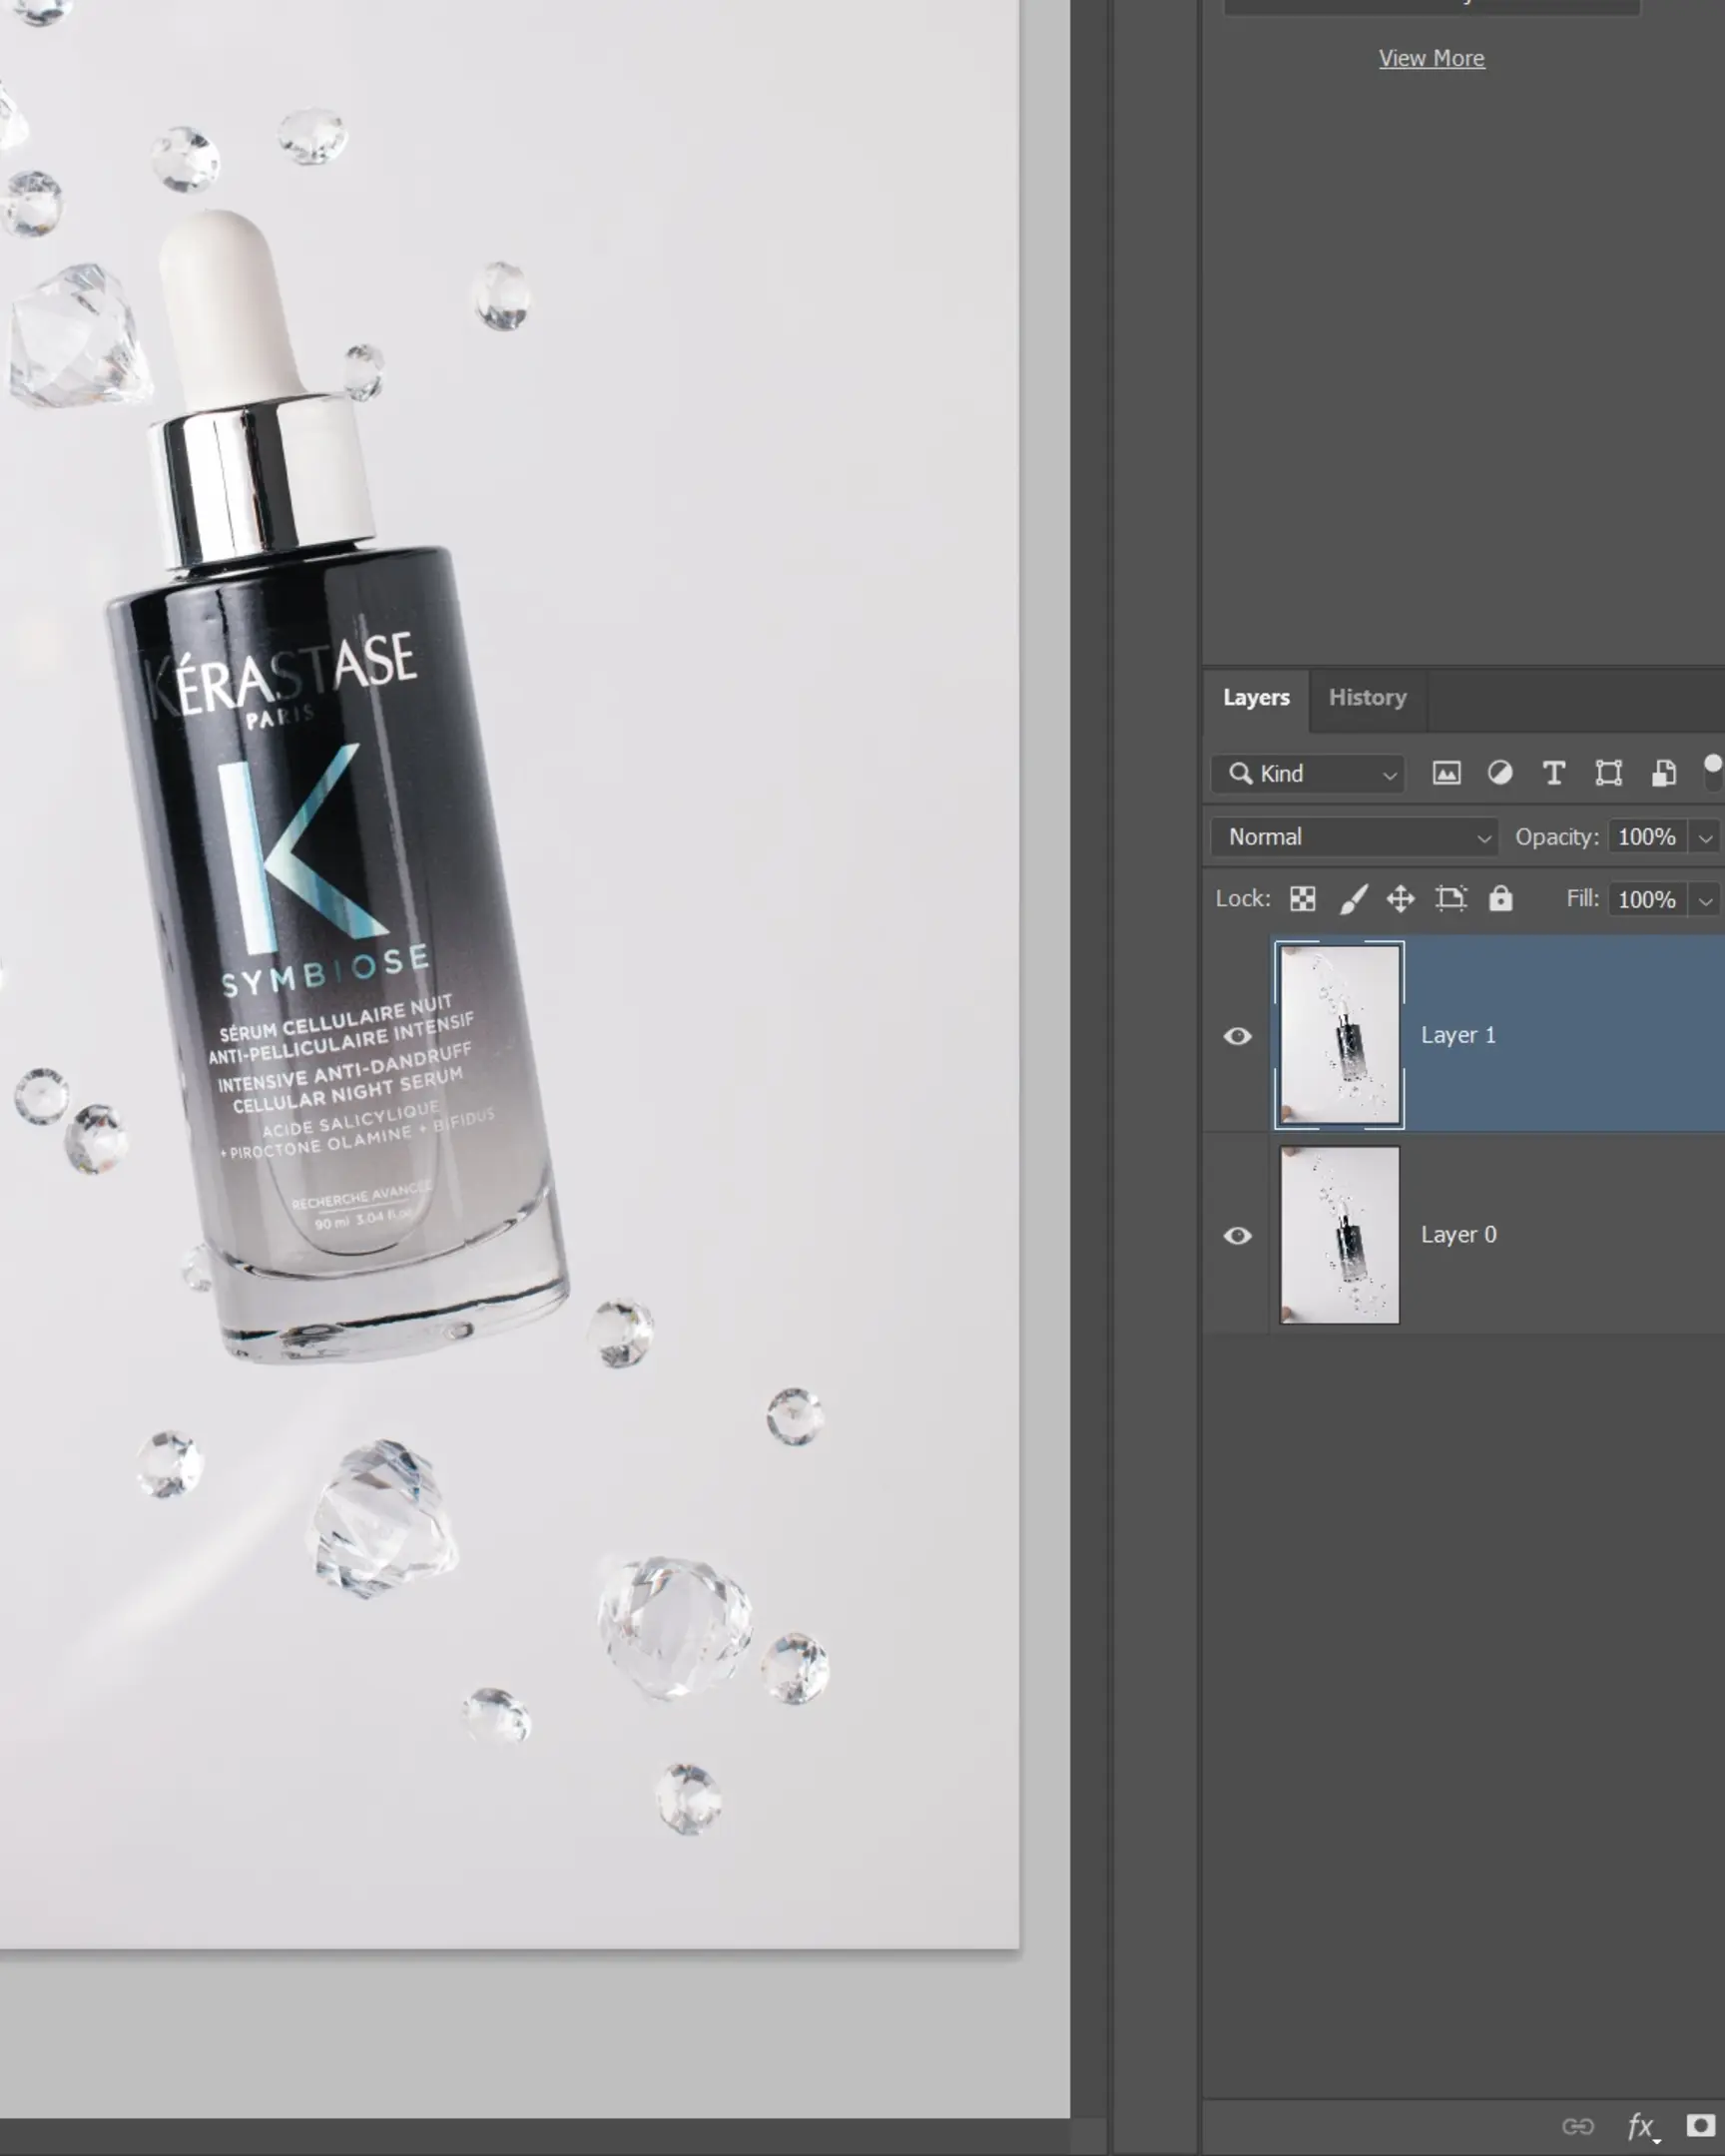
Step 1: Aligning the Base and Pipette Layers
I started with the “Kristal” frame as my base.
First, I overlaid the “Pipette” frame on top. Open the pipette file, press Ctrl+A to select all, Ctrl+C to copy, then switch to your base file and press Ctrl+V to paste.
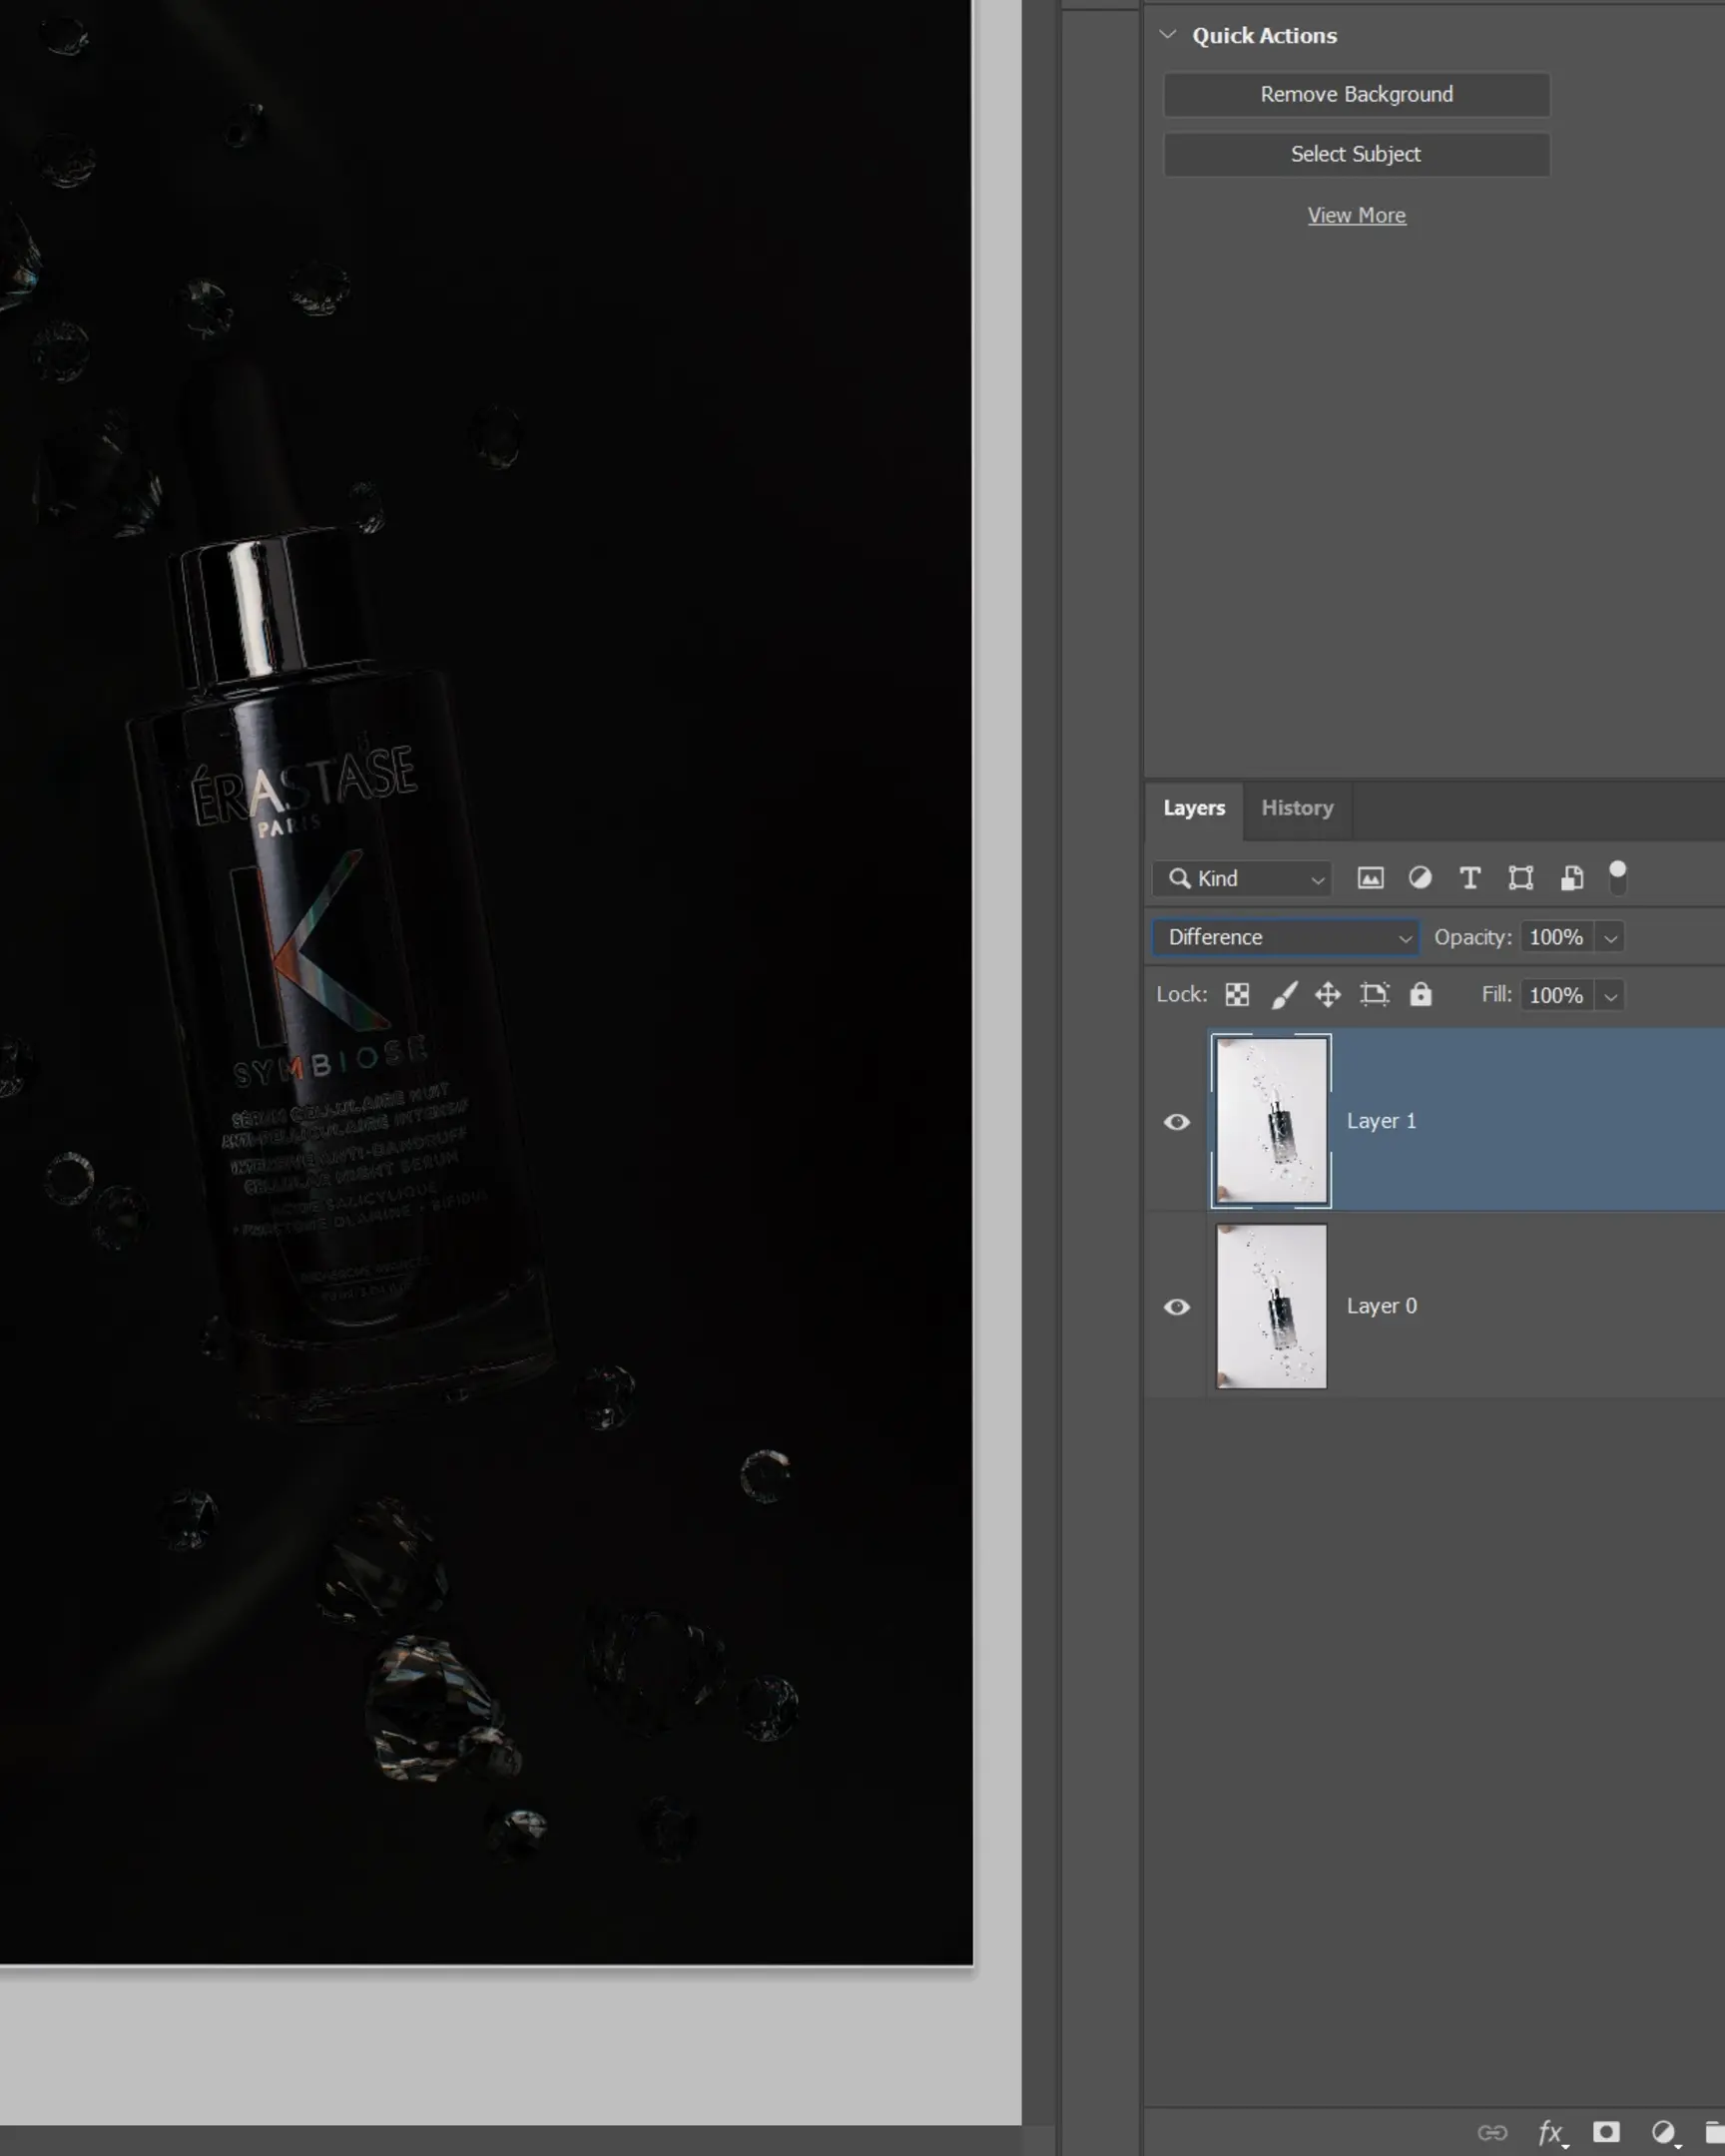
To check alignment, switch the top layer’s blending mode to “Difference.”
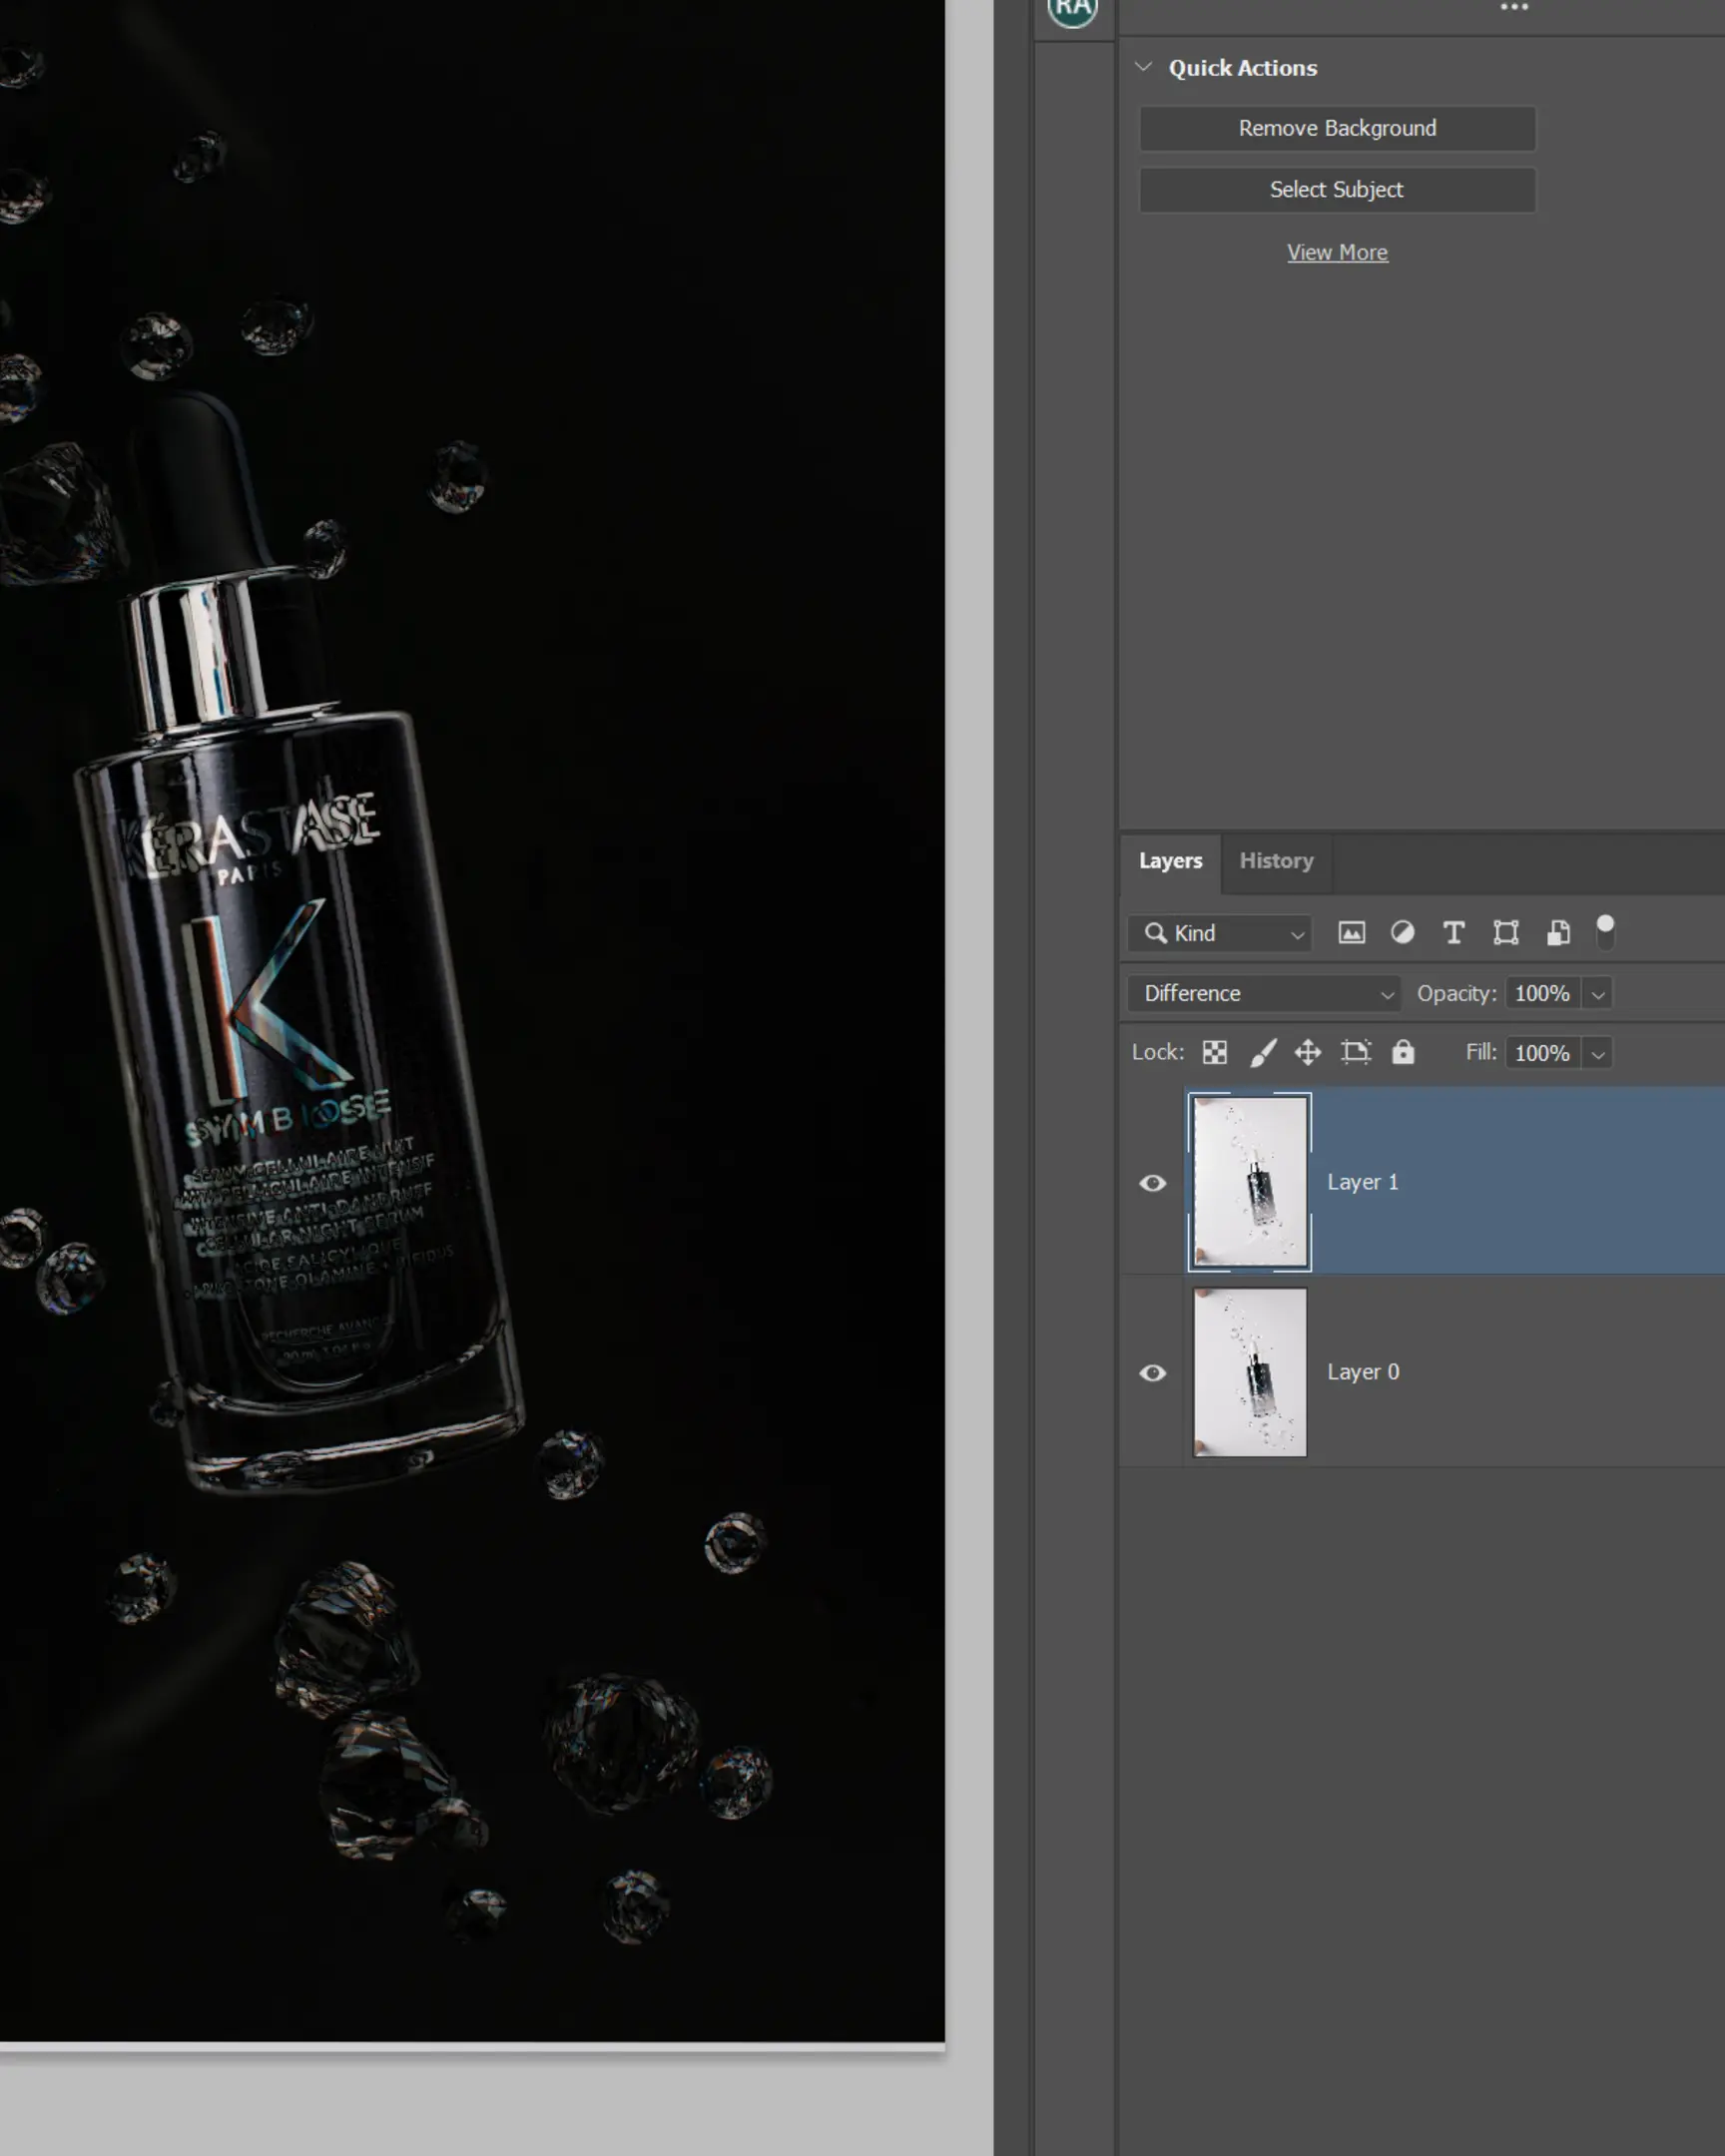
If the image turns mostly black, you are aligned. If you see bright “double lines,” the camera or table likely shifted. Use Ctrl+T or the Move Tool to nudge the top layer until the image looks as black as possible.
Once aligned, switch the blending mode back to “Normal.”
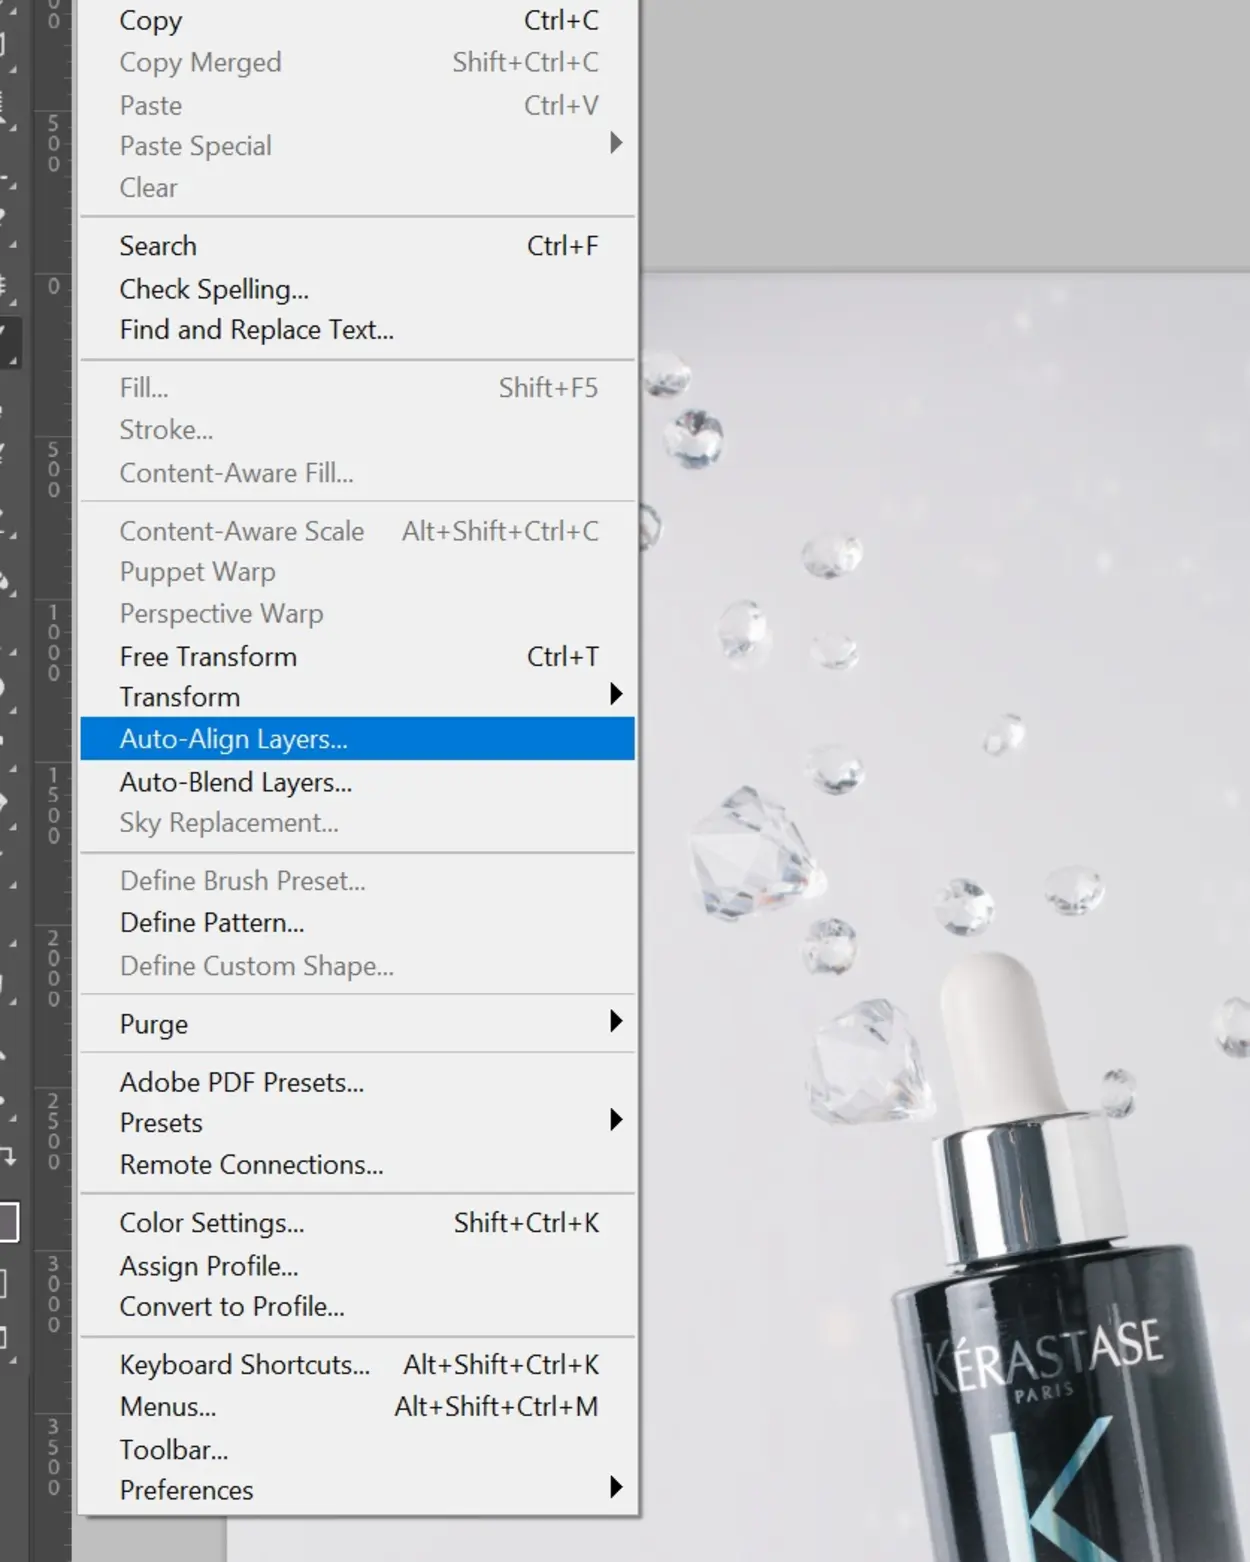
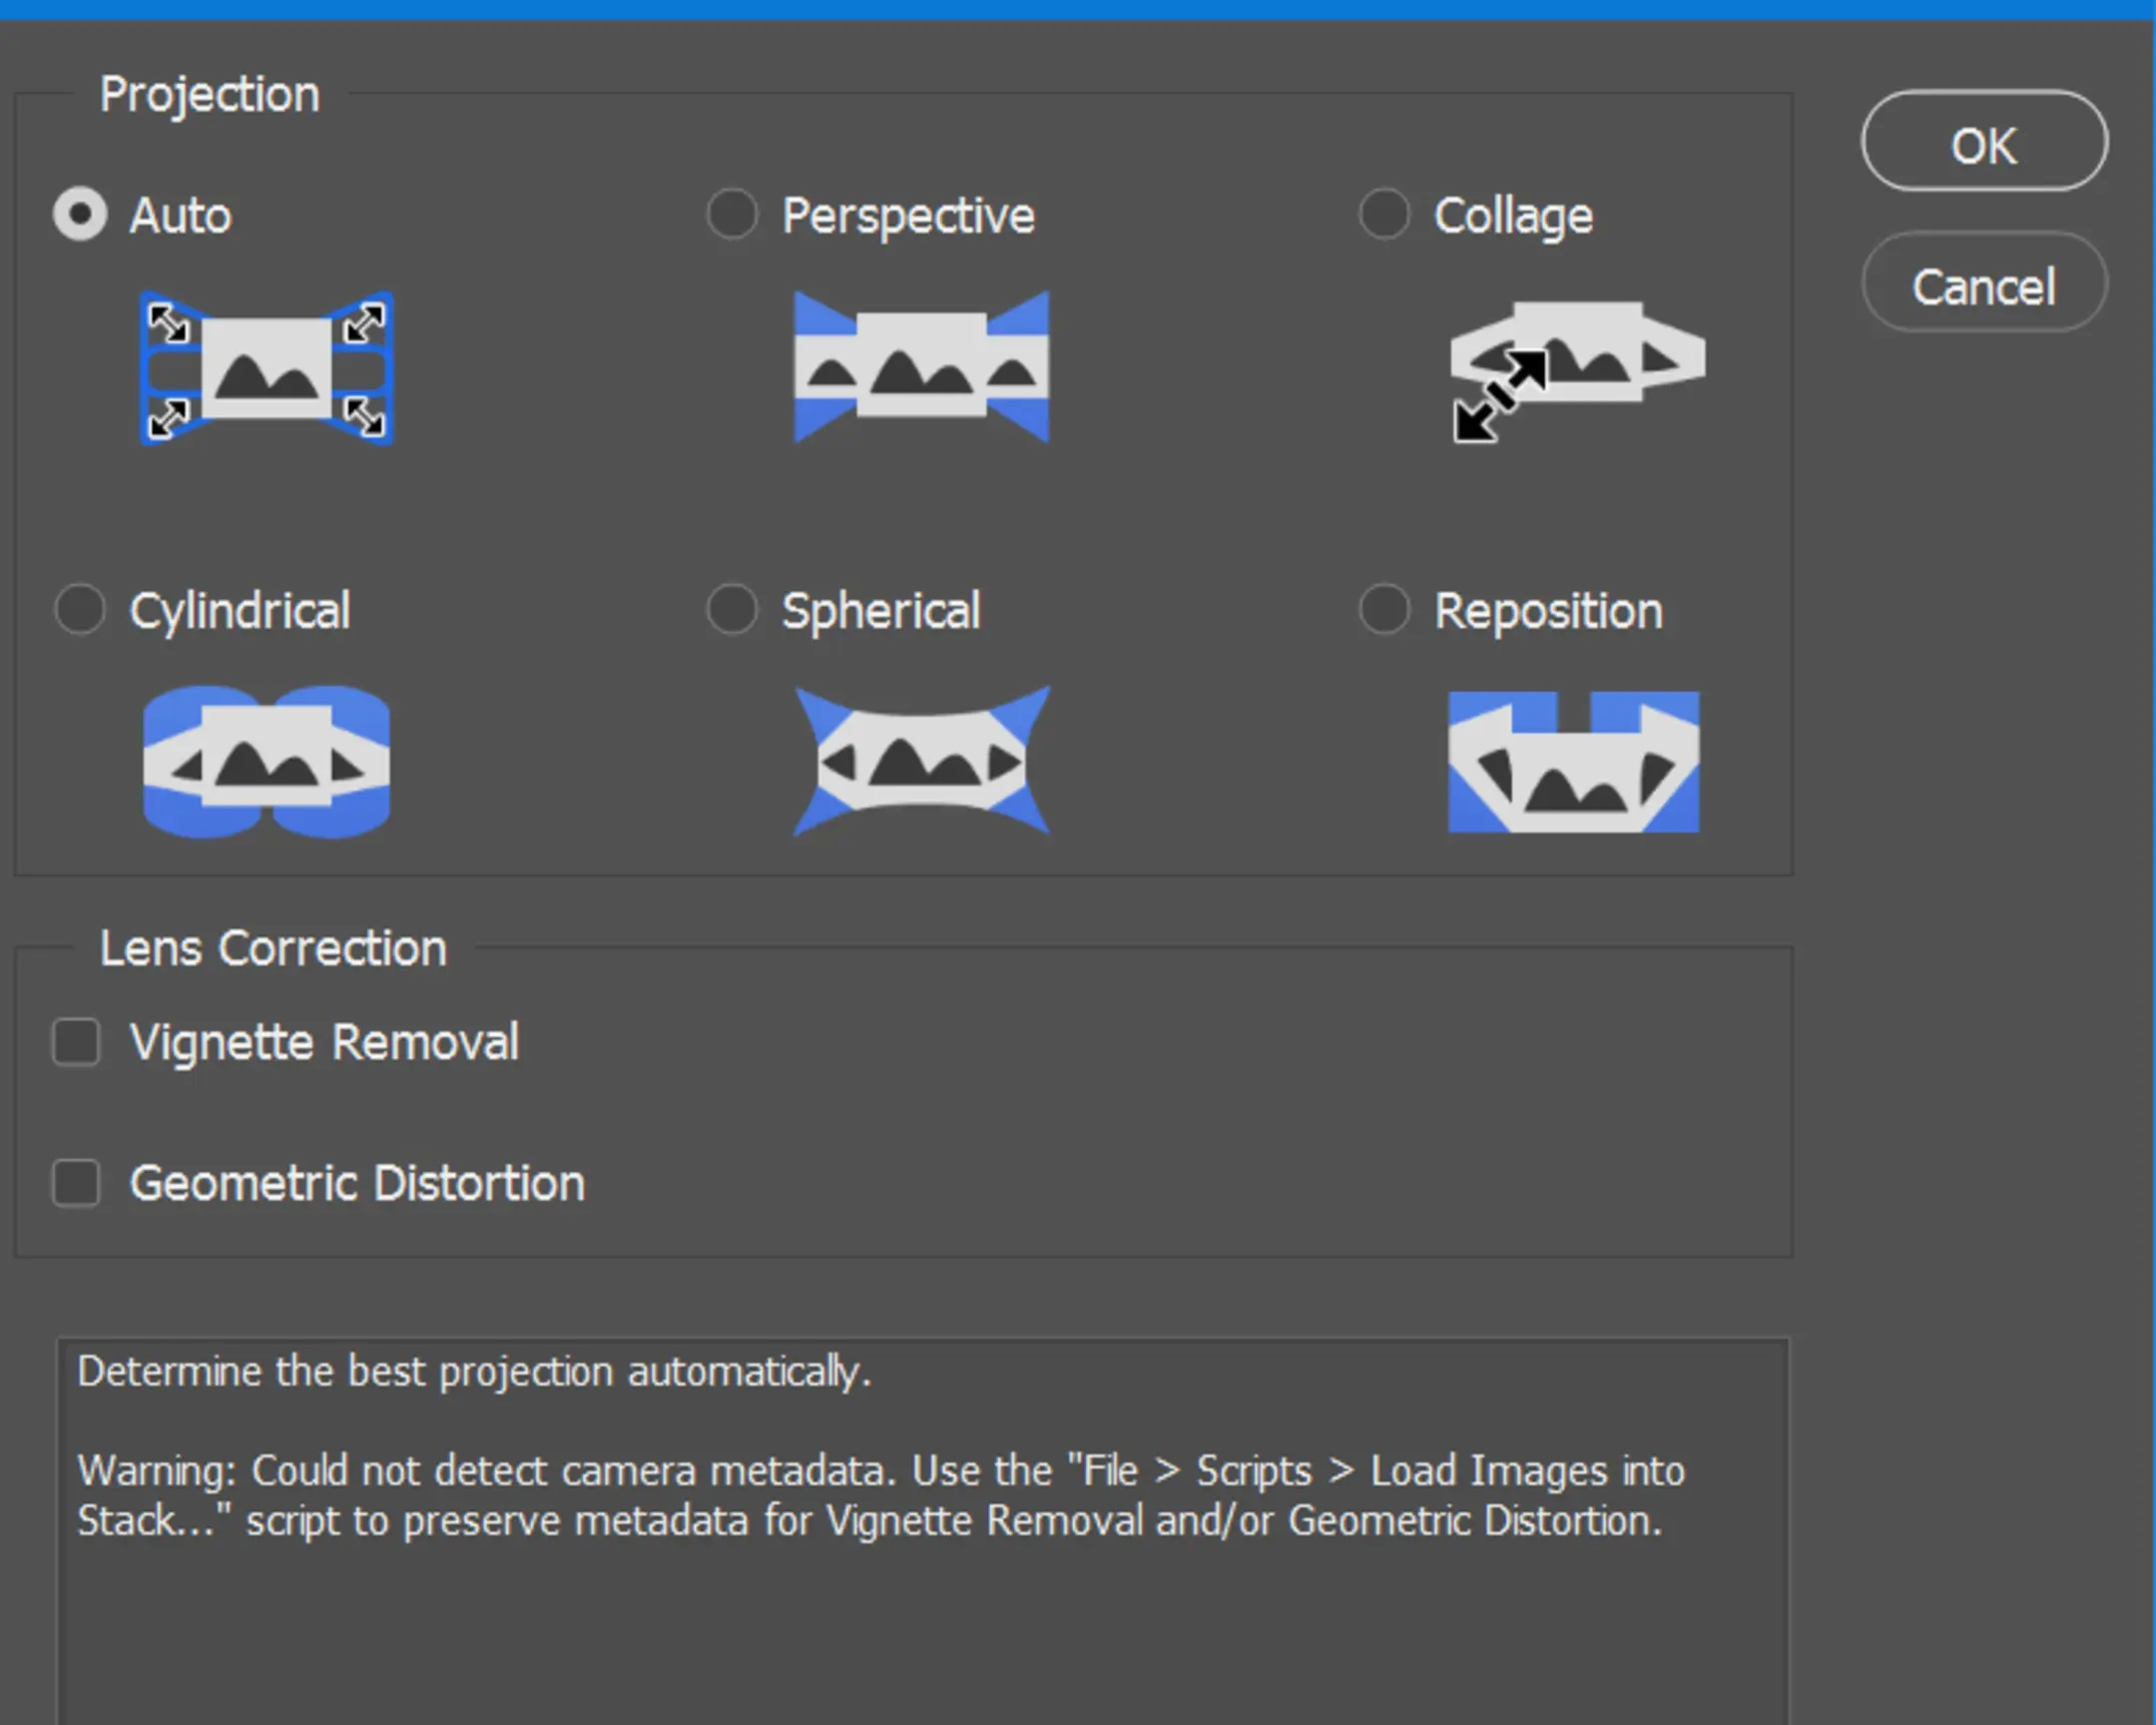
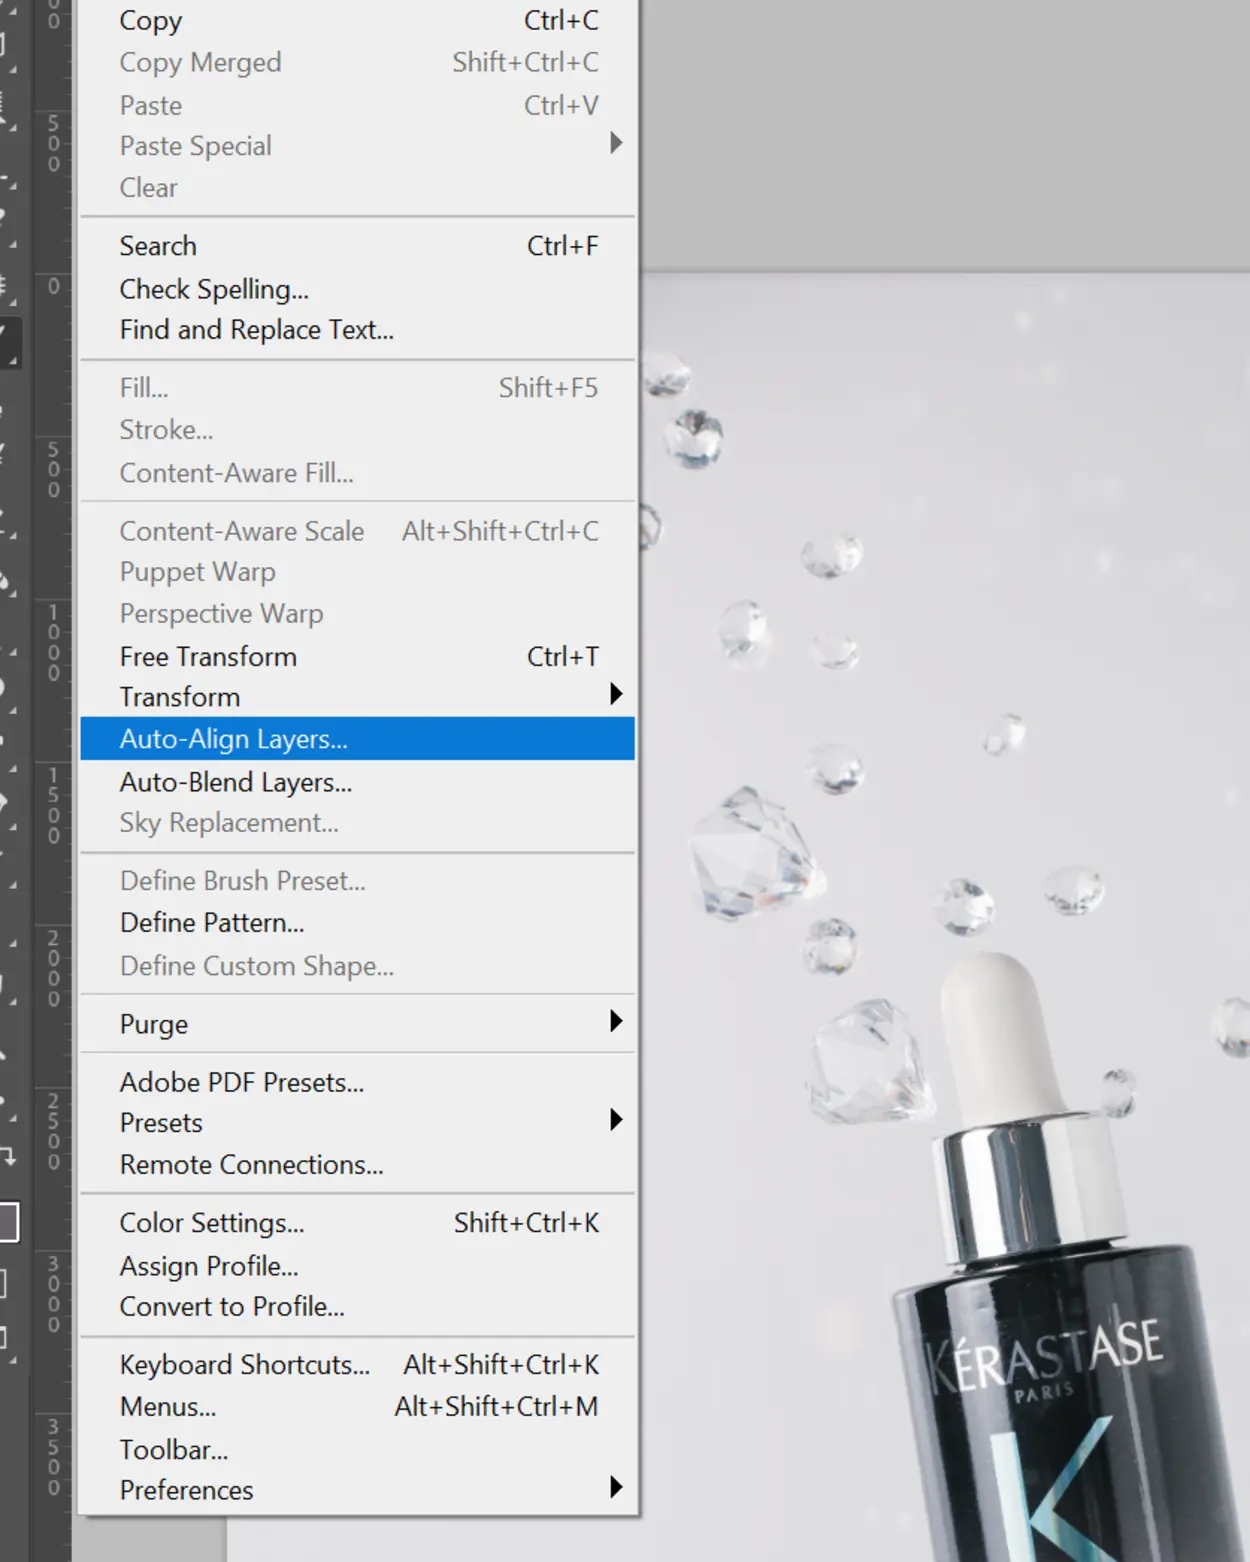
You can also let Photoshop do the heavy lifting. With both layers in “Normal” mode, select both in the layers panel (hold Ctrl and click each). Go to Edit > Auto-Align Layers, select “Auto,” and click OK. Photoshop is usually very good at locking them together.
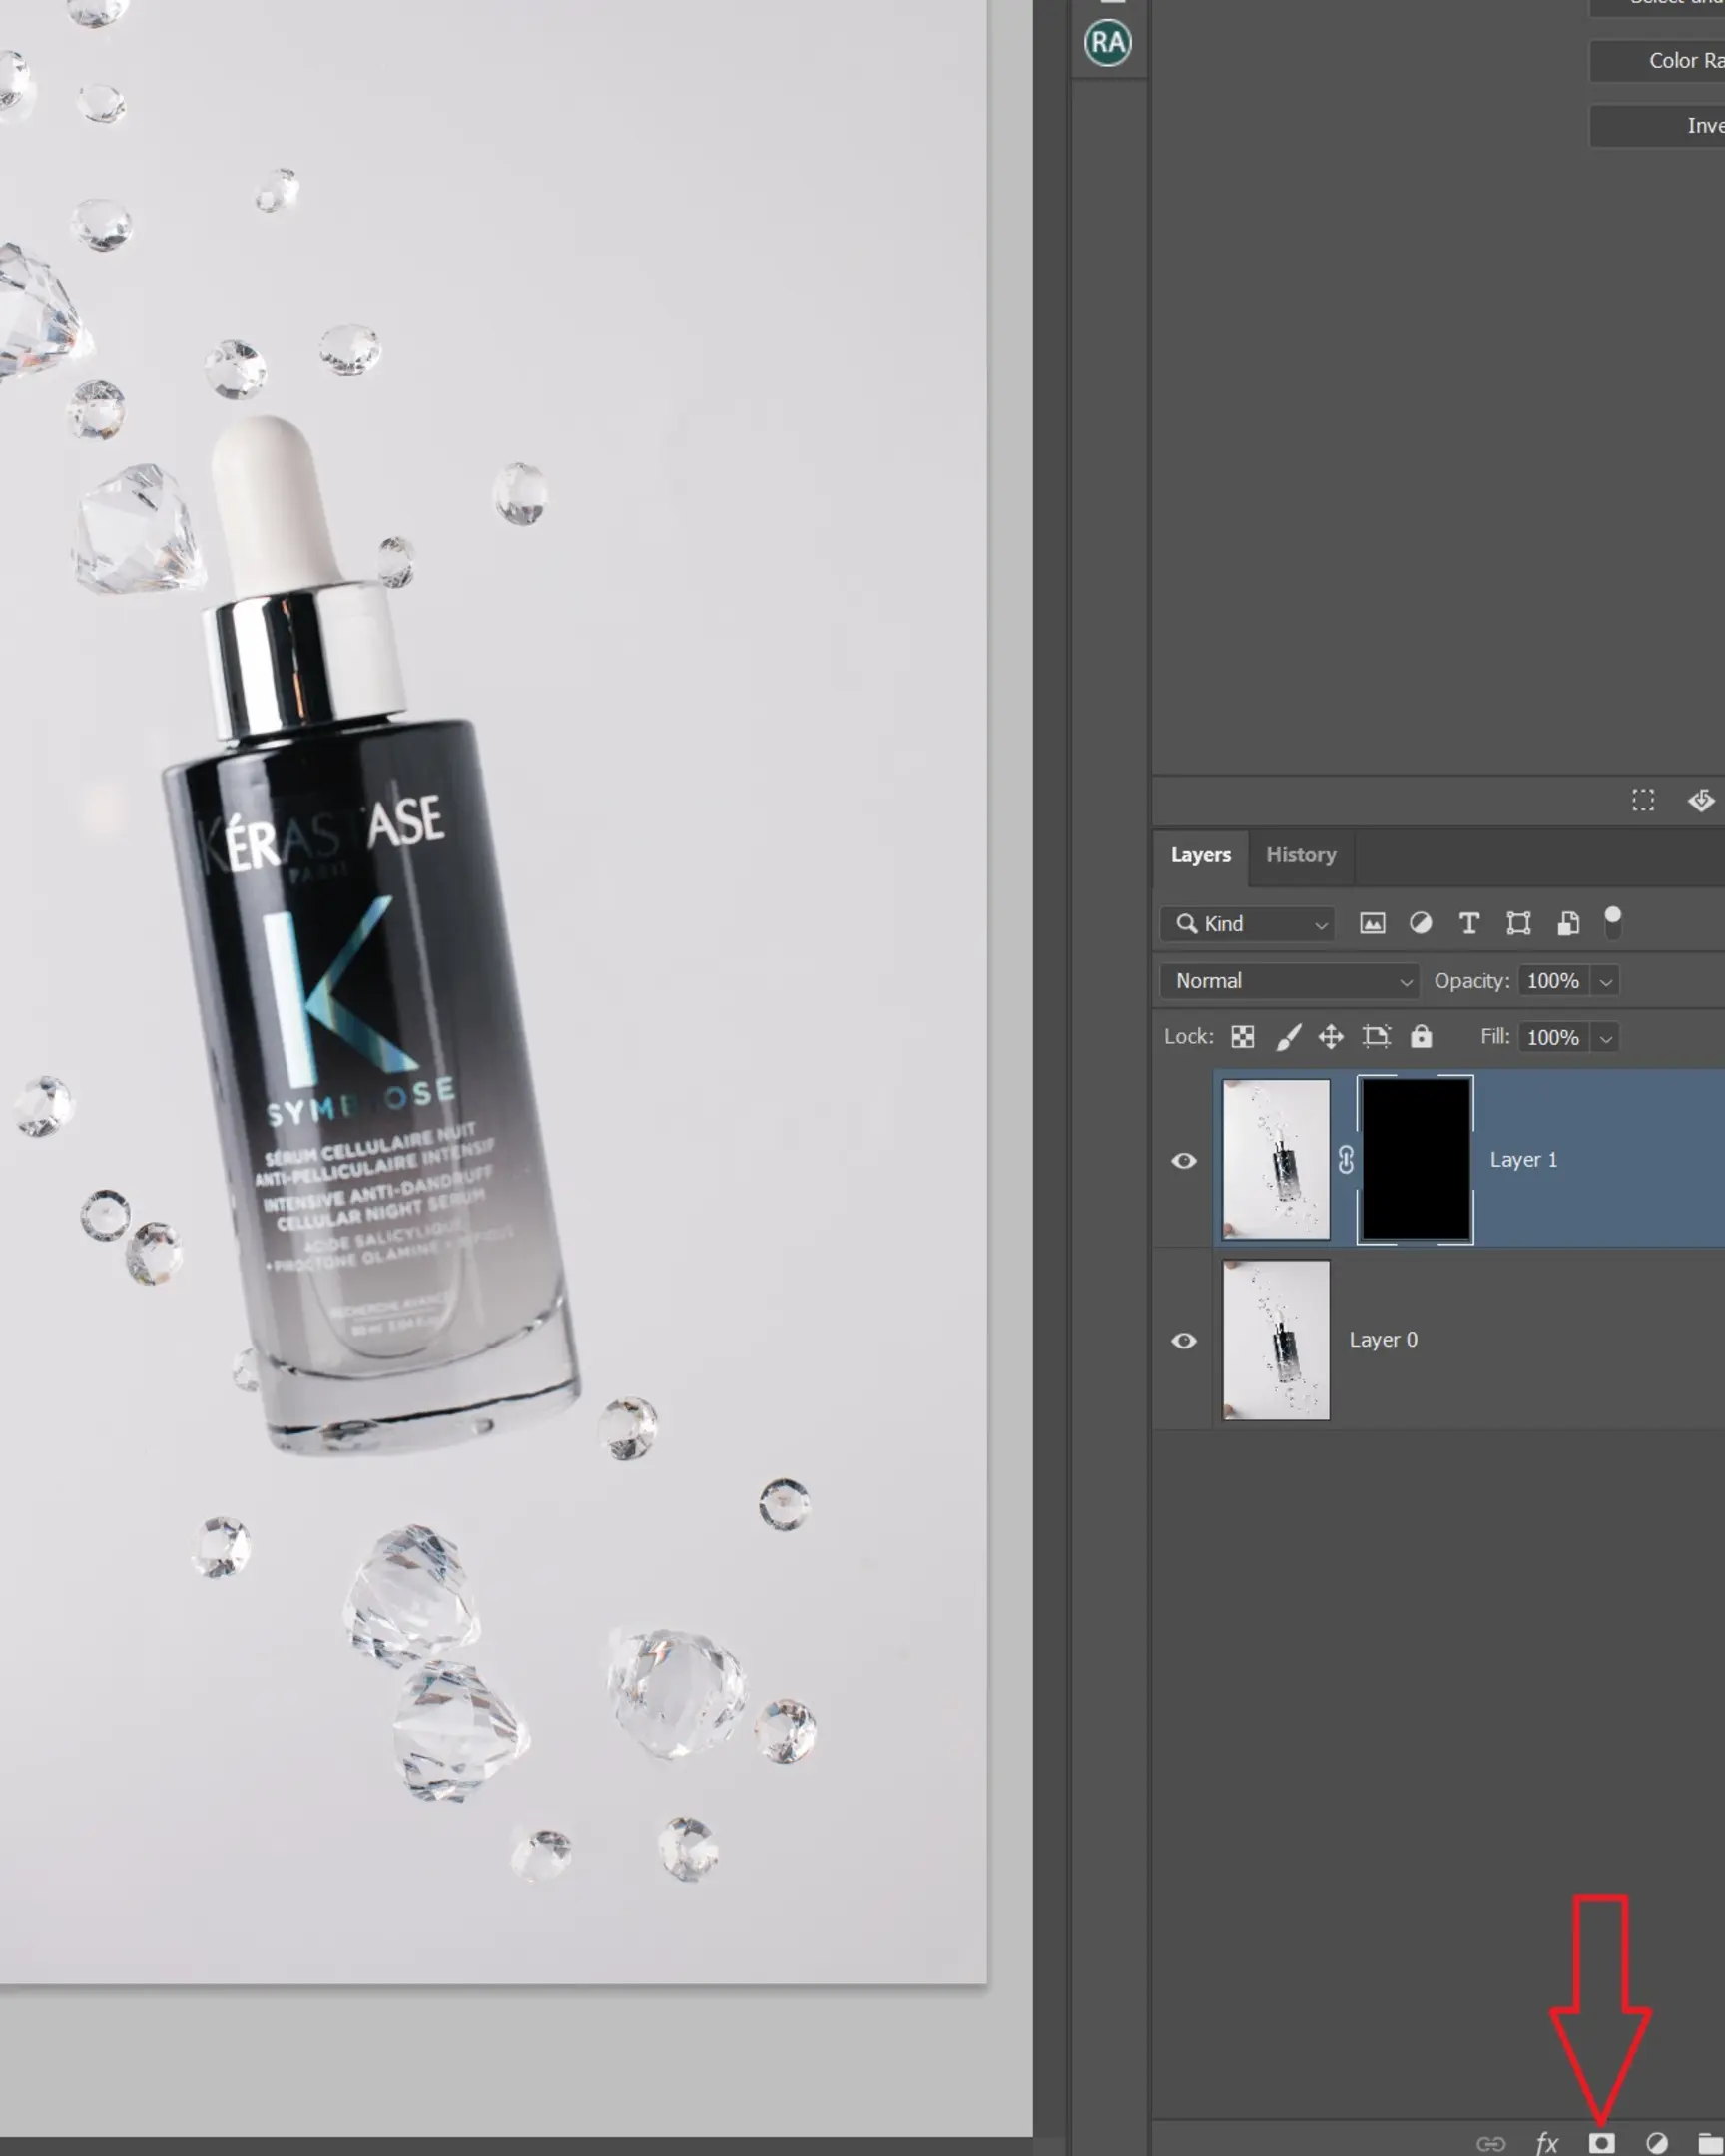
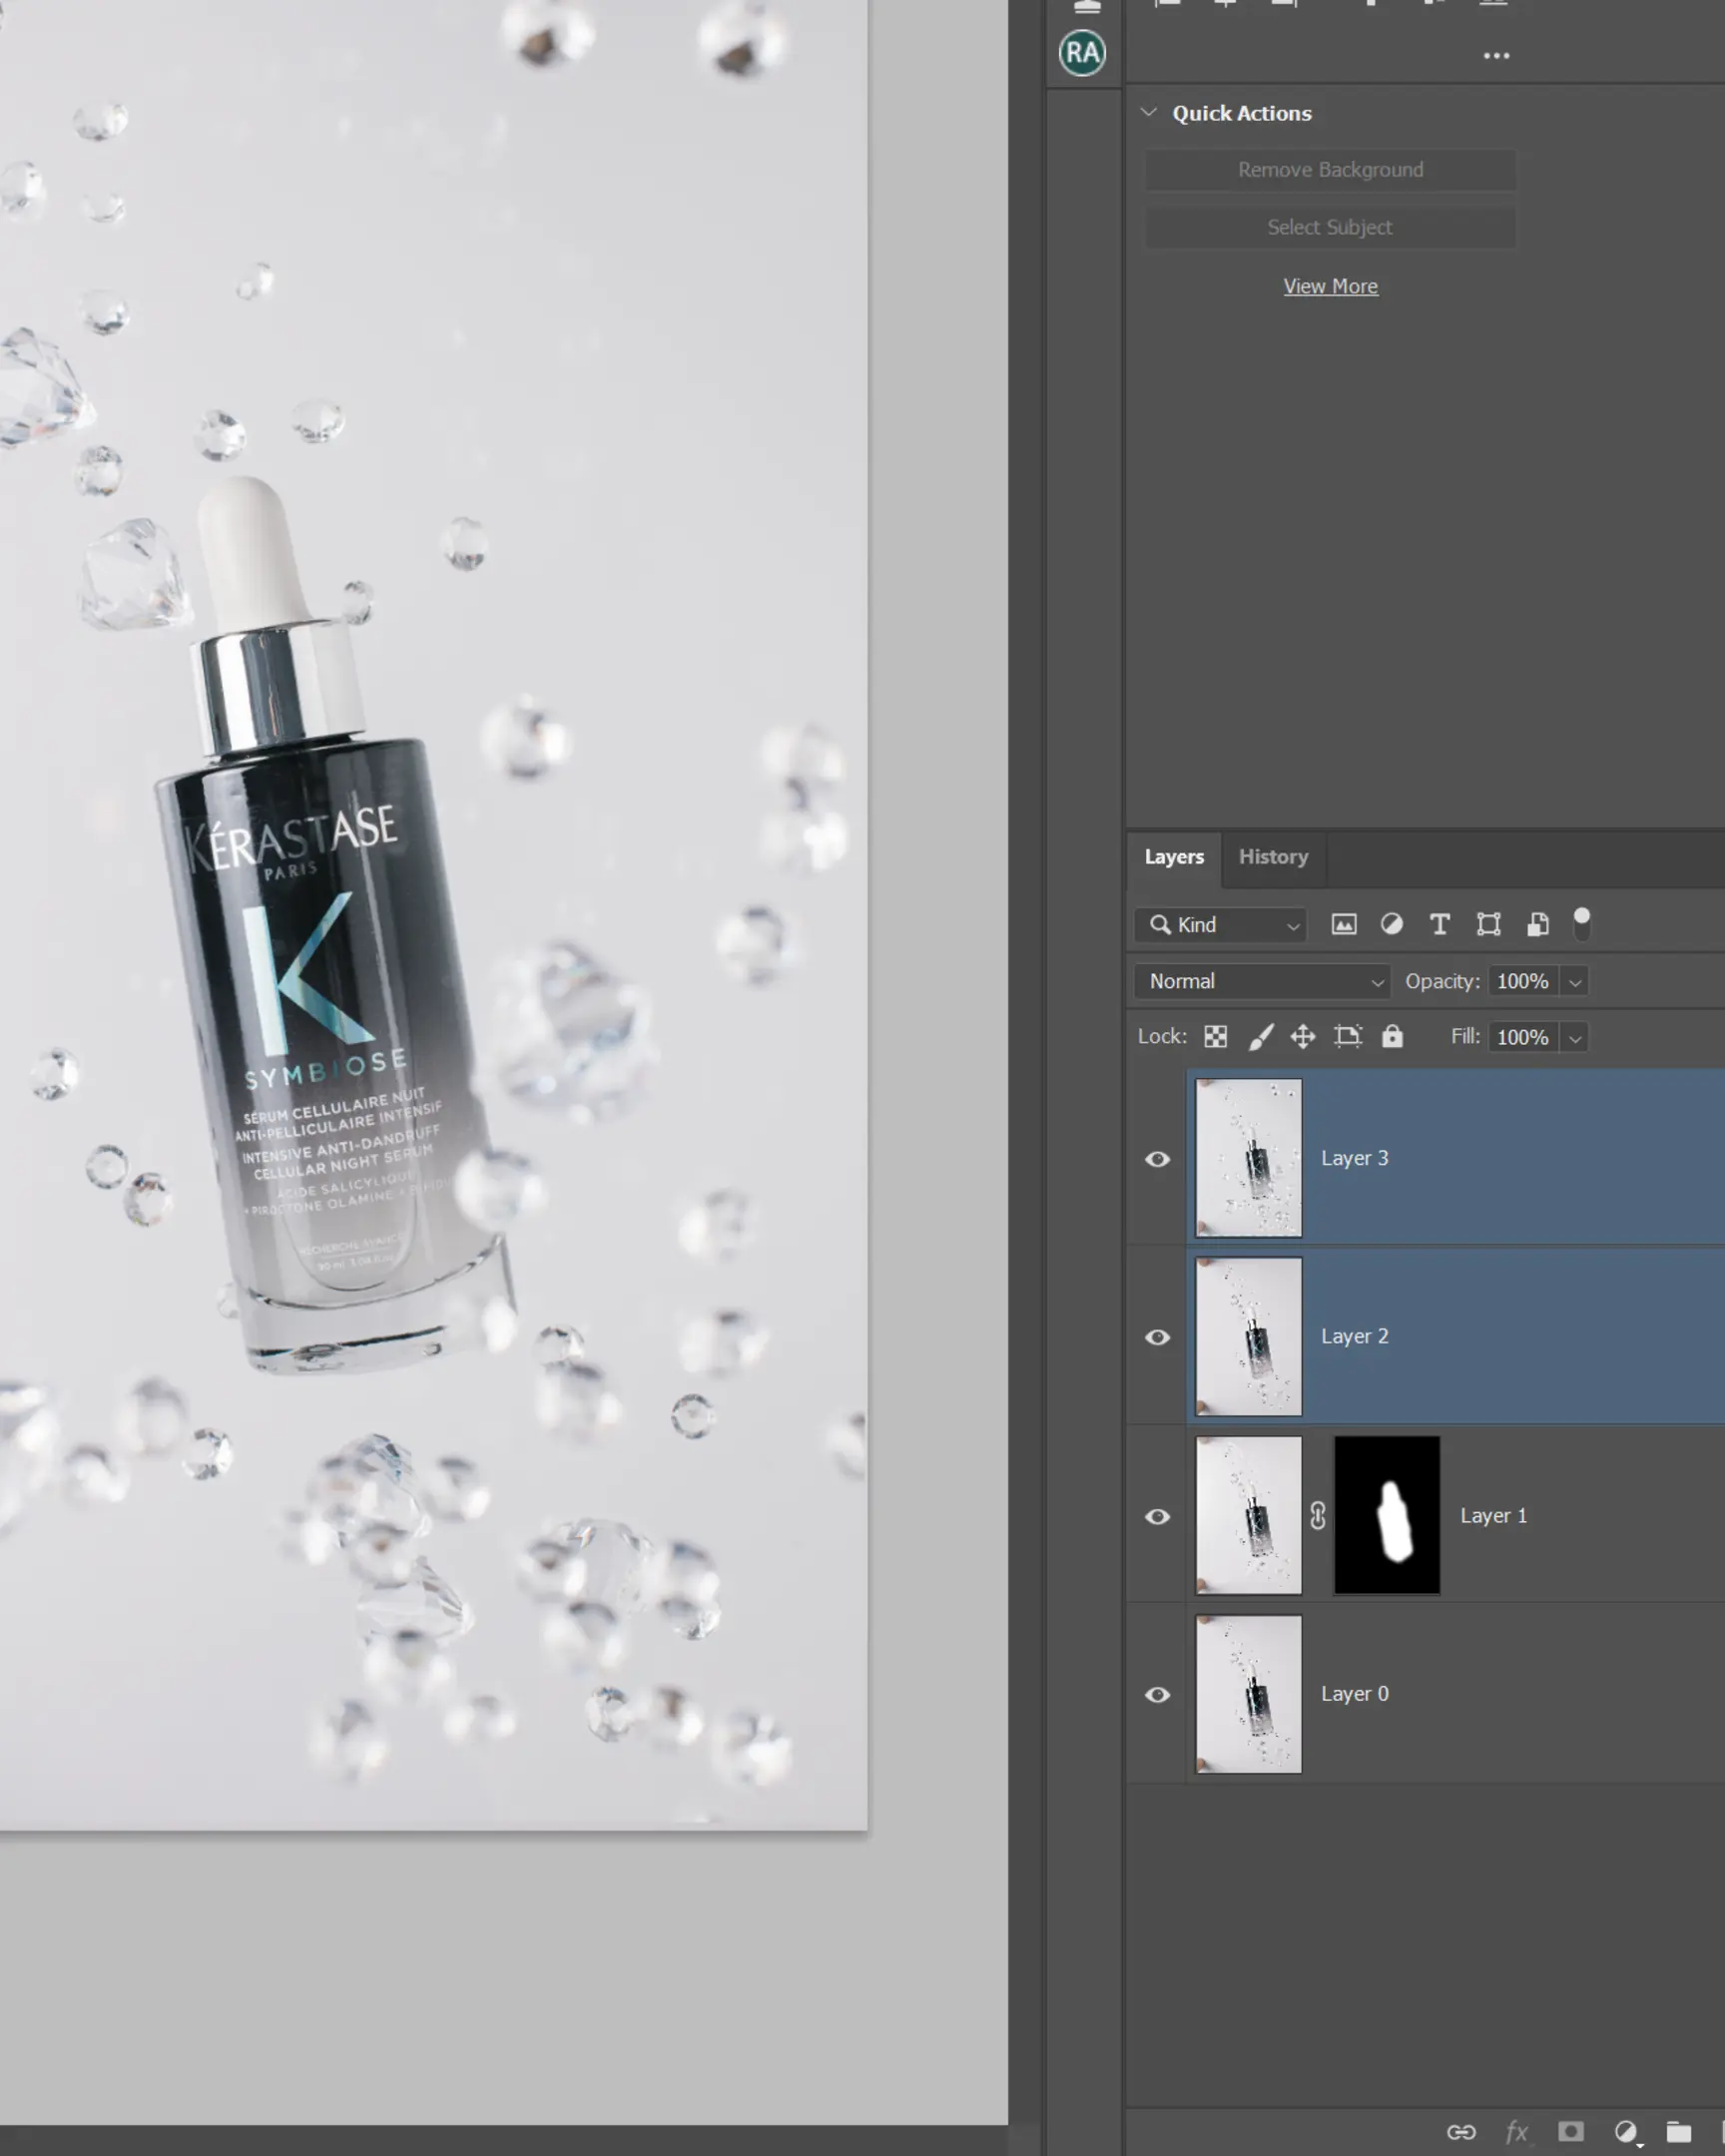
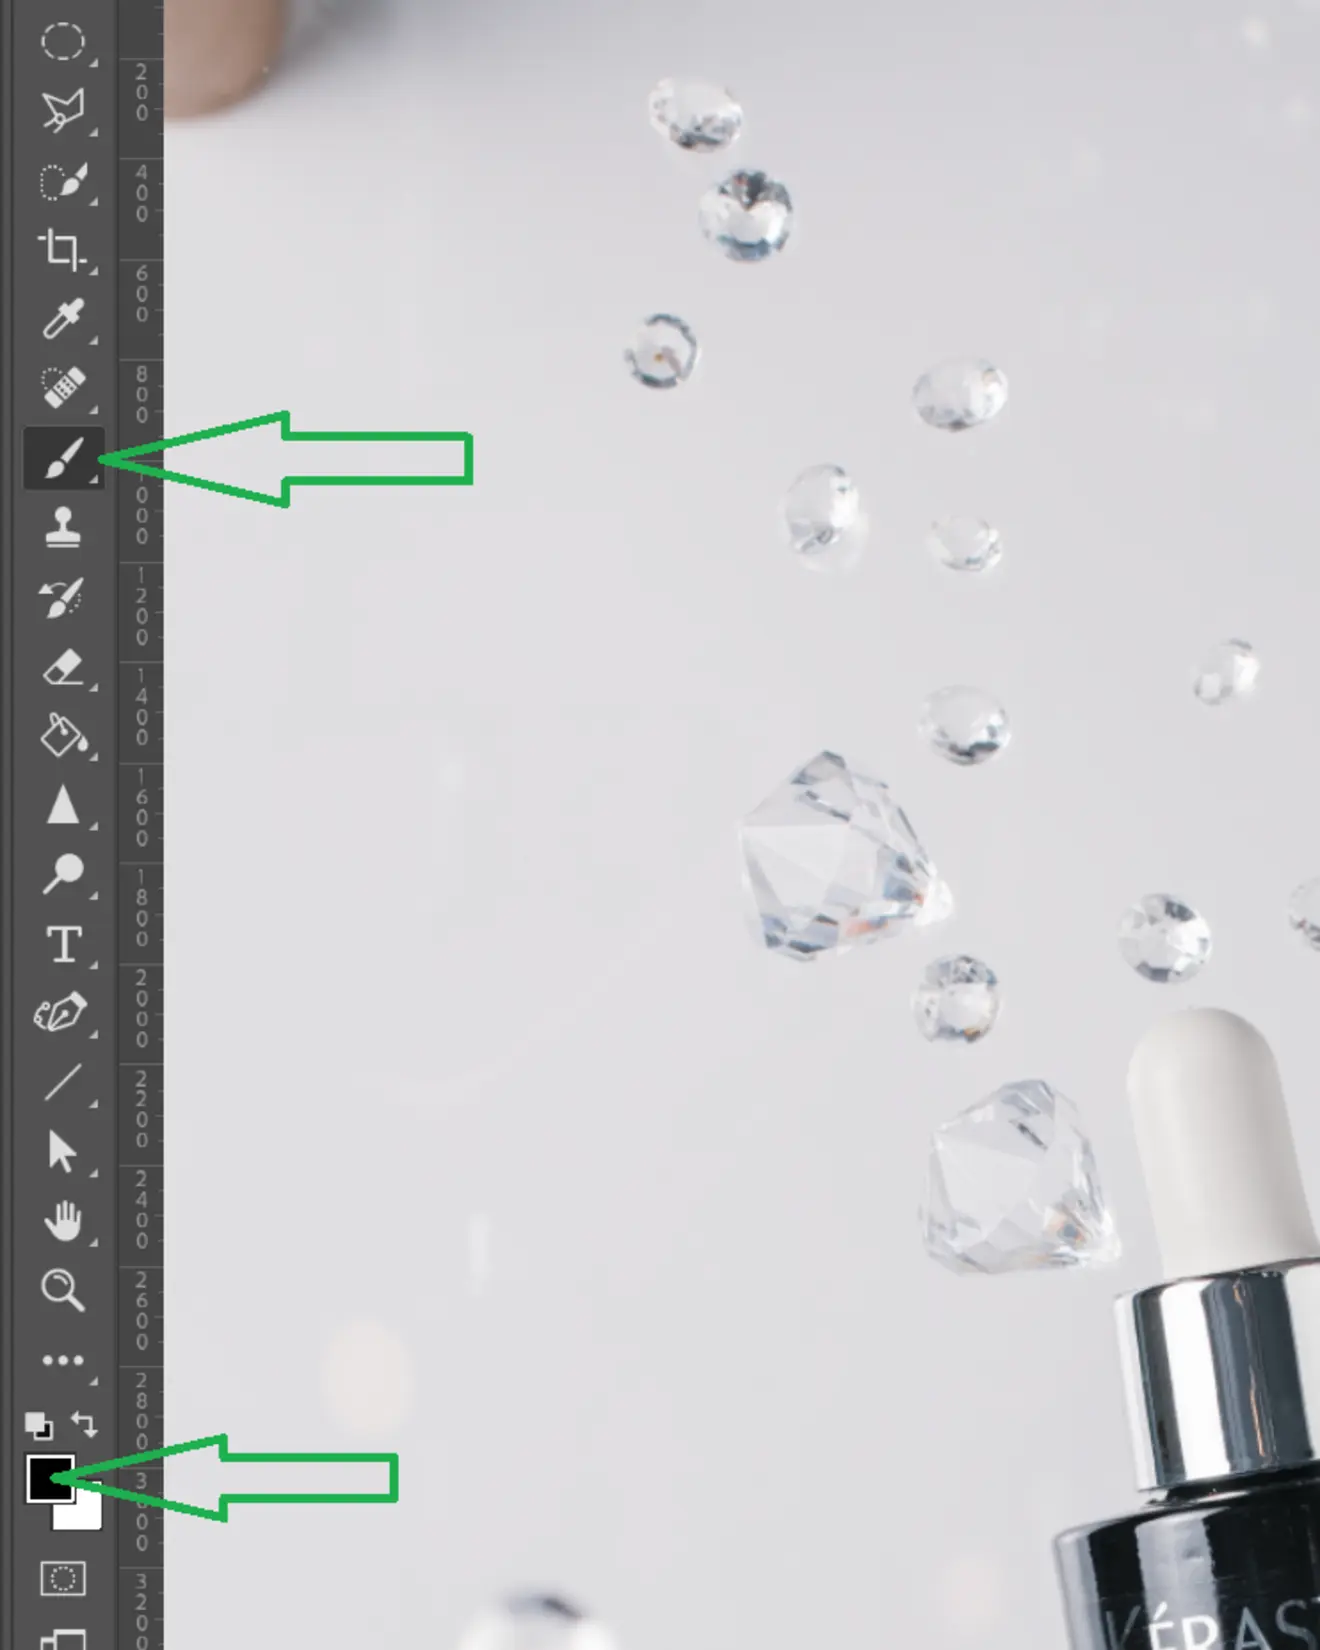
With the layers aligned, hold down the Alt key and click the “Add Layer Mask” icon to add a black mask to the top layer. This hides everything.
Then, use a white brush on the mask to paint in the sharp label and pipette details where needed.
Step 2: Removing Reflections from the Main Glass Using the Clone Stamp Tool
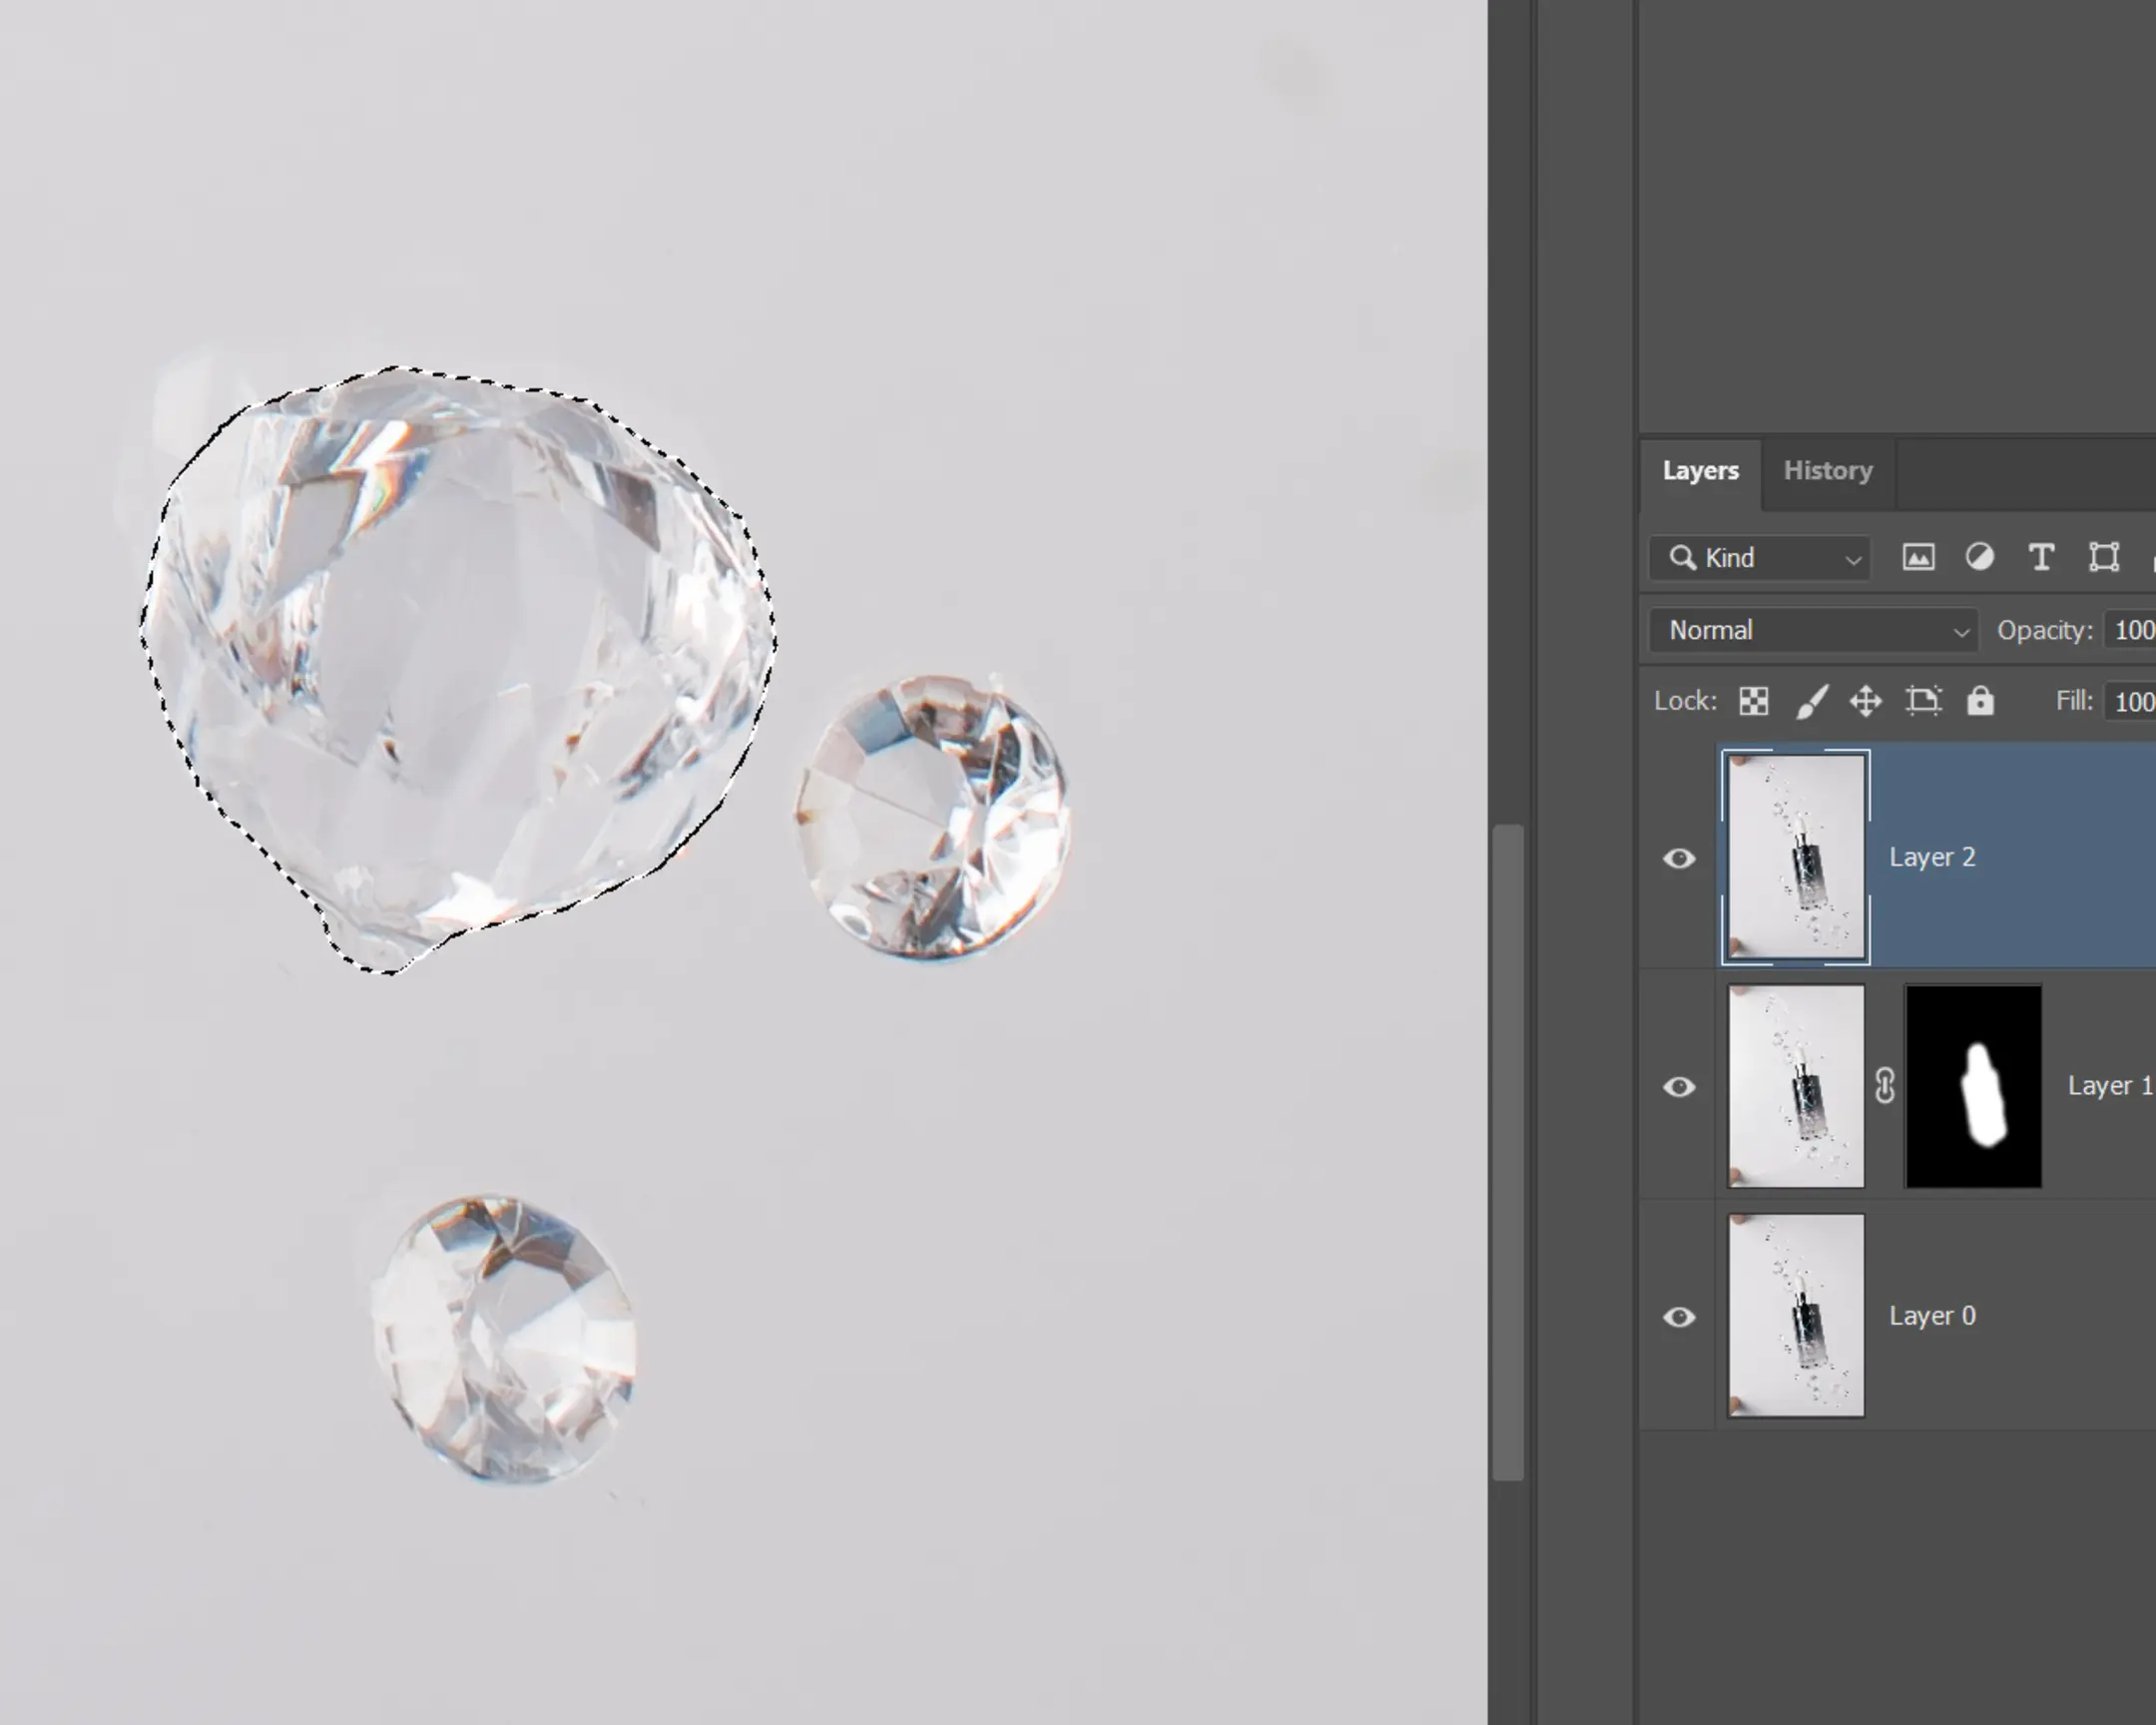
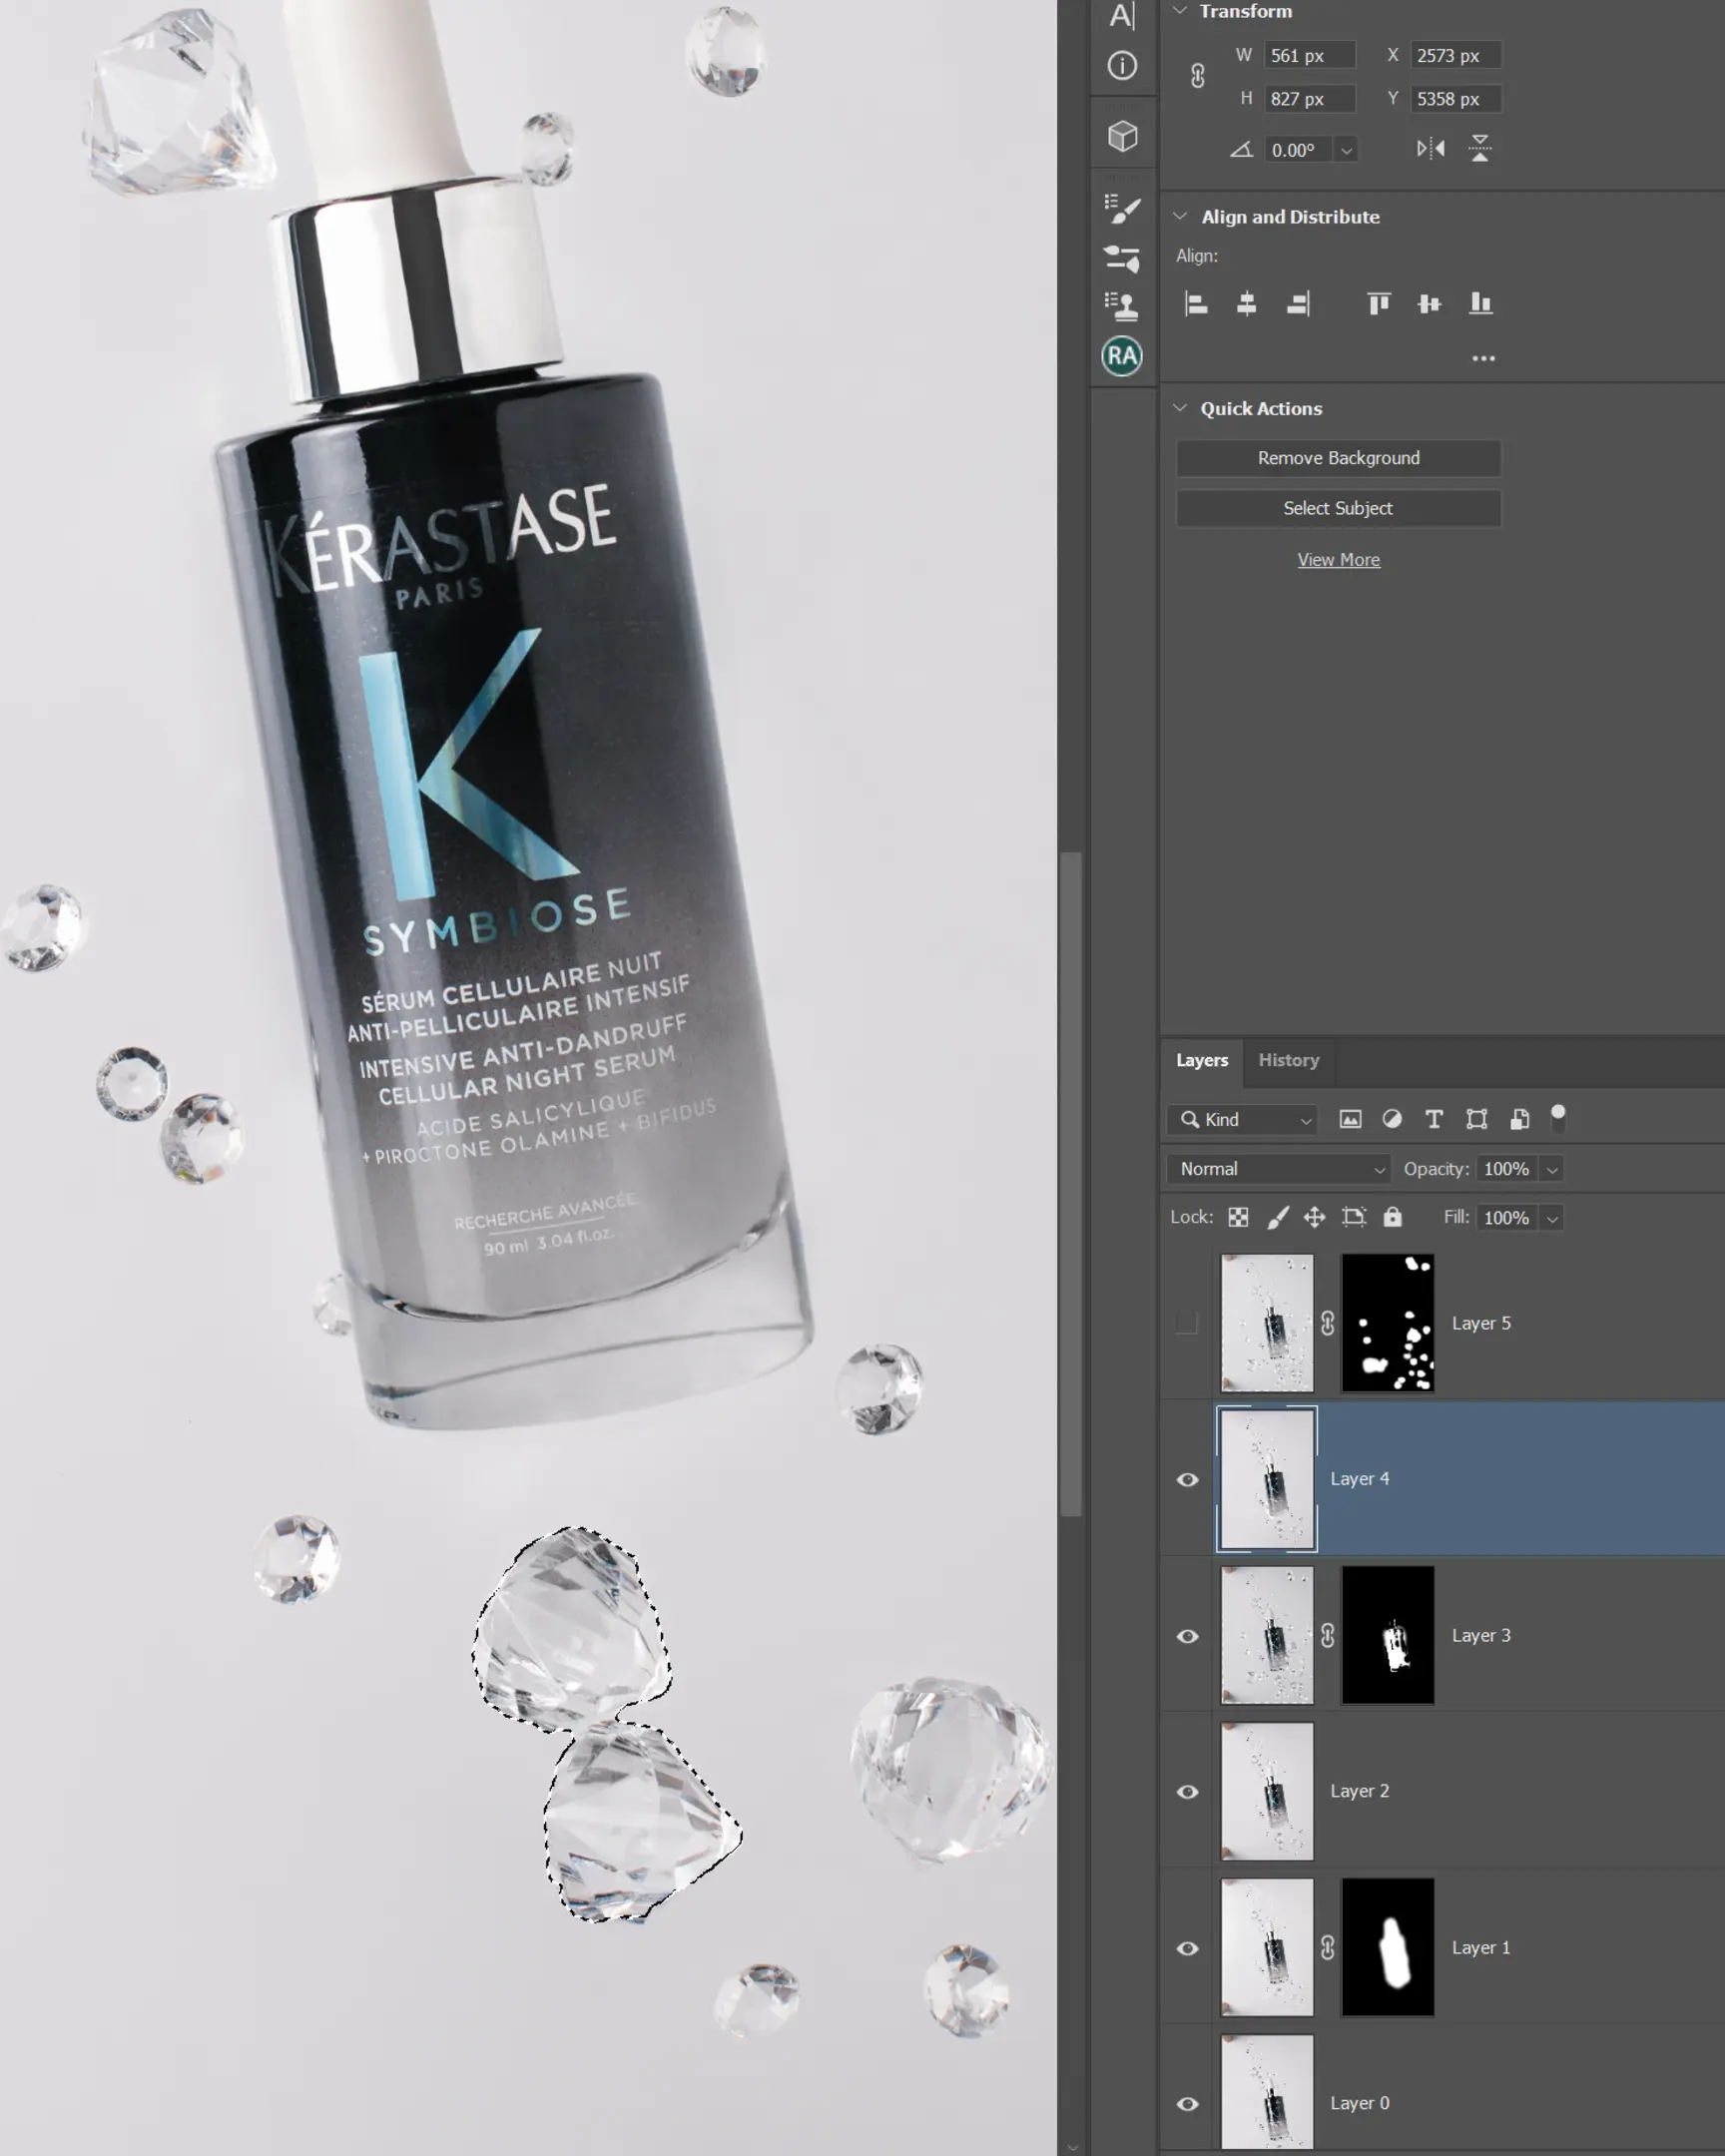
Next, I cleaned up the reflections on the main glass surface. I merged all visible layers into a new layer using the shortcut Ctrl+Alt+Shift+E.
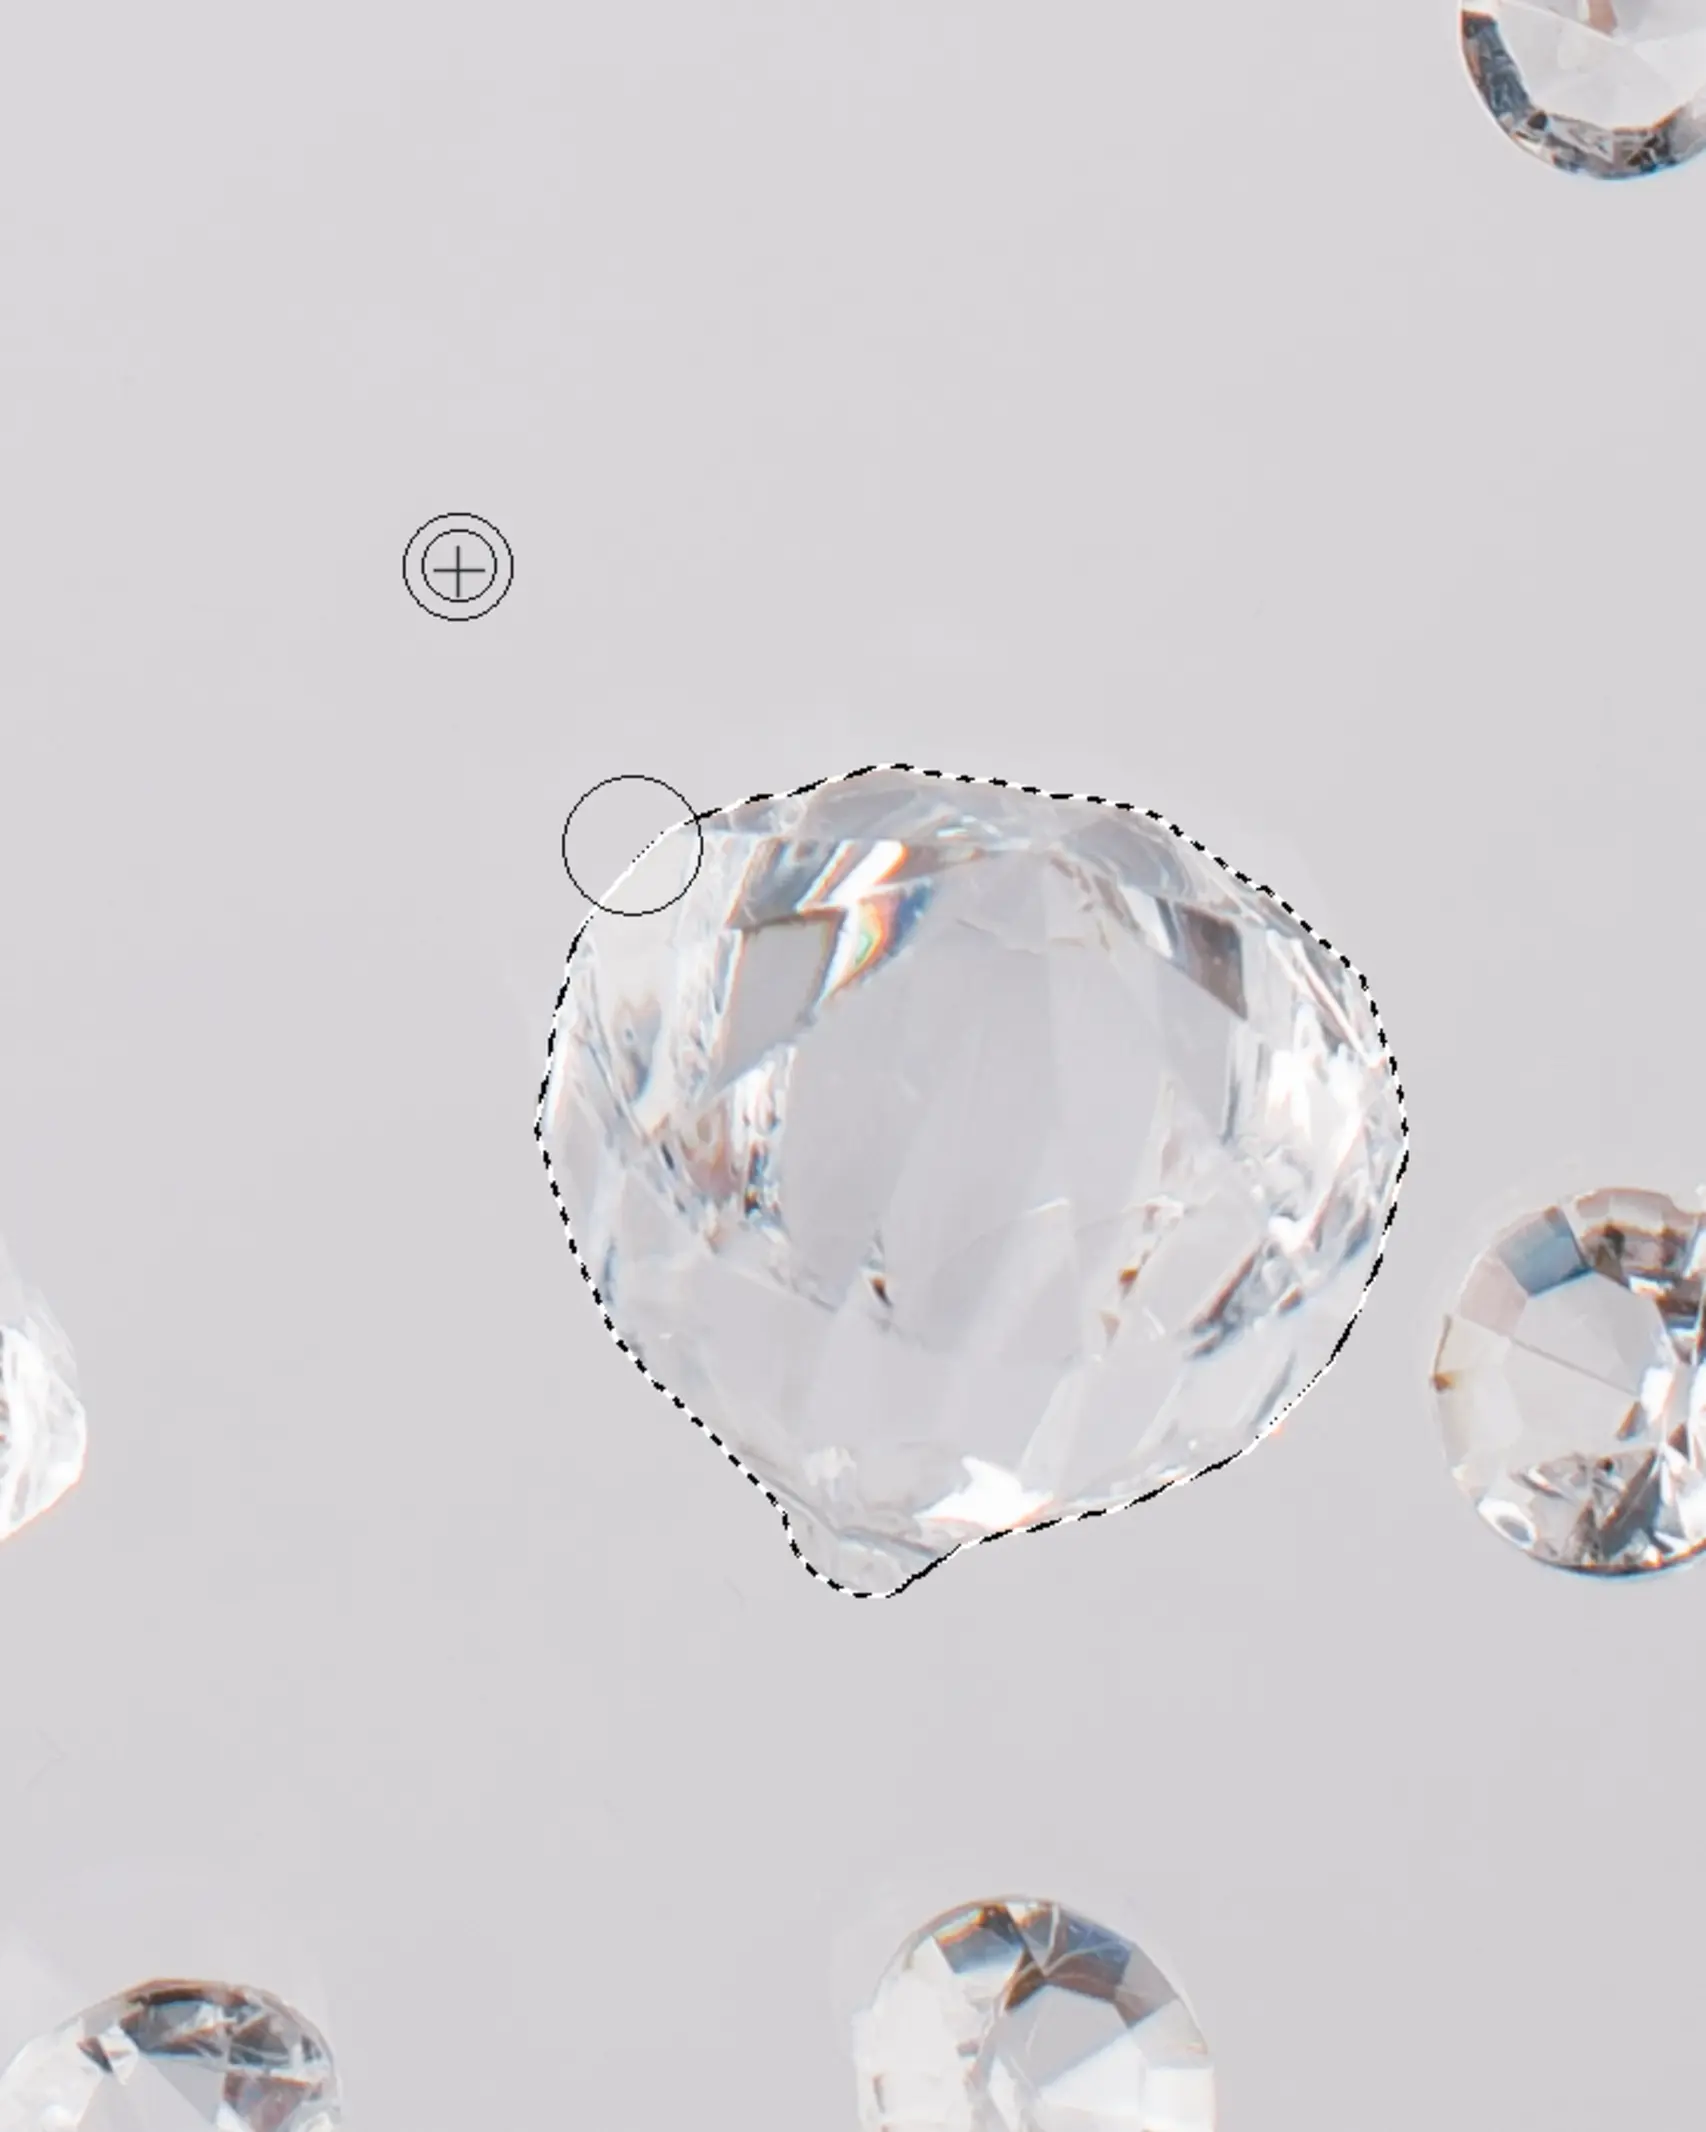
Zoom in close to the crystals where the reflections are most visible.
You need to select the crystal to protect it while you clean the background. I used the Quick Selection Tool (W).
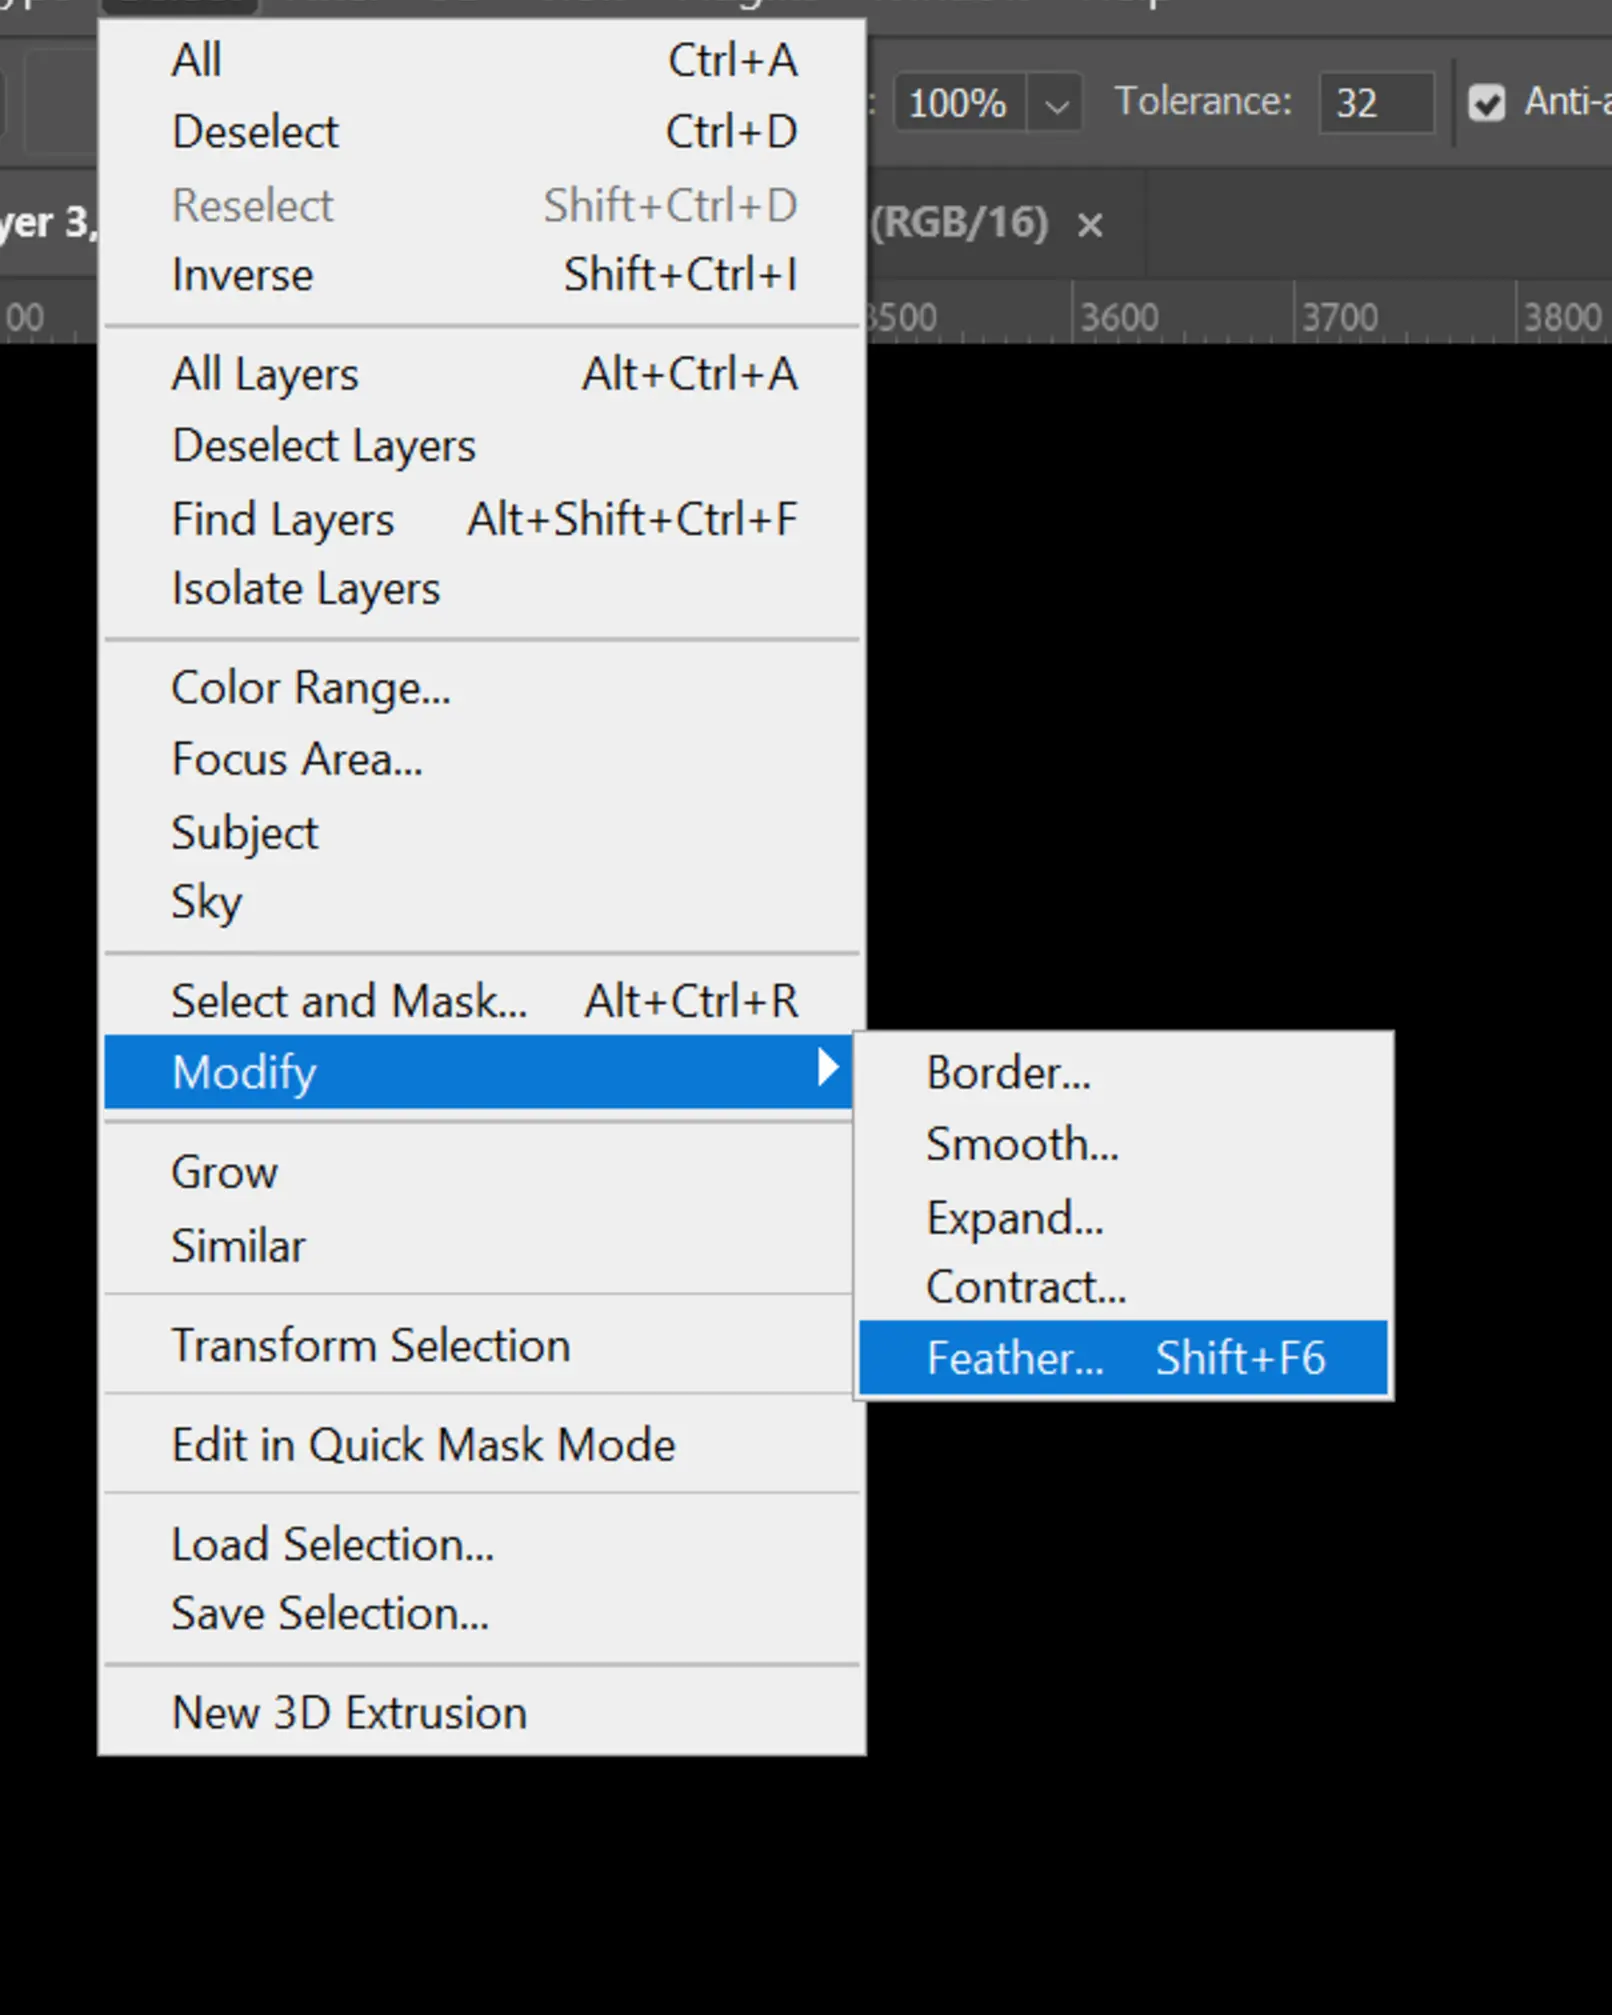
To make the edit look natural, the selection edges shouldn’t be too sharp. Go to Select > Modify > Feather (Shift+F6) to soften the selection.
For this image, a radius of 3 pixels worked well.
![]()
Think of feathering this way: a sharp, in-focus object needs a low number (like 1px), while a blurry, out-of-focus object needs a higher number to blend seamlessly.
Now that the crystal is selected, we need to clean around it. Invert the selection by pressing Ctrl+Shift+I.
![]()
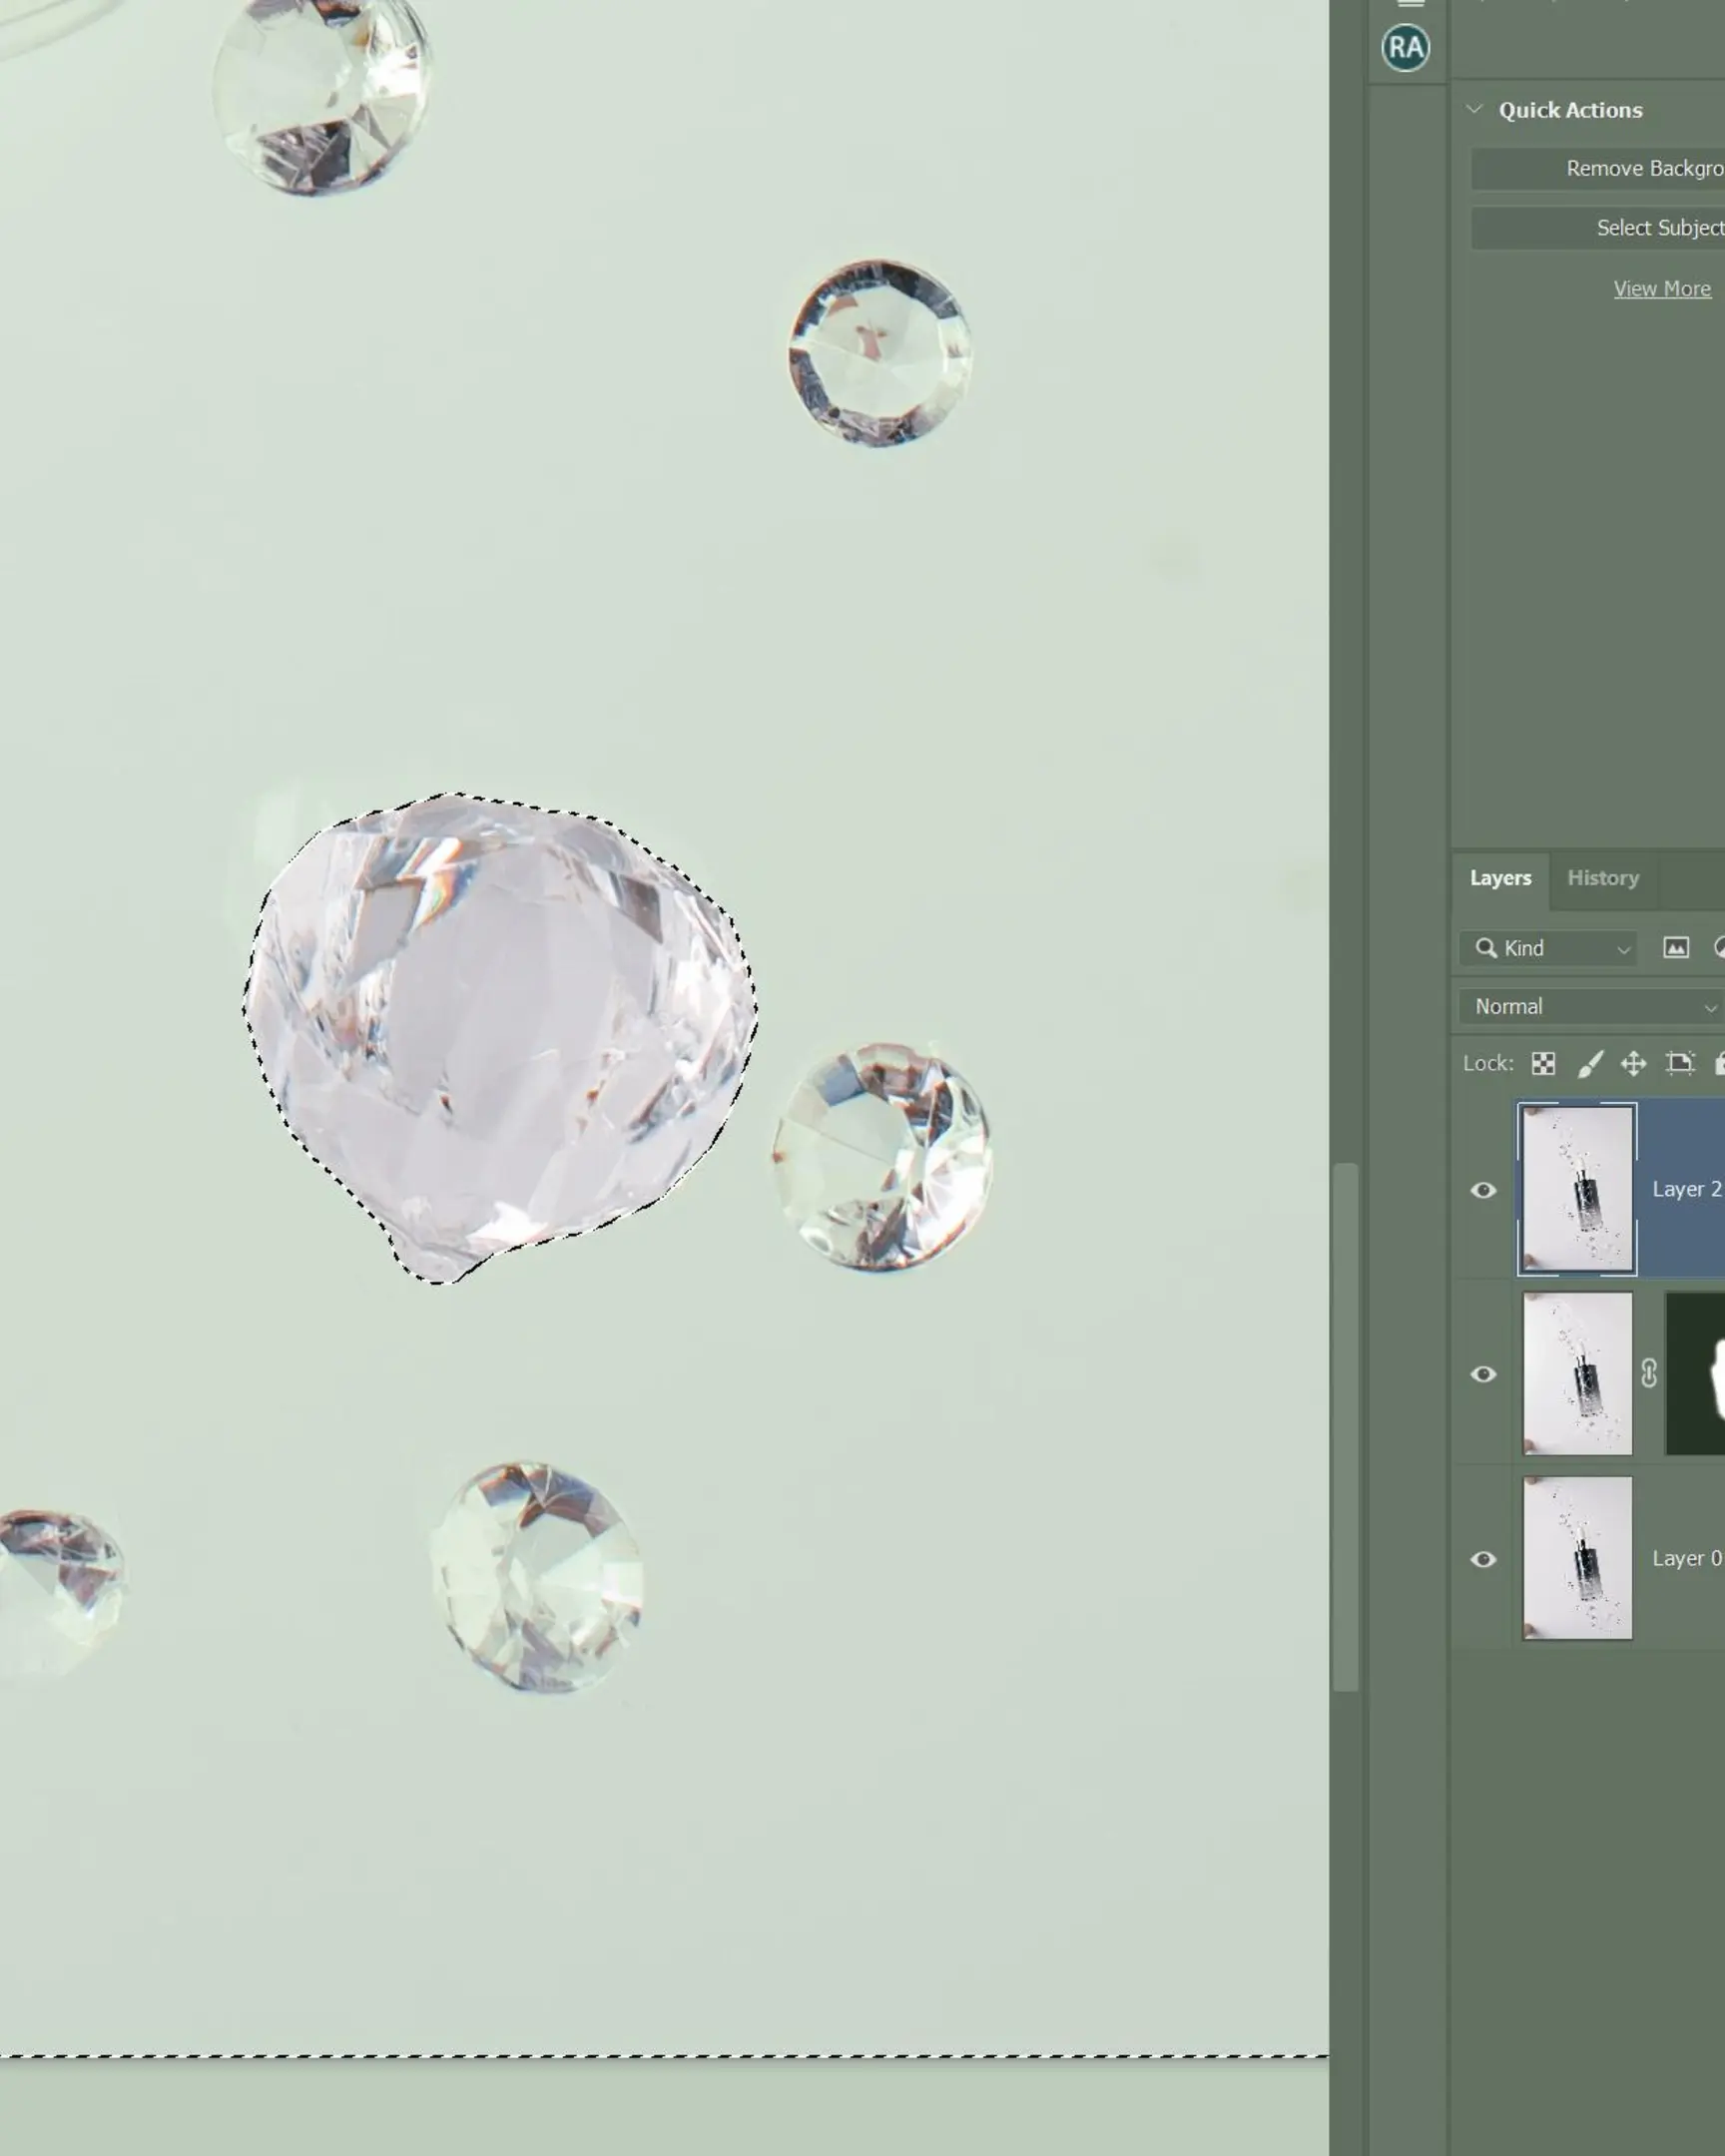
Now your selection targets everything except the crystal.
Grab the Clone Stamp Tool (S) with a soft brush.
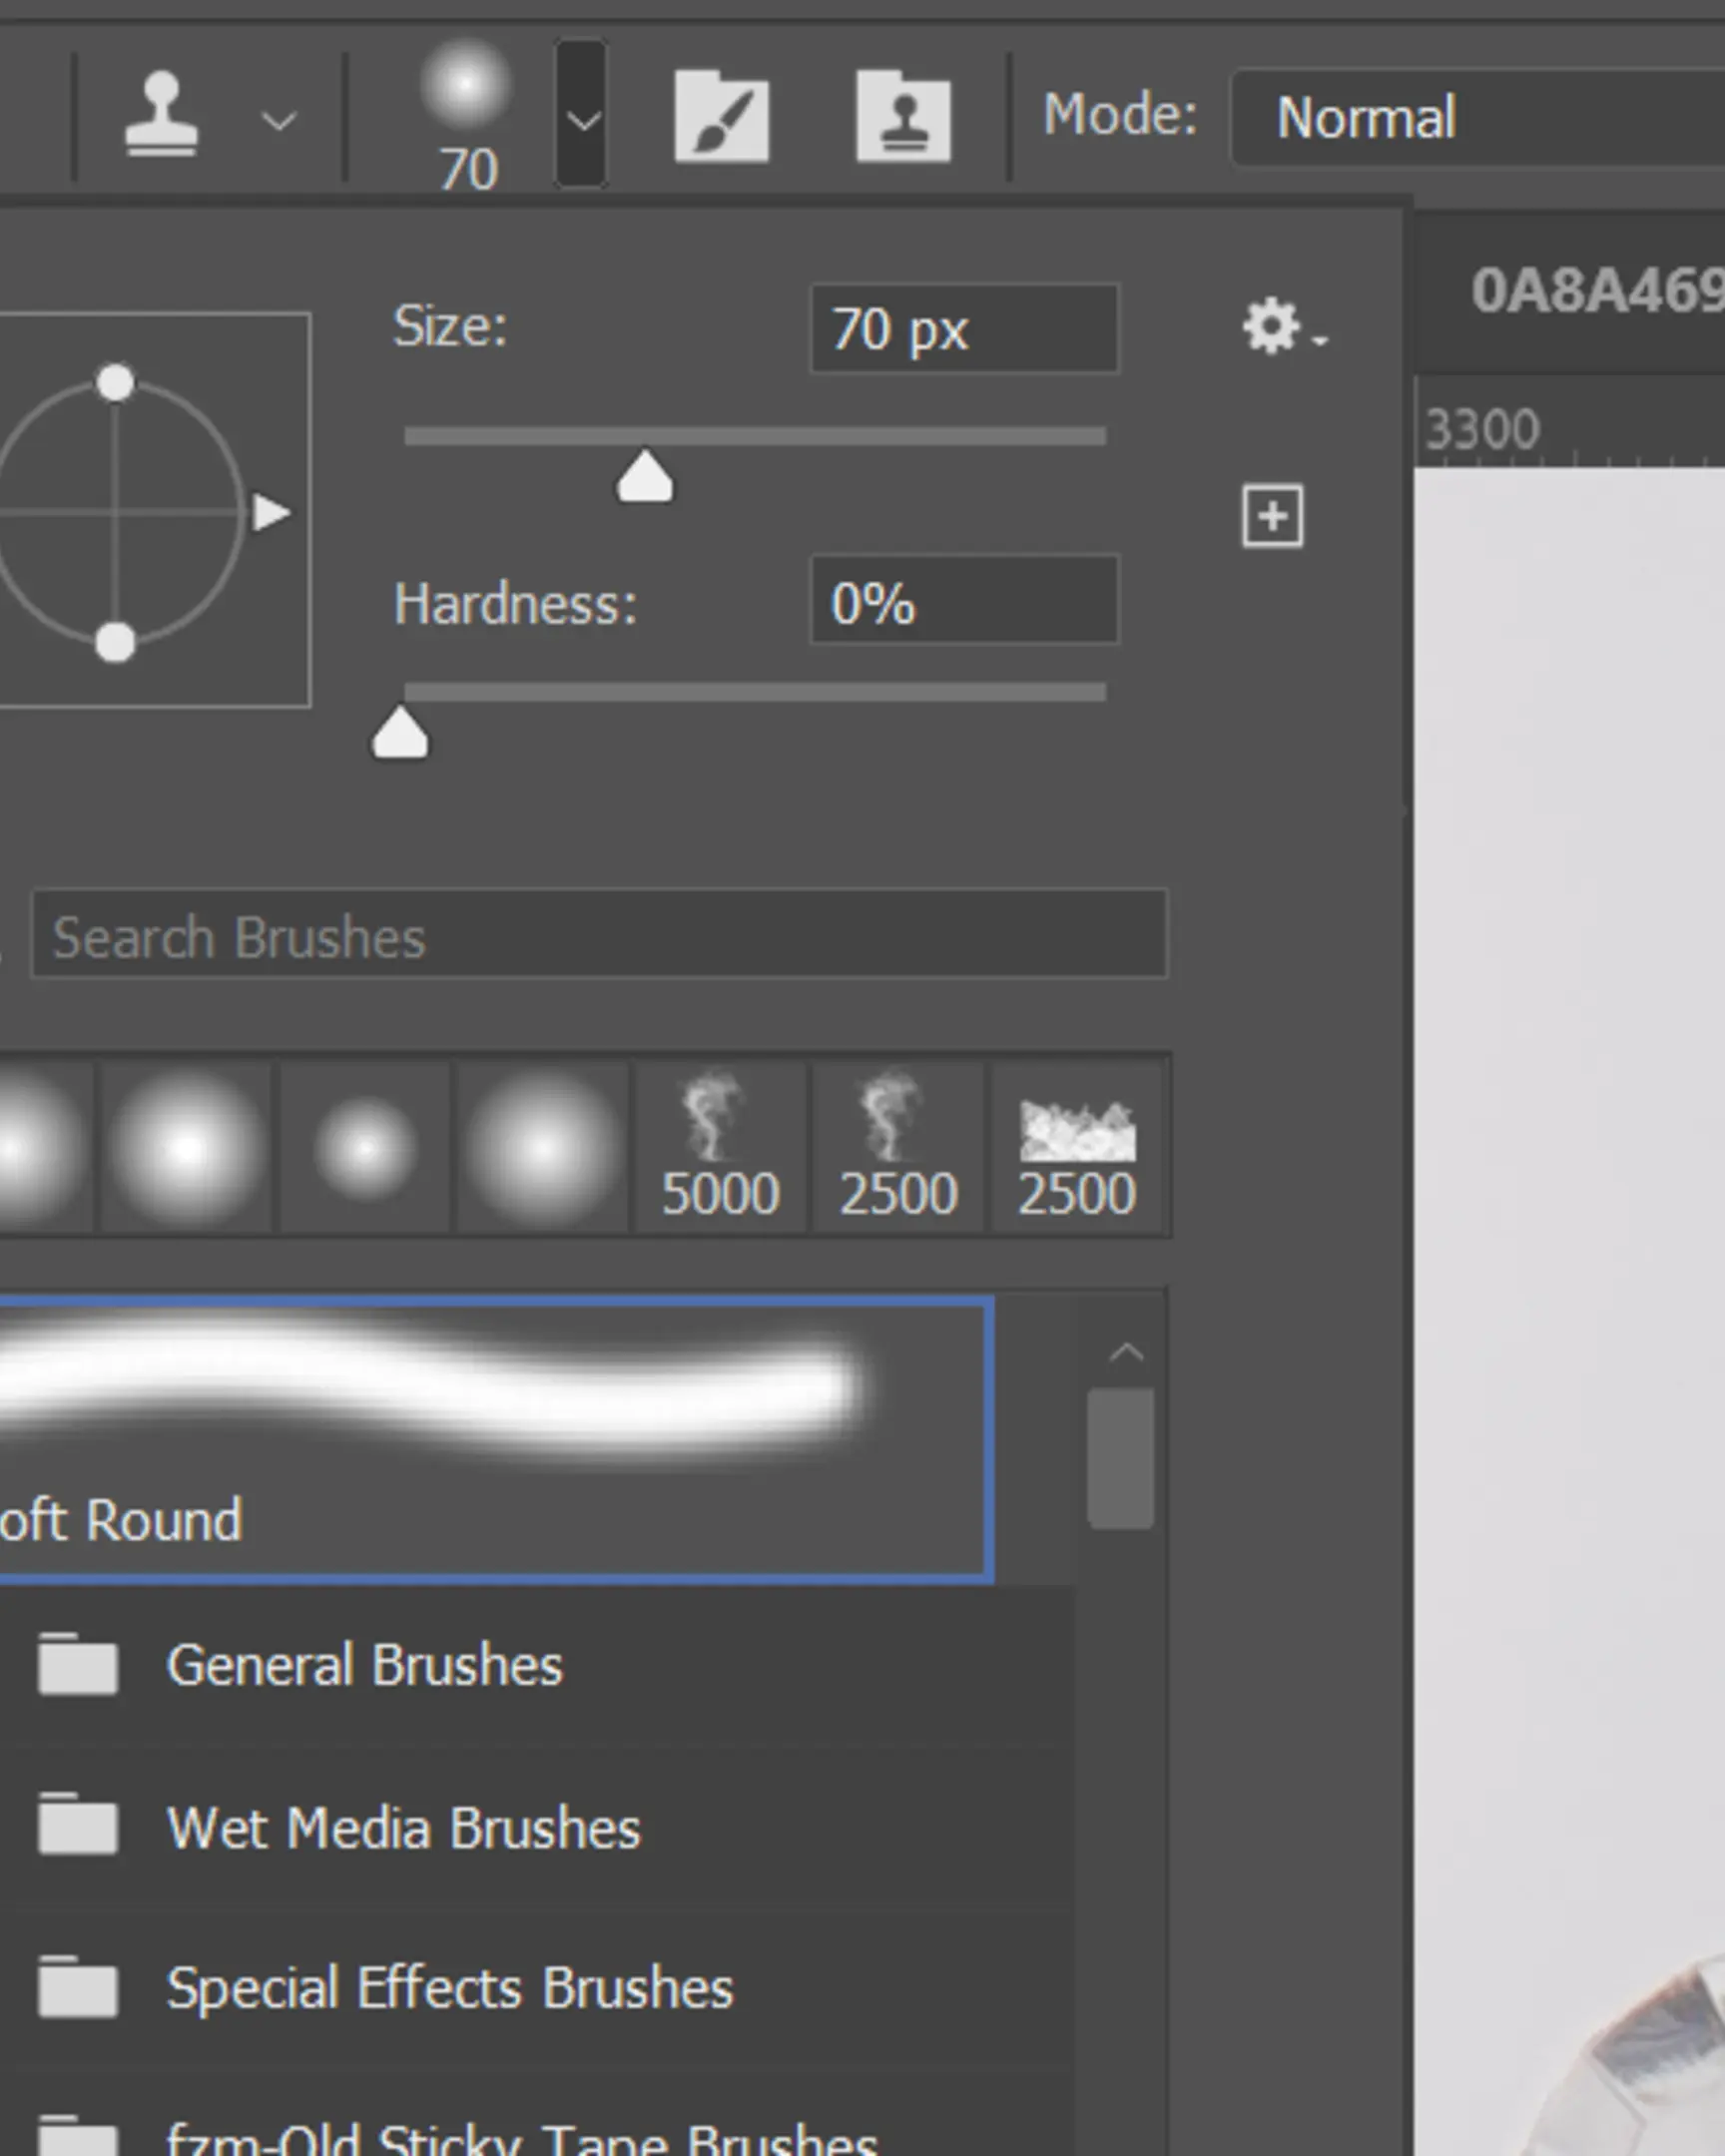
Hold Alt to sample a clean area of the background, then paint over the reflection. Because of your selection, you can paint right over the crystal without erasing it—the mask protects it.
Once one crystal is done, press Ctrl+D to deselect, and repeat the process for the next one: Select, Feather, Invert, Clone.
Step 3: Integrating the Blurred Label and Crystals Layer
Now, let’s bring in the third frame (“Label and blur”). Copy and paste it on top of your working file just like before.
Select your current merged layer and this new top layer, then use Edit > Auto-Align Layers to ensure everything matches up perfectly.

Add a mask to this new layer and paint in the bottle parts if needed. I usually merge everything again (Ctrl+Alt+Shift+E) at this point to keep the file clean.
![]()
I did some quick retouching on the label here using the Clone Stamp Tool, but since we are focusing on the glass technique, I won’t bore you with the details.
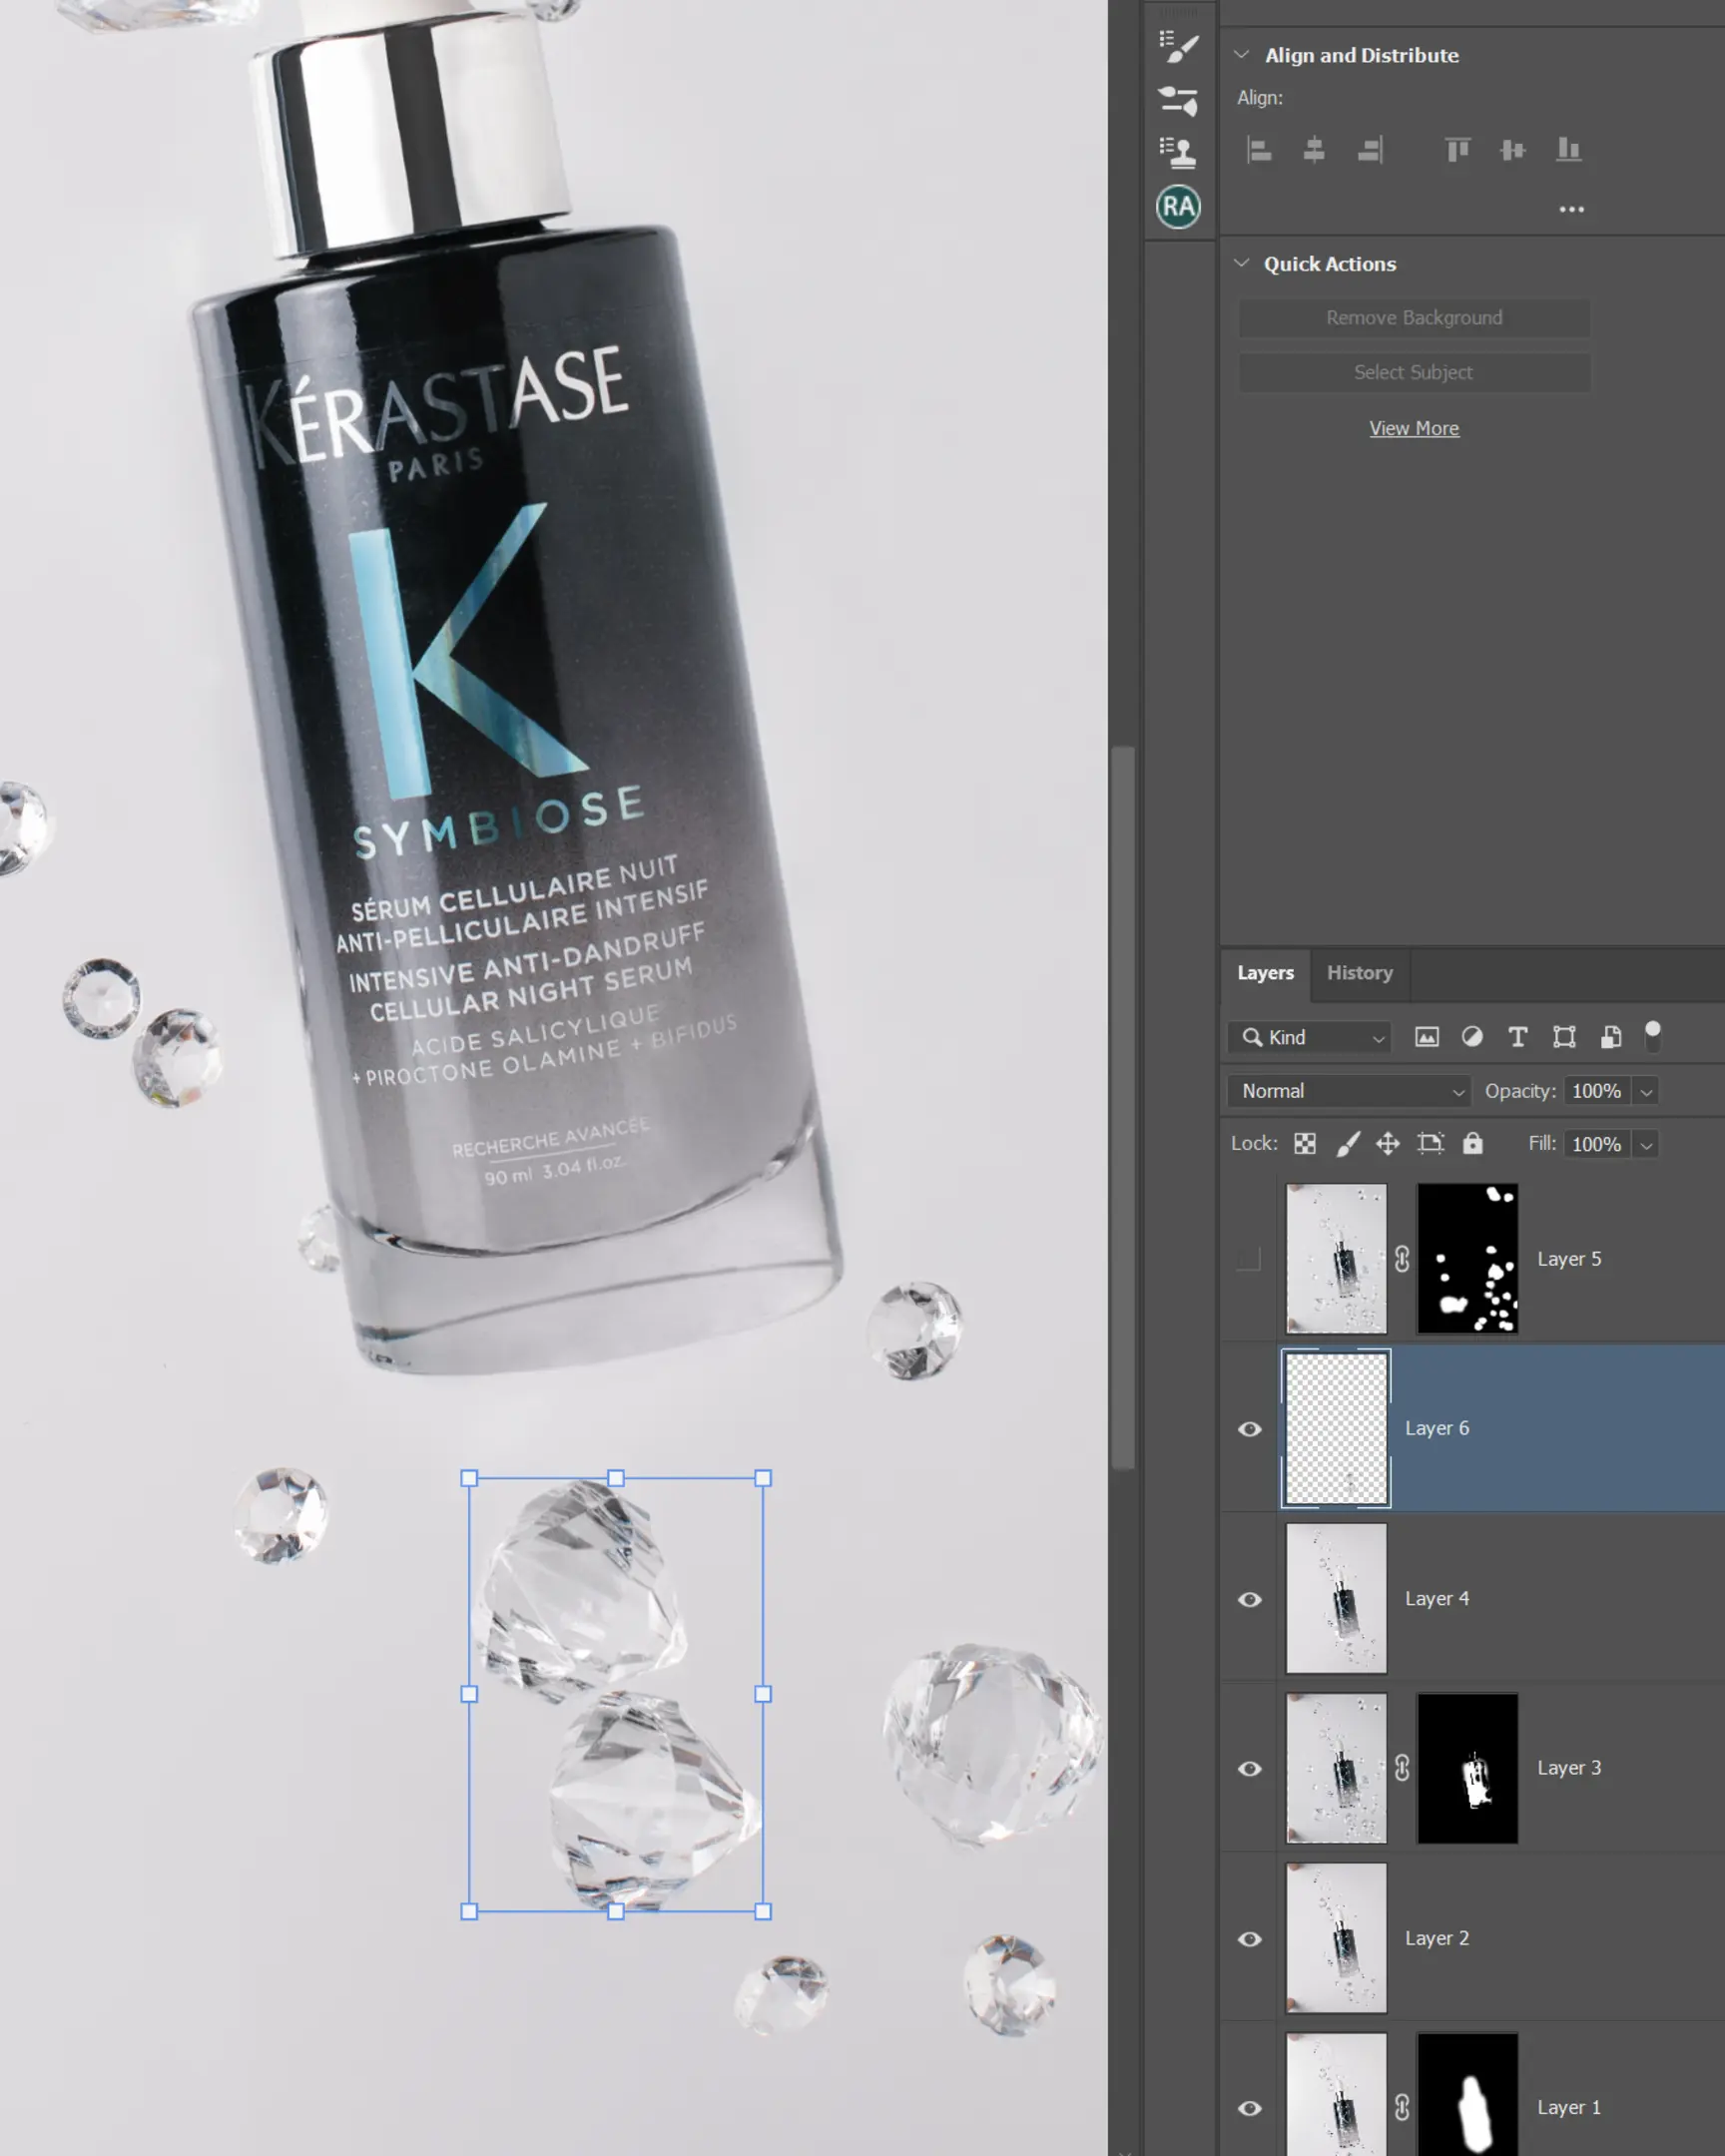
Step 4: Adding Blurred Crystals with Mask Inversion
This step adds that magical depth. We want to add the blurry foreground crystals from the “Label and blur” shot without the messy reflections.
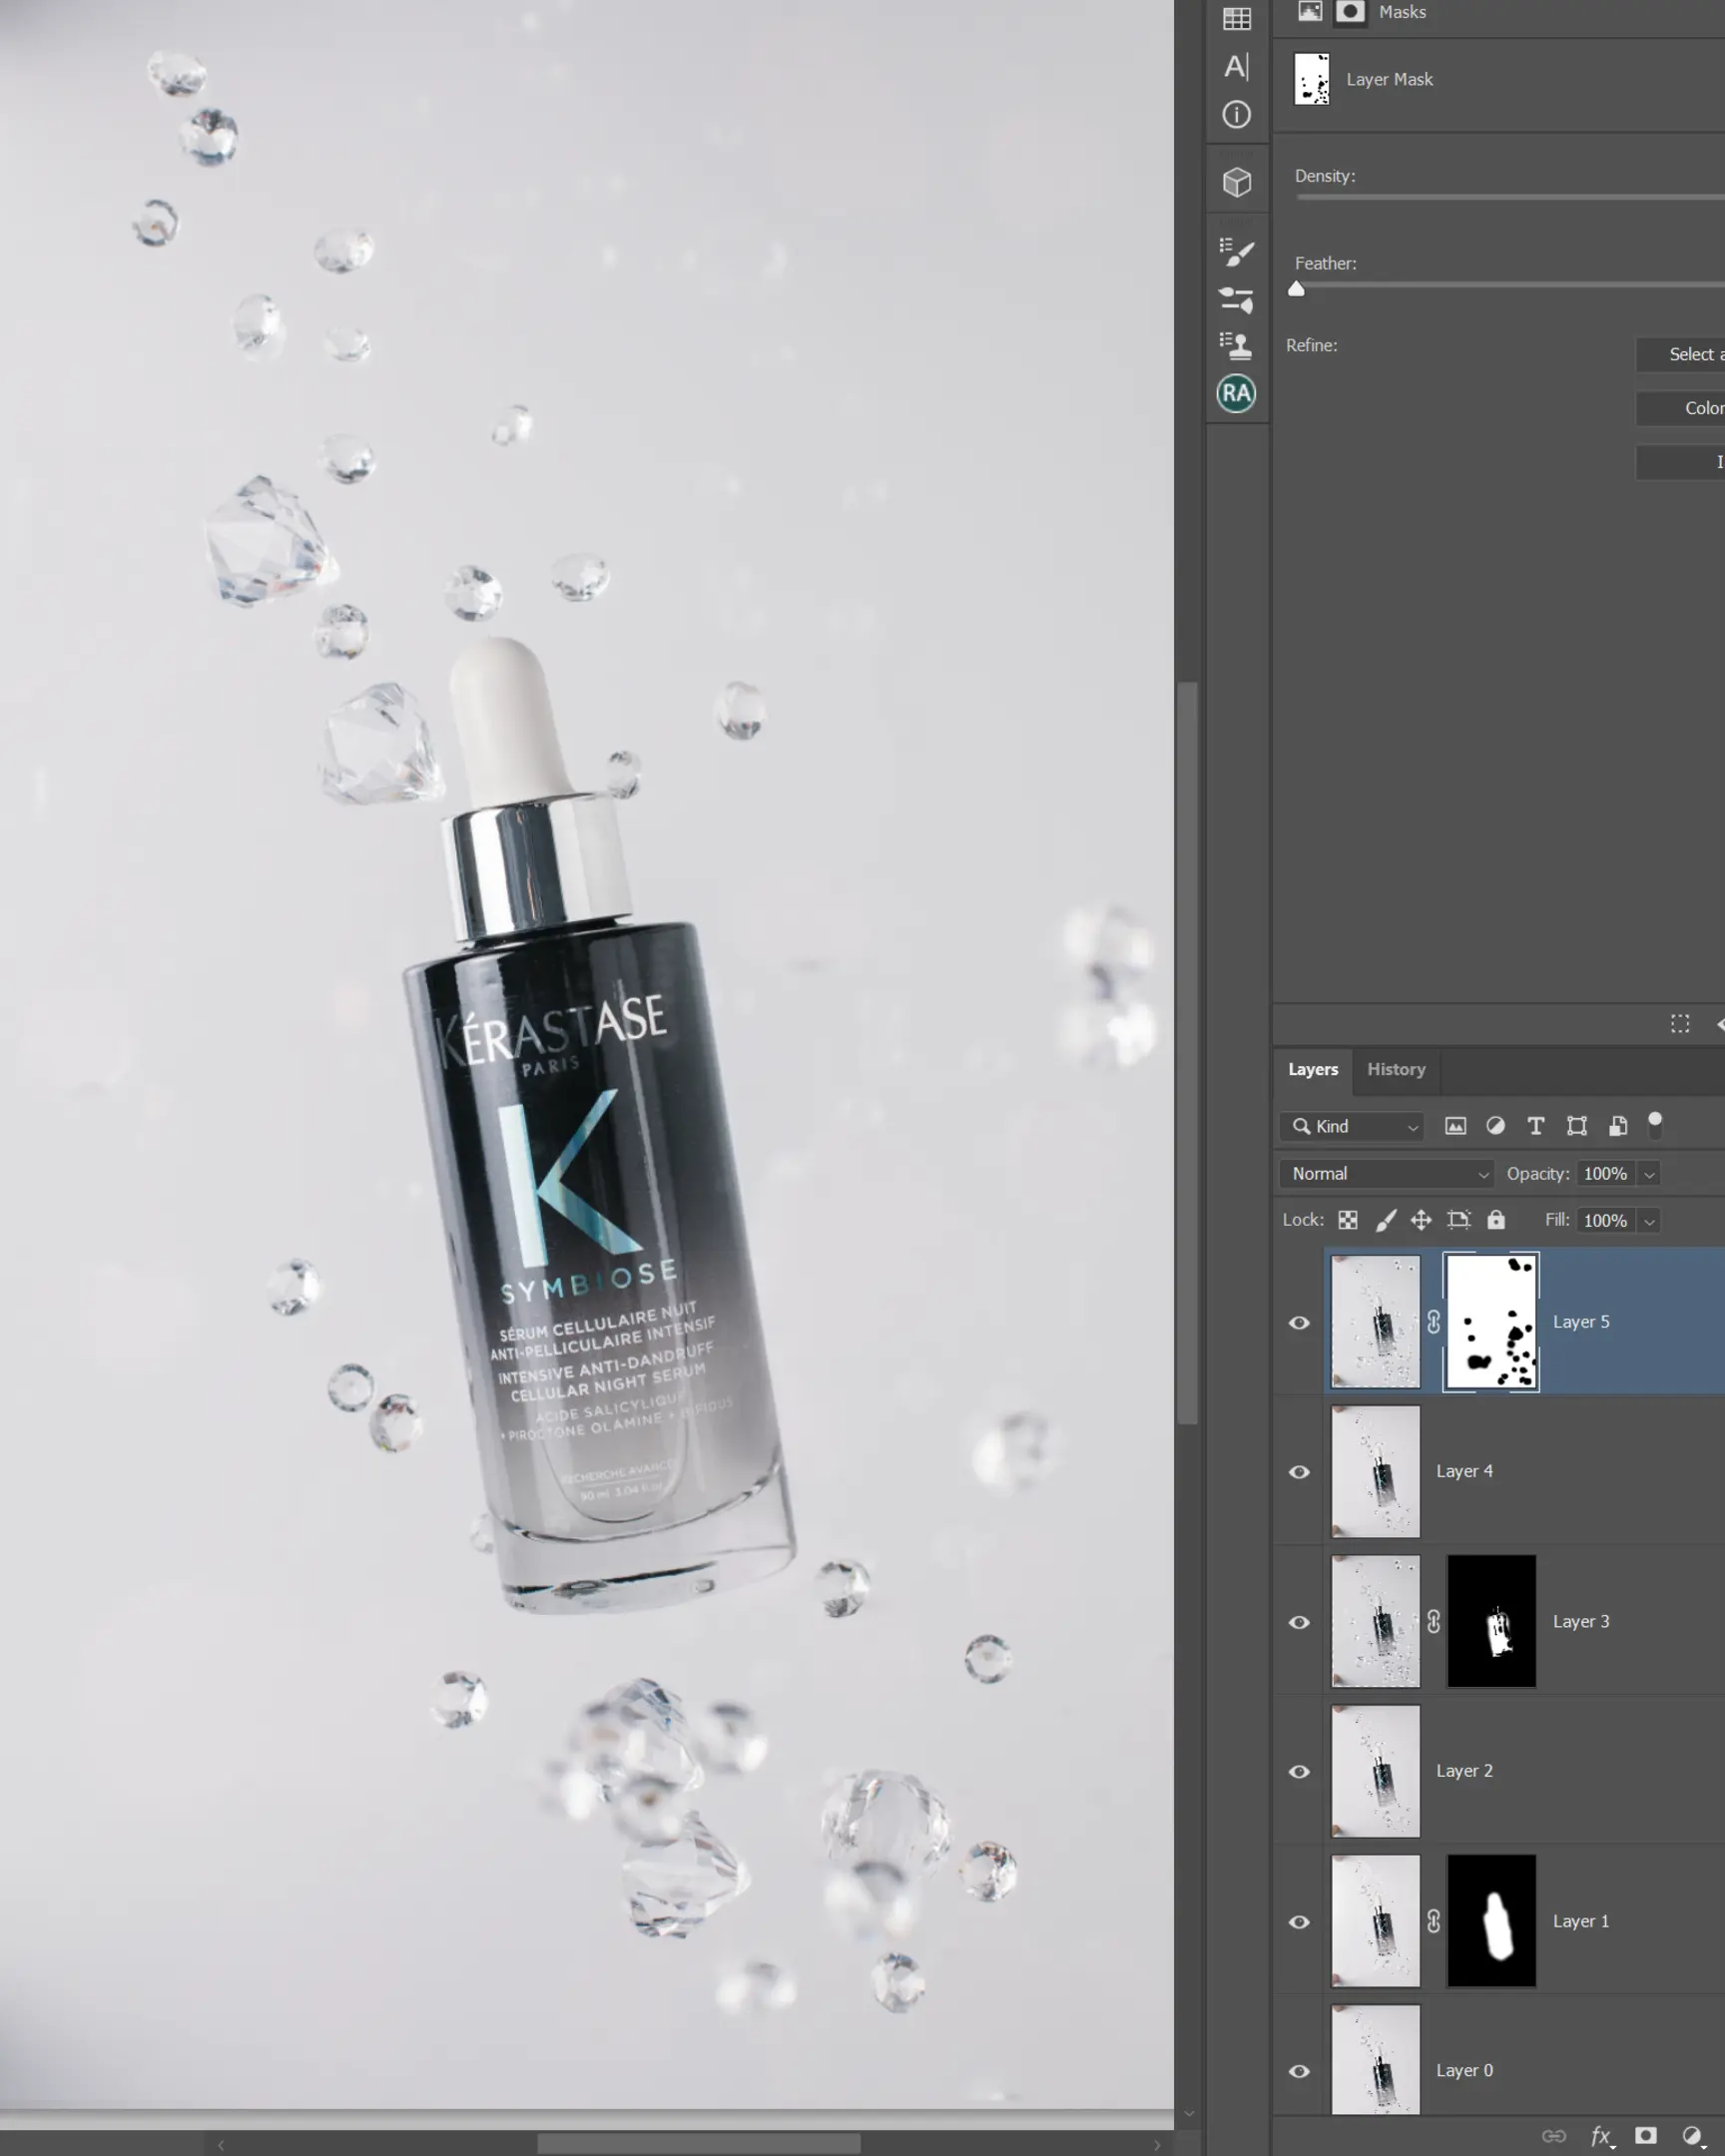
Insert the “Label and blur” file again (Layer 5). Align it, but this time add a white layer mask (just click the mask icon without holding Alt).
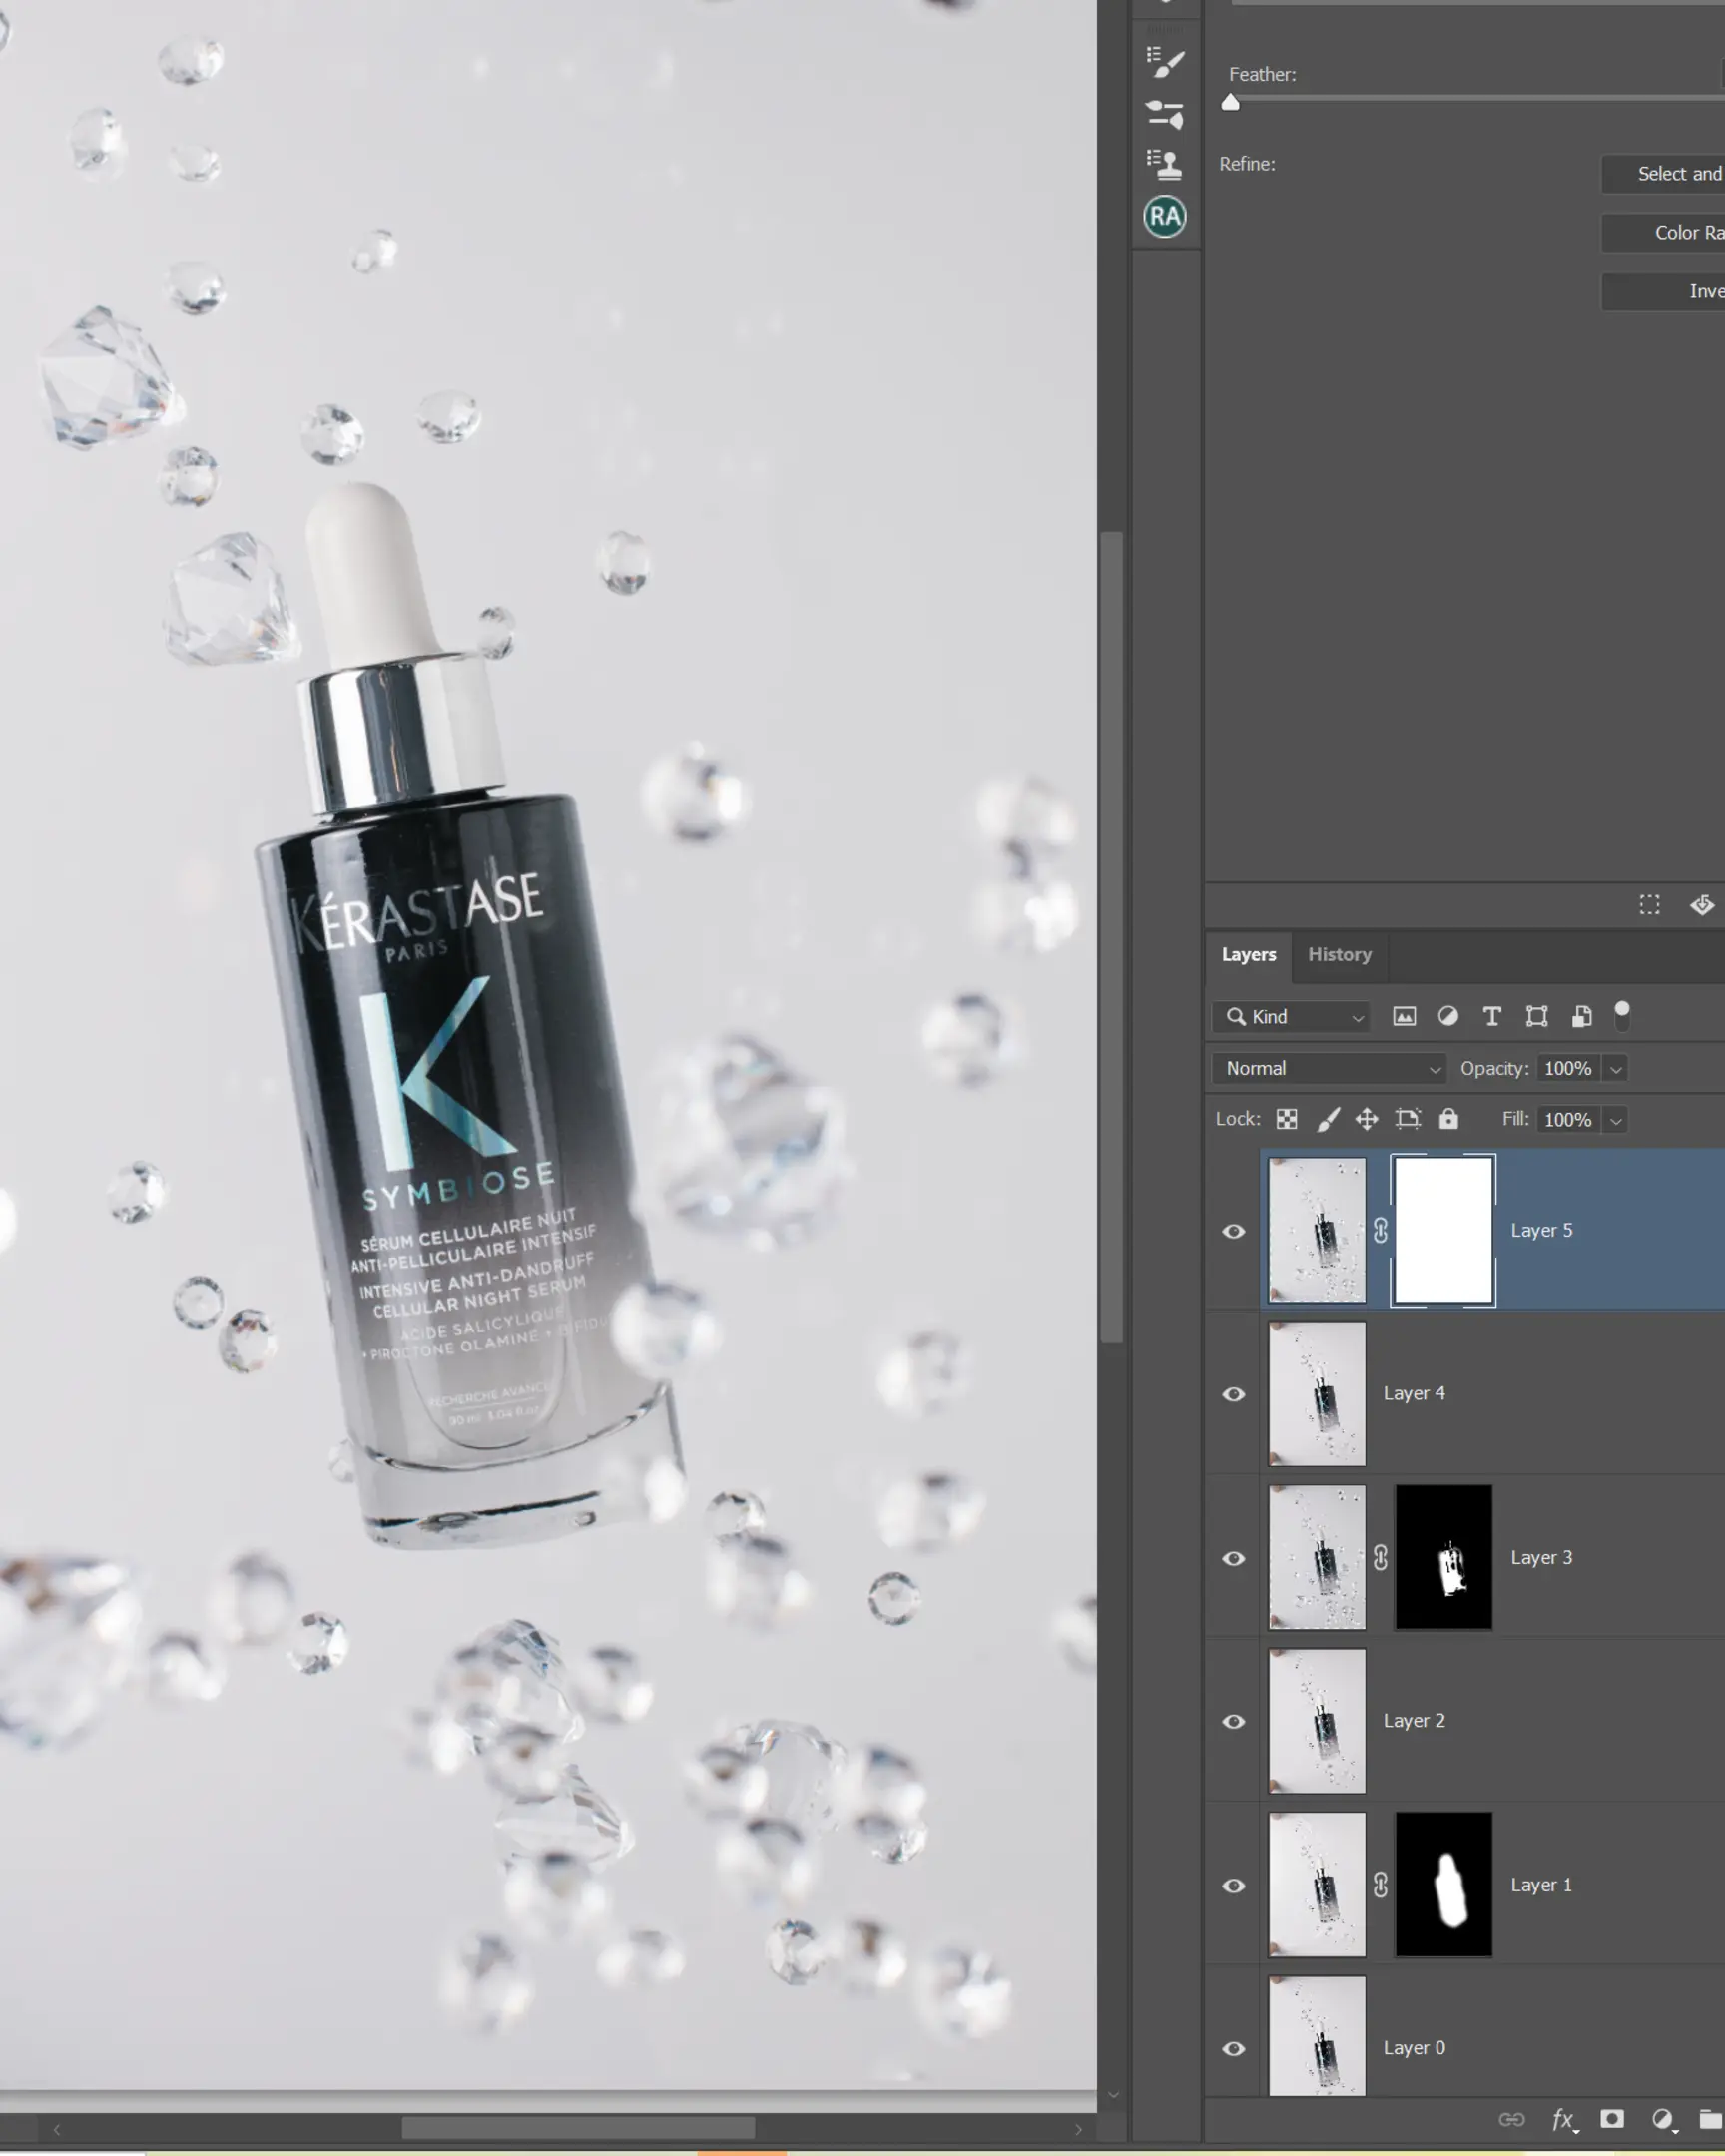
Here is a great workflow trick:
We have a layer with beautiful blurred crystals, but it also has ugly reflections. Instead of trying to “paint in” the crystals, we will “paint out” everything else.
Select a soft black brush and start painting on the mask to hide the crystals you don’t want (and the reflections). It feels backward, but stay with me.
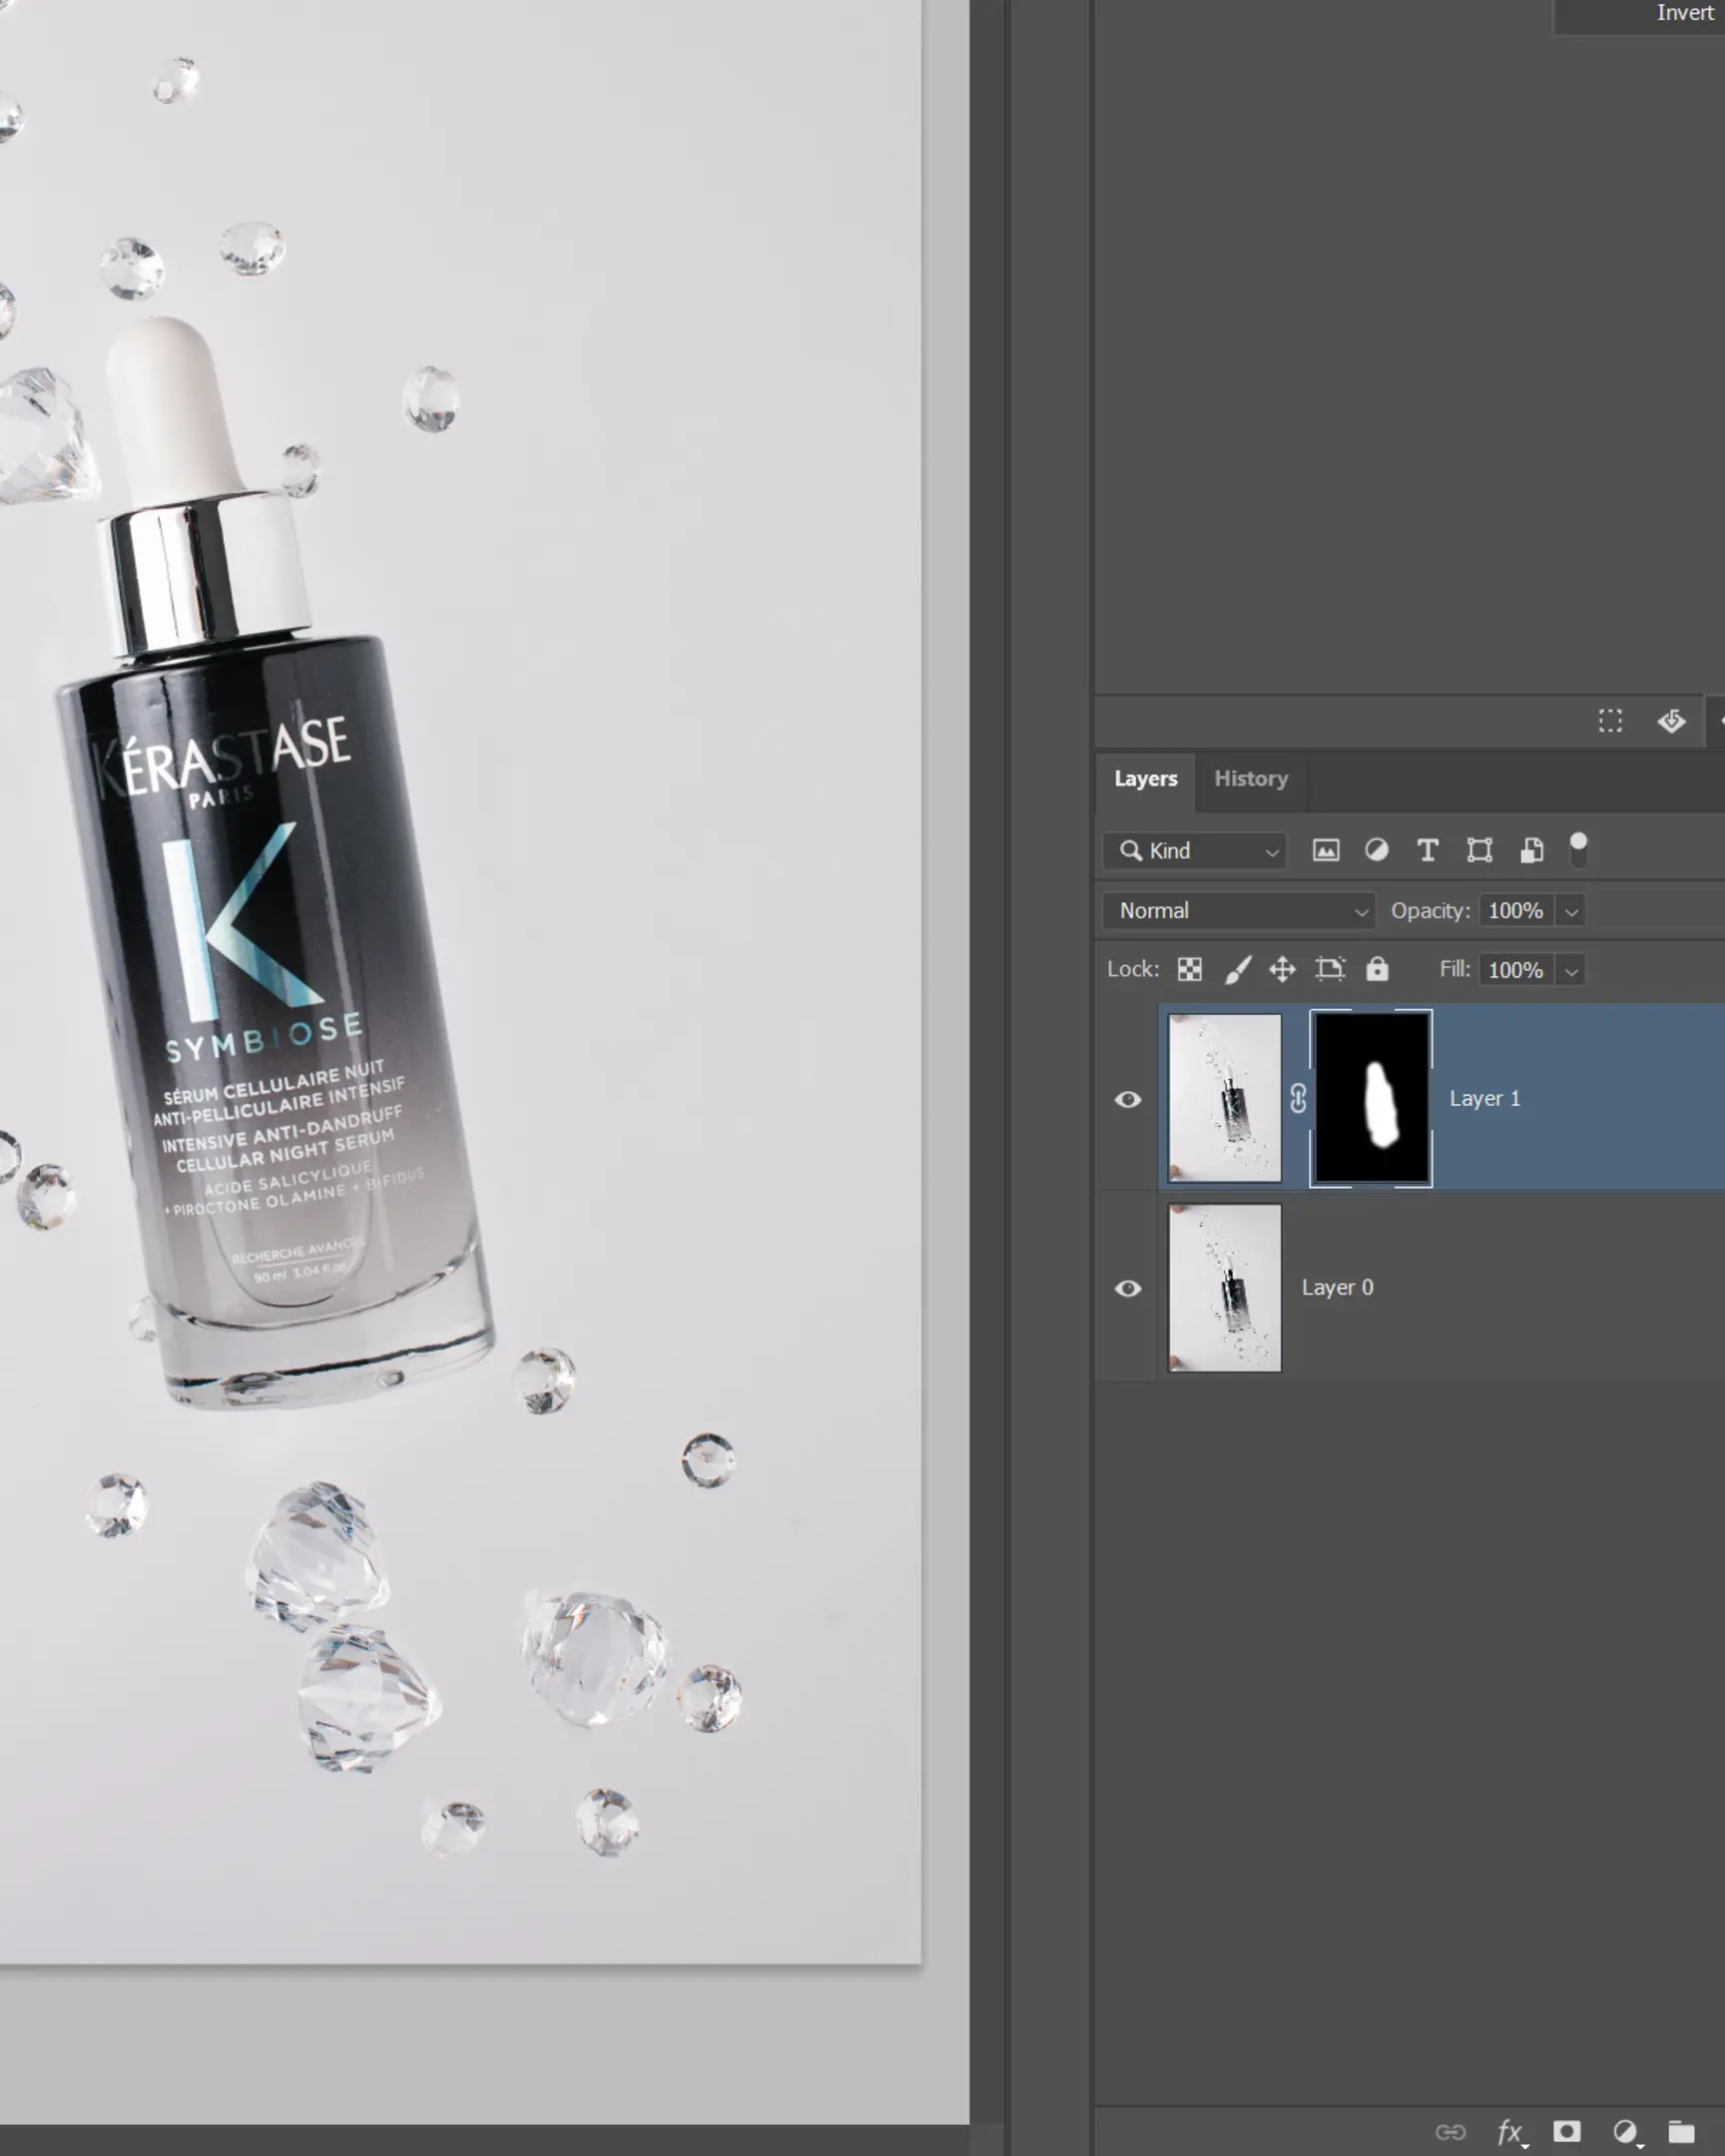
Your mask will look spotty, like the image below.
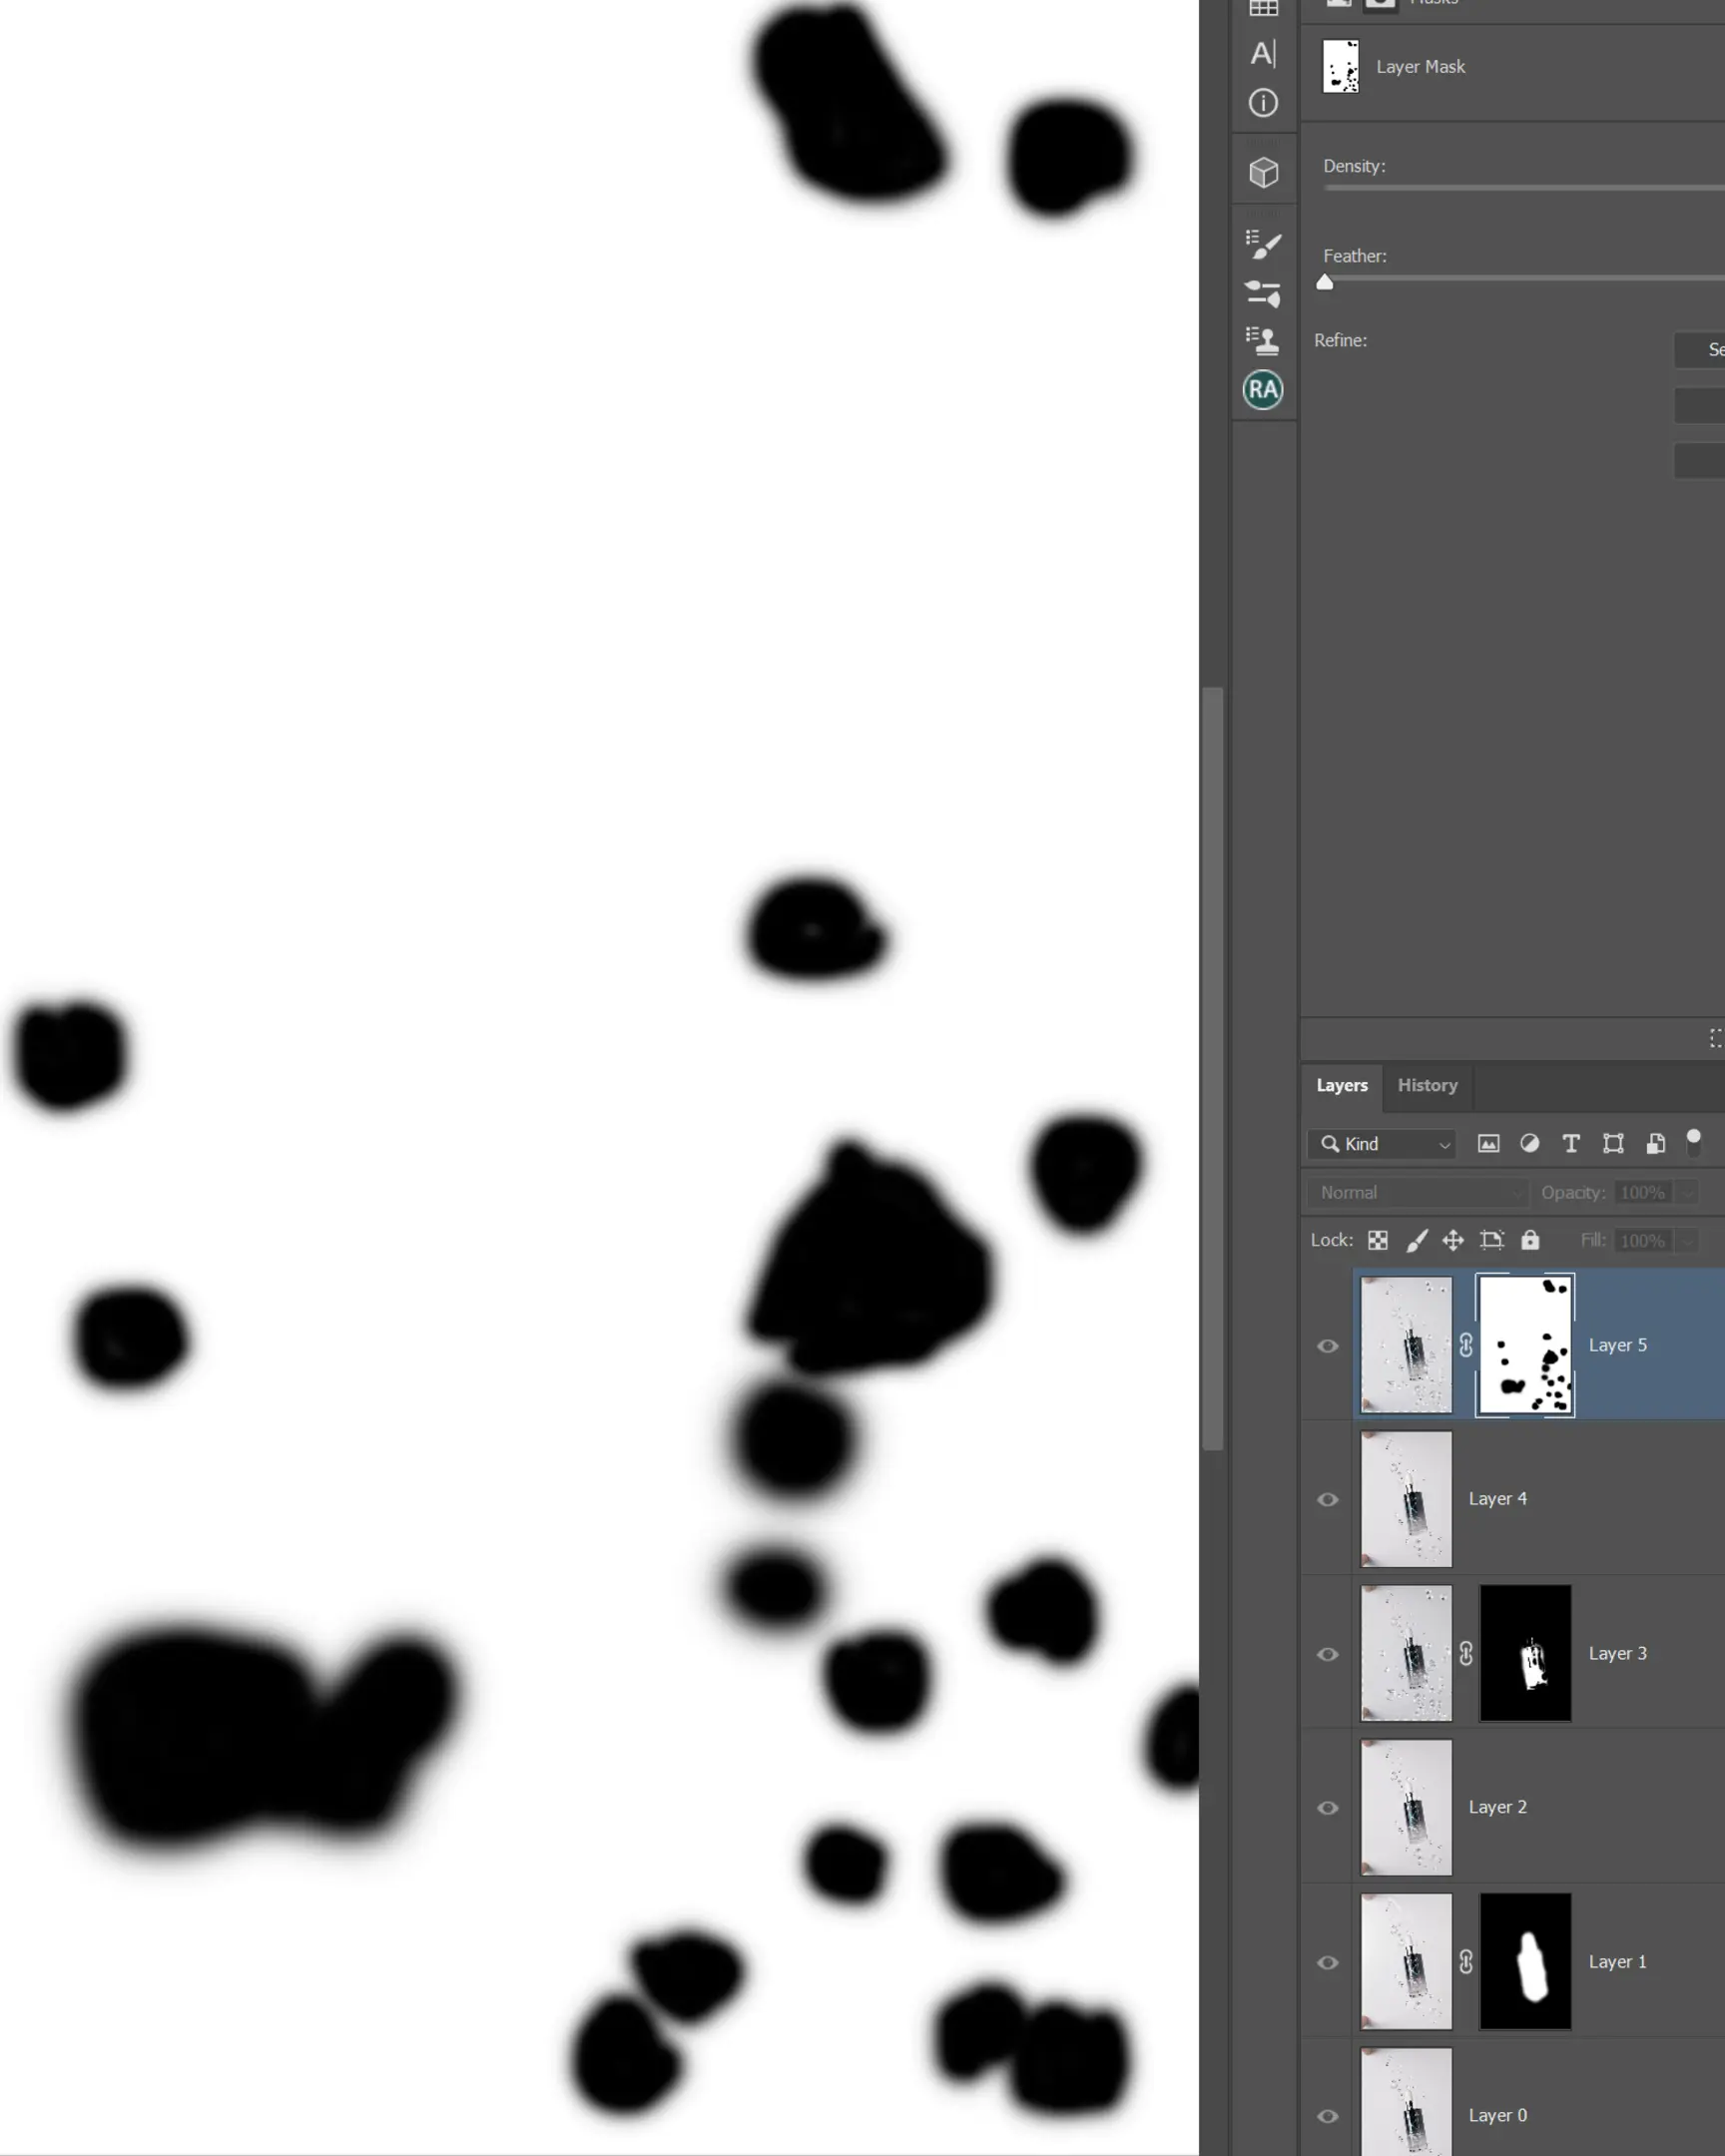
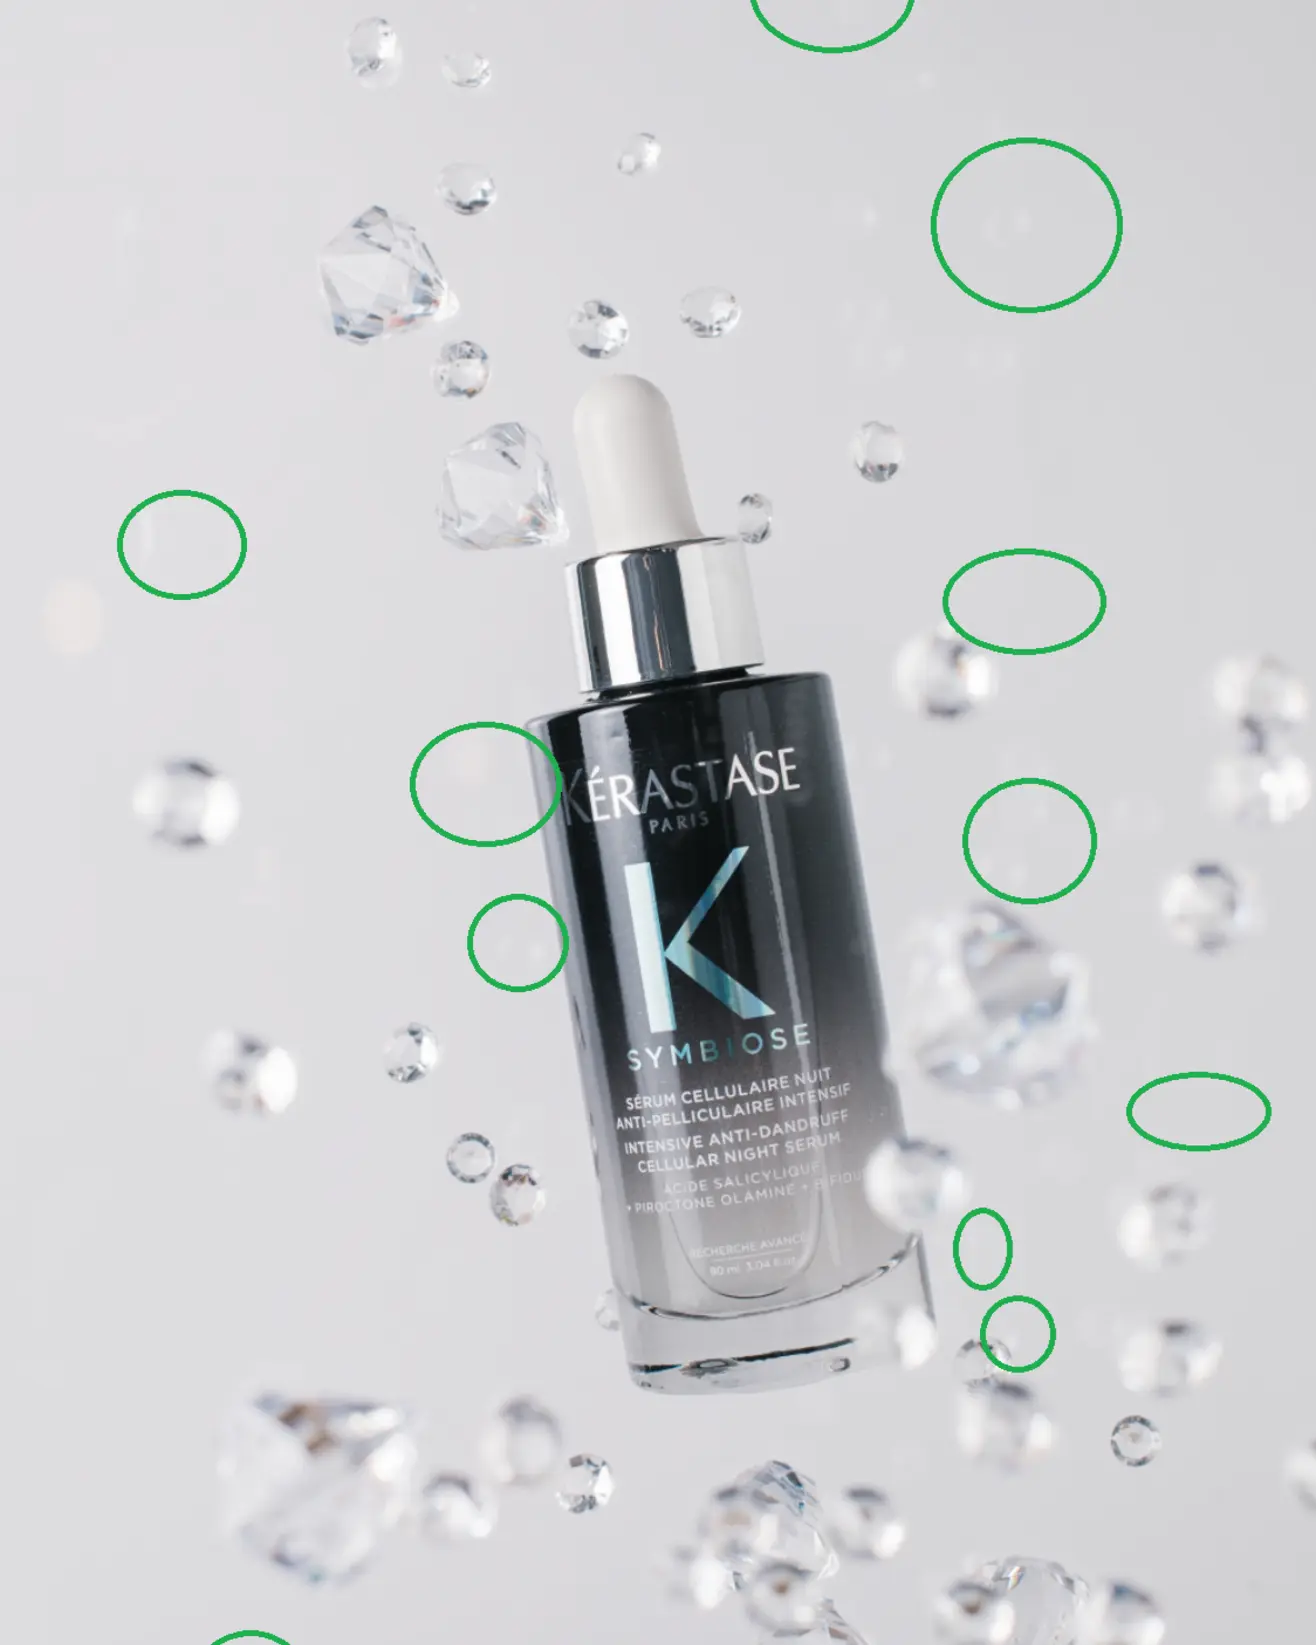
Now, with the mask selected, press Ctrl+I to invert it.
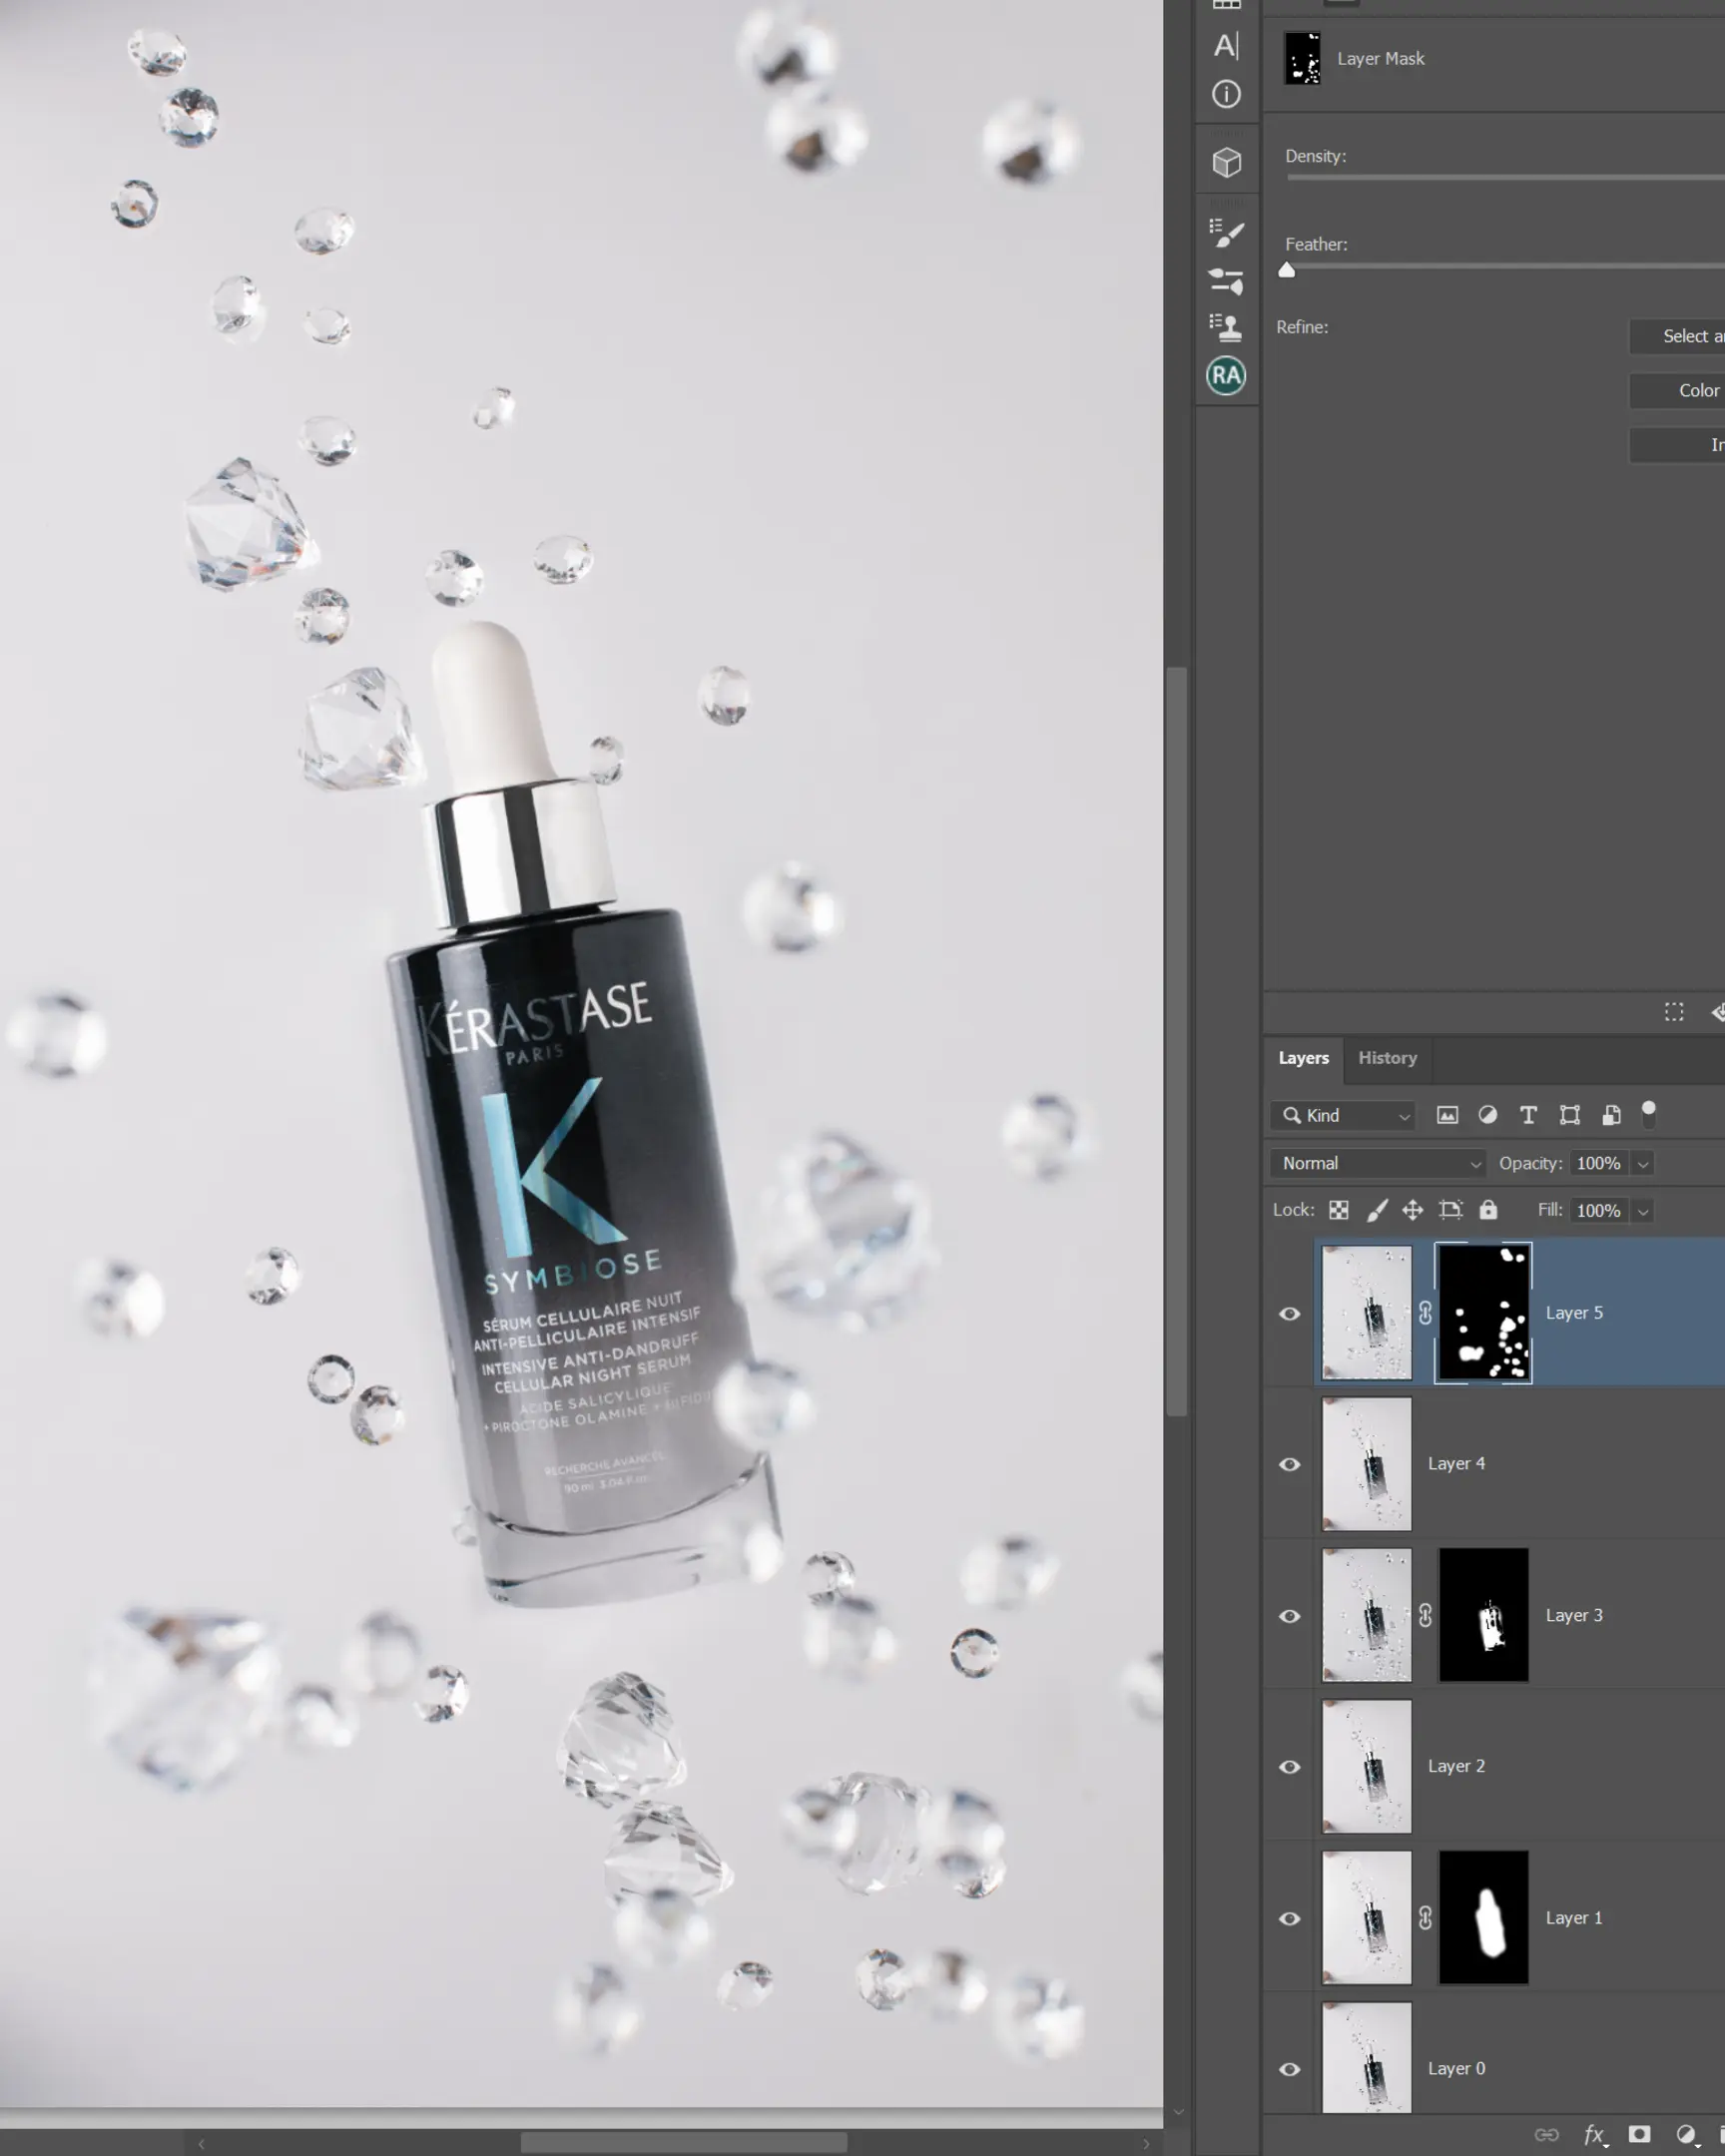
Suddenly, only the crystals you painted over appear! This method saves you from having to trace edges or mess with opacity. You just hide what looks bad, flip the mask, and keep what looks good.
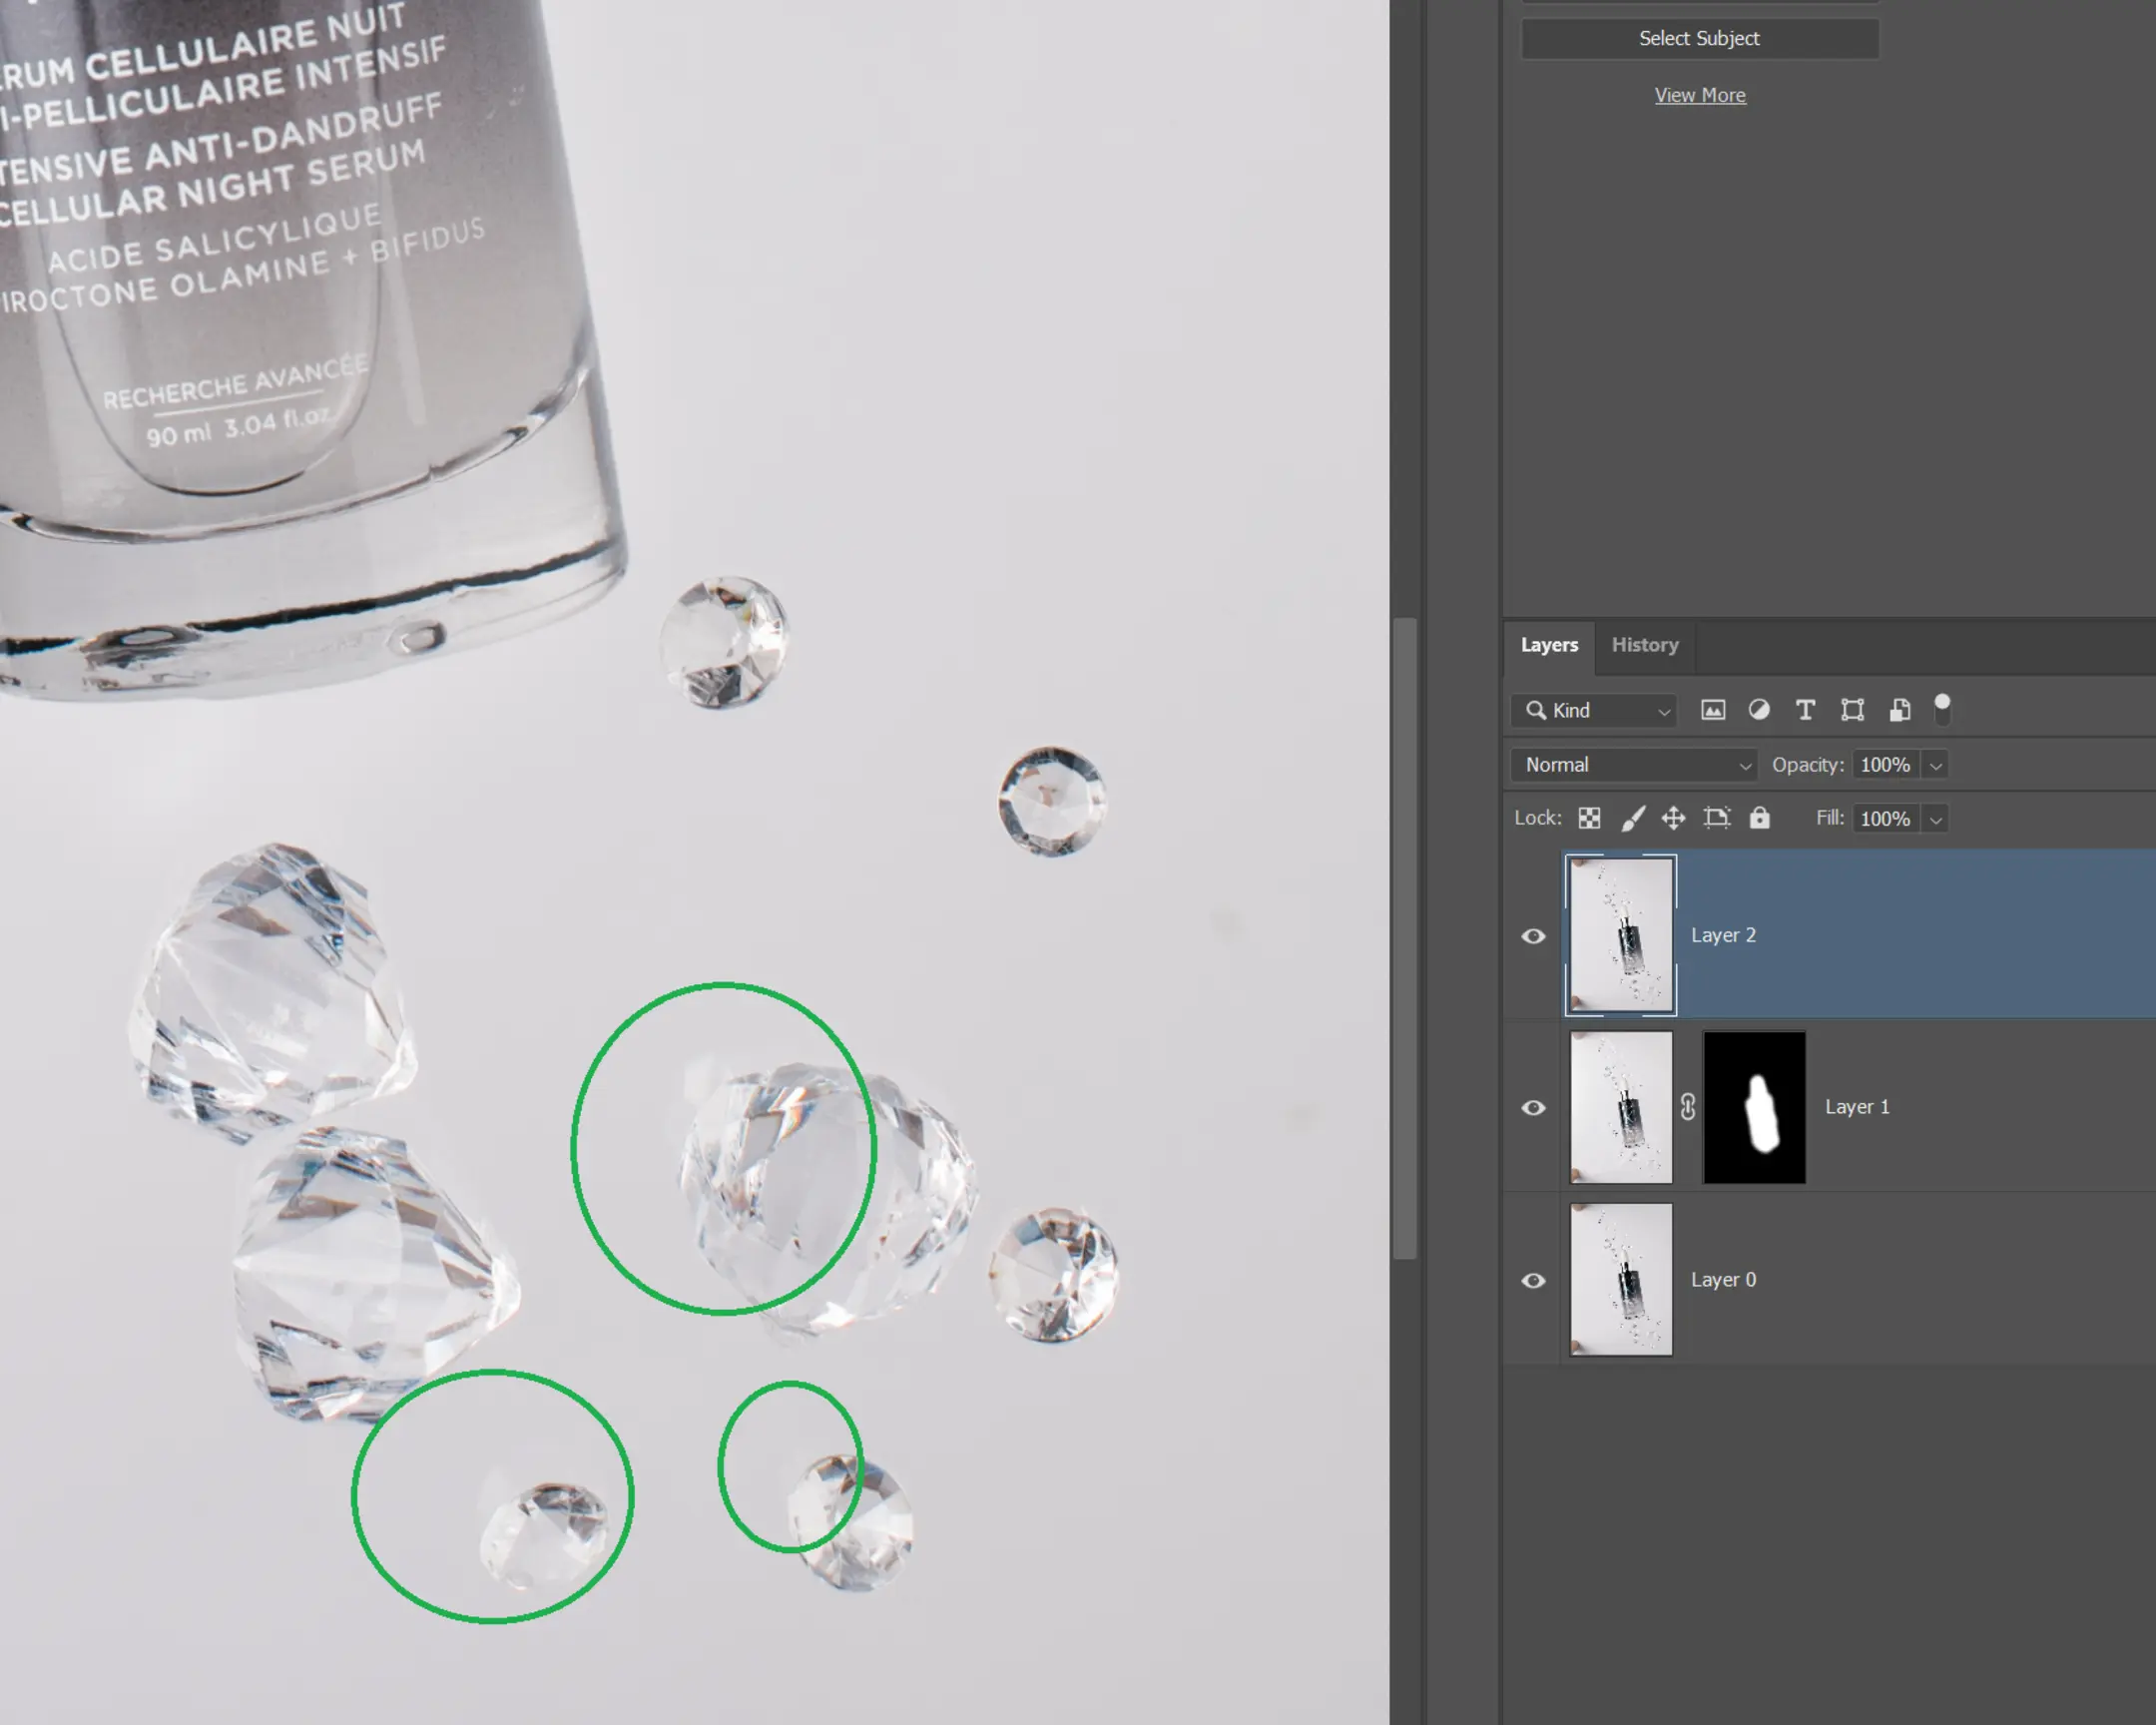
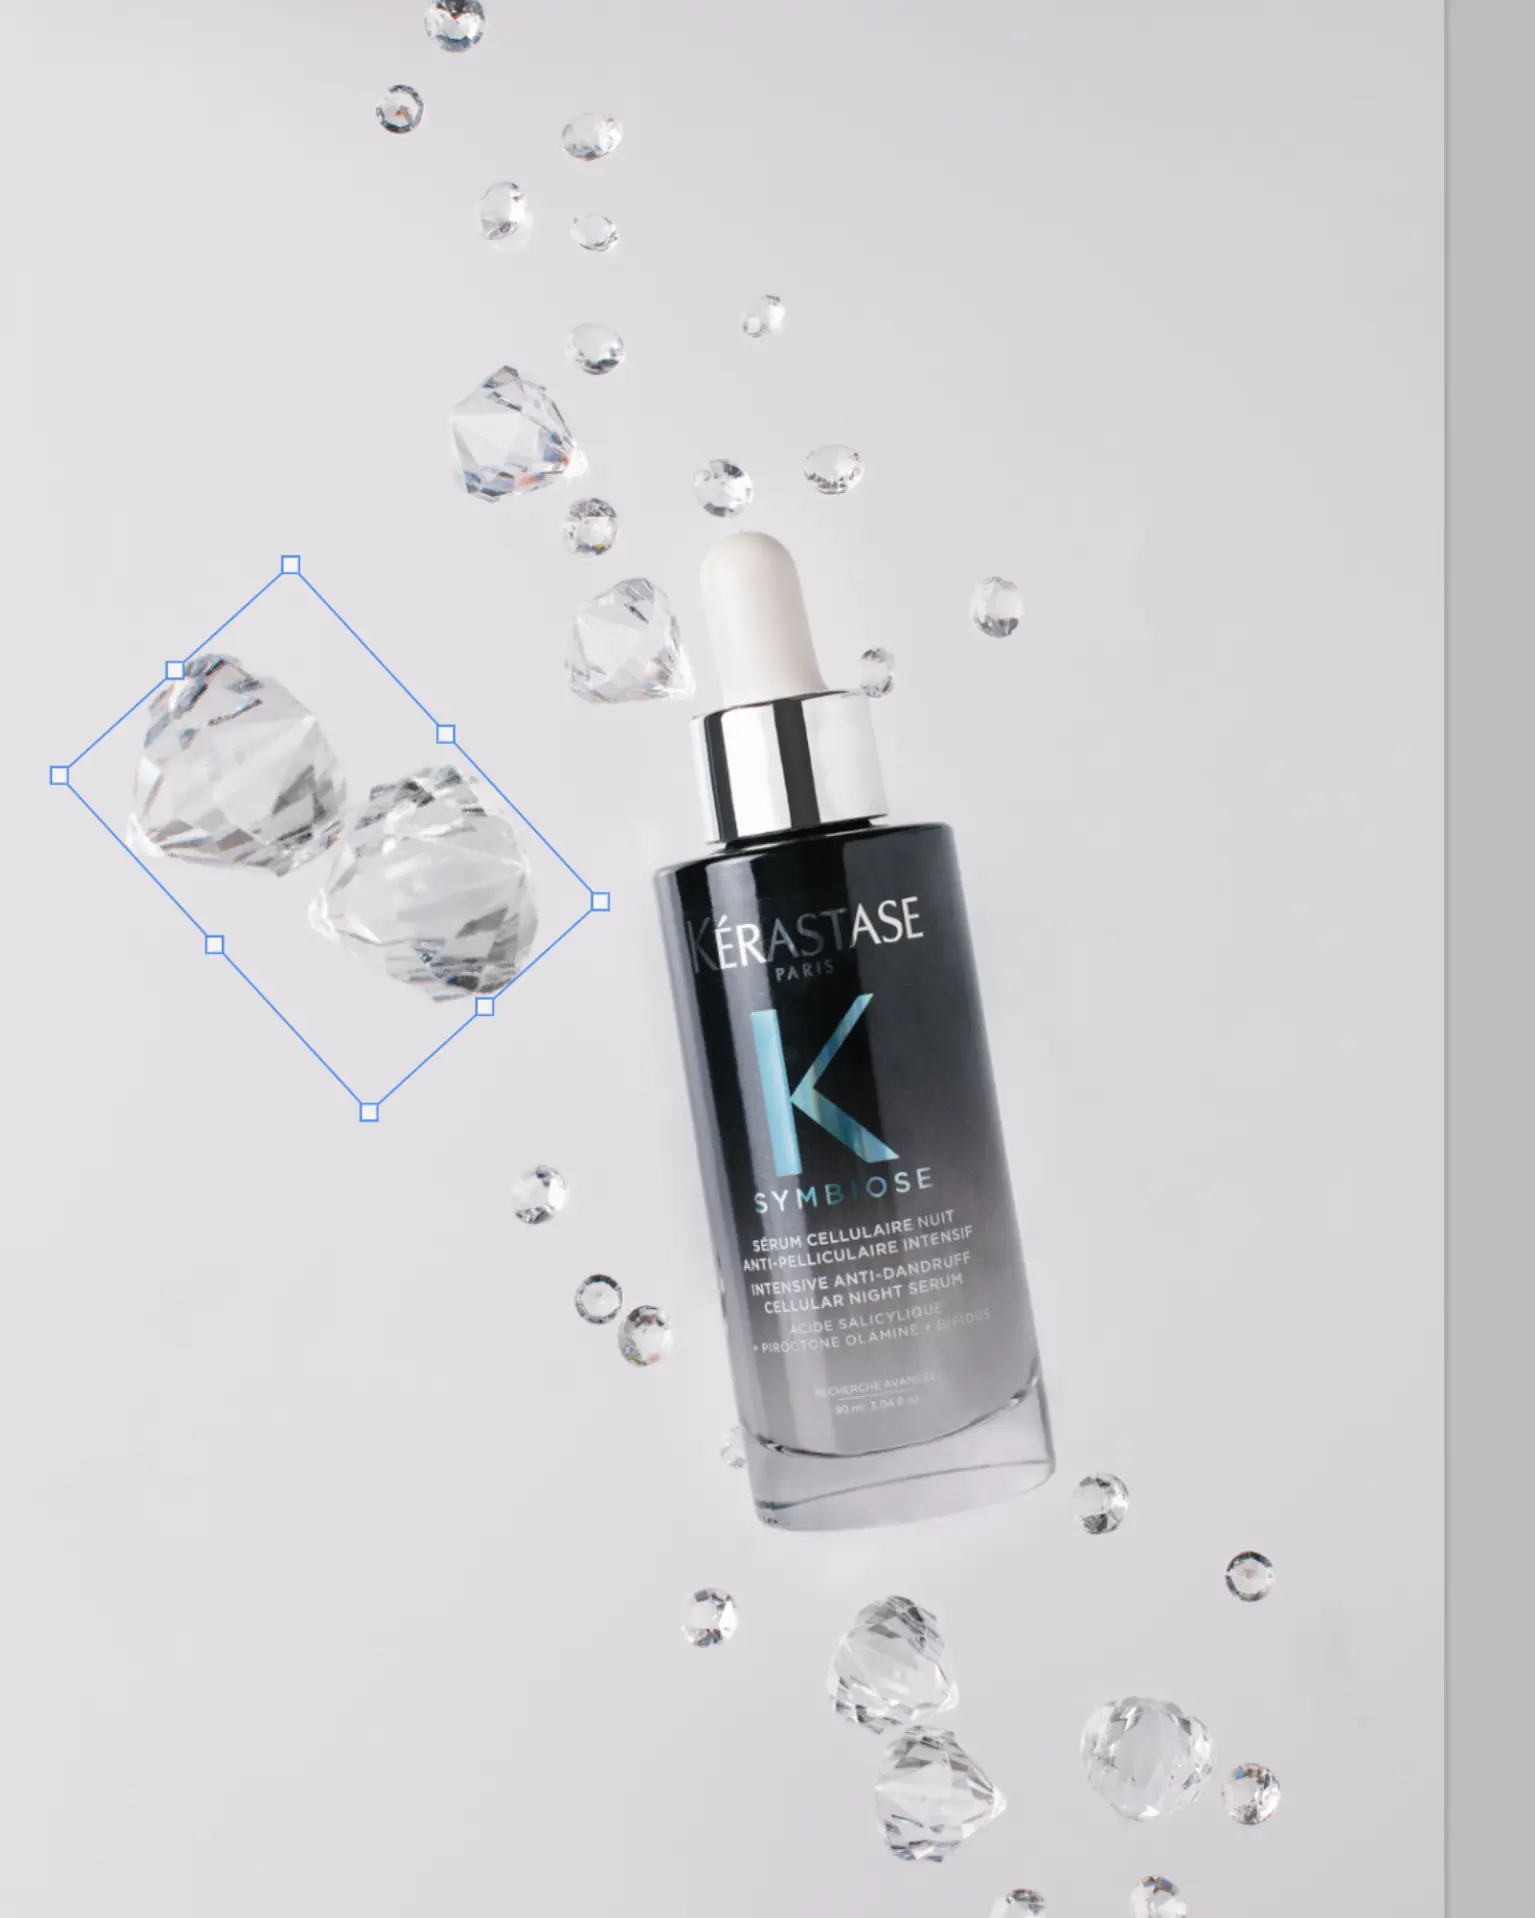
Step 5: Enhancing Depth with Additional Blurred Crystals
To make the floating effect really convincing, I wanted more crystals in the foreground. Since I didn’t have any more real ones in the shot, I created them from the existing ones.
Select a crystal you like (I used the Object Selection Tool this time, as perfect precision isn’t critical for blurry objects).
Press Ctrl+J to duplicate it to a new layer. Use Ctrl+T to move and resize it. Hold Shift while resizing to maintain proportions.
Move this duplicate to an empty spot in the composition.
It will look unnatural at first because it’s too sharp. Apply a Gaussian Blur filter to blend it in. I used a radius of about 16 pixels, but use your judgment.
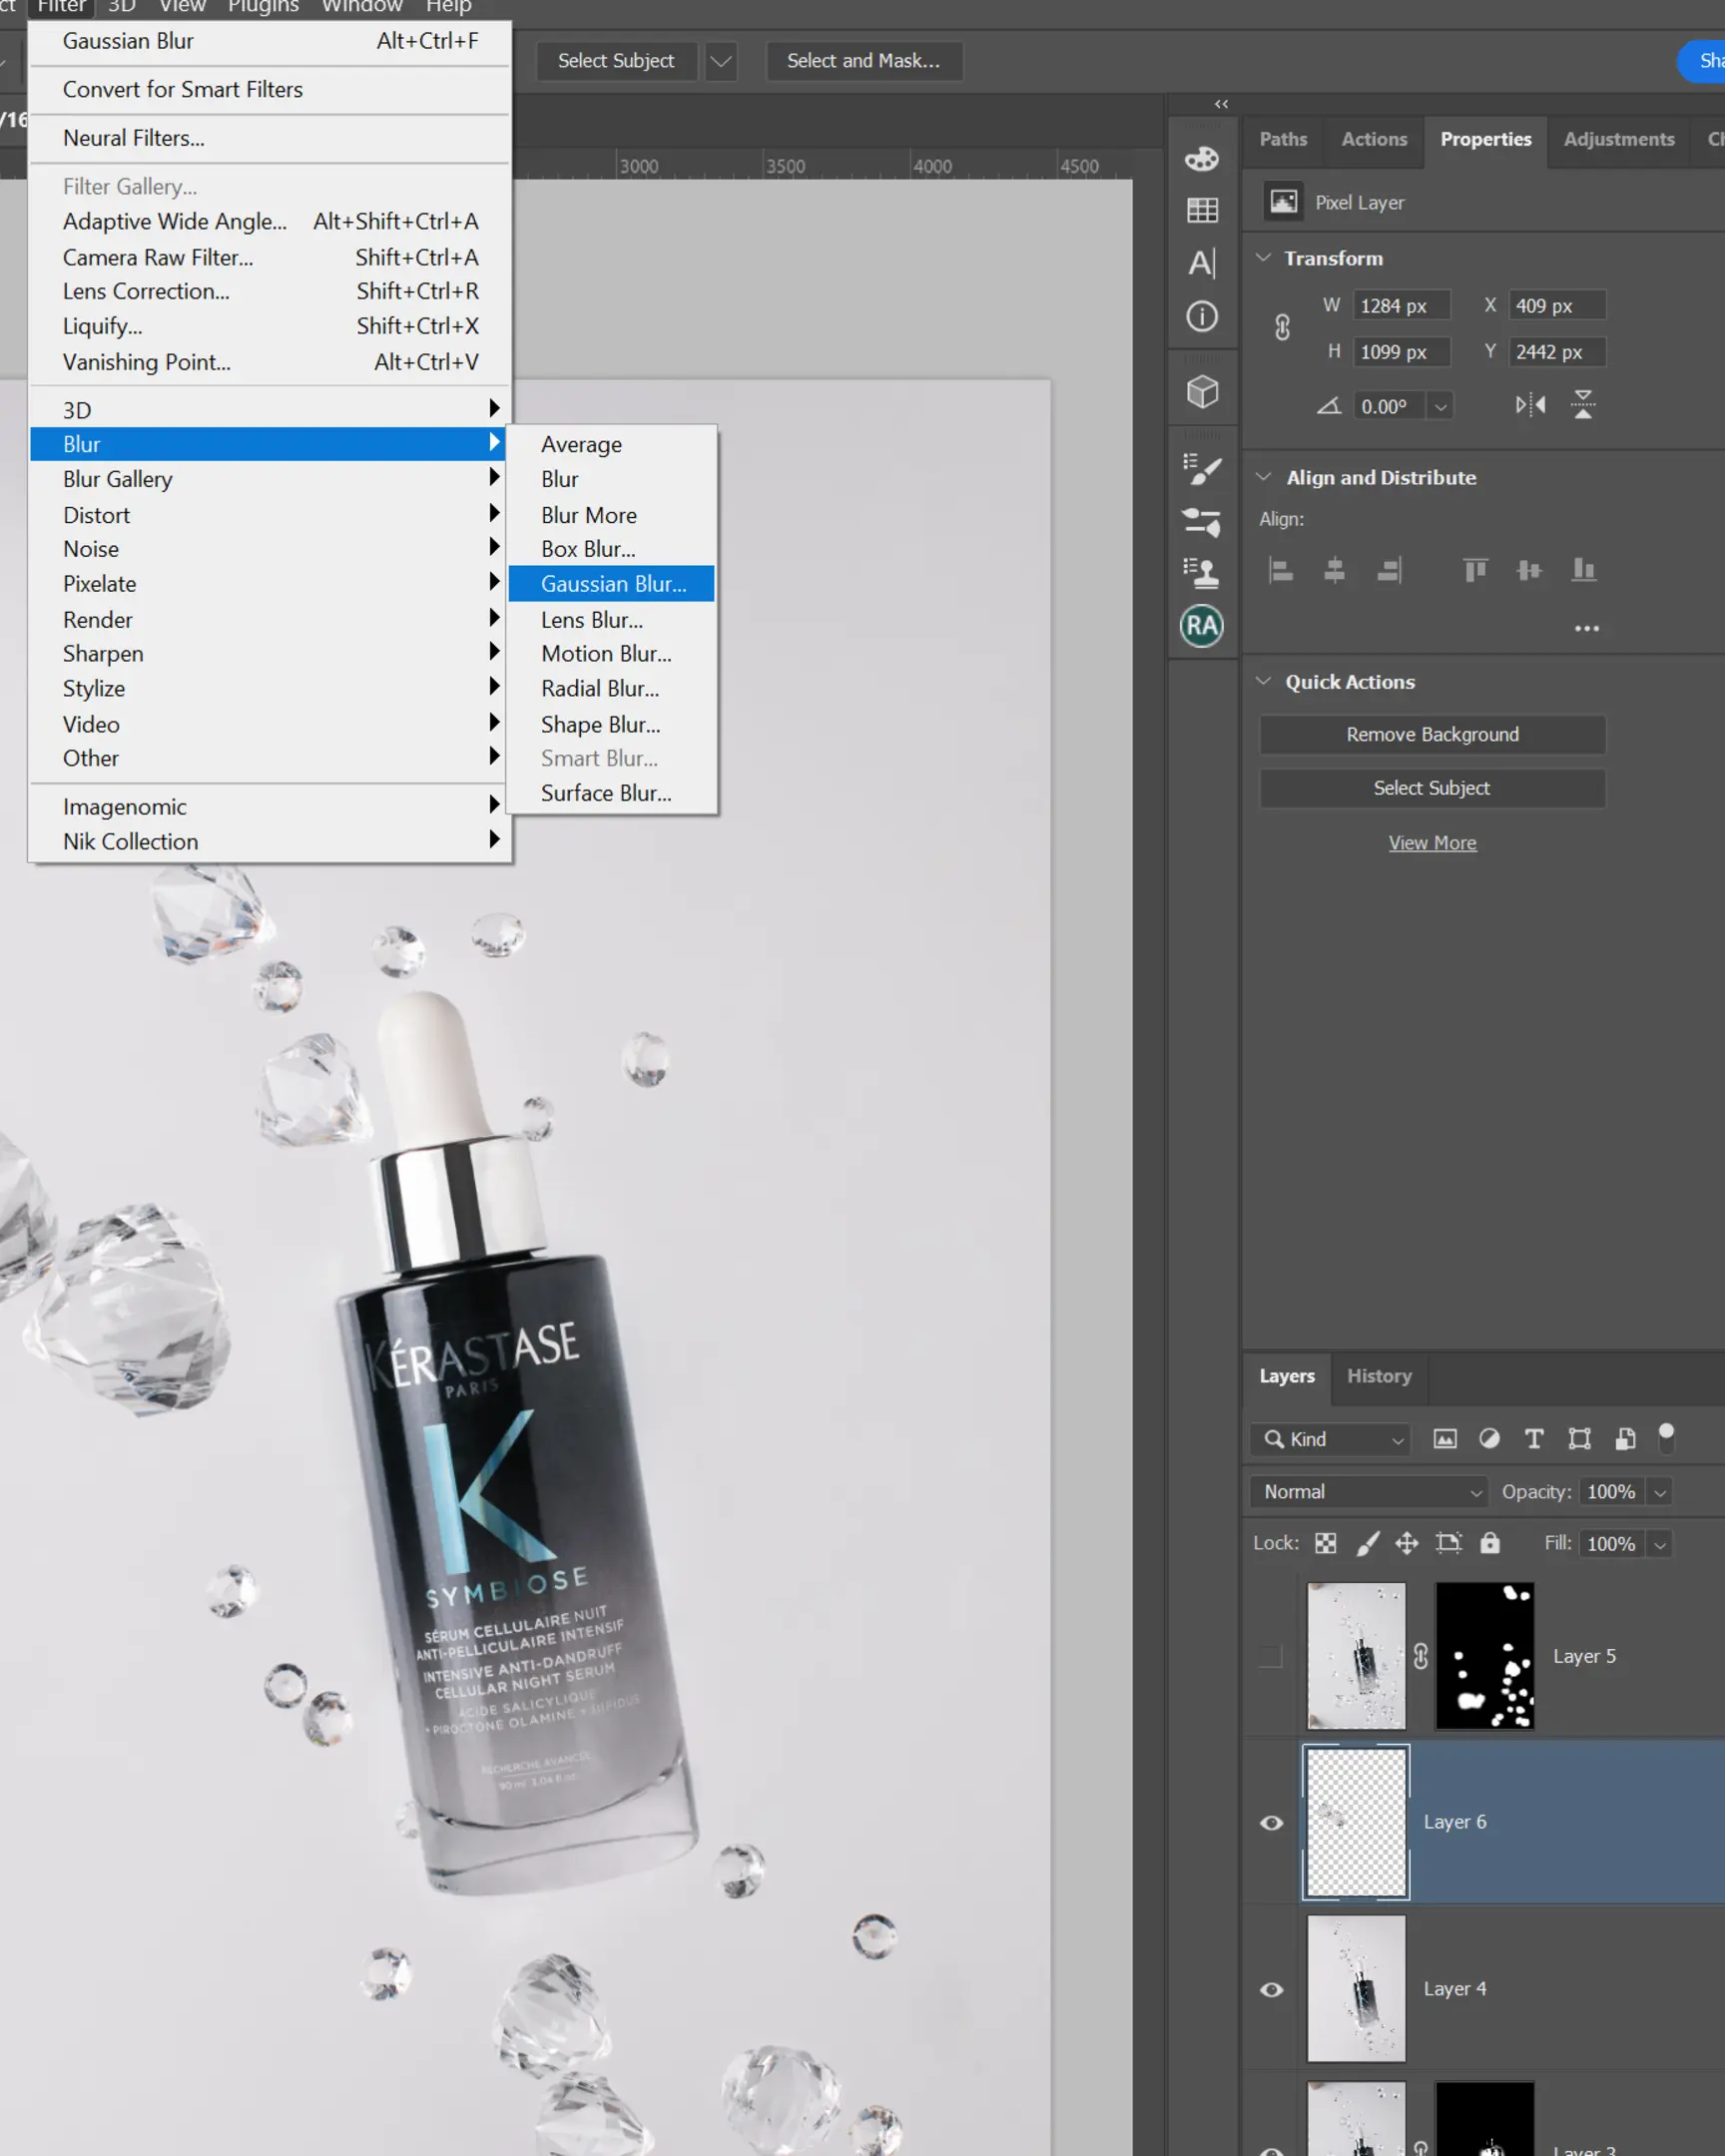
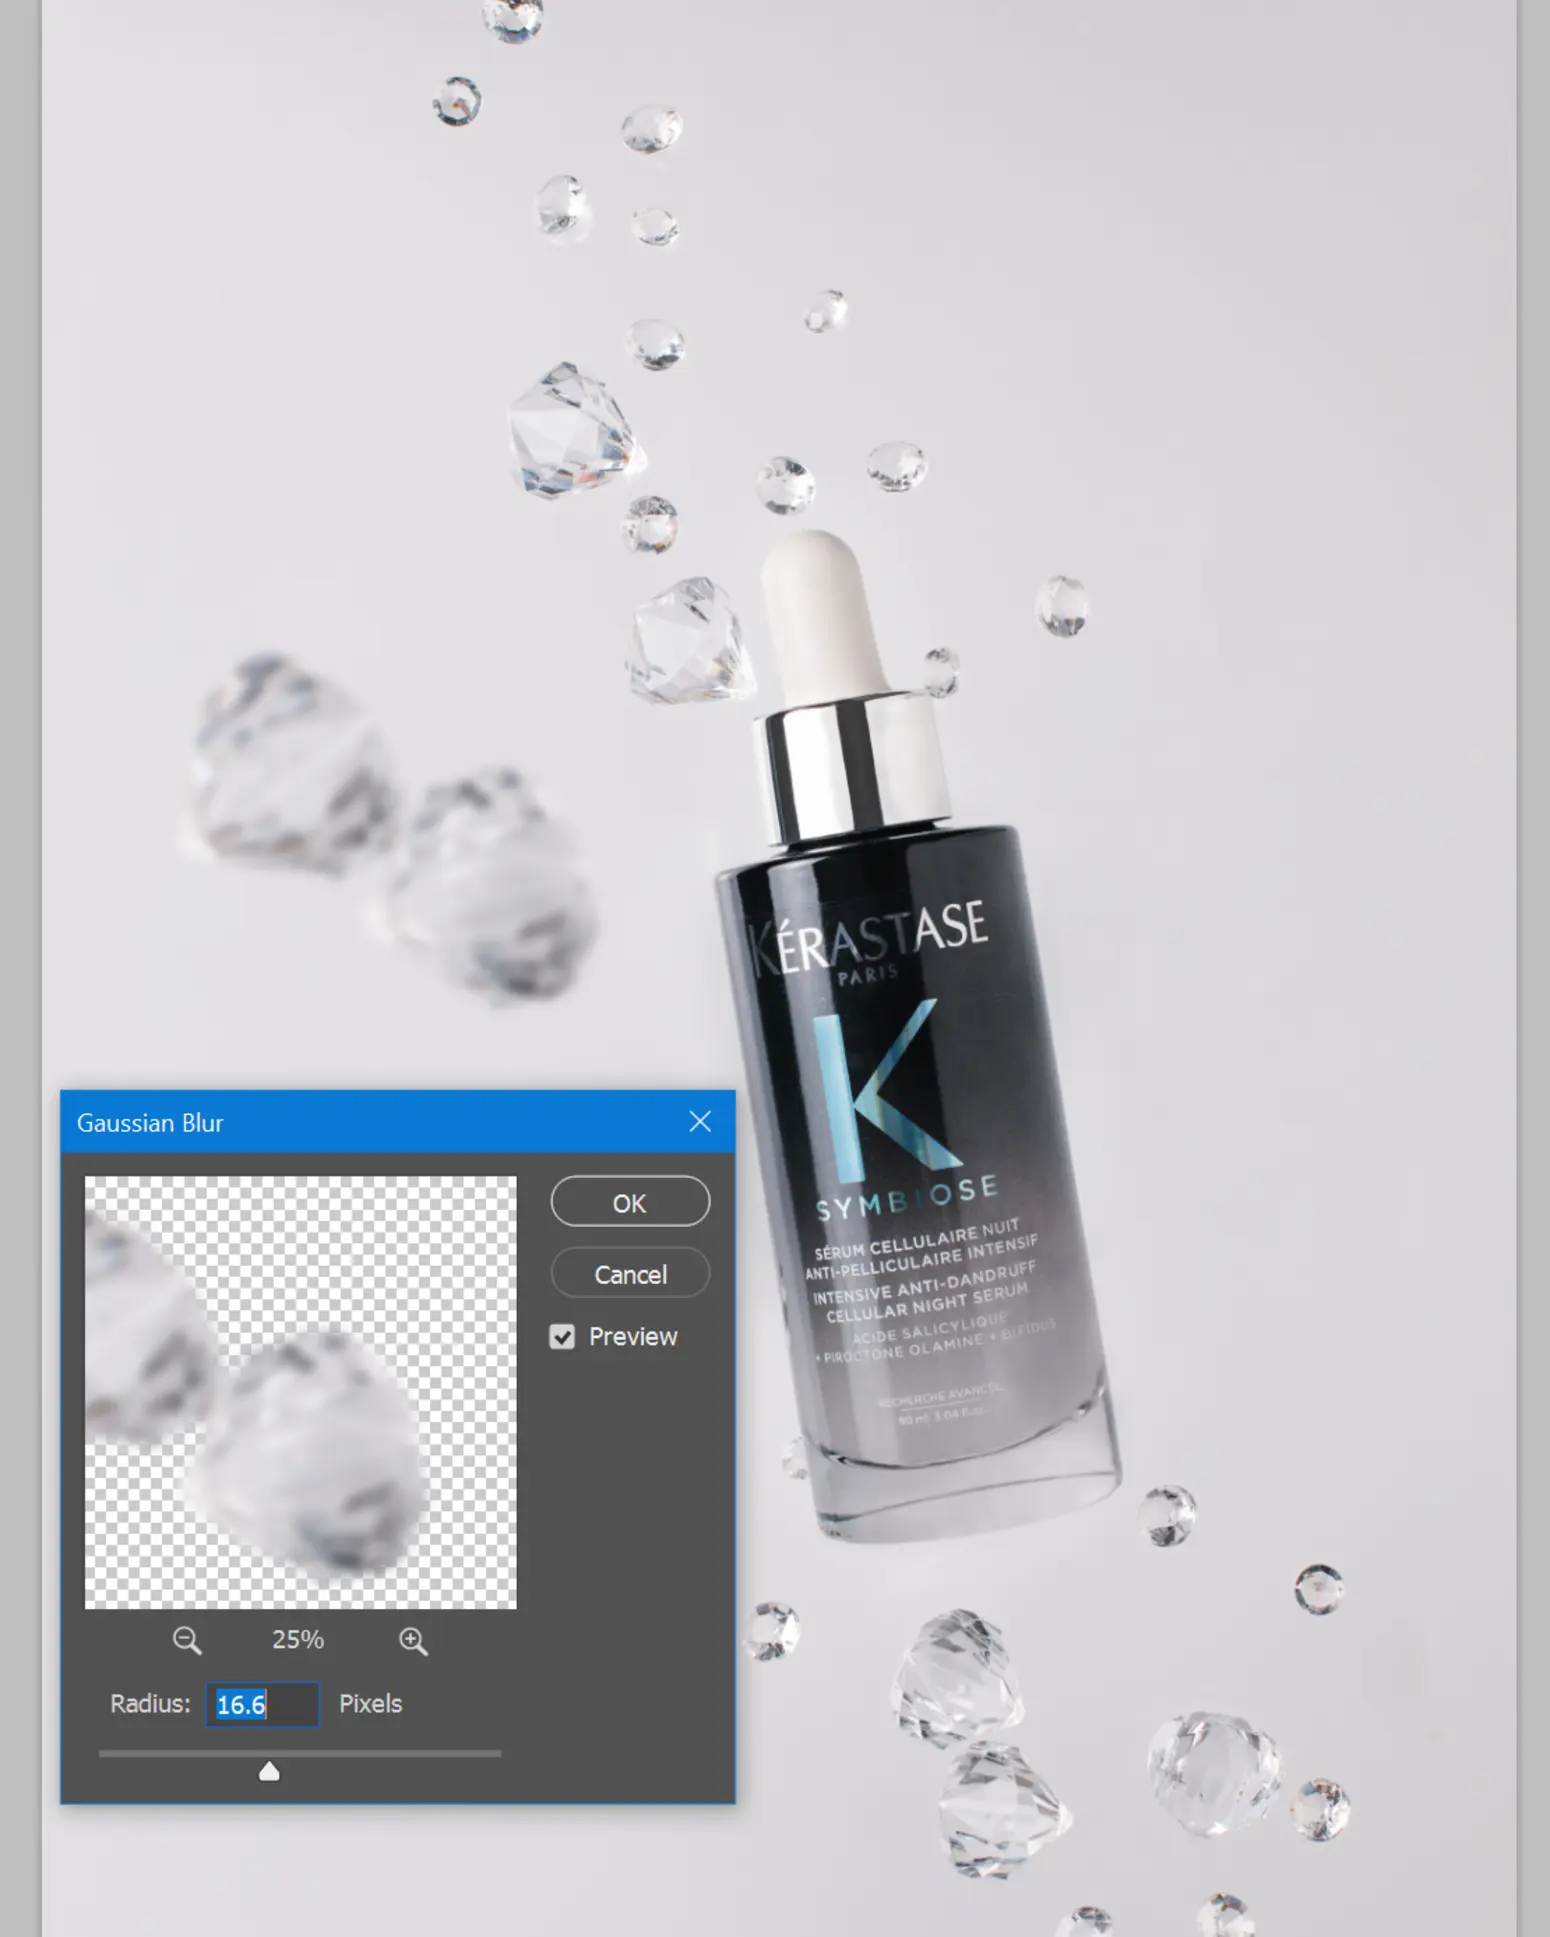
Finally, adjust the lighting on these fake crystals. Press Ctrl+M to open Curves.
Remember the rules of atmospheric perspective: objects further away (or out of focus) often appear lighter and less distinct. Brighten these blurred crystals slightly to push them visually into the foreground or background.
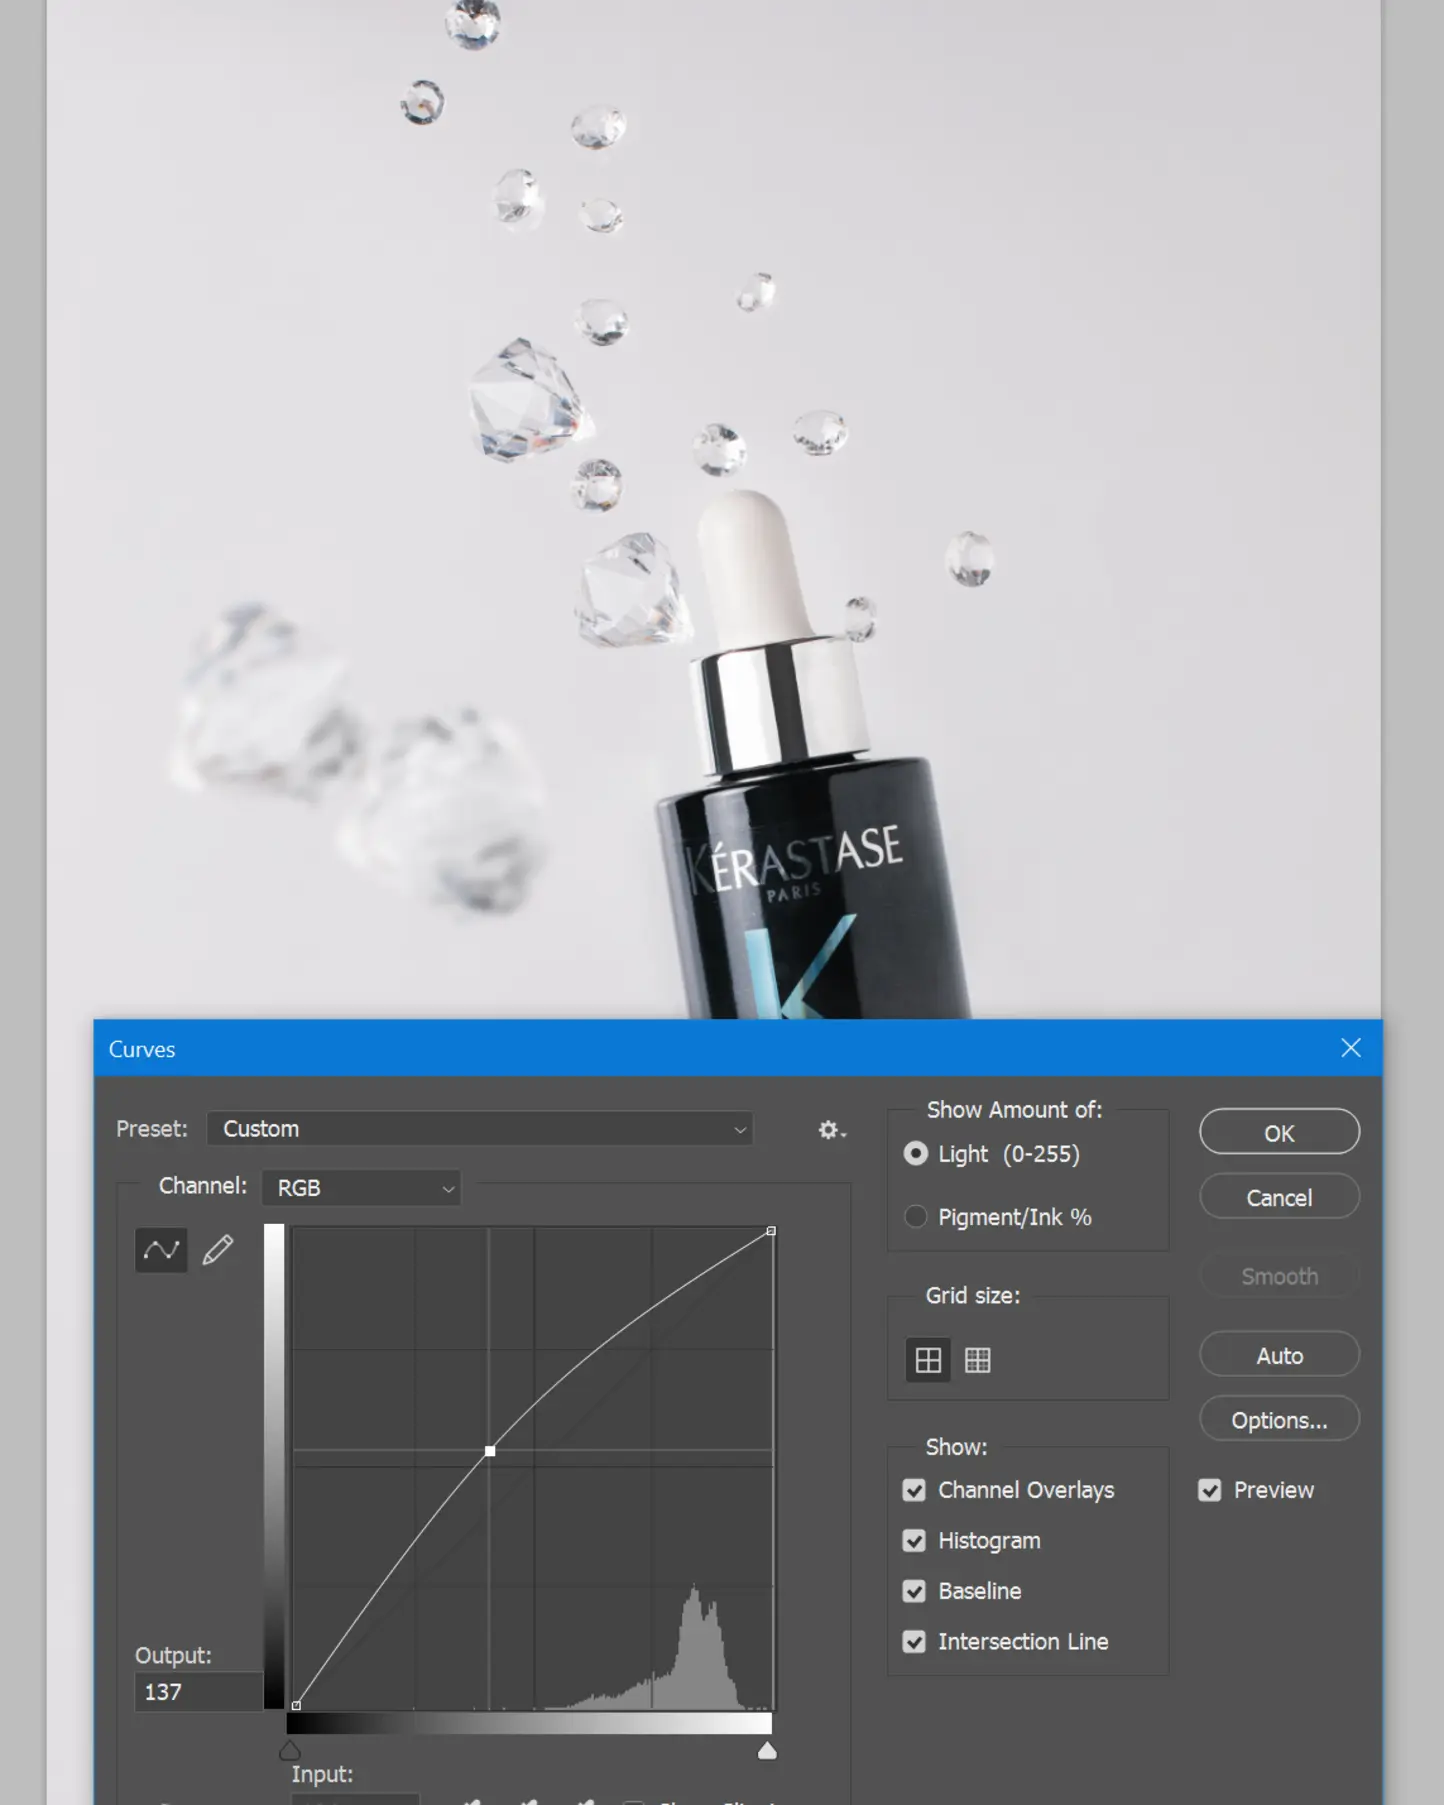
Experiment with making them lighter, darker, larger, or smaller until the scene feels cohesive and believable.
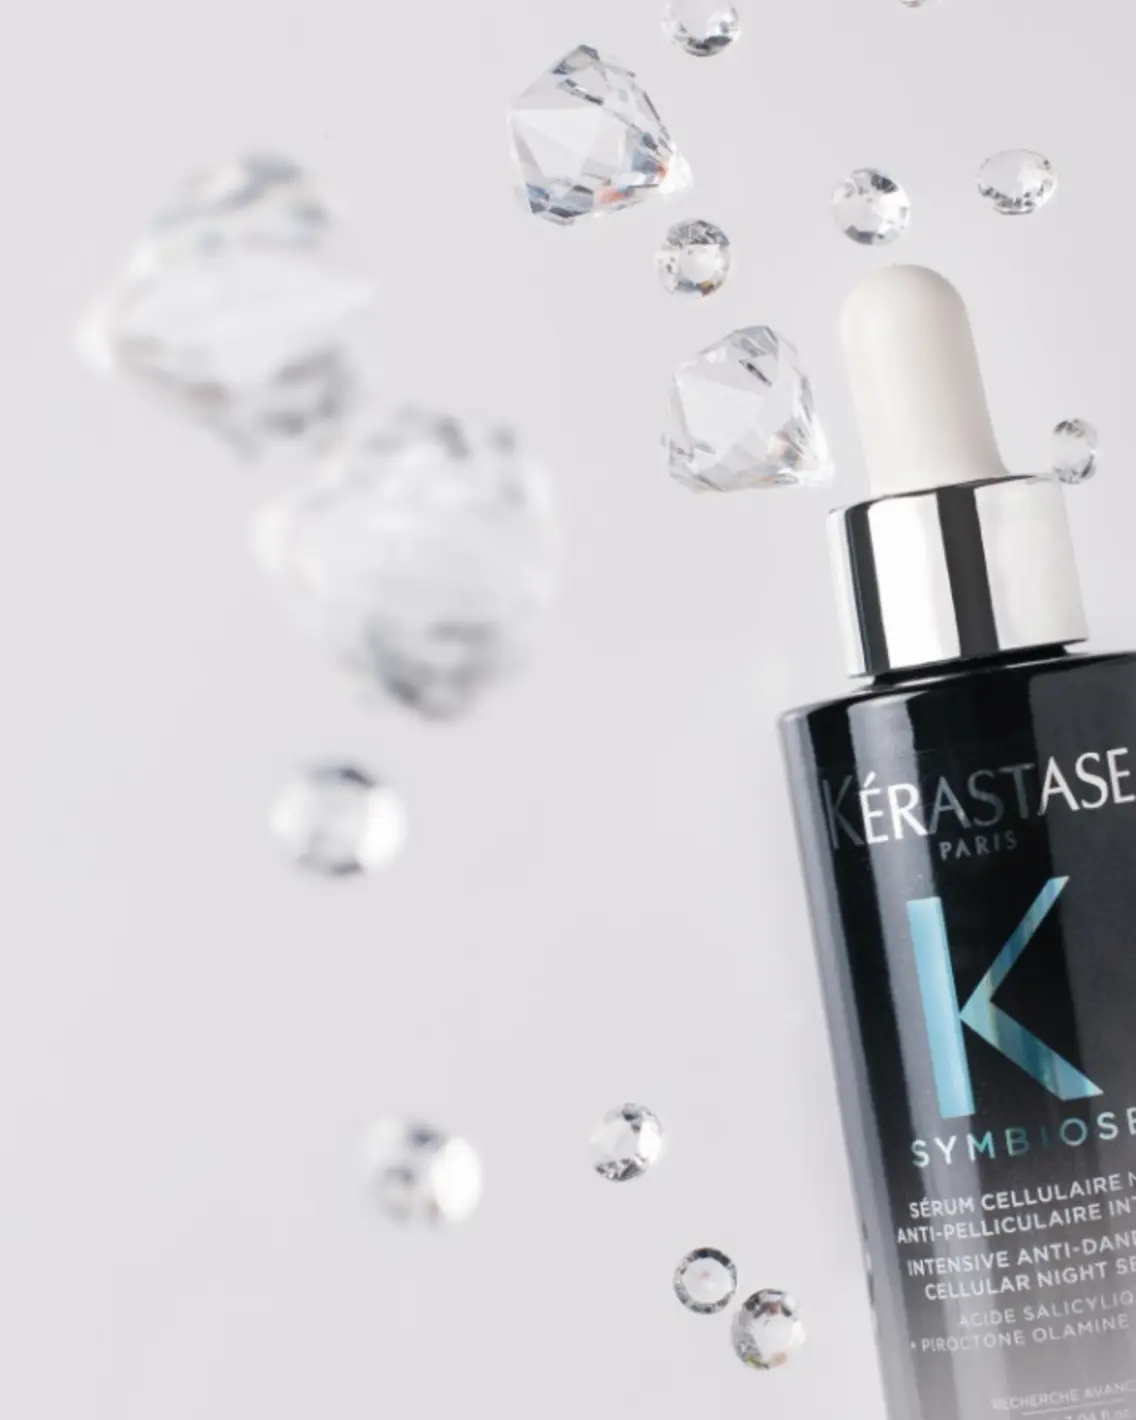
Final Touches for Your Product Shot
Now it’s time for the fun part: apply your personal style. Add your color grading, crop the image for better composition, and do any final polishing.
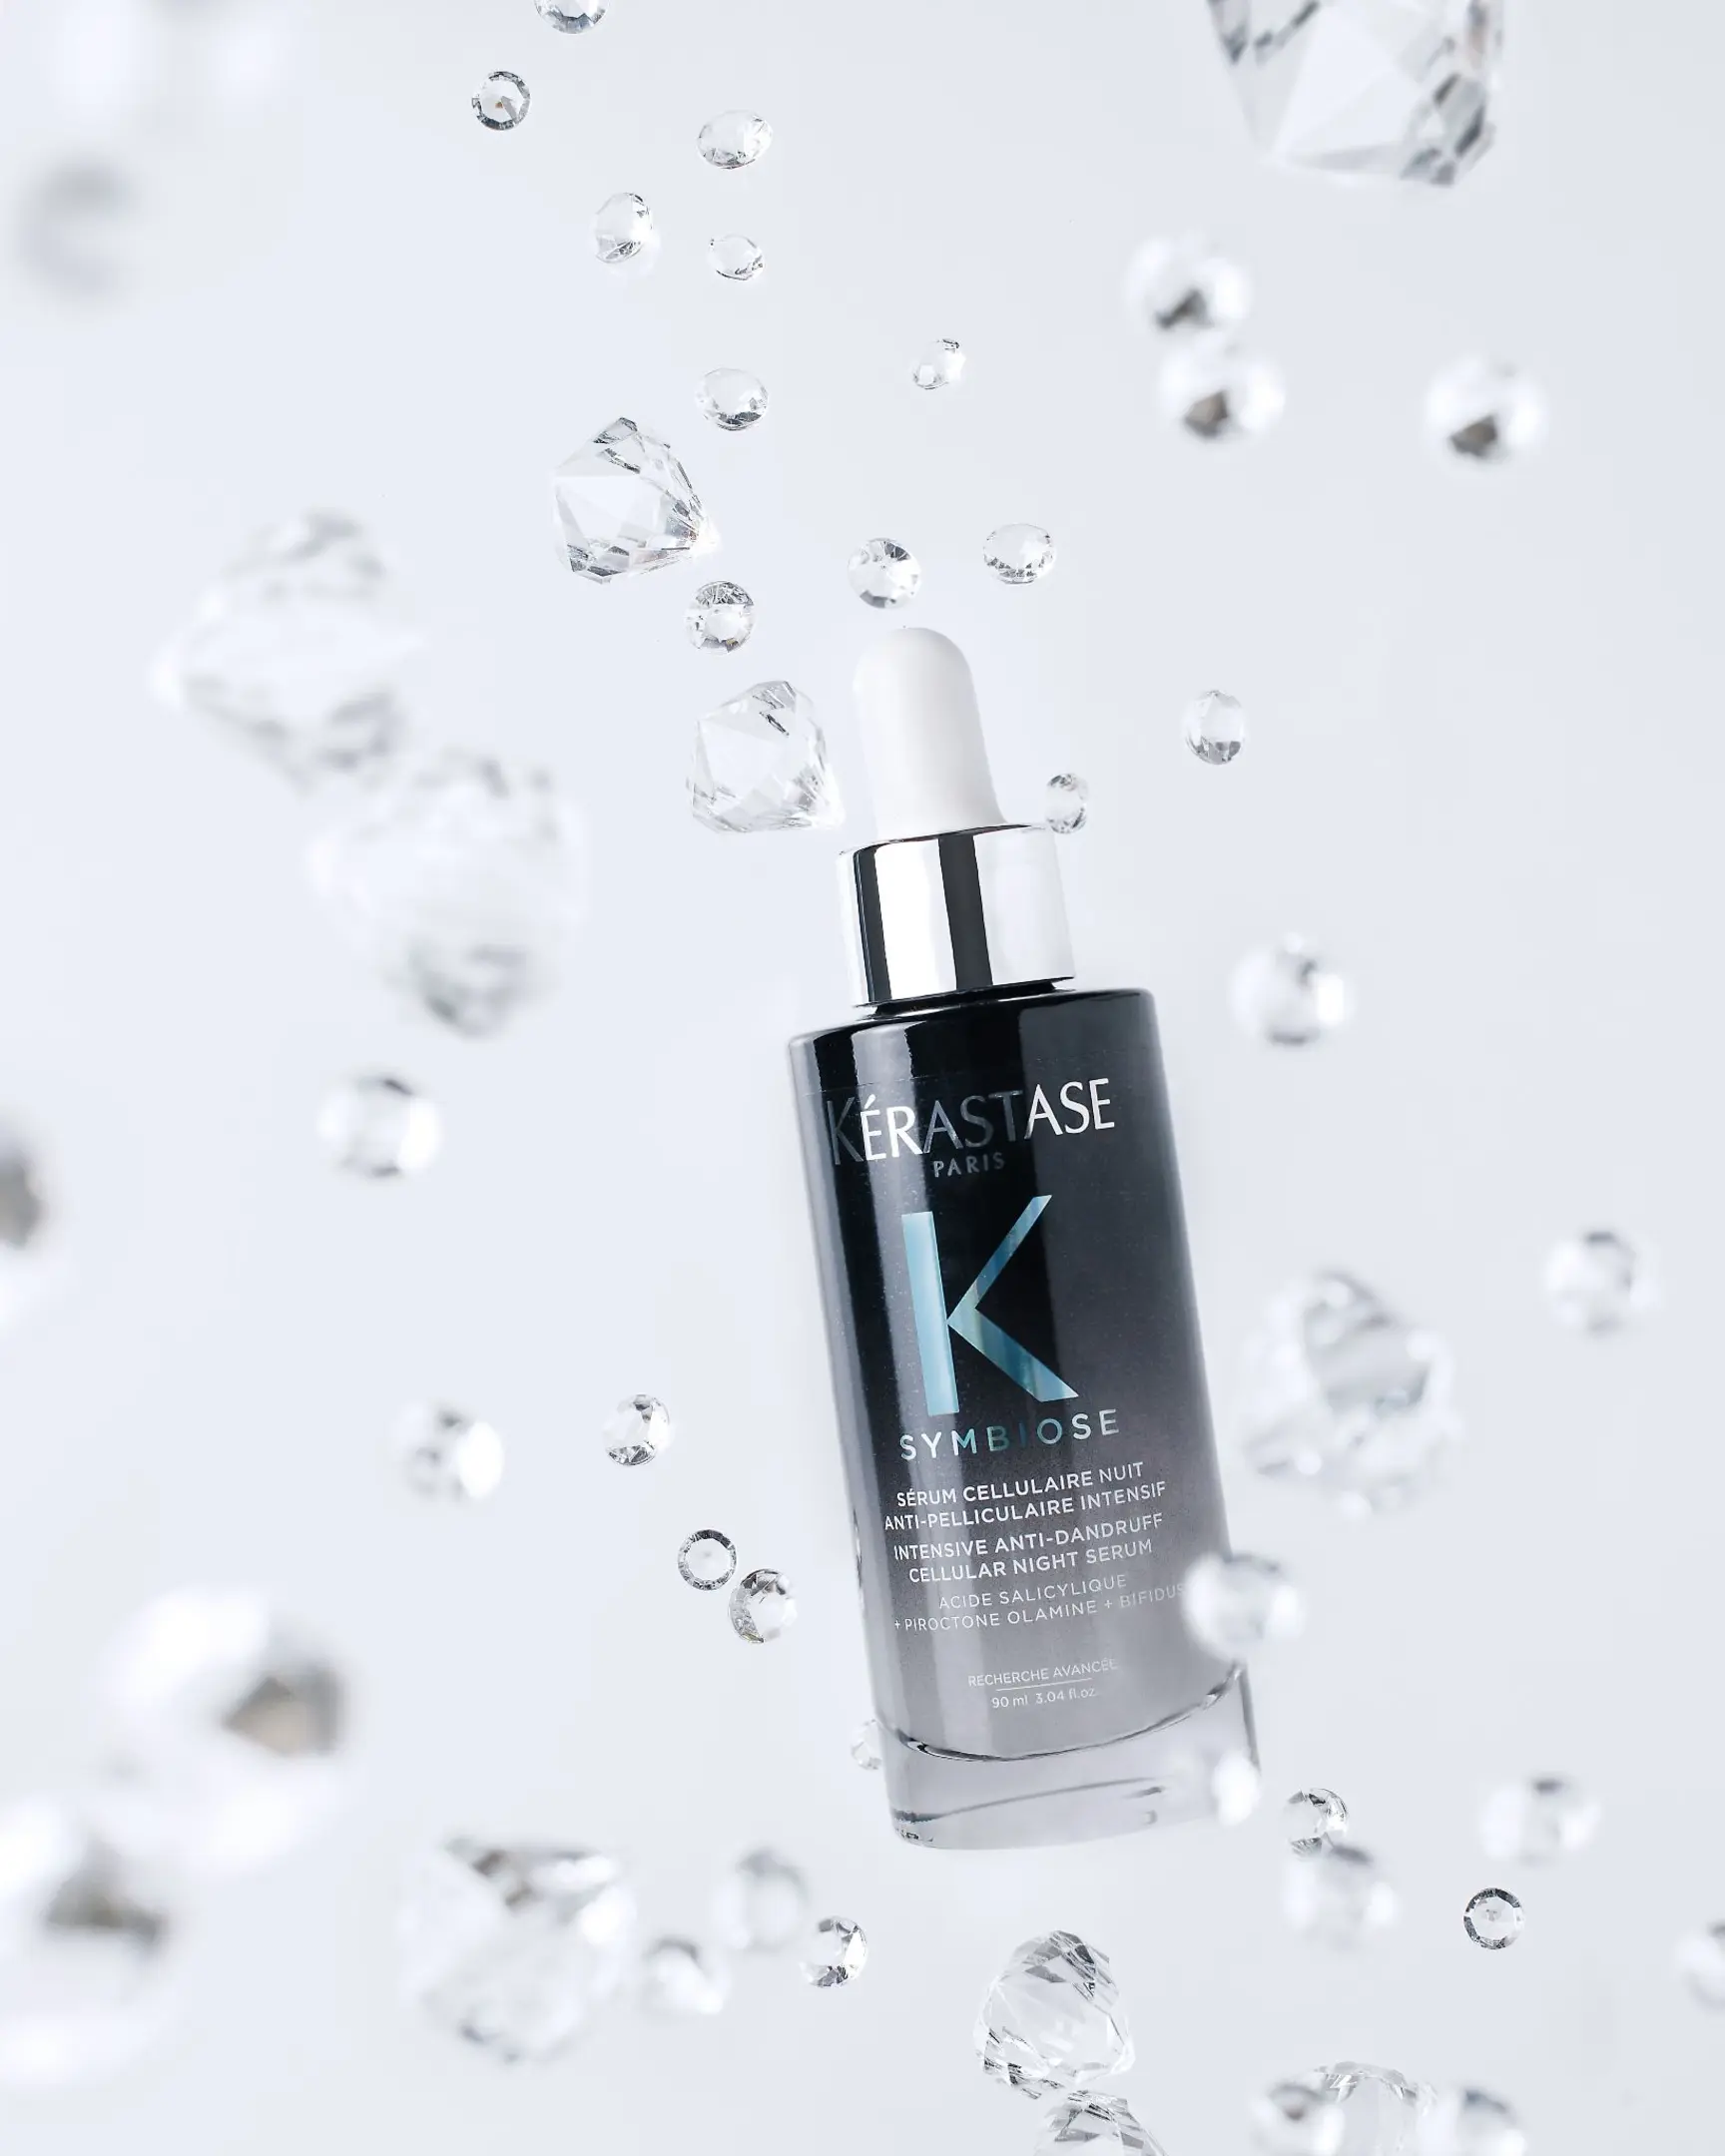
If you want to practice this specific edit, I’ve included the raw files below. Feel free to download them and give this workflow a try.