Milky Girl Cake
The name of the Milky Girl milk cake has a charming little backstory. In Germany, where this delightful dessert originated, the condensed milk cans feature a girl on the label, and the brand is known as “Milchmädchen,” or “Milk Girl.” Since the many thin, tender layers of this recipe are based on condensed milk, this popular cake was named after the iconic tin. While the original inspiration comes from that specific brand, you can easily use any kind of sweetened condensed milk you have on hand to create this beautiful homemade treat.
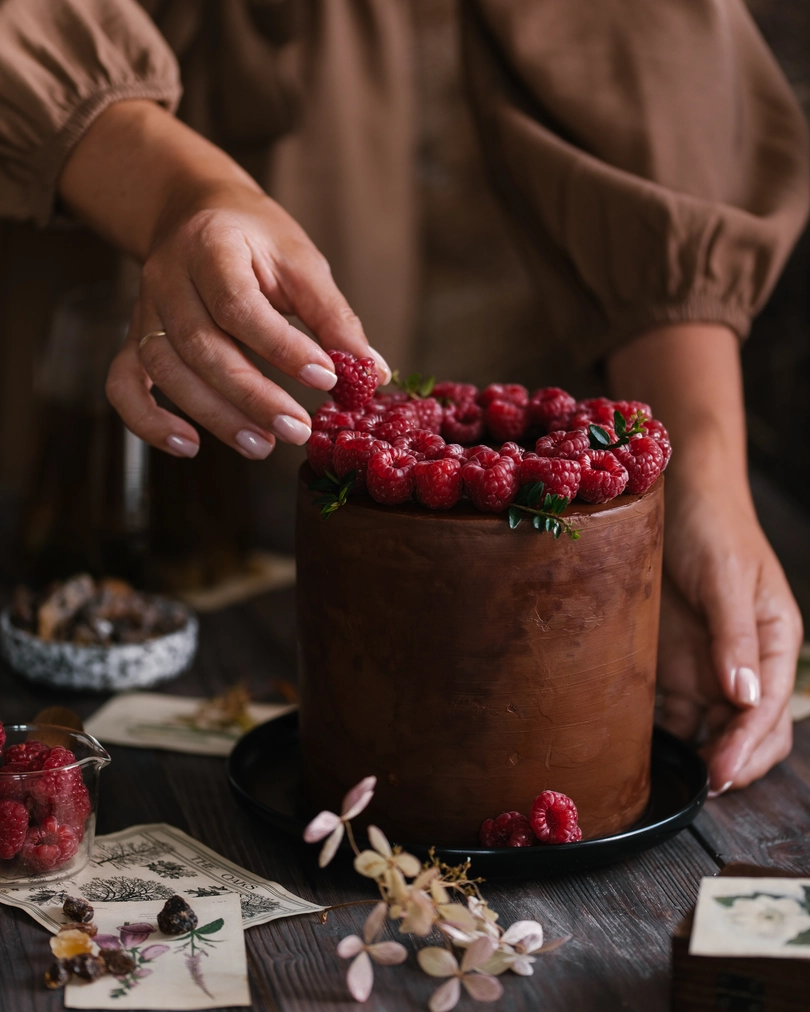
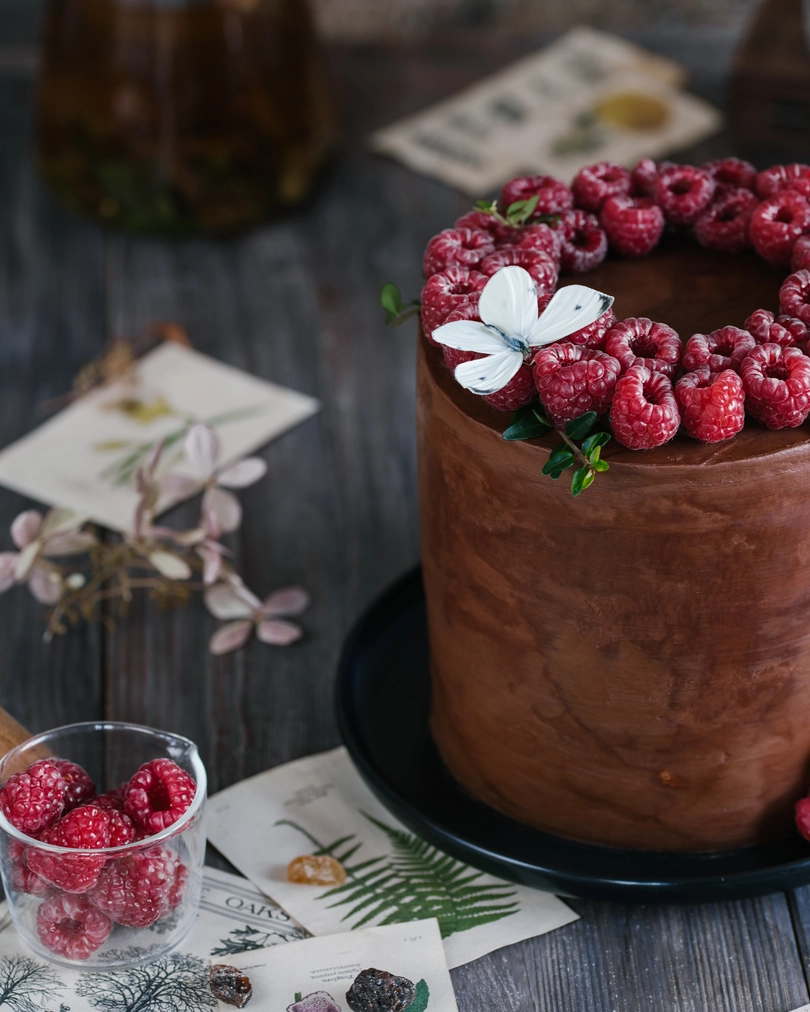
The resulting size of a Milky Girl cake is: Diameter 15cm Height 11cm Weight 2,2 kg
Delicious Milky Girl Cake Ingredients
Dought for Milky Girl Cake:
- 3 eggs
- 370 gr condensed milk
- 40 gr butter
- 180 gr flour
- 1 tsp baking powder
- 420 gr cream cheese
- 150 gr sugar powder
- 140 gr berries
- 20 gr glucose
- 60 gr cream 33%
- 70 gr butter (room T)
Сream with Berries for Milky Girl Cake:
- 610 gr wiping cream
Chocolate Smoothing Cream for Milky Girl Cake:
- 150 gr milk chocolate
Instructions
-
Baking the Condensed Milk Cake Layers
To prepare the dough, whisk the eggs with the condensed milk, then stir in the melted butter until the mixture is smooth. Next, sift in the flour and baking powder, mixing until combined.
Let the batter rest for about 10 minutes at room temperature. Use this time to preheat your oven to 180°C.
Each thin layer will require approximately 50-60 grams of dough.
Mark 15 cm circles on a sheet of parchment paper. Drawing with a pencil on the reverse side works well. Alternatively, take a round baking ring of the right diameter, dip it in flour, and gently tap it onto the baking tray to leave a perfect circular guide for your layers.
Spread the dough evenly inside your marked circles (the layers will be quite thin). Bake in the preheated oven for 5-6 minutes until they are just slightly browned. Keep an eye on them—these layers shouldn’t turn dark brown, so be careful not to overbake.
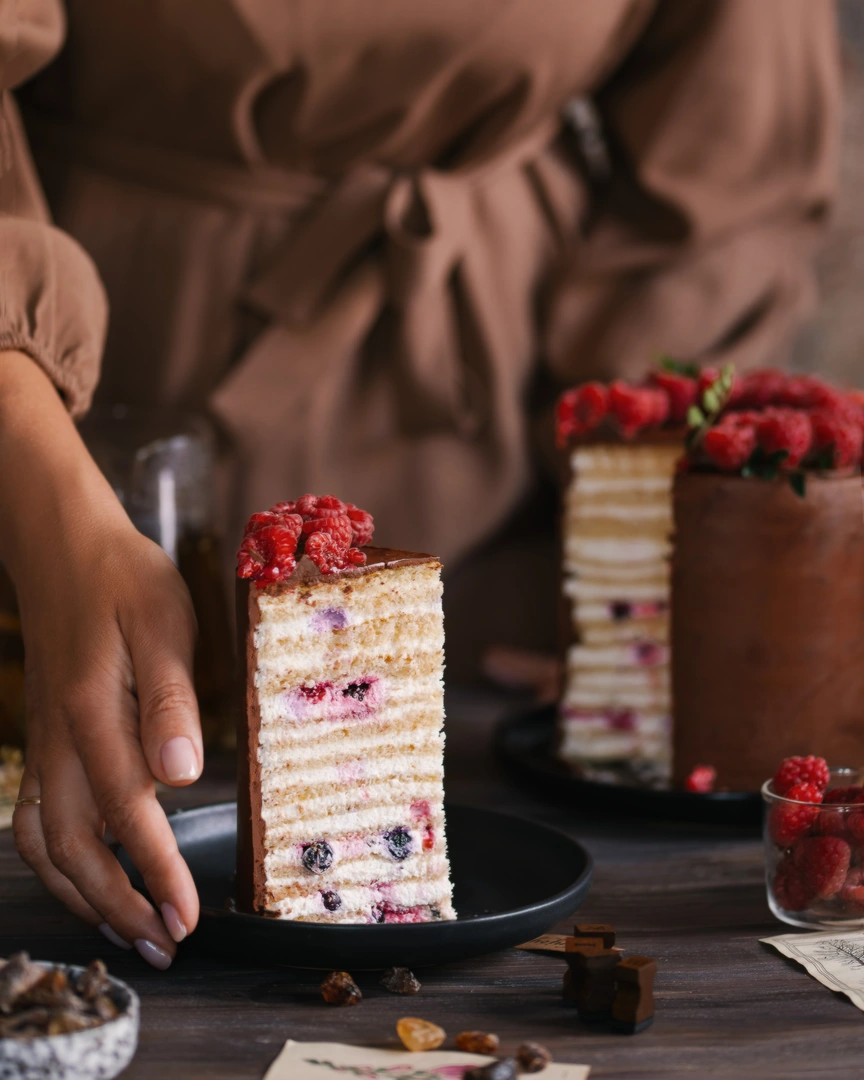
This recipe yields approximately 14 delicate cake layers.
Allow the baked sheets to cool for 10 minutes on a wire rack. For the best texture, let the cooled layers rest in an airtight container for a couple of hours, though you can proceed immediately if you’re short on time. Once cooled, you are ready to start assembling the cake with the cream.
-
Preparing the Berry Cream Filling
Start the assembly by placing a small dab of frosting on your serving board or platter. This secures the bottom layer so it doesn’t slide around; place the first cake disc on top and press gently.
For the berry cream filling, add the base ingredients (cream cheese, sugar, and berries) to a mixing bowl and whip until smooth. Then, gradually pour in the cold whipping cream while mixing until the frosting becomes fluffy and well-combined.
Continue to stack your condensed milk layers, spreading a generous amount of the fluffy berry cream between each one. You can also add fresh berries between the layers for an extra burst of tartness.
-
Making the Chocolate Smoothing Cream (Ganache)
To make the chocolate smoothing cream, heat the cream with the glucose until it reaches a boil, then pour this hot mixture directly over the milk chocolate.
Let it sit undisturbed for 2-3 minutes to allow the heat to melt the chocolate, then stir gently until smooth.
The ganache will thicken slightly at this stage, but the consistency will improve significantly once we incorporate the butter.
When the chocolate mixture cools to approximately 40°C, add the soft butter. Use an immersion blender to mix thoroughly until the ganache is emulsified and silky smooth.
Pop the cream in the refrigerator for 5-7 minutes to cool slightly. Once it has firmed up a bit, whip it briefly and use it to level and coat your cake.
This chocolate frosting is firm enough to hold its shape well, but keep in mind that it can soften from the heat of your hands while decorating. It offers a stable and beautiful finish to your Milky Girl cake.